In the last two major upgrades to Photoshop, Adobe have made some valuable upgrades to adjustment layers.
These are essentially duplicating some functionality that is available in both Lightroom and Adobe Camera Raw and making it available as adjustment layers.
In the latest upgrade to Photoshop they have added two new adjustment layers, Clarity and dehaze; and Grain.
In the previous update they updated the Vibrance adjustment layer by adding Temperature and Tint sliders and the White Balance eye dropper, now calling it the Color and vibrance adjustment layer.
You will find these new (and updated) adjustment layers at the top of the adjustment layer menu (see Figure 1).
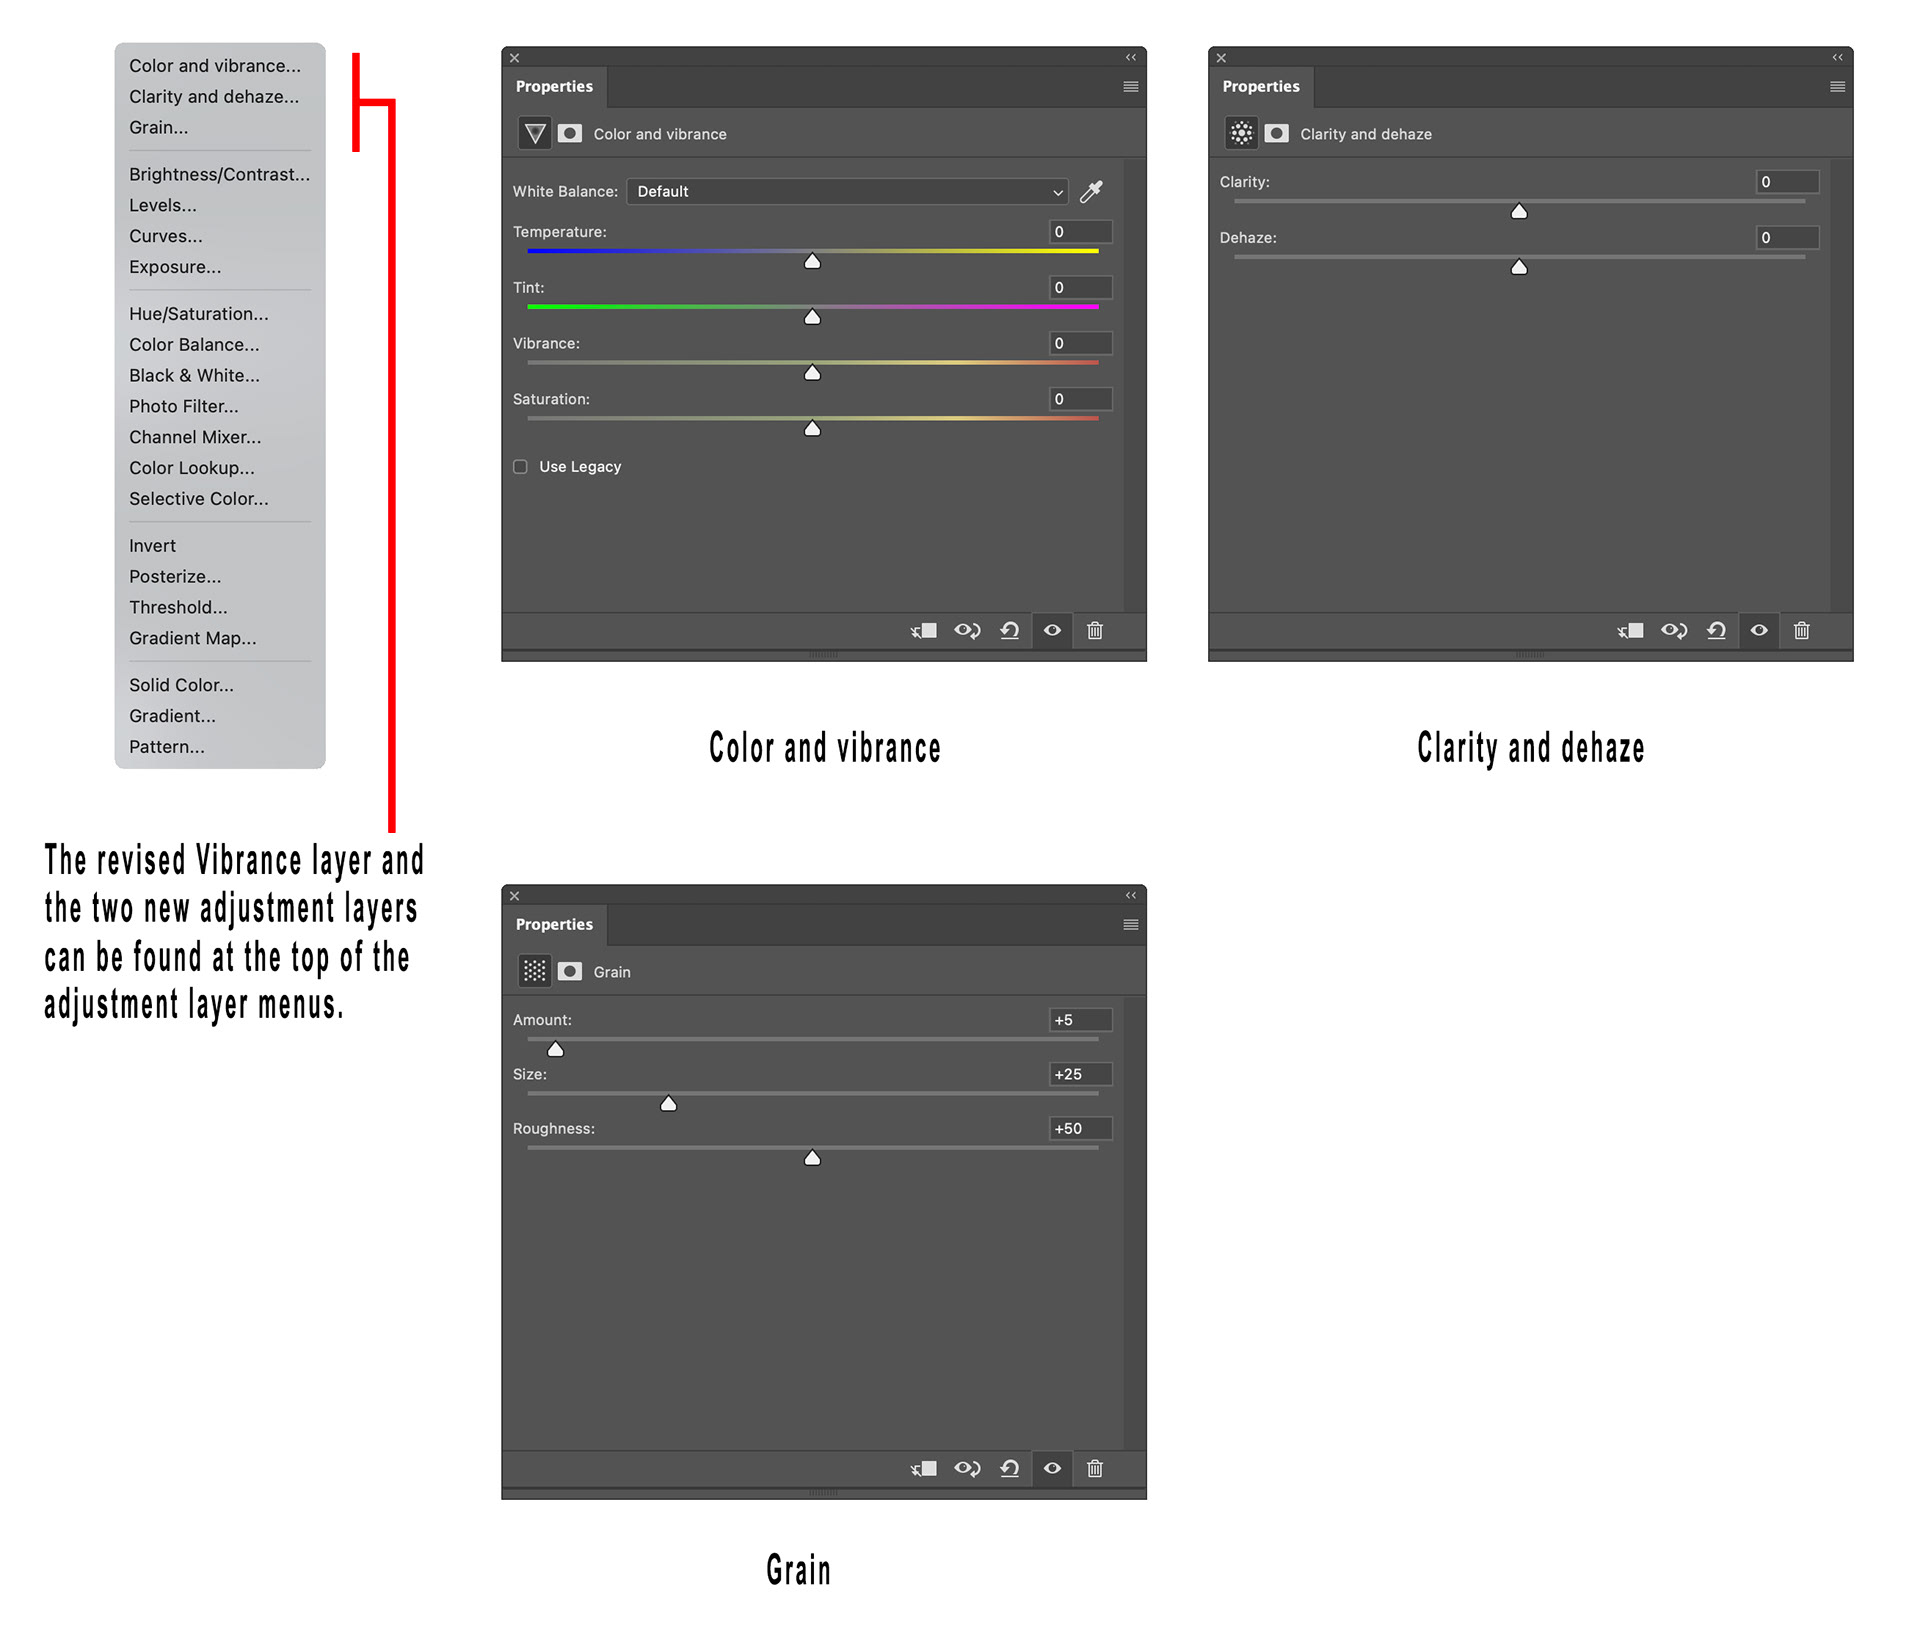
Fig 1 - New Adjustment Layers
Whilst the functionality of these is not new, and it adds no new capability, I think that by bringing the functionality natively into Photoshop it is a significant change that adds a lot of flexibility.
Previously when working in Photoshop, to use these features you would need to make a Stamp Visible layer and then use the Camera Raw filter to make the required change. If you wanted to retain the flexibility of adjusting the chosen settings at some later stage, you would also have to make this new layer a Smart Object.
This is three separate steps, and loading the Camera Raw filter can take some time, so adding an adjustment layer is much quicker and easier.
When making composites and perhaps wanting to make these adjustments to separate elements, clipping an adjustment layer is much easier.
The other significant benefit is in file size savings. Photoshop is not the most space efficient software and adding new pixel/raster layers will quickly bloat the file size.
As an experiment, I created a single layer pixel layer in a Photoshop file and saved it. I then added three copies of that layer and converted each to a Smart Object (simulating using each of the options above) and resaved the Photoshop file. I then deleted these three layers and added each of the three new adjustment layers and resaved the file again.
As you can see from the table below, the savings are significant.
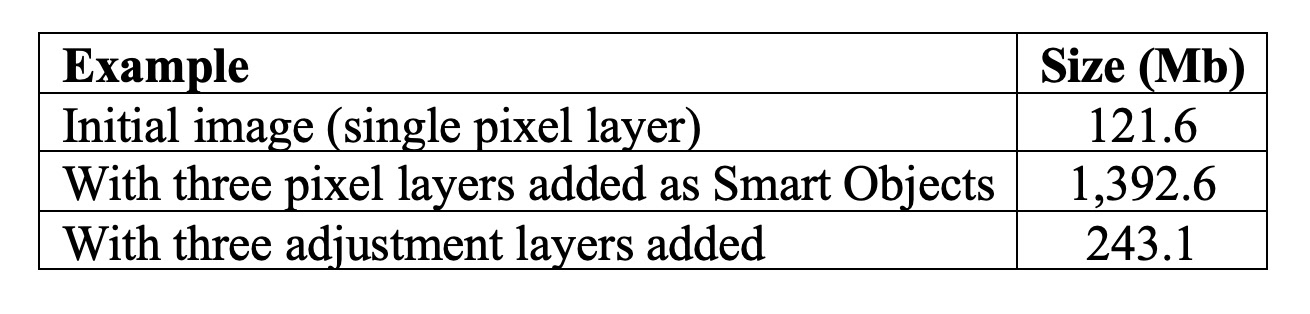
Table 1 - Example file sizes
I think that having these things available as adjustment layers might encourage their usage at different times in the workflow too, because many might do them in Lightroom or Adobe Camera Raw right at the start of the workflow during the initial Raw file processing, when they may be more beneficial at later stages.
It may also encourage other experimentation as well with options like different blend modes.
I like the flexibility and ease of having these options available as adjustment layers, I hope you do too.
This article was first published in the March 2026 issue of Artists Down Under magazine.