In version 14.0 of Adobe Camera Raw (ACR) released in October 2021, Adobe have greatly improved the masking capabilities. This article shows you these new features in ACR but the operation in Lightroom Classic is almost the same (from version 11 onwards which was released at the same time).
You’ll notice that the old Adjustment Brush, Linear Gradient and Radial Gradient tools are no longer in the tool bar, they have been replaced by the single Masking button (see Figure 1). Clicking this (or pressing the M key) brings up the masking dialog (also shown in Figure 1). This dialog appears only when the image has no active masks and allows you to create the first mask by clicking on one of the seven mask types offered.
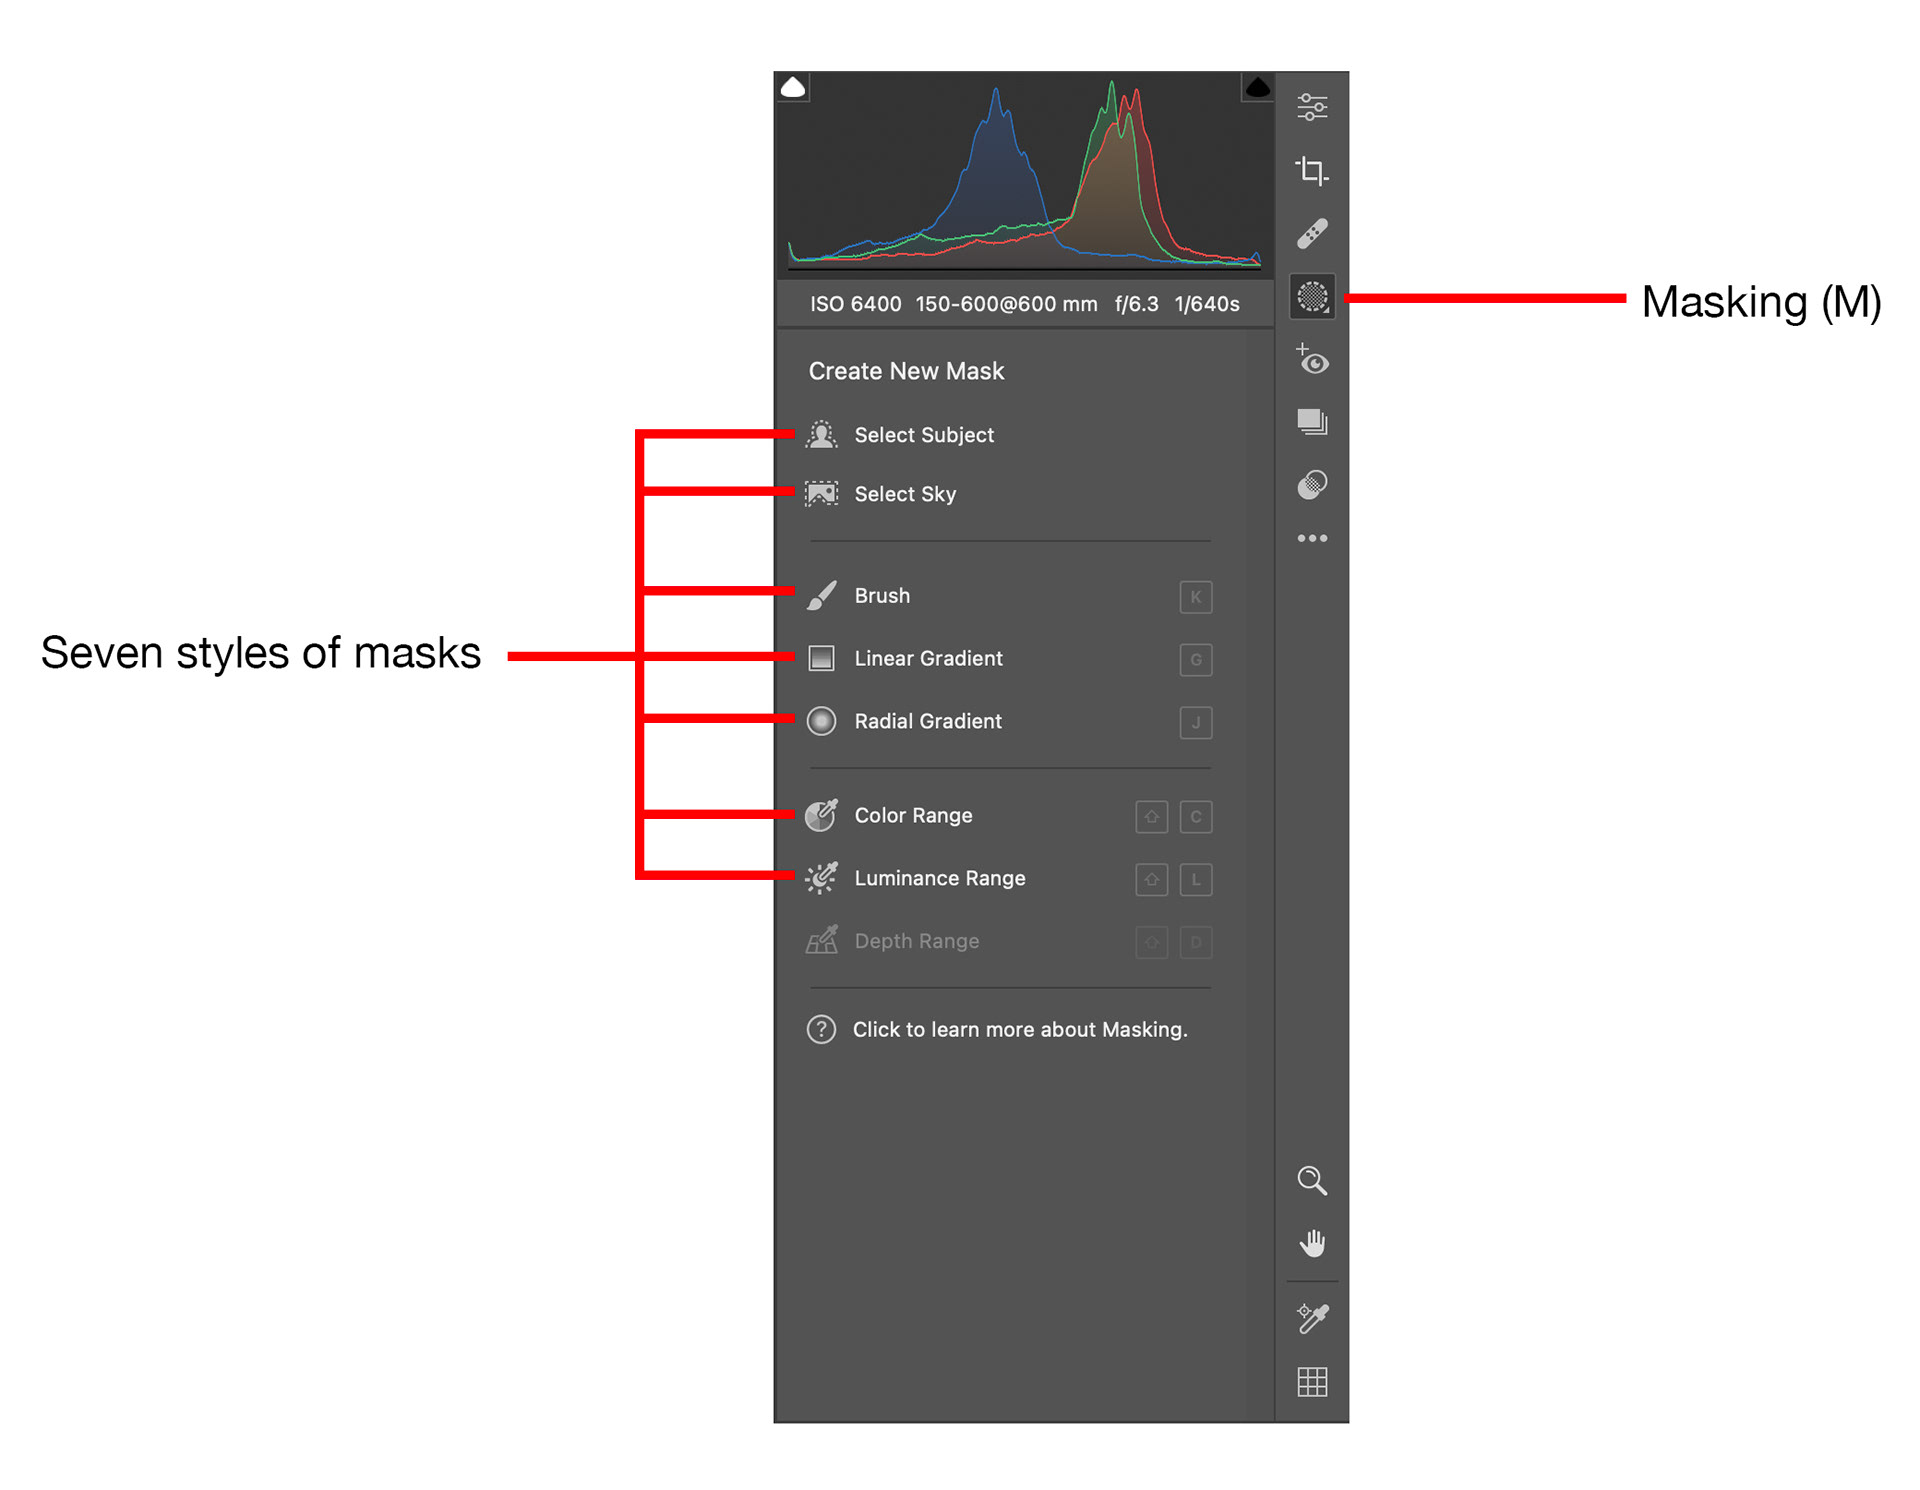
Fig 1 - Initial masking dialog
The old Adjustment Brush, Linear Gradient and Radial Gradient appear in the list, and operate in the same way they did before. You’ll also see the Color Range and Luminance Range options. These used to be only available as modifiers to the Adjustment Brush or Gradient tools but are now offered as individual masking options that can be used on their own or in combination with the other tools.
You’ll also see two new AI tools that have been available in Photoshop for some time, Select Subject and Select Sky.
Once you have created your first mask the Masking Panel shown on the left in Figure 2 will be visible each time you press the masking button. This panel can be moved around the screen and can also be docked into the main navigator panel.
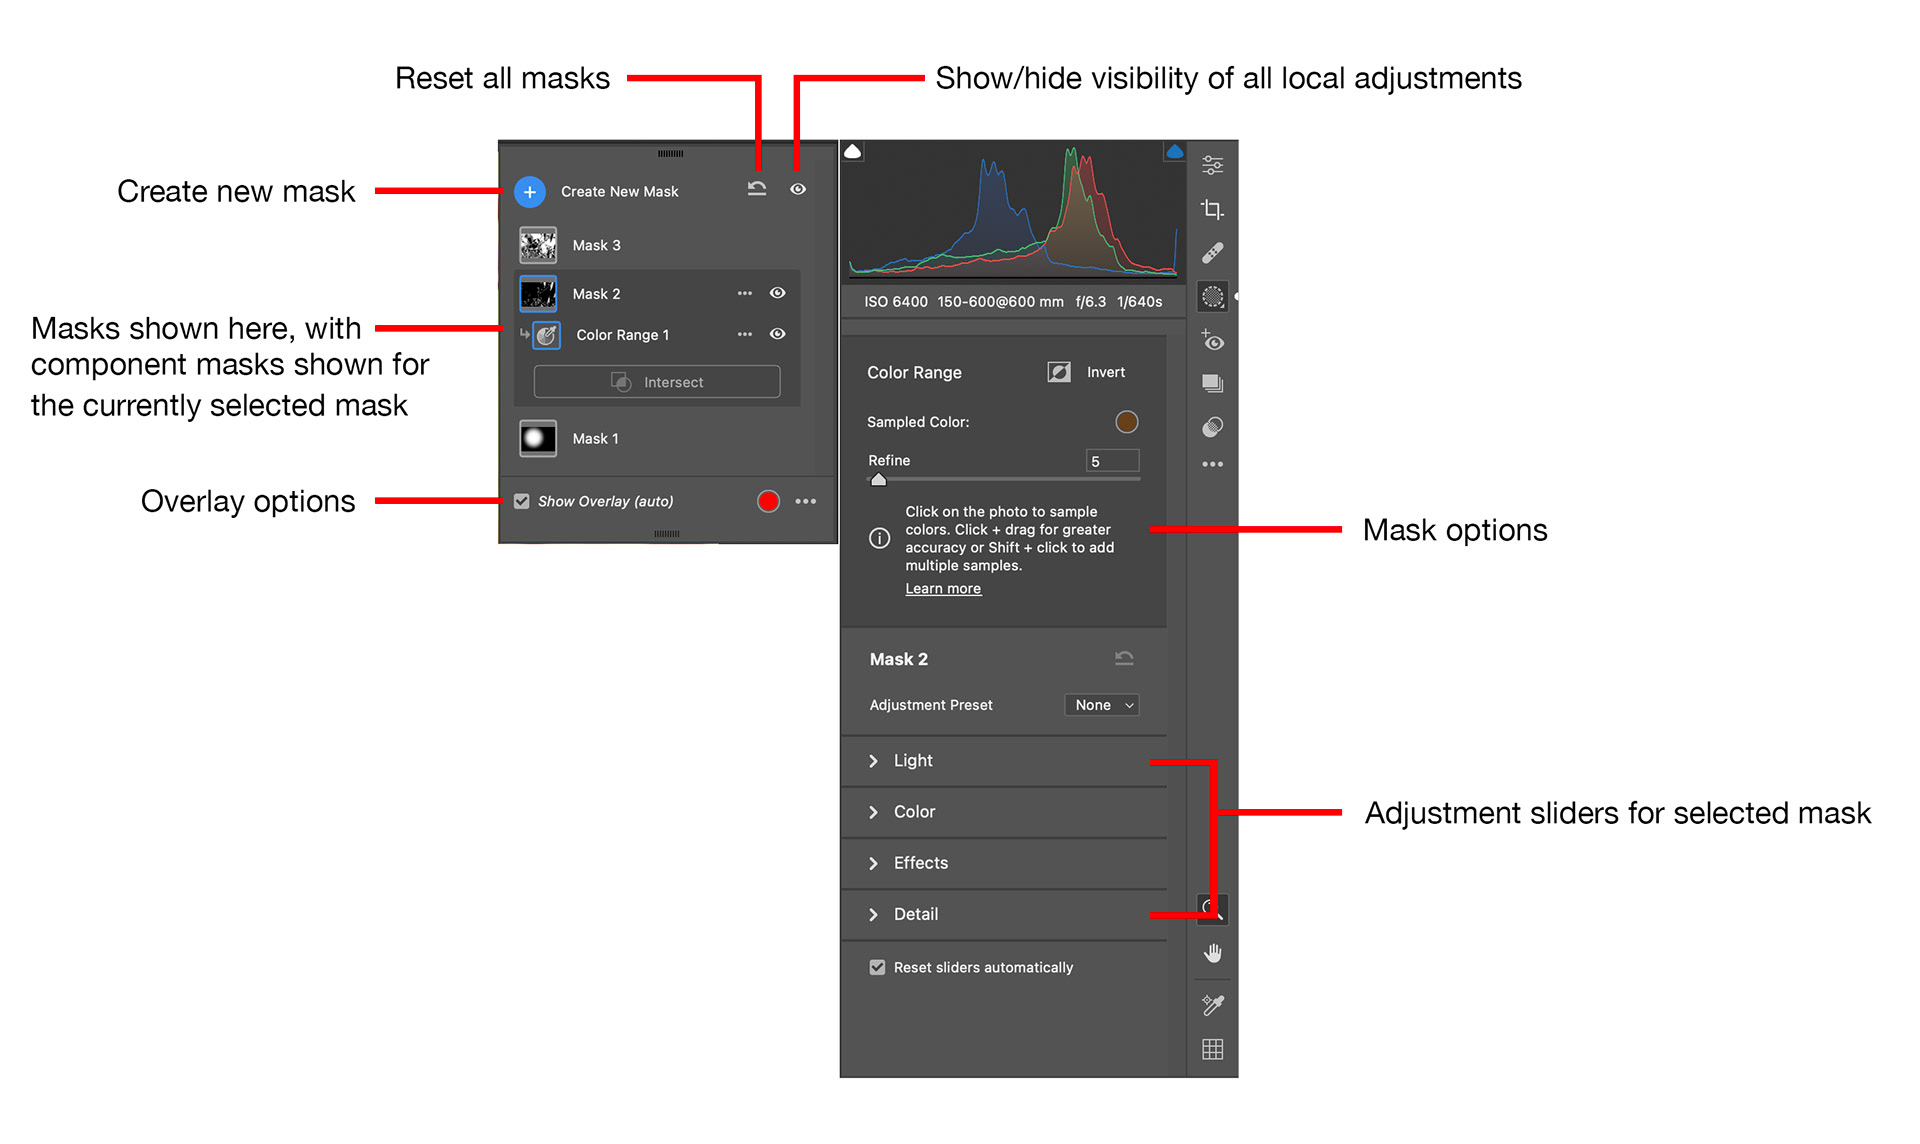
Fig 2 - Masking panel
If you have created multiple masks, they will be displayed in the Masking Panel (in Figure 2 you can see there are three masks with the default names of Mask 1, Mask 2 and Mask 3. Each mask will consist of one or more sub-masks created with the above-mentioned seven tools. The selected mask (in the case of Figure 2, Mask 2 is selected) will show these sub-masks indented below the main mask name.
You can rename a mask by double-clicking on the name in the Masking panel.
Selecting one of the masks (or sub-masks) in the masking panel will cause the various local adjustment sliders to be displayed in the navigator. These are shown in four collapsible panels named Light, Color, Effects and Detail, these are shown expanded in Figure 3.
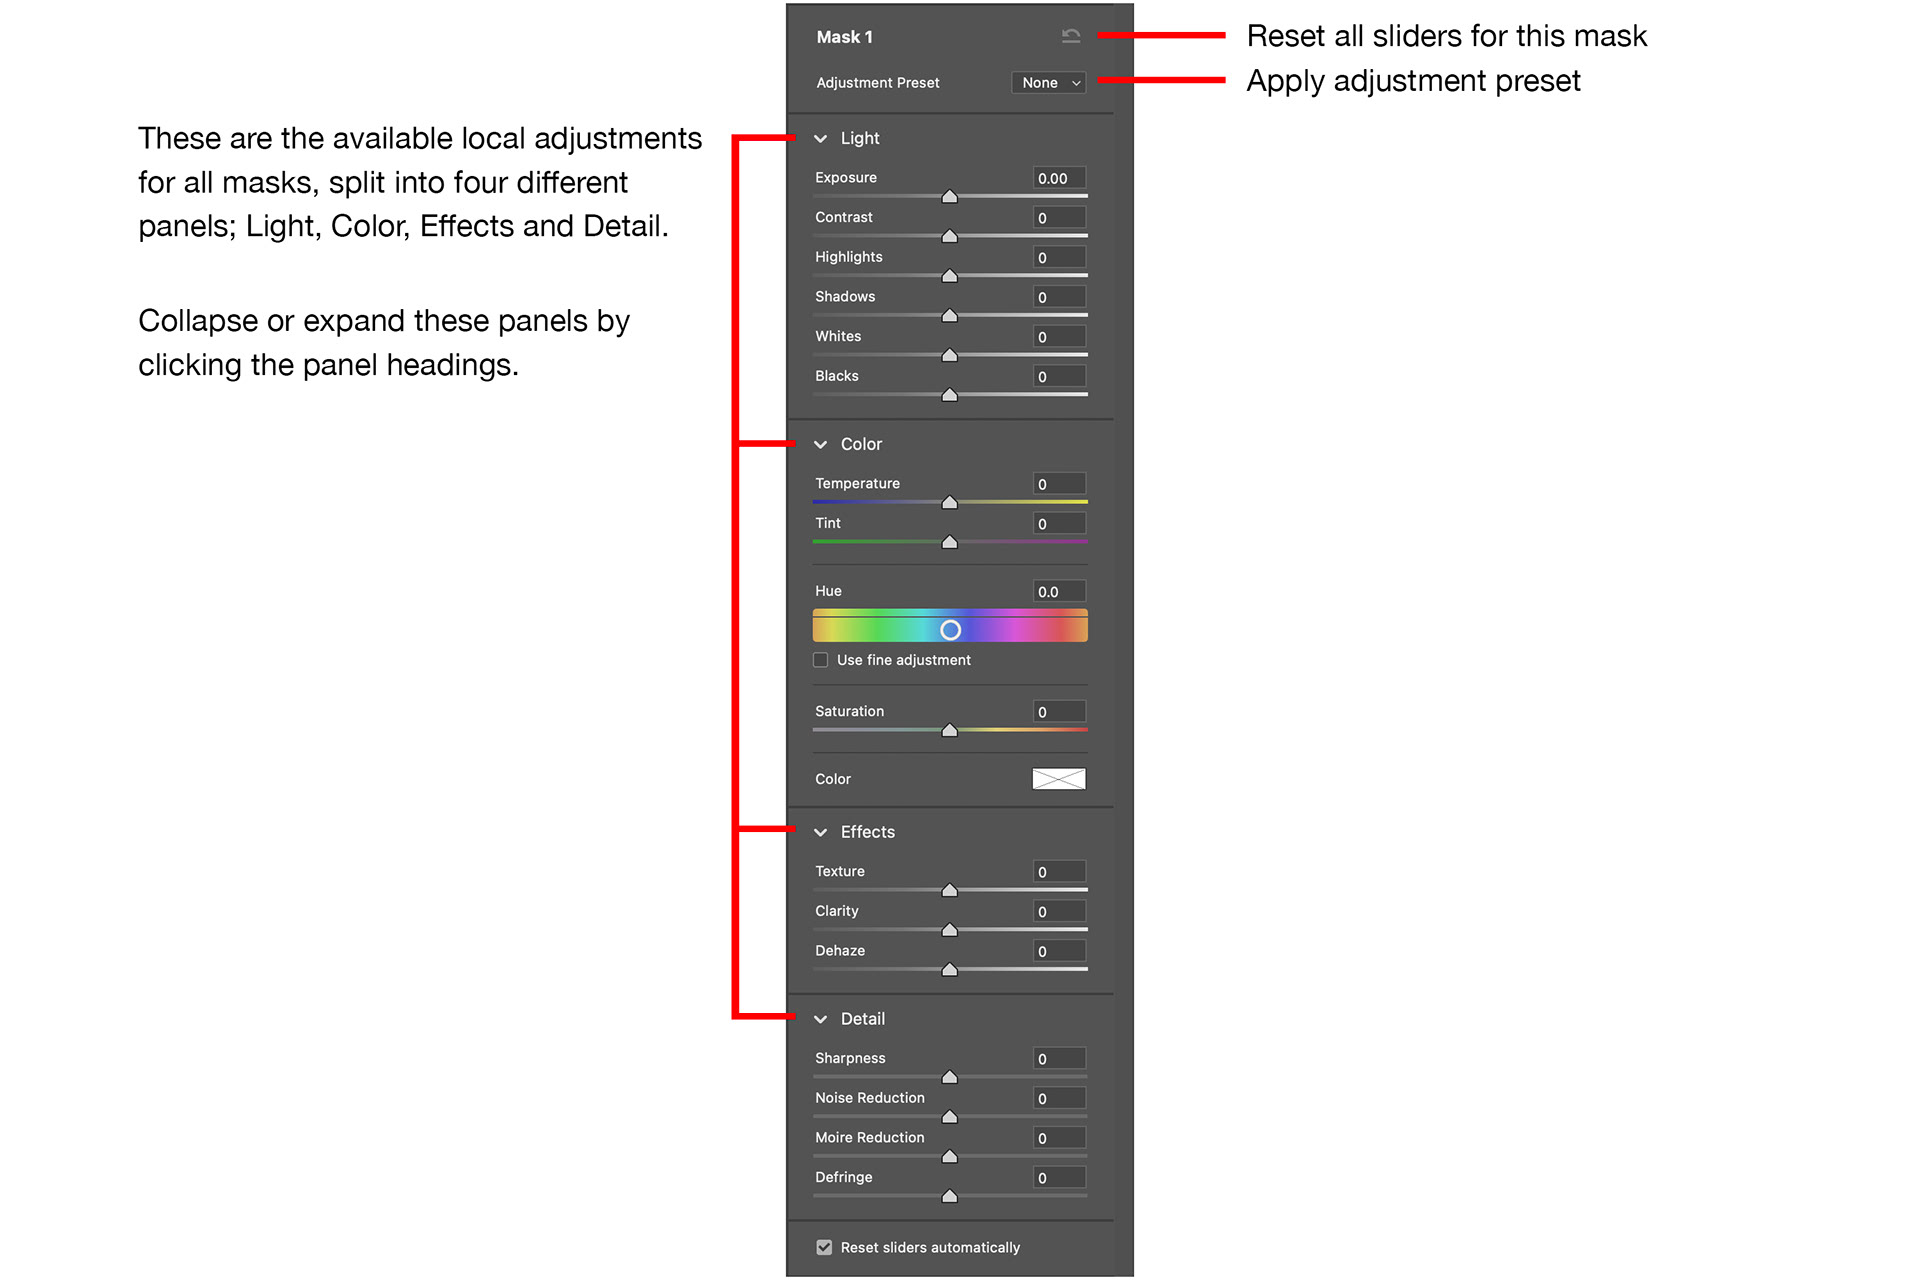
Fig 3 - Local Adjustment slider panels
Just above these you will see the options panel for the selected sub-mask. The Select Subject, Select Sky and Linear Gradient panels only have an Invert button, but the others have more options to control the way the tool works (eg feathering, flow) or to adjust/refine the selection made by the mask. The different options panels are all shown in Figure 4.

Fig 4 - Mask Option panels
You can turn visibility of the adjustments associated with a mask (or sub-mask) off and on by clicking the visibility “eye” icon next to the mask name in the Masking panel. You can turn off and on the visibility of all local adjustments by clicking the visibility “eye” at the top of the Masking panel. There is also a “Reset all masks” icon here that will delete all masks.
Just like the old tools, ACR will show you a coloured overlay (by default this is red) to highlight the selected area of your image. By default, this will appear, and then disappear when you first move any of the adjustment sliders. You can cause the overlay to reappear by ticking the Show Overlay check box, or by hovering the mouse over the icon for the mask or sub-mask in the Masking panel.
Clicking the coloured circle alongside the Show Overlay check box will display the Mask Overlay Color dialog which allows you to change the colour and opacity of the overlay.
There are also other styles of mask overlay you can choose, these are available on the Overlay context menu (to display this click the three dots alongside the Overlay colour circle (see Figure 5). For example White on Black gives the traditional Photoshop mask view.
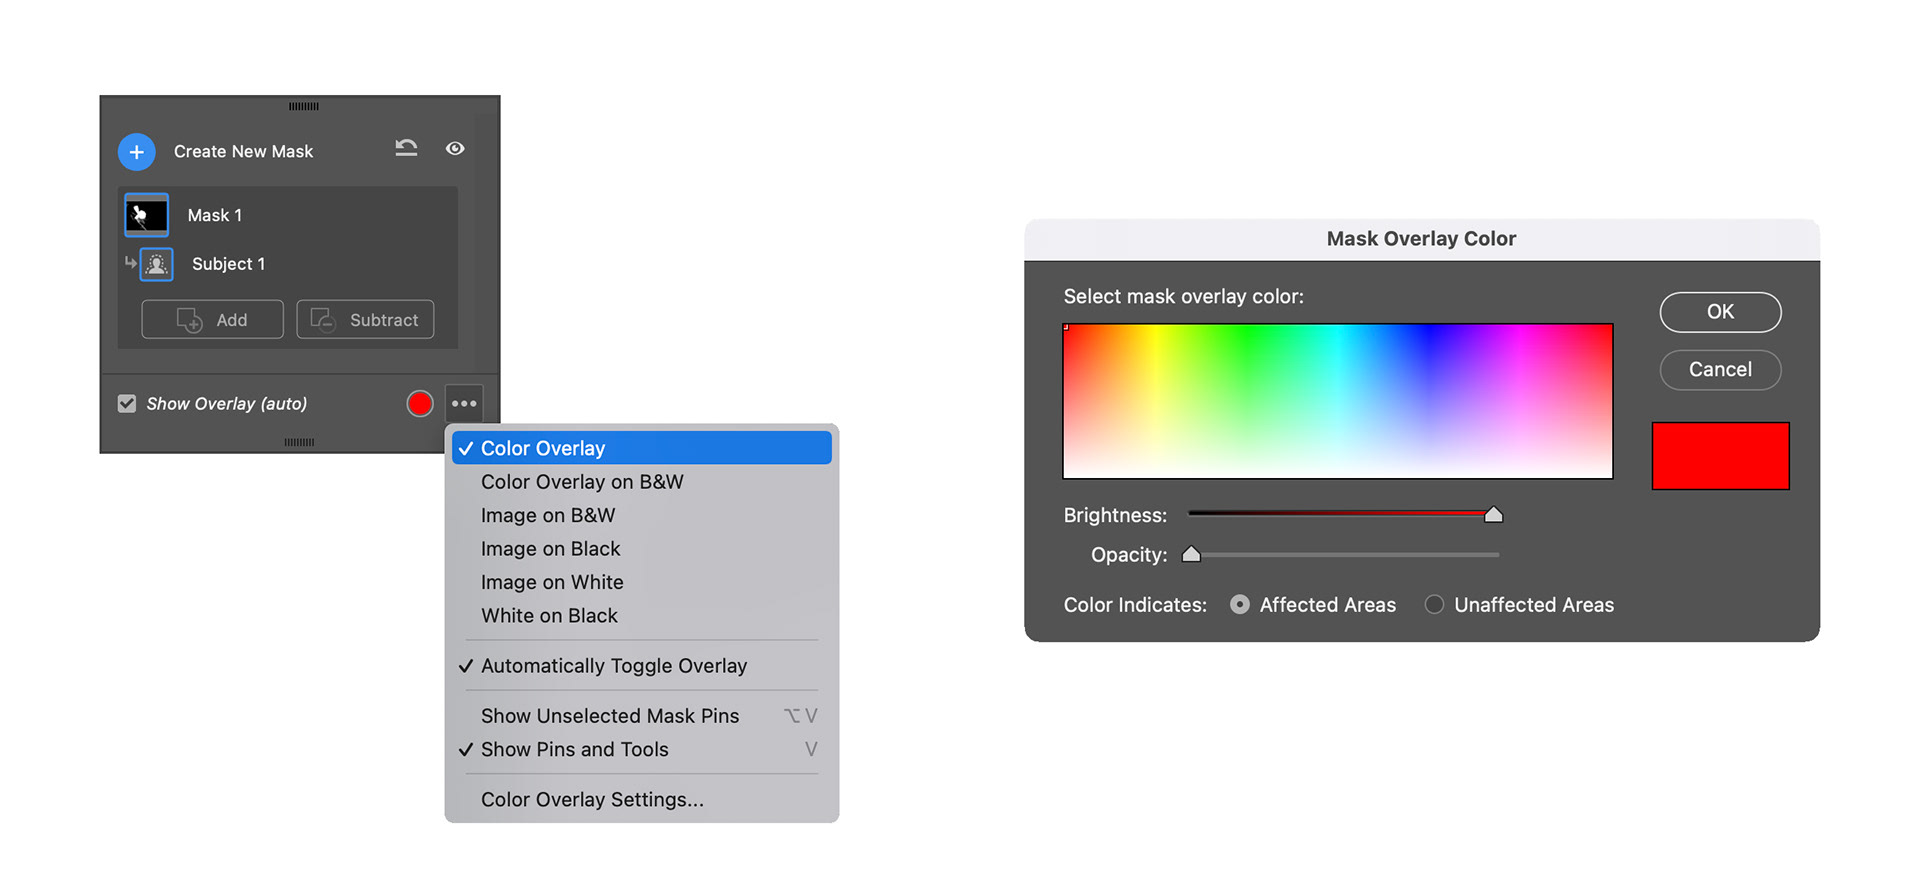
Fig 5 - Mask Overlay dialog
So, while being able to create all these different types of masks gives you lots of control, the true power and flexibility comes from being able to combine the different mask tools, by adding, subtracting, intersecting and inverting them. You will note the Invert button on the Mask option panel, and the Add and Subtract buttons in the Masking panel, there are also context menus available for both the main mask, and each sub-mask component that have these and other options like Duplicate, Intersect and Delete.
So some examples;
You want to make some adjustments only to the white clouds in the sky.
You could Select Sky, then Intersect with a Luminance mask that selects the white clouds, or alternatively you could Select Sky, then subtract the blue part of the sky using a Color mask.
You want to make some adjustments to all parts of the image, except the sky.
You could Select Sky, and then Invert the mask.
You have an image of a model in a red dress, and you want to adjust the colour of the dress.
You could Select Subject, then intersect that mask with a Color mask selecting the reds in the dress.
Obviously, any selections you make with any of the tools can be adjusted by adding or subtracting with the Brush tool.
As with previous versions, you will see little “pins” on the image representing each mask you have created, but now, rather than being simple dots they are different little icons depending upon the type of mask. Given that now you can access these easily in the Masking panel you might choose to turn these off in the Overlay menu (see figure 5) by choosing the Show Pins and Tools option.
Both the mask, and each sub-mask have context sensitive menus accessible by clicking the “three dots” to the right of the mask or sub-mask icon. These give you options to Rename, Duplicate, Delete, Invert and Intersect the mask, they are shown in Figure 6.
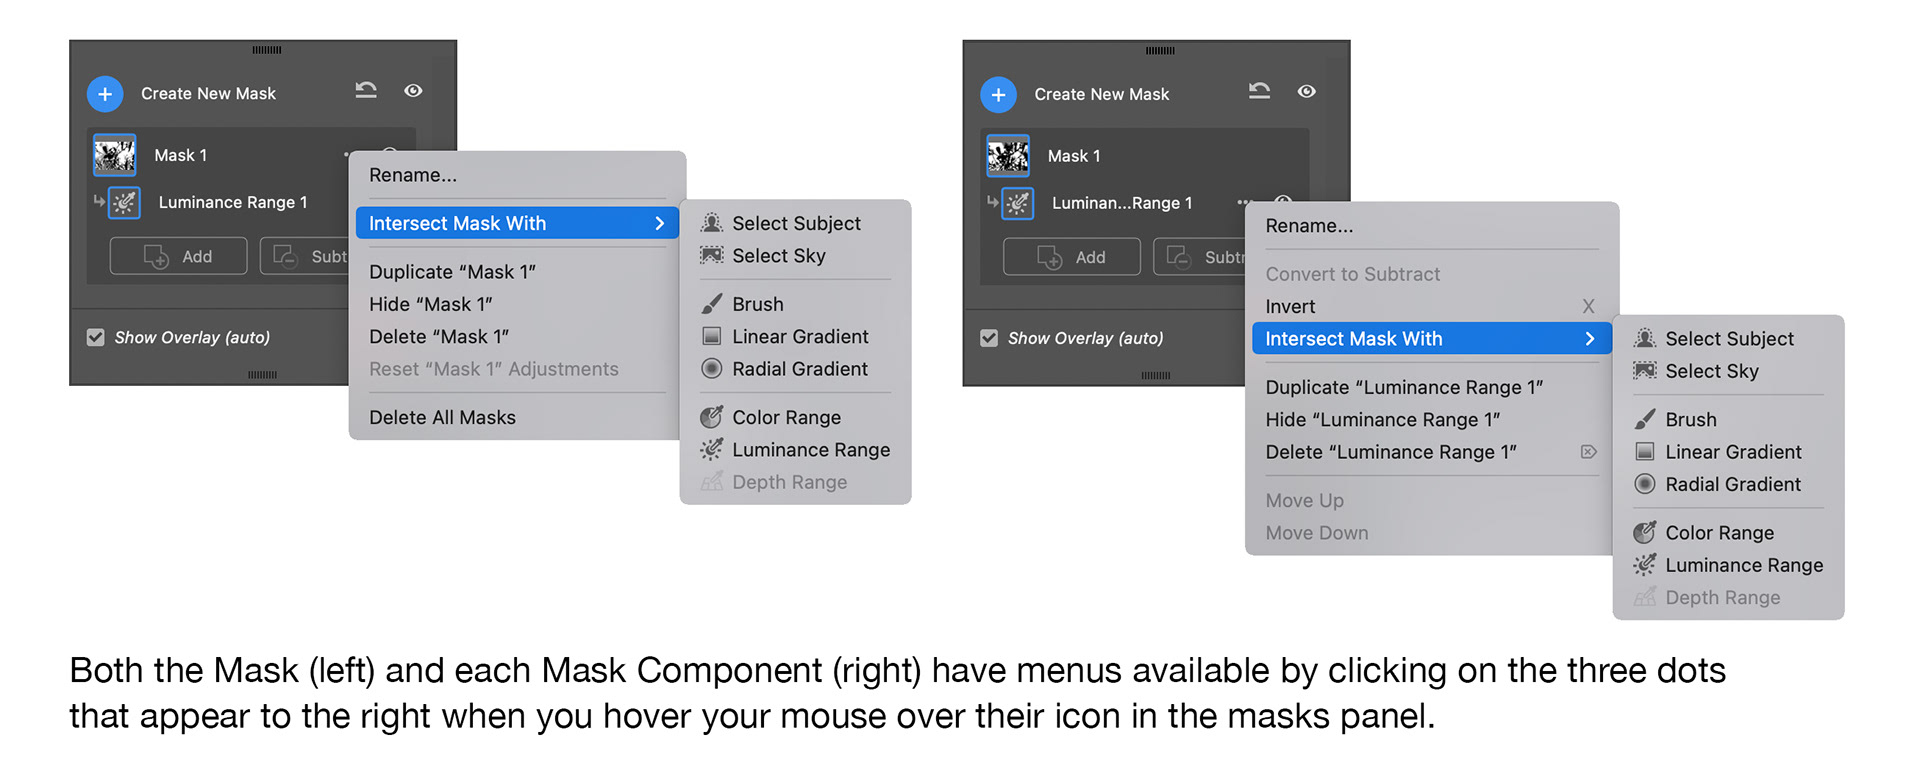
Fig 6 - Mask and Sub-mask menus
The Color and Luminance mask tools probably warrant some further discussion. In both cases you can click the image to select a colour or luminance value or click and drag over the image to select a range of colours or luminance values. You can also hold down the Shift key and click to make additional selections.
The Color mask options panel has a Refine slider to widen or narrow the range of colours selected (see Figure 7).

Fig 7 - Color Range and Luminance Range option panels
The Luminance mask options panel has a Select Luminance slider that has a large bar in it that defines the fully selected area, you can move it left (darker) or right (lighter) to affect the selected area. You can also drag the small handles on the edge of the bar to change its size (to select a bigger or smaller range of luminance values). The lines on either side of the bar that get small triangles under them when you hover the mouse define the feathered area, so move these further away from the central bar to get less severe transitions from selected to unselected, or closer to the central bar for a more severe transition.
These new masking capabilities offer very much more power than you had previously in ACR or Lightroom and make it possible for much more precision and accuracy for local adjustments.
This article was first published in the February 2022 issue of Artists Down Under magazine.