A Smart Object in Photoshop is essentially a layer that can contain another entire Photoshop file. The contents of a Smart Object can be a Raw image, a single pixel (rasterized) layer, or any combination of any number of Photoshop layers.
You can tell that a layer is a Smart Object by the presence of a small icon in the bottom right corner of the layer thumbnail (see Figure 1).
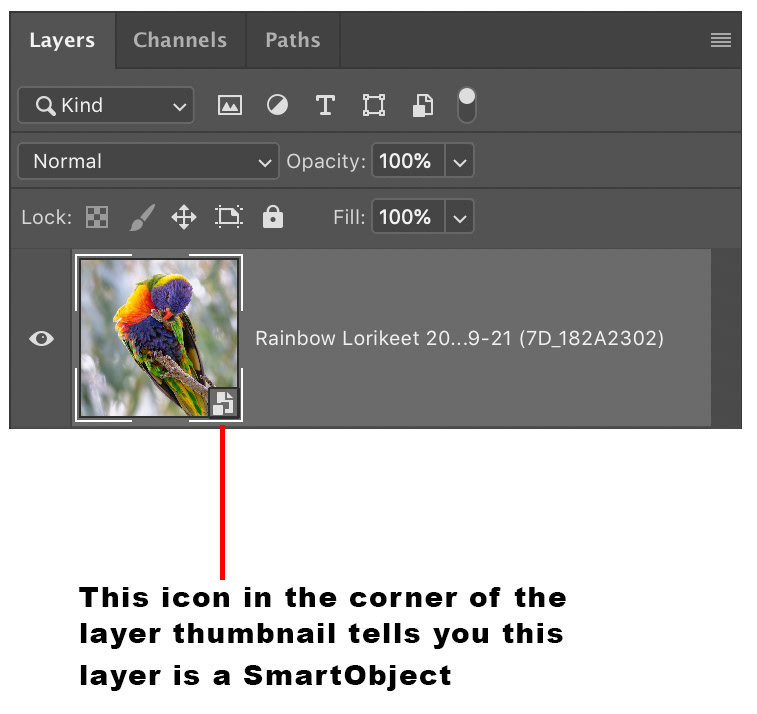
Fig 1 - Smart Object icon
When opening an image (Raw, JPG or TIFF) from Adobe Camera Raw (ACR) into Photoshop you can choose whether to open it as a Smart Object or as a normal pixel layer. The Open button in ACR will either say Open or Open Object depending on a preference setting in ACR preferences.
In Figure 2 you will note that I have my preference set so the button shows Open Object. You can switch the behaviour from Open Object to Open (and vice versa) by holding down the [Shift] key.
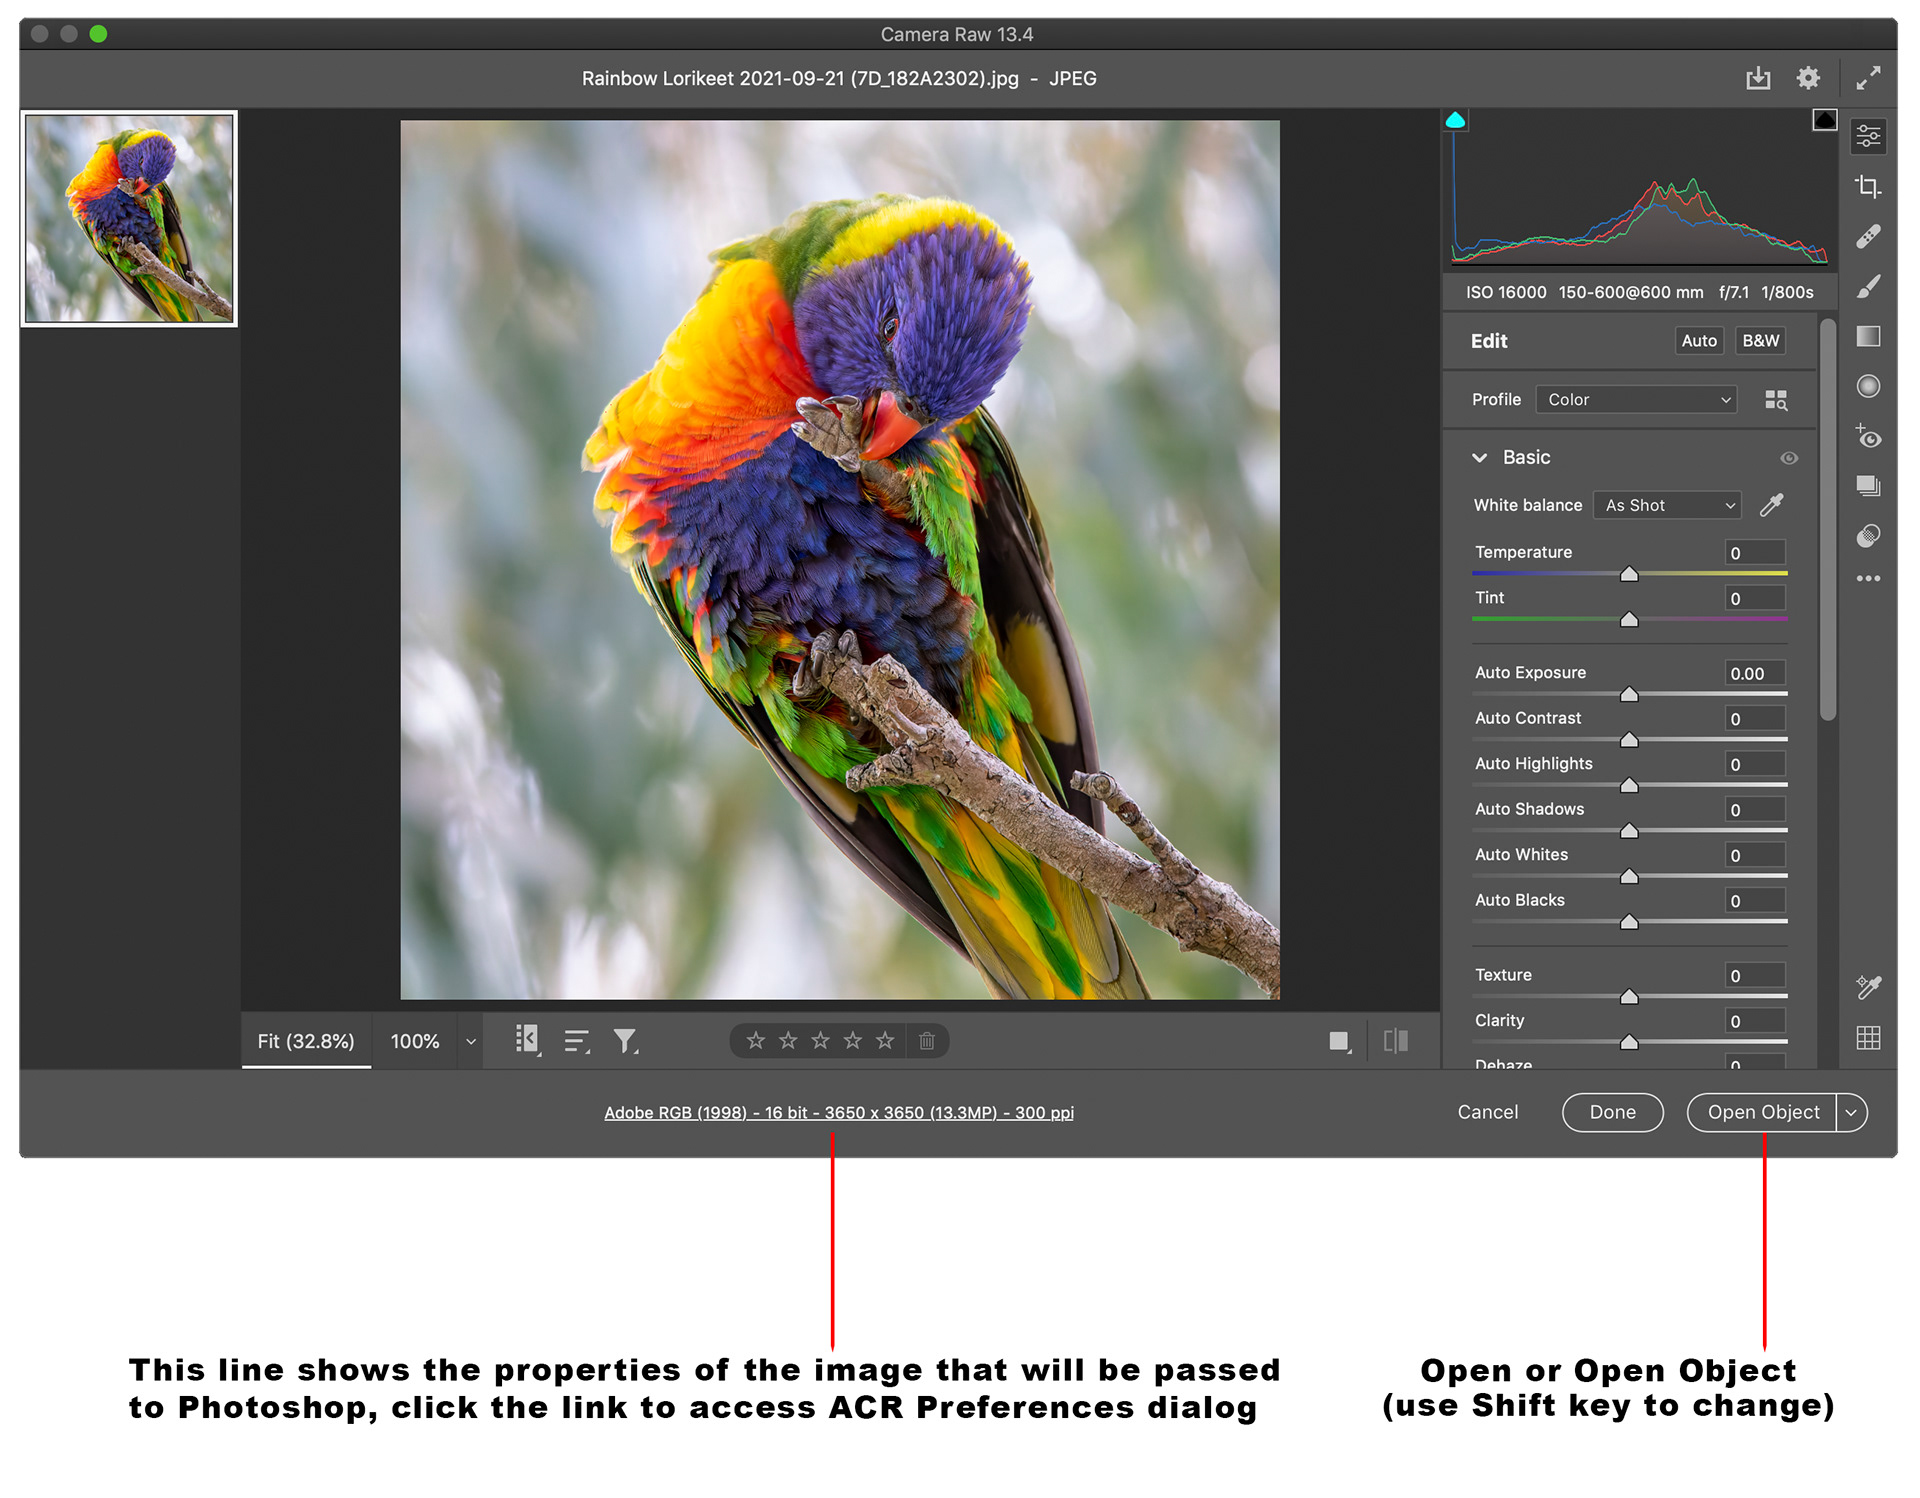
Fig 2 - Adobe Camera Raw window
The line at the bottom centre of the ACR window (see Figure 2) not only shows you the properties of the file that will be passed to Photoshop but is also a clickable link that will take you to the ACR Preferences dialog (see Figure 3). Here under Workflow preferences, you will see the check box that determines the default behaviour of the Open / Open Object button.
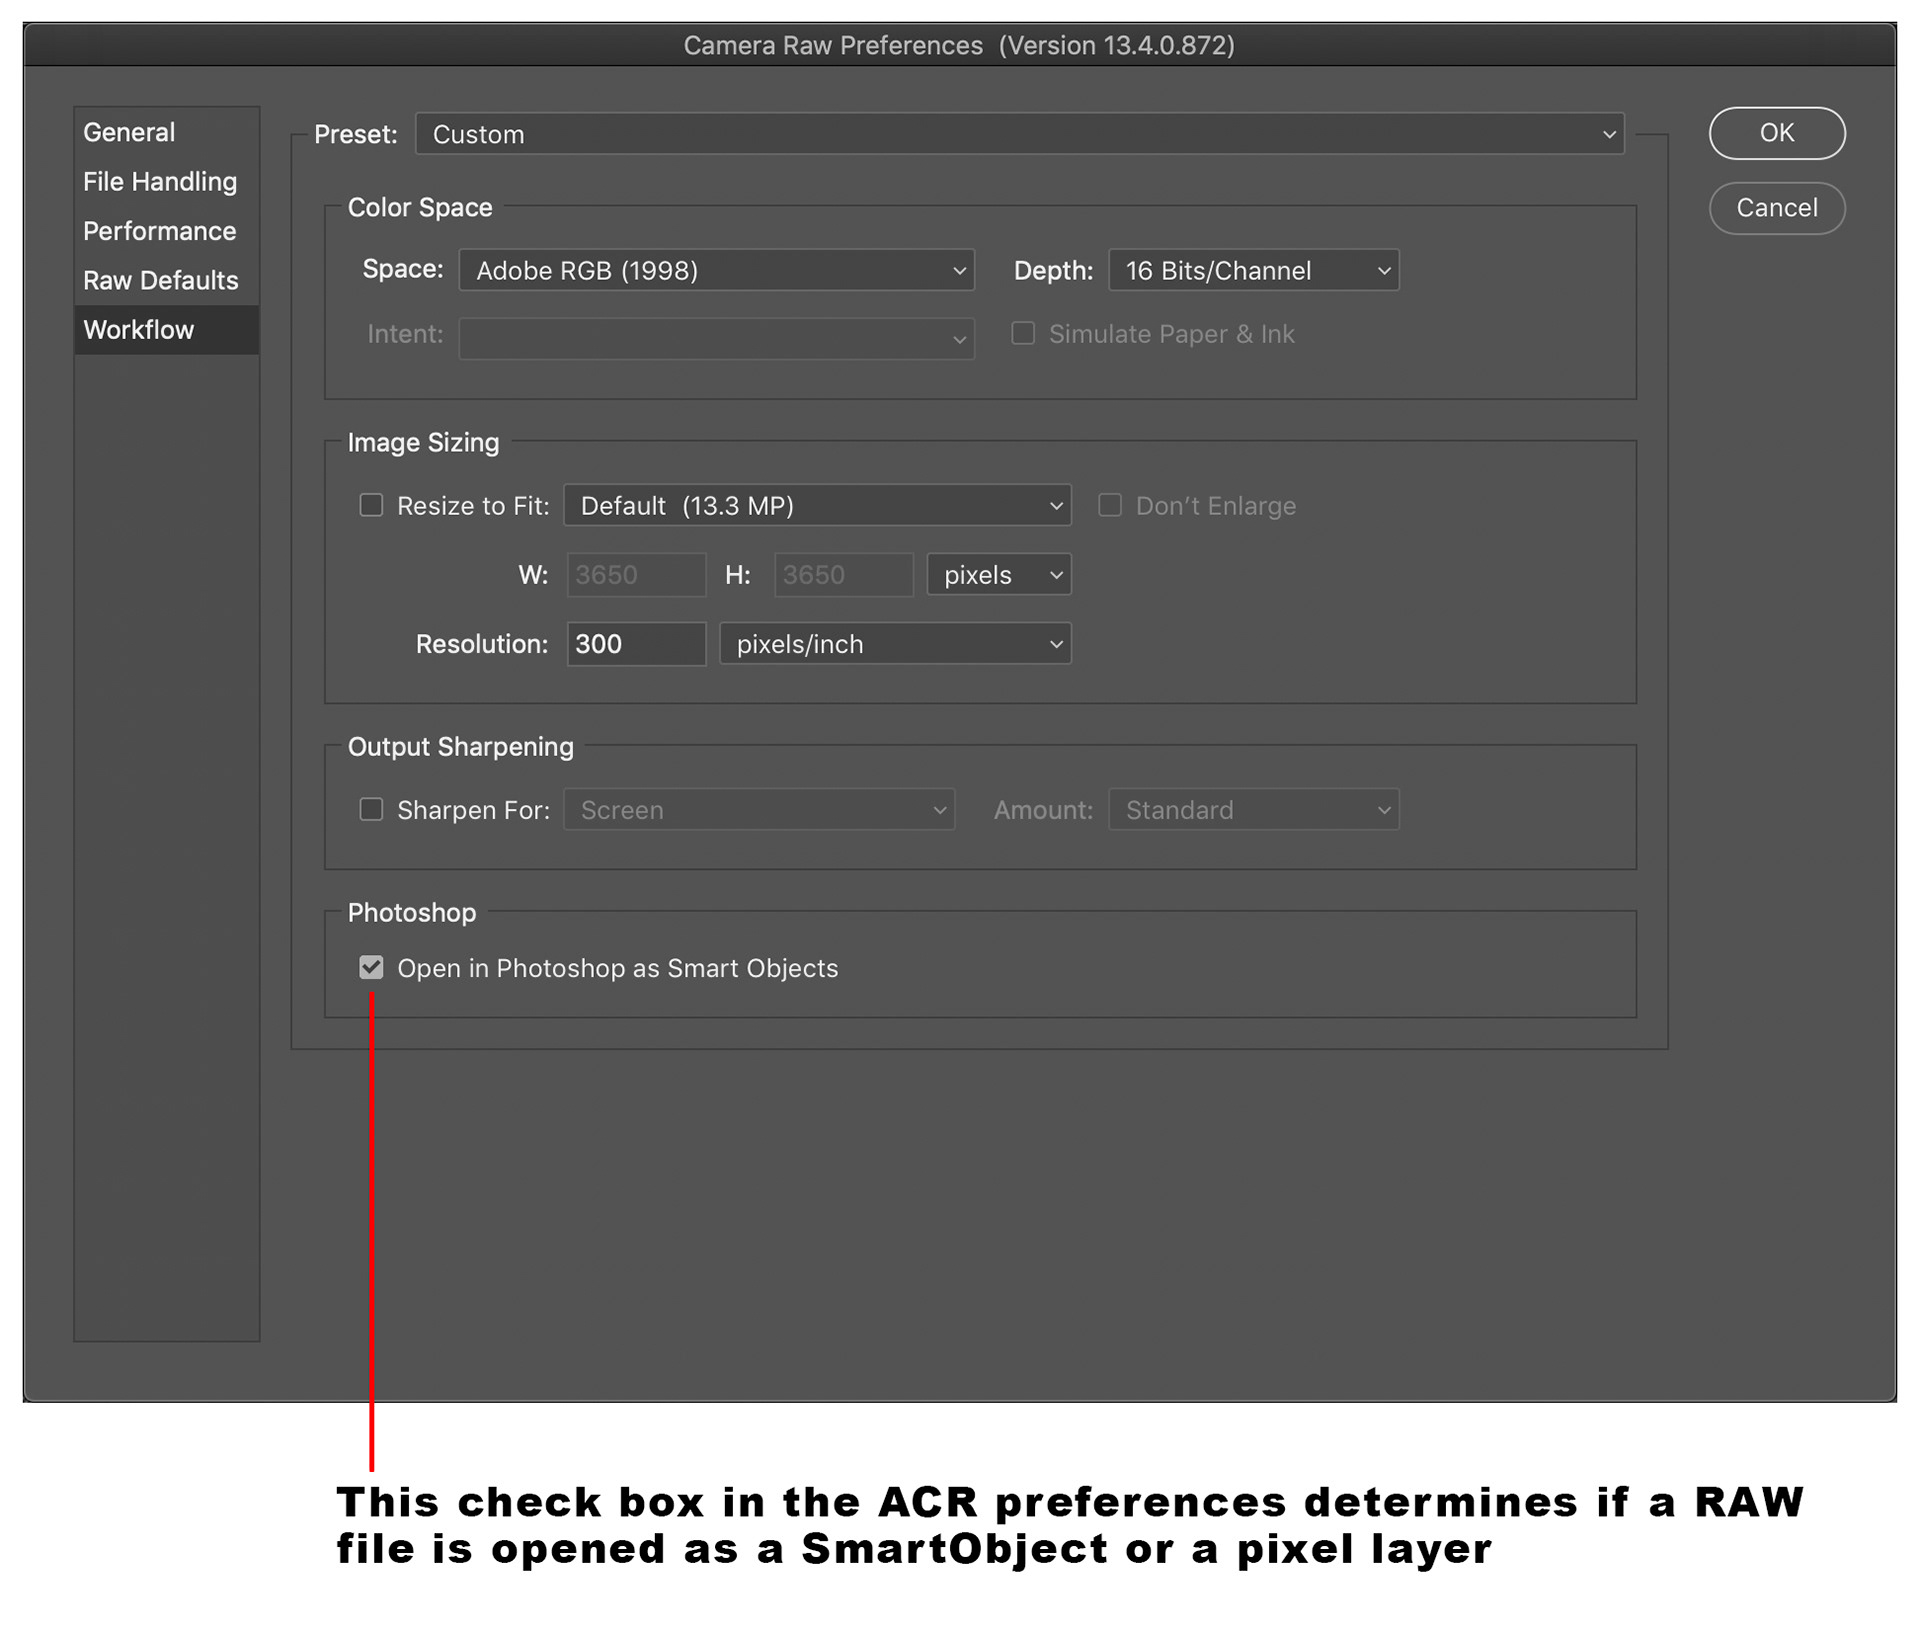
Fig 3 - ACR Workflow Preferences
You can edit the content of a Smart Object by choosing Layer / Smart Objects / Edit Contents from the menu, or by right-clicking the layer to the right of the layer description and choosing Edit Contents from the context menu, or simply by double-clicking the layer thumbnail.
If the layer contains a single image layer created from ACR, the image will be opened in ACR for you to edit.
Otherwise, it will be opened as another Photoshop file which you can edit. When finished editing, choose File Save and File Close and the Smart Object layer will be updated in the original document.
To create a Smart Object from a number of layers or groups in your Photoshop document, simply select the groups/layers and then choose Layer / Smart Objects / Convert to Smart Object (or right-click the selected layers and choose Convert to Smart Object from the context menu).
It makes sense for the layers to be contiguous when creating a Smart Object but Photoshop will allow you to select non-contiguous layers and pull them into a Smart Object, but this could change the order of layers in your document which may not be a desired result.
To convert a SmartObject back to layers, choose Layers / Smart Object / Convert to Layers (or select Convert to Layers from the right-click layer menu). Photoshop will unpack the layers in the Smart Object and place them in a layer group in place of the Smart Object.
An important concept to keep in mind is that if you duplicate a Smart Object layer, for example using Layer / Duplicate Layer or the [Cmd/Ctrl]+J keystroke, the contents of the Smart Object are not duplicated, you simply have two layers in your file referring to the same contents. This can provide you with significant saving in overall file size, but may not yield the result you want.
One example where this might be important would be if you wanted to have multiple copies of a Raw image Smart Object to adjust to different exposures for exposure blending. If you created the multiple copies using the normal layer duplication method, when you changed one of them in ACR, all the copies would update too. These are called dependent Smart Objects.
If you want to create an independent copy of your Smart Object layer, right-click the layer to the right of the layer description and choose New Smart Object via Copy from the context menu (see Figure 4), or choose Layer / Smart Objects / New Smart Object via Copy from the menu system.
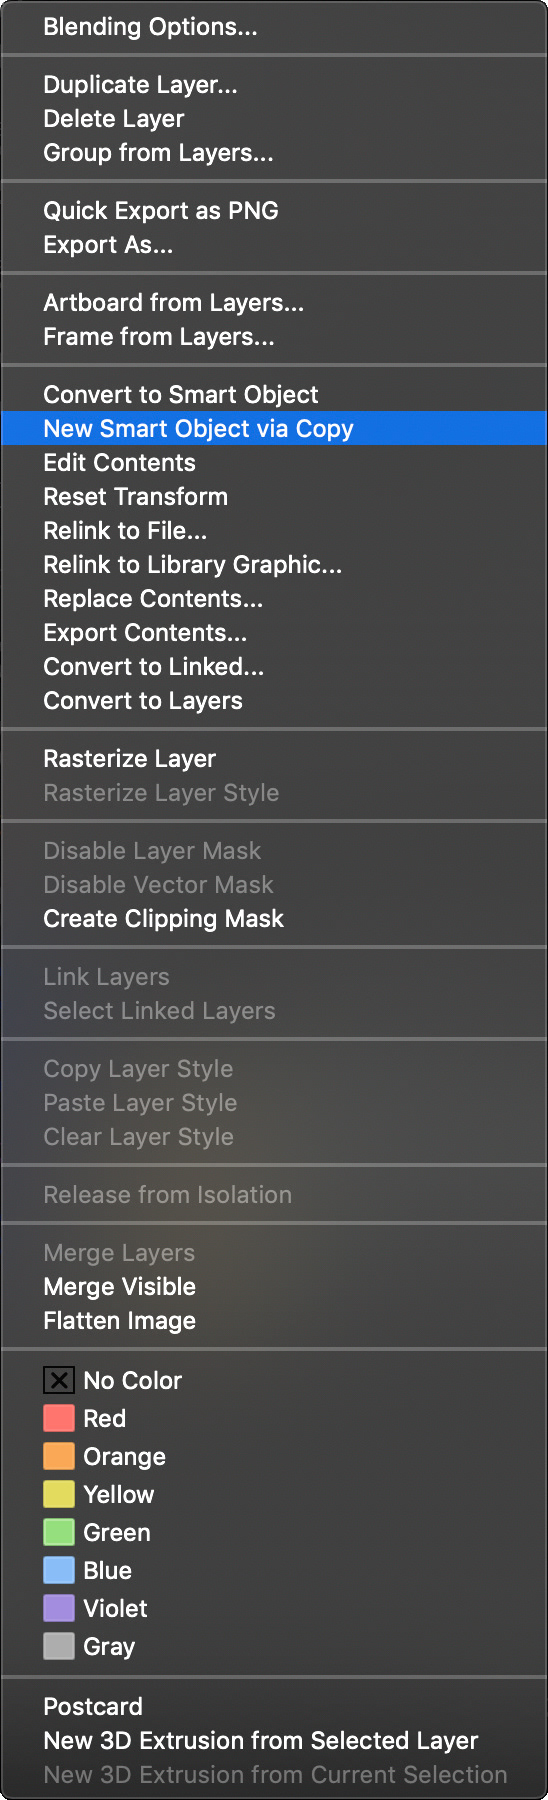
Fig 4 - Layer right-click menu
Unfortunately, in native Photoshop there is no way that I know of to tell if a Smart Object layer is a Raw image, and if it is dependent or independent. The Basics panel that comes with Greg Benz’s Lumenzia luminosity masking panel does this for you though. If you look at the Raw button in the Basics panel (see Figure 5), the colour of the writing indicates the type of Smart Object for the currently selected layer;
- Normal grey – layer is not a Smart Object
- Red – layer is a Smart Object but not a Raw image
- Yellow – layer is a dependent Raw Smart Object
- Green – layer is an independent Raw Smart Object
- Normal grey – layer is not a Smart Object
- Red – layer is a Smart Object but not a Raw image
- Yellow – layer is a dependent Raw Smart Object
- Green – layer is an independent Raw Smart Object
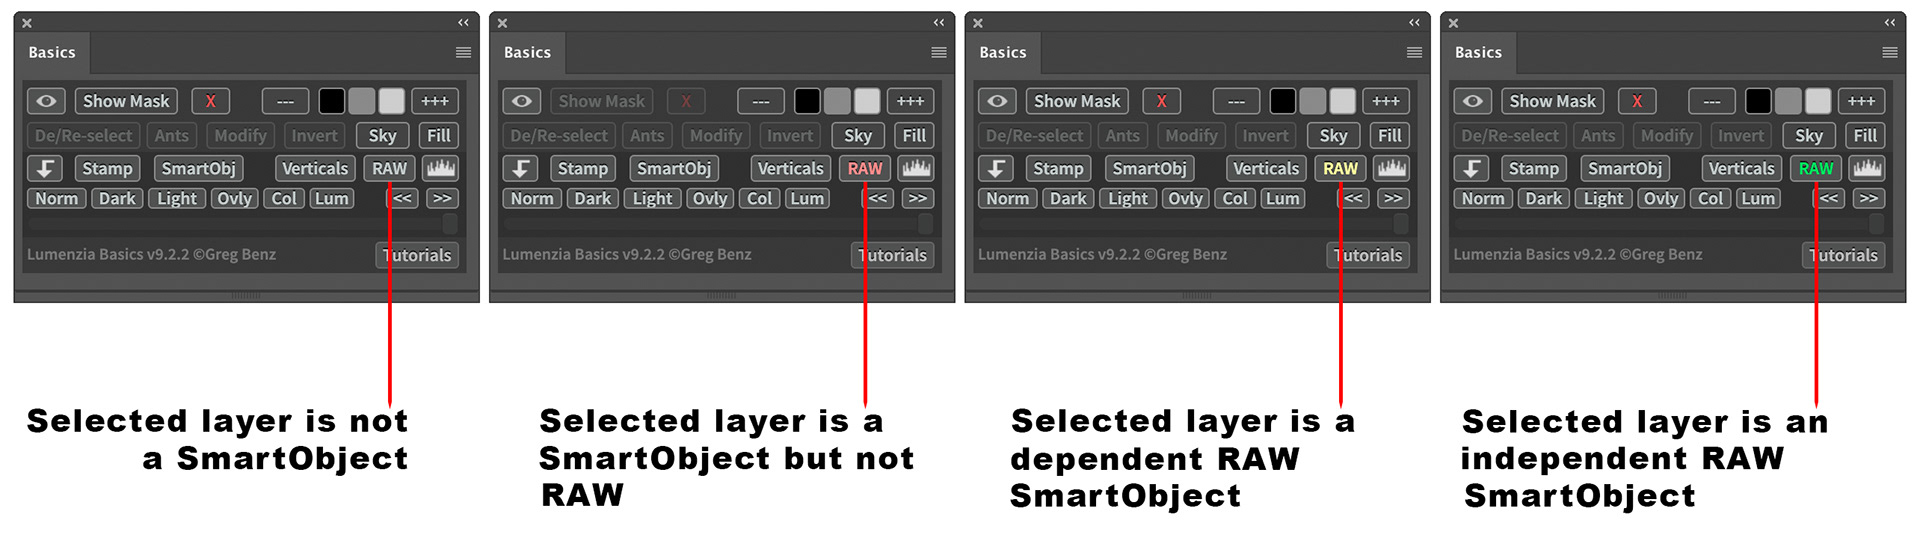
Fig 5 - Lumenzia Basics panel
When you apply a filter to a Smart Object it becomes a Smart Filter which gives you a number of advantages. The main one is that you retain a non-destructive workflow because you can at any time adjust the settings within the filter, remove it or temporarily remove it’s effect.
When you run a filter on a pixel-based layer the filter will overwrite the pixels of that layer changing them for ever. Also, once you close out the filter and the pixels are over-written you have no record of, or ability to change, the settings chosen in the filter.
When you apply filters to Smart Objects you see them differently as shown in Figure 6.
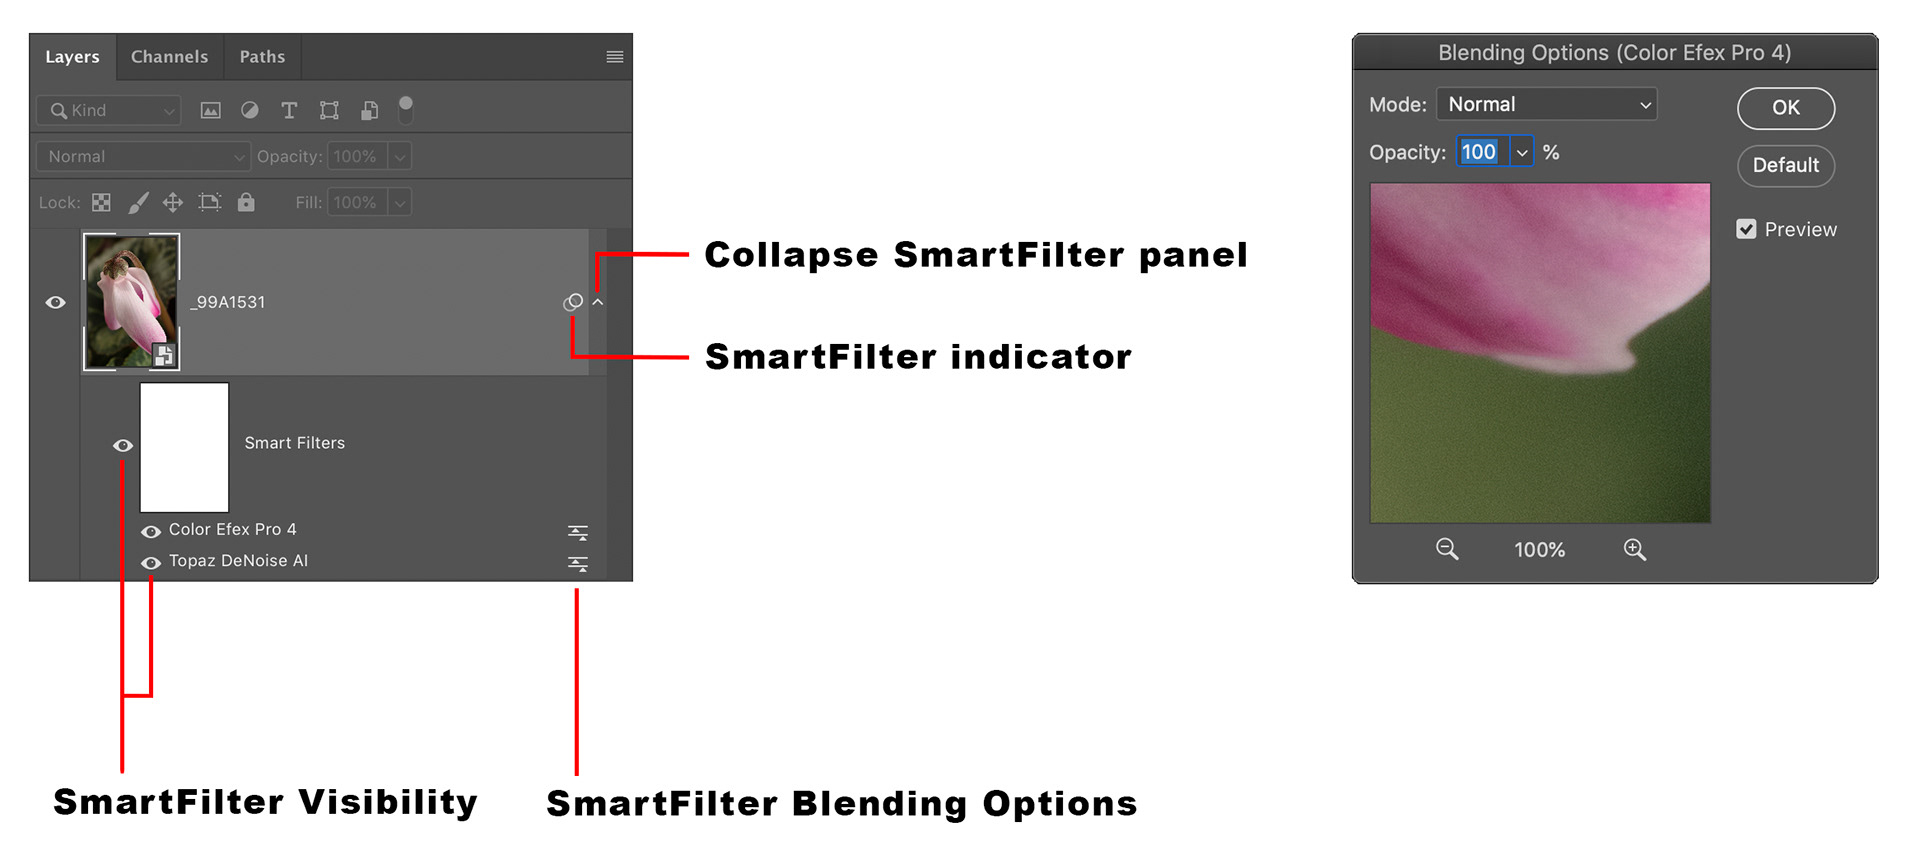
Fig 6 - Smart Filter panel and Smart Filter Blending Options dialog
The filters applied to the Smart Object are listed below under Smart Filters. You can turn off all filters with the main visibility “eye” icon or turn off individual filters with the individual visibility icons. You are also given a mask to use to selectively brush in/out the filters from parts of your image.
Double-clicking the name of the filter will take you back into that filter, showing you the last used settings, and you can adjust them as desired.
Clicking the Smart Filter Blending Options icon to the right of the filter name will bring up the Blending Options dialog (see Figure 6) where you can change the Blend Mode and Opacity for that filter.
So why might we want to use Smart Objects?
- To easily retain access to the full power of Adobe Camera Raw for image layers.
- To save file space / size.
- To be able to edit one single copy of an element in your file, and have multiple copies of it updated at once.
- To retain quality when resizing / distorting / skewing pixel-based graphics.
- To maintain a non-destructive workflow.
- To increase the flexibility when using filters
So, what are the downside to using Smart Objects?
Primarily, the main downside is that pixel-based operations such as dodging and burning, painting with the brush tool, cloning, spot healing etc cannot be performed on a SmartObject layer, but these can be performed by editing the Smart Object itself (as described above) and then saving it back into the original file.
Secondly, Smart Objects do add a level of complexity that some people do not like, but once you understand the “embedded file” nature of Smart Objects, you should get past this.
Thirdly, they can add processing time under certain conditions, for example when using Smart Filters performing certain operations to your Smart Object layer will cause re-execution of all of the Smart Filters that had been applied to the layer.
I highly recommend having a play with Smart Objects if you’re not familiar with them, they can really add to the processing power and flexibility you have in Photoshop. Their judicious use will make you a better editor.
This article was first published in the December 2021 issue of Artists Down Under magazine.