Back in October 2019 I wrote an article for the magazine titled “Gradient Maps and ColourMapX” which was all about colour grading using gradient maps. The article referenced a Photoshop plug-in panel called ColourMapX.
That product has had a huge overhaul and whilst it was good back then, it is much better now, re-vamped with lots of added features and re-released under the name CMX2 by NBP Retouch Tools+, run by Nino Batista.
I’m not going to go into the details of gradient maps, and colour grading using them, please go back and read the old article for that information, but I wanted to let you know about CMX2, it’s now one of my favourite little Photoshop plug-in panels, and I’m using it a lot.
I’m not going to go into the details of gradient maps, and colour grading using them, please go back and read the old article for that information, but I wanted to let you know about CMX2, it’s now one of my favourite little Photoshop plug-in panels, and I’m using it a lot.
What CMX2 does is very easily extract a colour palette from an image, creates a gradient map from the extracted colours, gives you great tools to modify the gradient map, then allows you to easily apply the gradient map to another image. It also allows you to save the gradient maps for later use.
Figure 1 shows the main Explore panel of CMX2 – pressing the left-most icon on the bottom row of the panel will cause CMX2 to analyse the active image and select several colours and then combine these into a gradient map based on their luminosity. Here, a nice blue gradient map has been created from the digital art image shown.
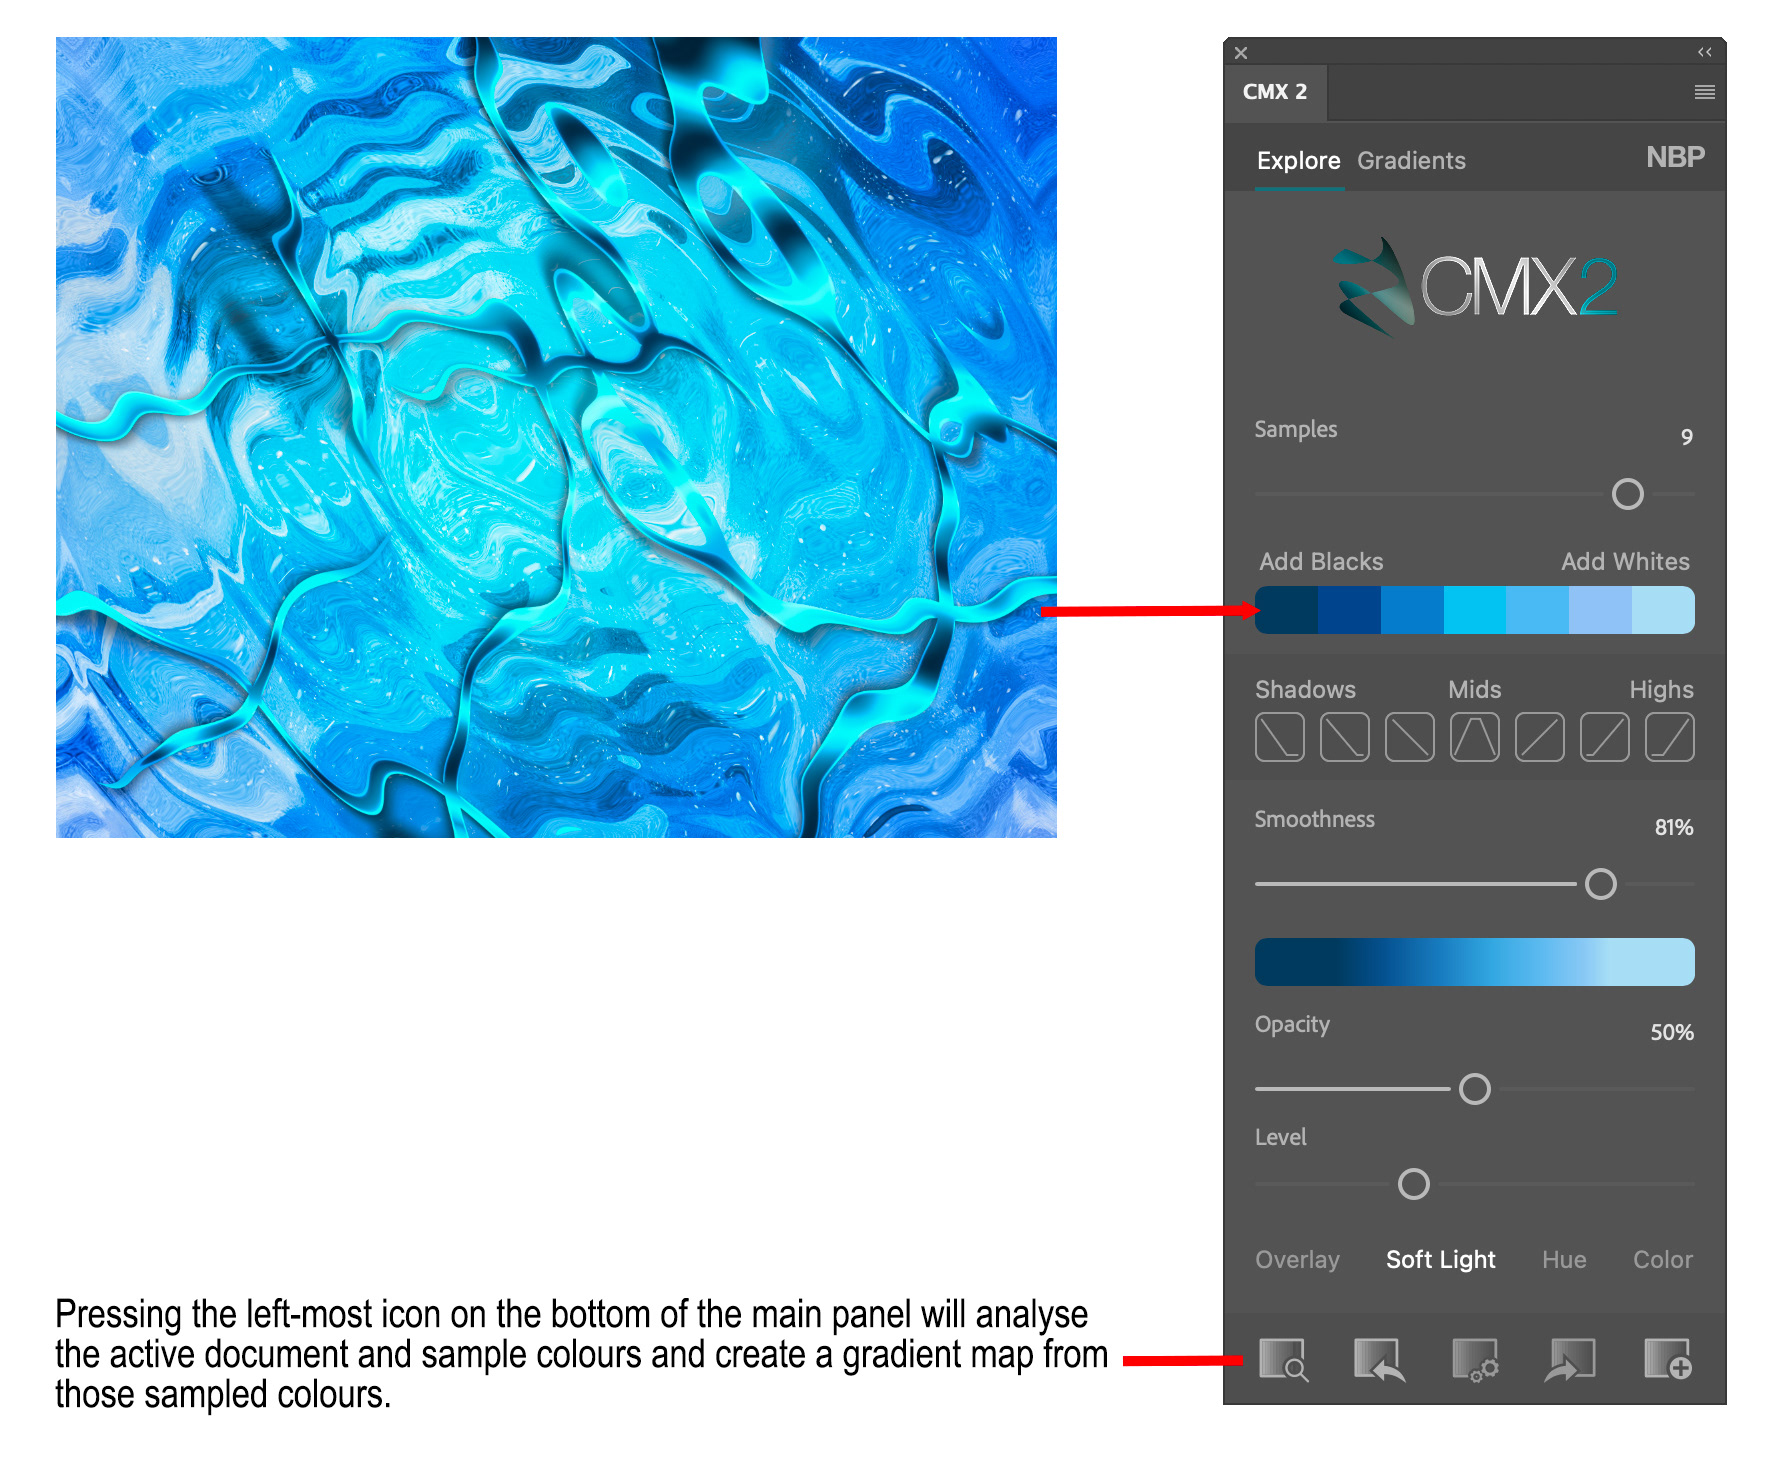
Fig 1 - Creating a gradient map from an image
You can increase or decrease the number of sampled colours using the Samples slider.
You can choose to omit a sampled colour by clicking on it, then click it again to re-include it.
You can “smooth out” the gradient by dragging the Smoothness slider towards 100%.
Add blacks to the shadows end of the gradient map or add whites to the highlights end of the gradient map by clicking the Add Blacks or Add Whites headings (these will remove the Blacks and Whites if they already exist in the gradient map).
Figure 2 shows the Explore panel and identifies the main options for customising the gradient map and how it is applied to an image.
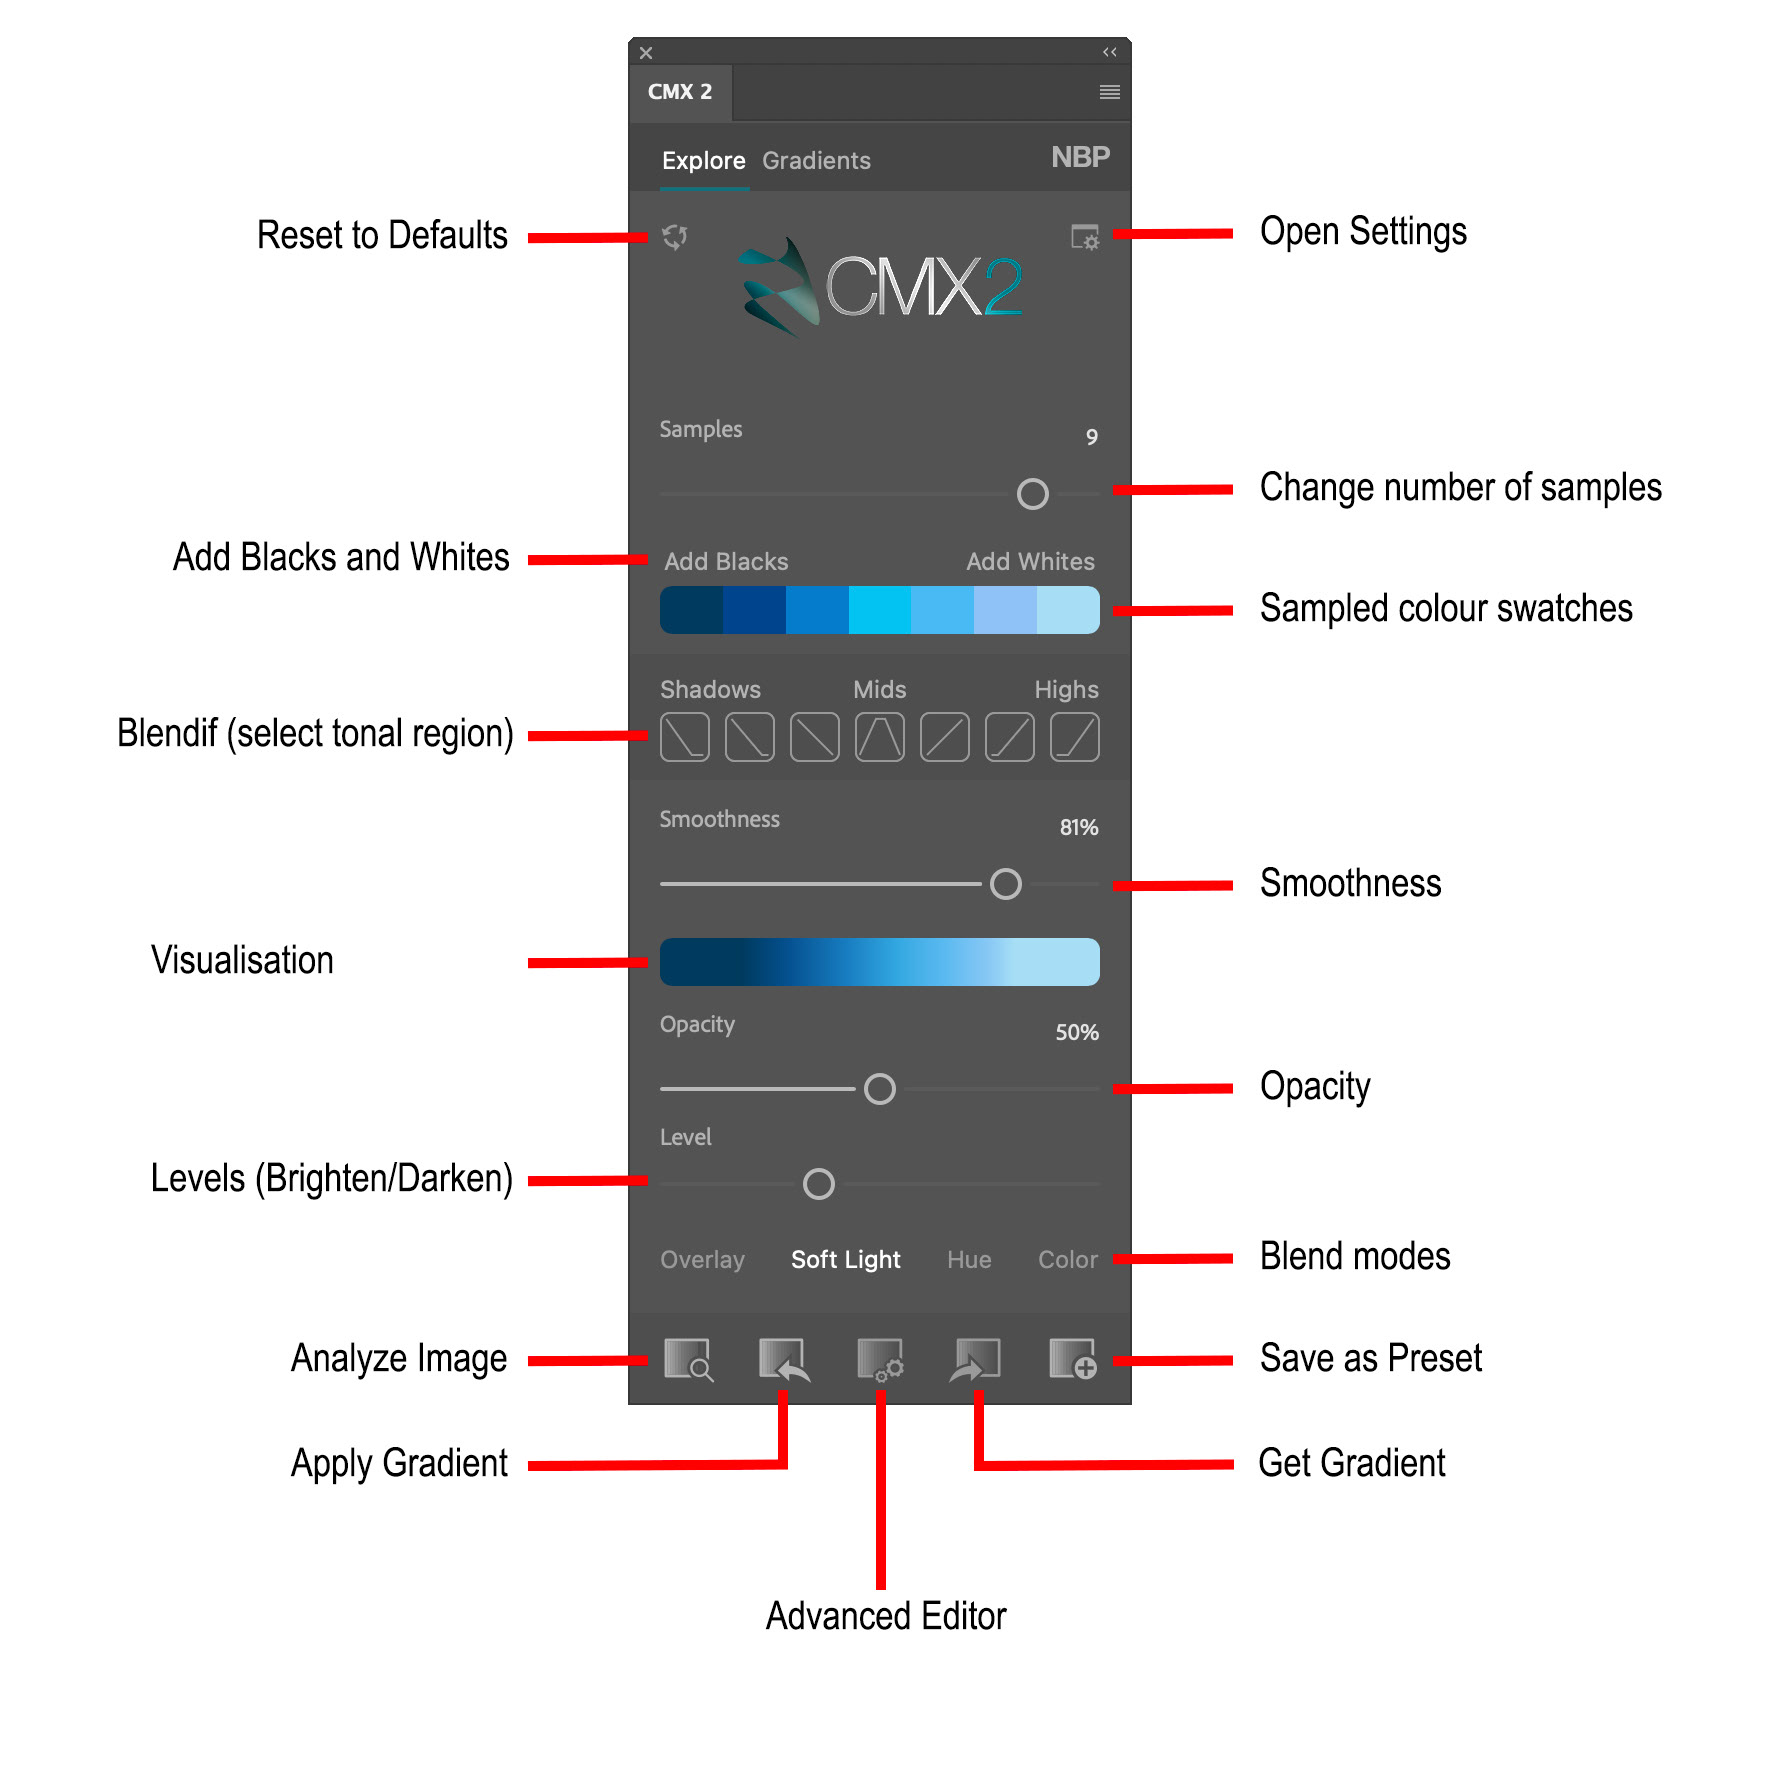
Fig 2 - The CMX2 Explore panel
Once you have created your gradient map, switch to the image you wish to colour grade with it and press the Apply Gradient icon. CMX2 will create a layer group, applying the gradient map to your image.
With the controls on the Explore panel you can change the blend mode used to apply the gradient, change the opacity of the applied gradient map and you can brighten or darken the image using the Levels slider.
The middle icon at the bottom of the Explore panel will open the Advanced Editor (see figure 3), this gives you even more precise control over your gradient.
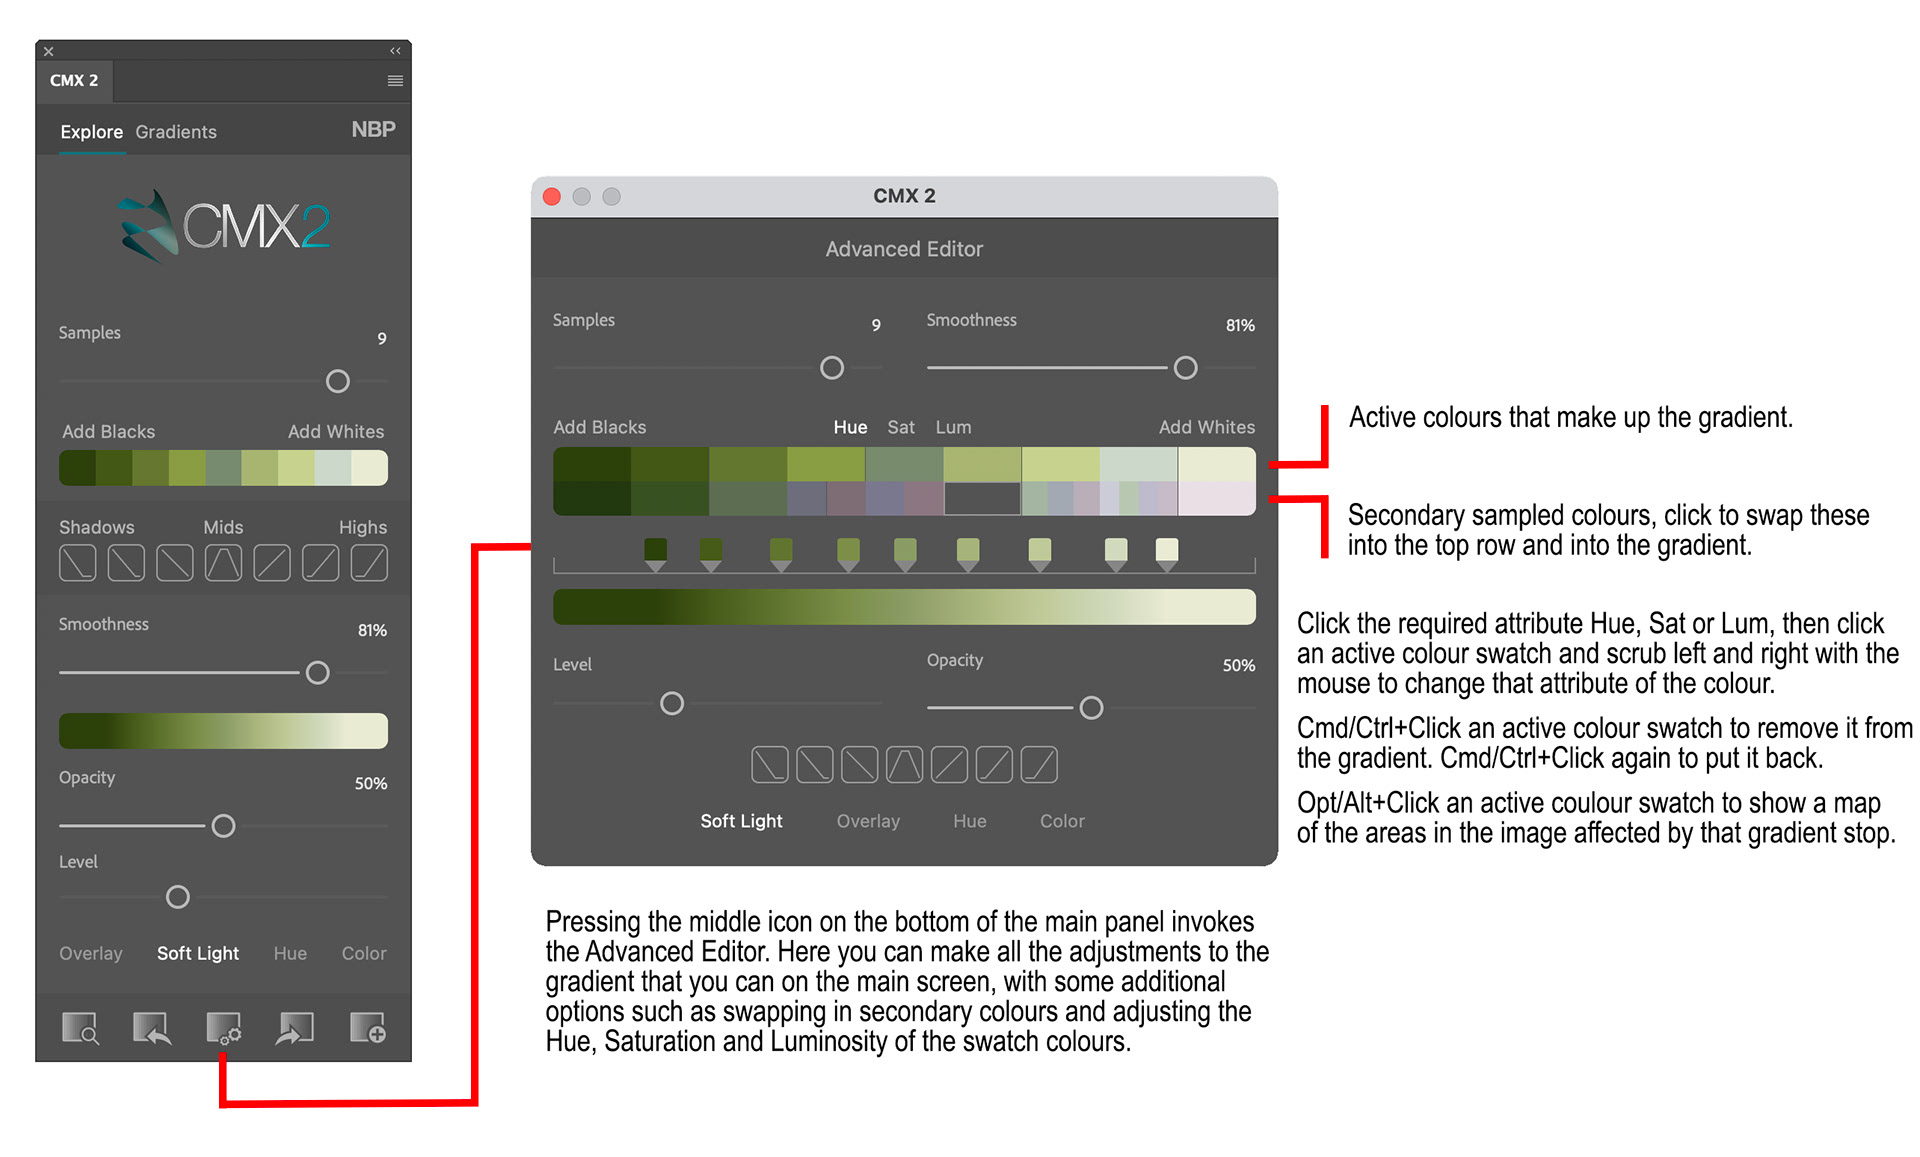
Fig 3 - Advanced Editor
The Advanced Editor panel repeats all the functionality of the main panel and adds some significant extra capabilities.
Underneath the colour swatches for the sampled colours, you will see some other secondary colours. These were also sampled from the image but not chosen by the initial analyse process, you can click one of these secondary colours to swap it into the gradient map.
On this screen Cmd/Ctrl+Click one of the primary colours to include/exclude it from the gradient map.
You can also click one of the primary colour swatches and then scrub (drag) left or right with the mouse to adjust the hue, saturation or luminosity of that swatch. First click the Hue, Sat or Lum label to choose the required attribute to change, then click and scrub (left/right) the swatch to change it.
Opt/Alt+Click one of the primary colour swatches to show a map of the areas that are affected by that colour swatch in the gradient map.
CMX2 allows you to save the gradient maps you create as presets for use to colour grade any of your images. These are found in the Gradients tab of the panel (see Figure 4).
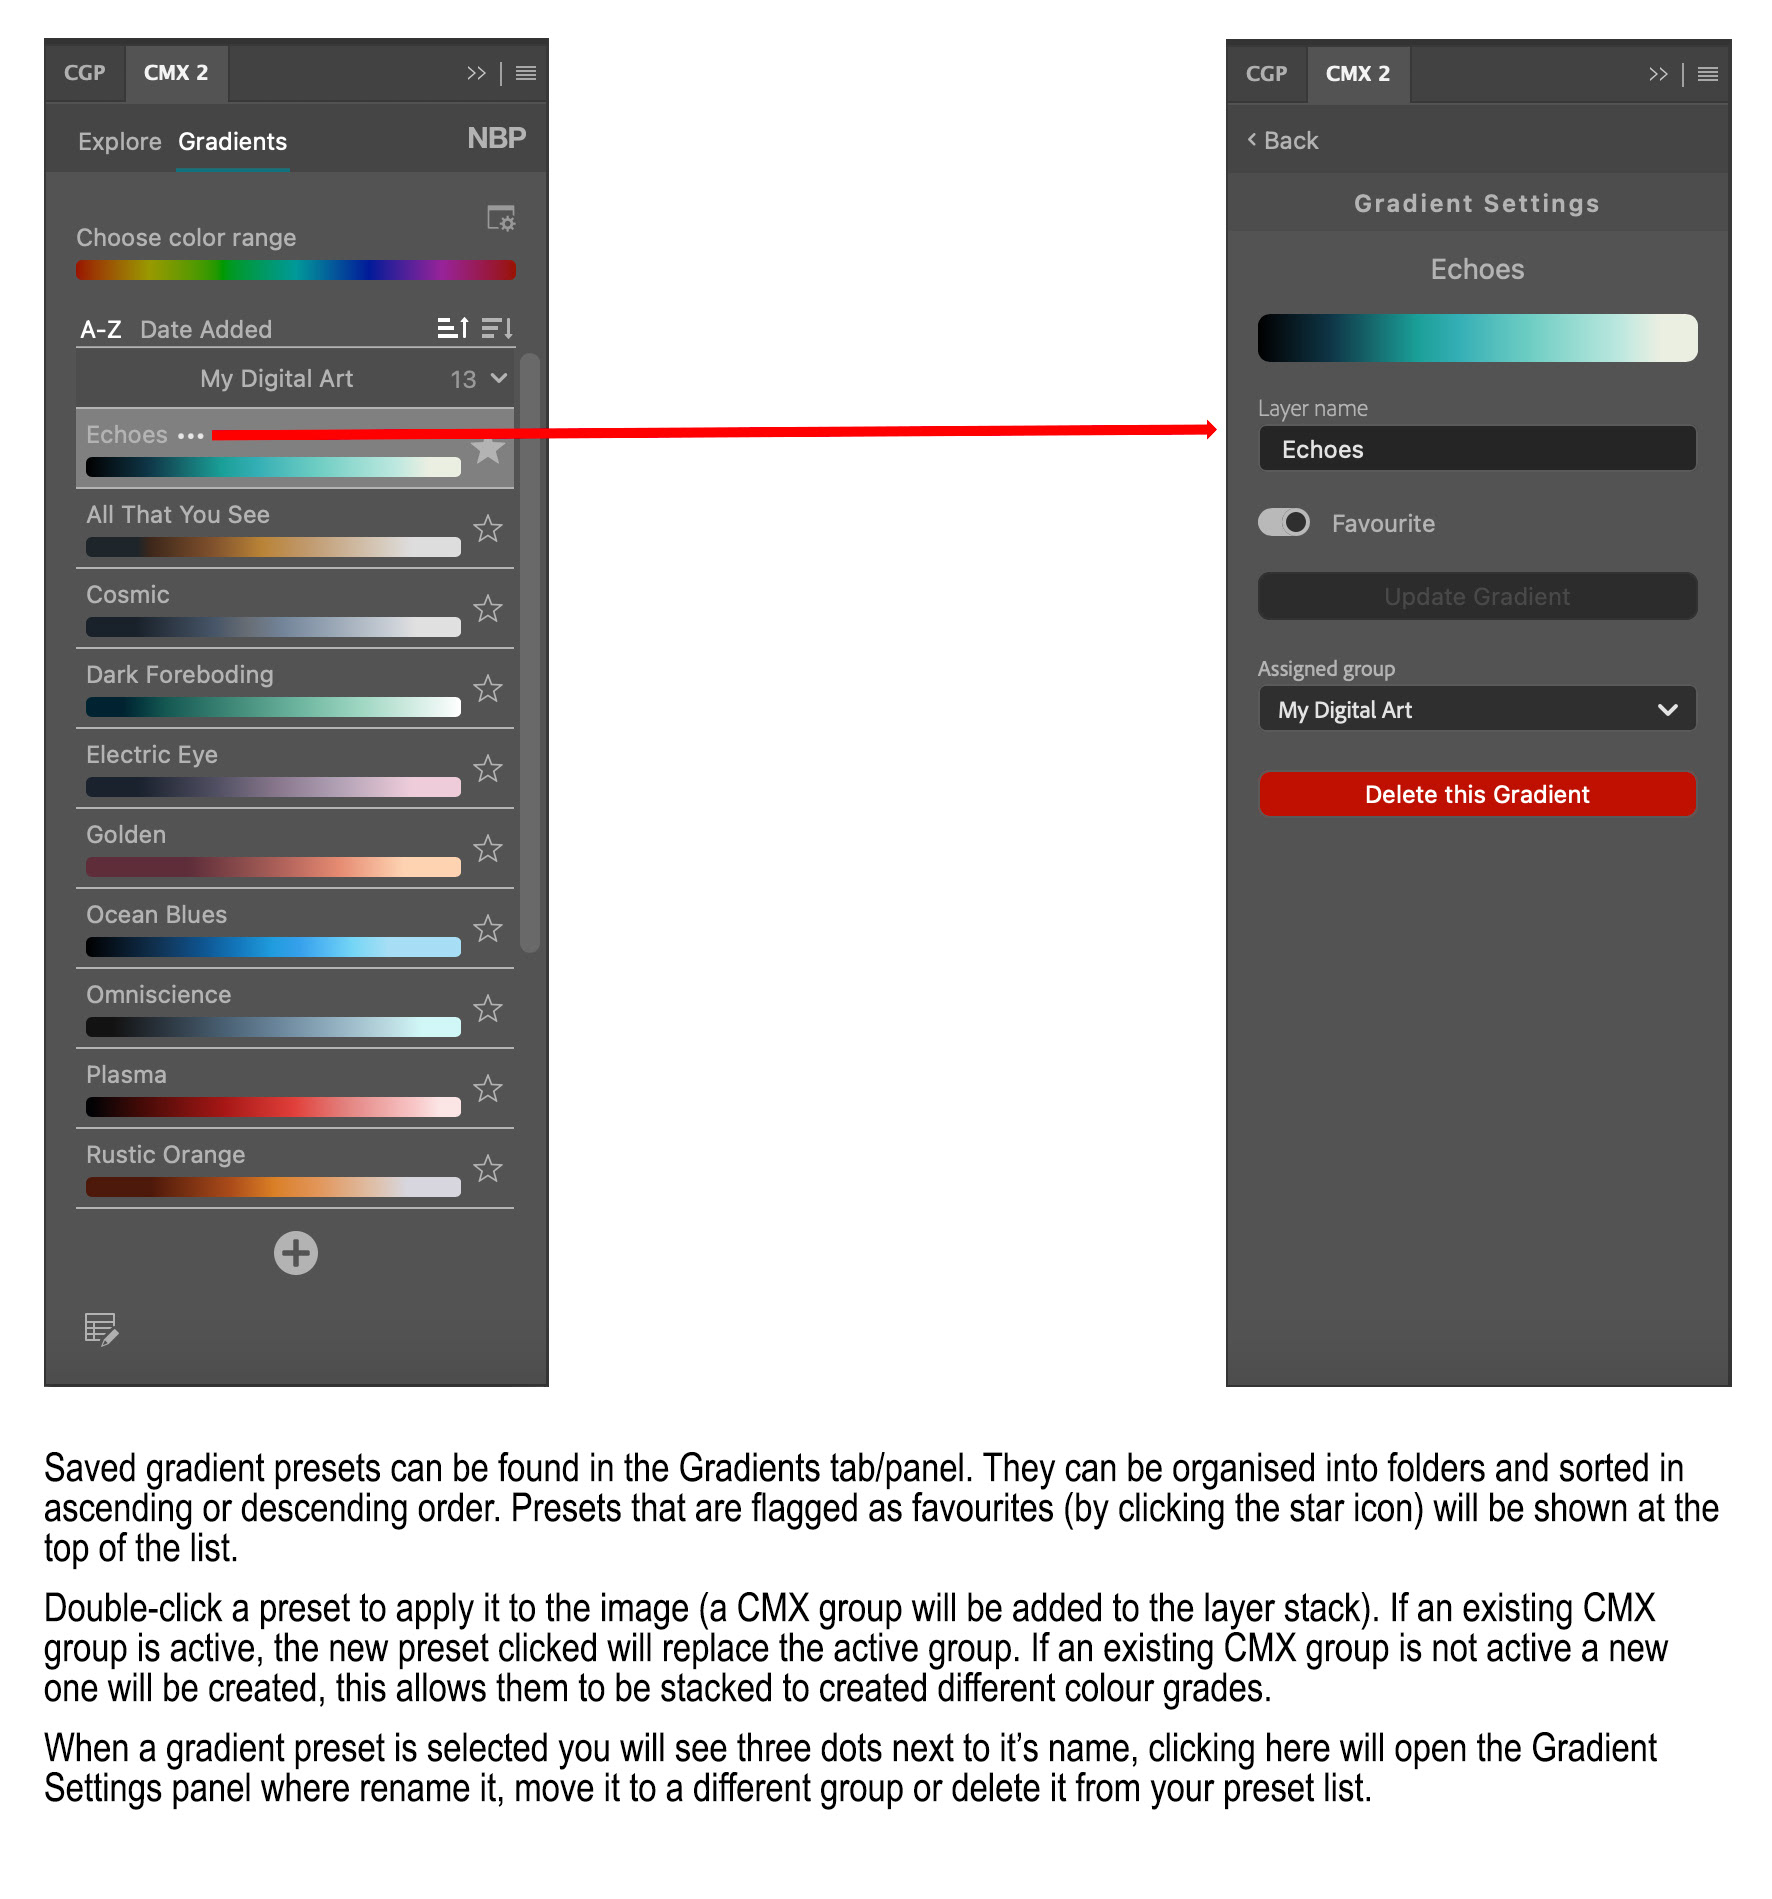
Fig 4 - The CMX2 Gradients panel
Saved gradient presets can be organised into folders and sorted in ascending or descending order. Presets flagged as favourites (by clicking the star icon) will be shown at the top of the list. Clicking a hue in the “Choose color range” area at the top will limit the display of gradients to those that contain that hue.
Double-click a preset to apply it to the active image (a CMX2 layer group will be added to the images layer stack). If an existing CMX2 layer group is selected the new preset will replace the selected one. If an existing CMX2 layer group is not selected a new CMX2 layer group will be added, this allows you to stack these layer groups to combine into a colour grade.
When a gradient preset is selected you will see three dots just to the right of its name, clicking here will open the Gradient Settings panel where you can rename it, move it to a different group or delete it from your preset list.
Figure 5 shows an example of an extracted gradient and a few different colour grades of another image using the gradient map.
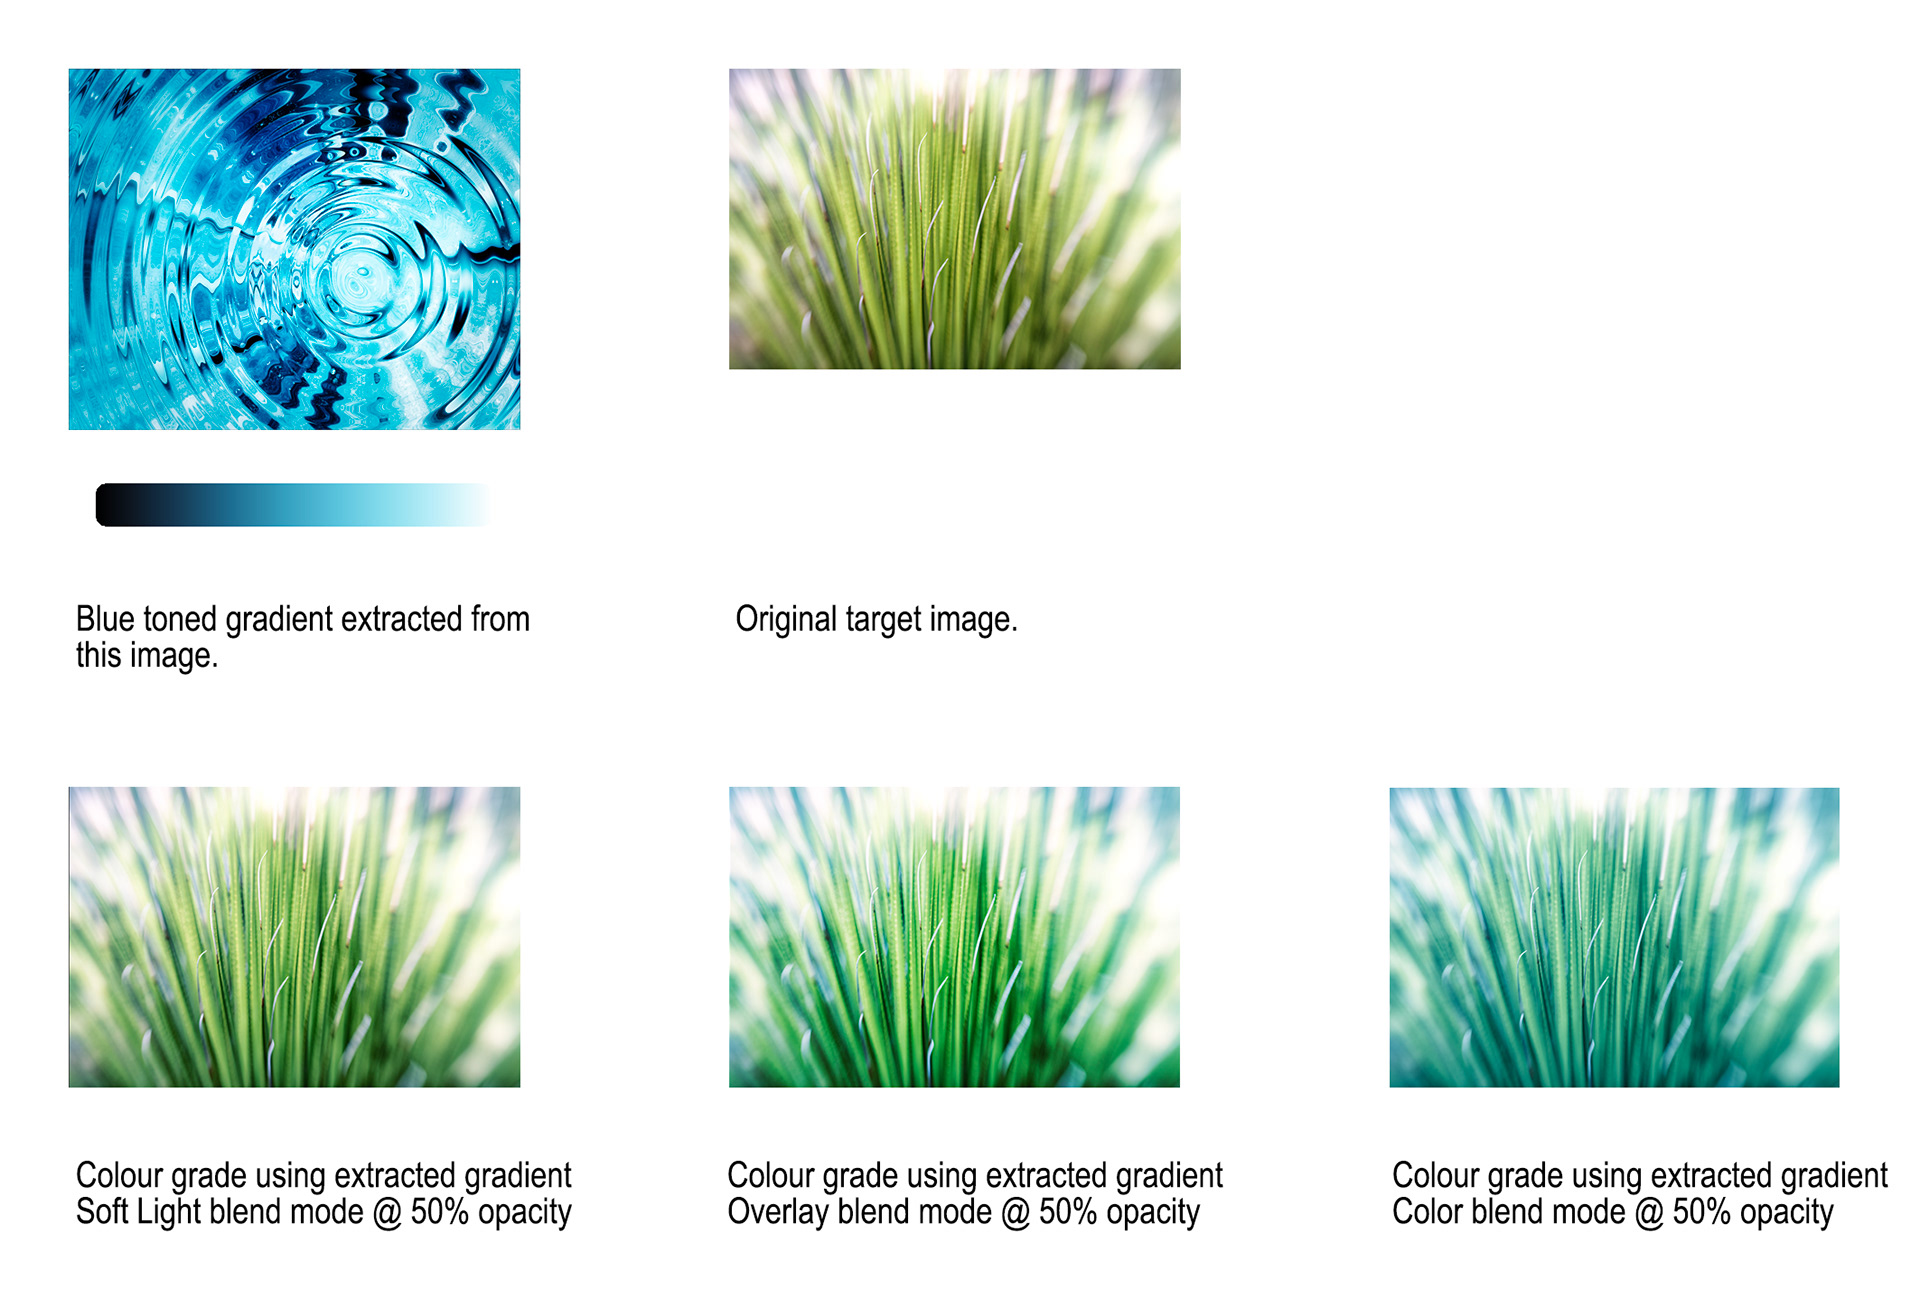
Fig 5 - Example colour grades
If you’re someone who likes to finesse the colour of your images, or you just enjoy playing with nicely engineered Photoshop panels to adjust colour then you’ll like this panel a lot, just like I do.
For more information check out this YouTube video it is a good introduction to CMX2. There are many more videos on the channel showing some of the more advanced features, and their other products.
https://www.youtube.com/watch?v=ftPchTOaO9s
I love this little plug-in, and there’s lots of very cool Photoshop content on the NBP Retouch Tools+ channel as well, check it out.
This article was first published in the April 2025 issue of Artists Down Under magazine.