If you’re like me and you often use the Pen Tool for cutting out objects or making selections then this new tool will be of interest to you.
It’s currently what Adobe calls a “Technology Preview”, that is it doesn’t appear in your toolbar by default but will appear if you turn it on in the Photoshop preferences.
To turn it on go to Photoshop / Preferences and select the Technology Previews tab. Make sure that the “Enable Content-Aware Tracing Tool” checkbox is ticked (see Figure 1). Press OK and shutdown and restart Photoshop.
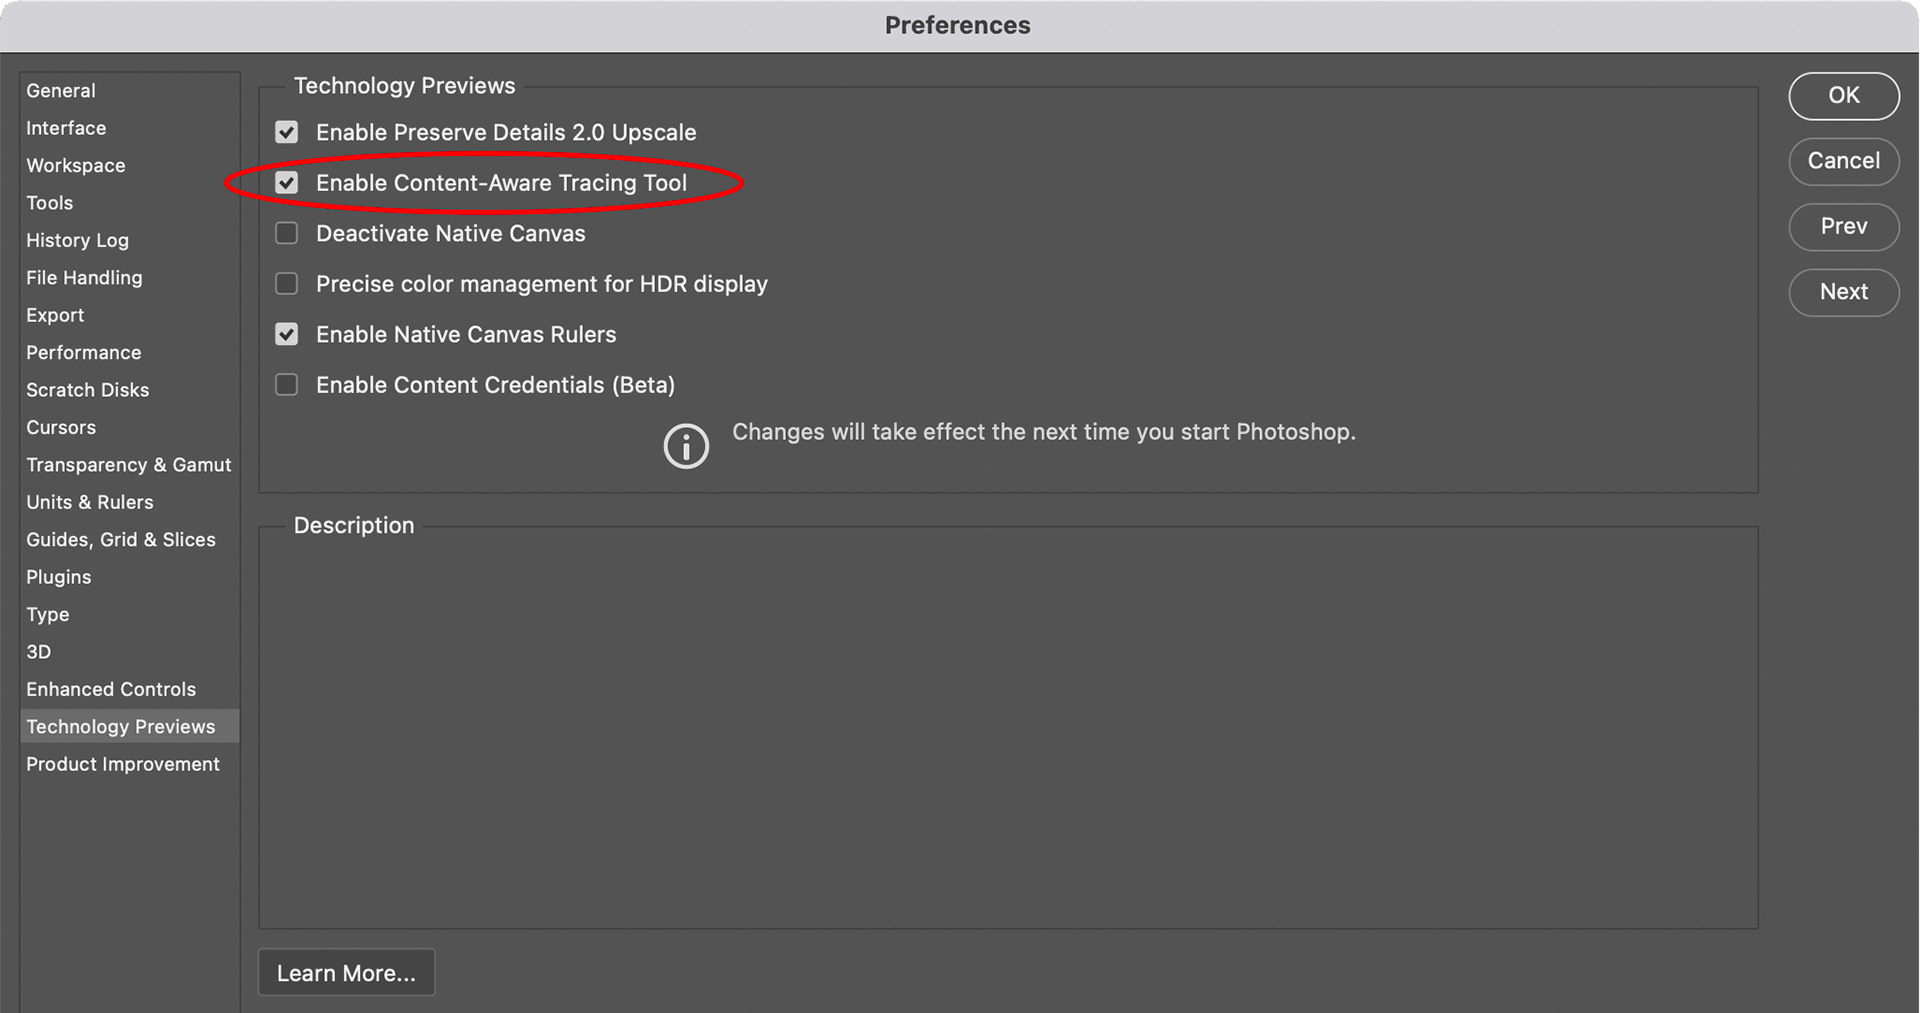
Fig 1 - Photoshop Preferences
Now, when you click your Pen Tool in the toolbar you will see that you have a new tool there, the Content-Aware Tracing Tool (see Figure 2).
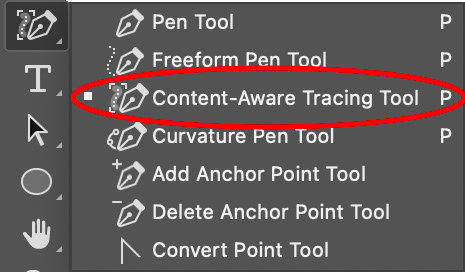
Fig 2 - Pen Tools
This tool allows you to easily create paths along detected edges (areas of tone contrast) in your image.
Like some of the selection tools the Content-Aware Tracing Tool has three options in the Options bar (see Figure 3) that allow you to create a new path, add to an existing path or delete a path segment, based on detected edges in your document.
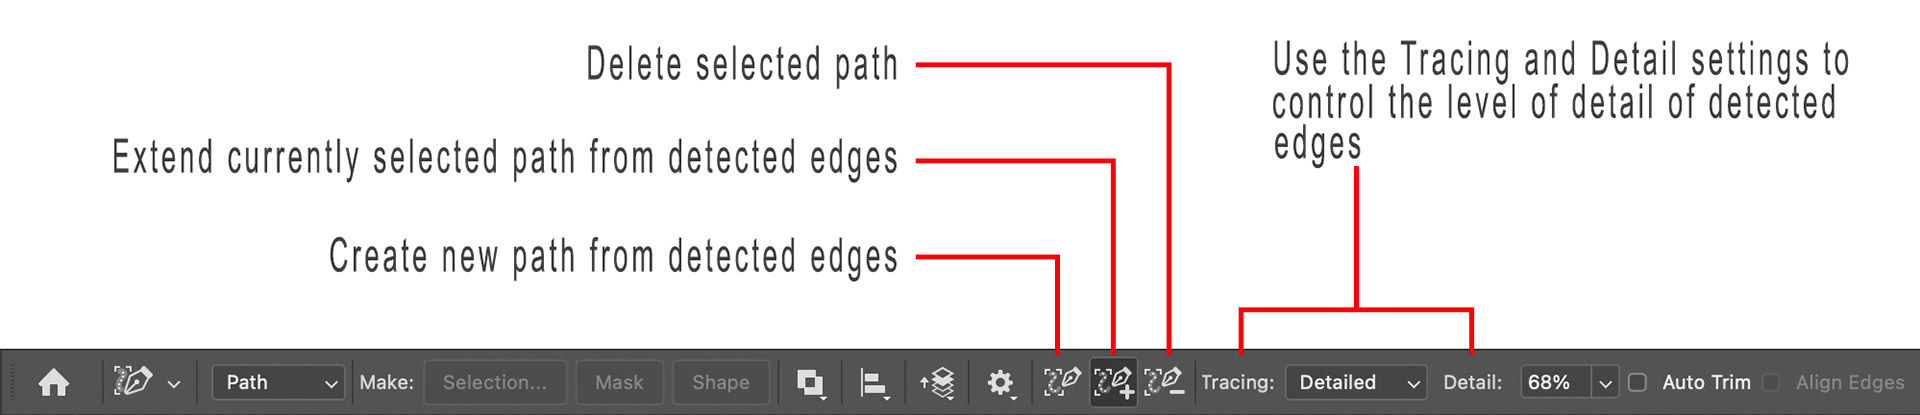
Fig 3 - Options Bar
When you hover the tool over an edge in your image a light dotted line will appear along the edge (see Figure 4a). When you then click the mouse that line will be converted into a path (see Figure 4b).

Fig 4a & 4b - Creating a new path from detected edge
If you wish to add another segment (edge) to the path you can either select the “Extend currently selected path from detected edge” icon in the Options bar (see Figure 3) or hold down the [Shift] key. In either case the tool mouse icon will change to show a plus sign and now as you hold the tool over an adjacent edge you will see the same light dotted line, but also a pink line attached to the selected path (see Figure 5a). This pink line shows you that you are adding to the selected path. Click the tool and the new detected edge segment will be added to the path.
If you wish to remove a segment from the path you can either select the “Delete selected path” icon in the Options bar (see Figure 3) or hold down the [Alt/Option] key. In either case the tool mouse icon will change to show a minus sign and now as you hold the tool over a part of the part you’ll see a small red “x” (see Figure 5b). Clicking the mouse will delete that path segment.
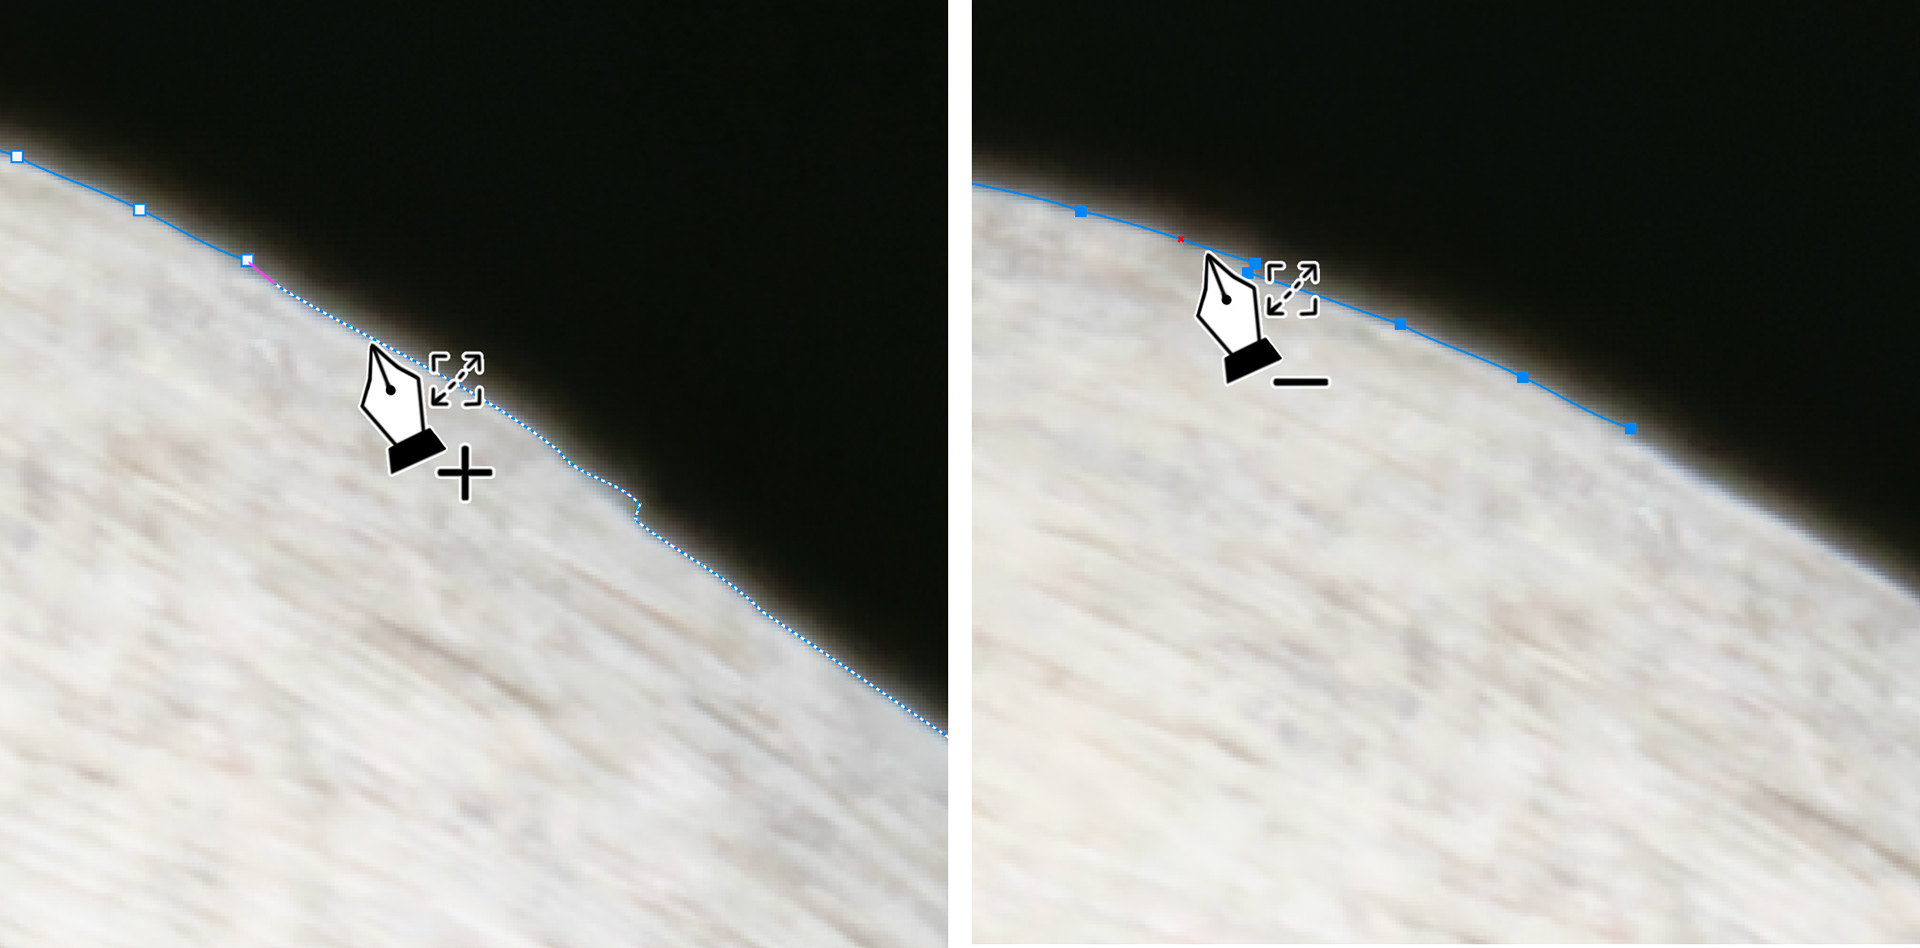
Fig 5a & 5b - Adding and deleting path segments
One thing that impacts the “quality” of the edge detection is how “zoomed in” you are on your image. The closer you are zoomed in, the better the detailed edge detection will be. Look at Figures 6a and 6b and note the different edges that have been detected, the only difference here was that the image was zoomed in a lot closer when the tool was used in Figure 6b.
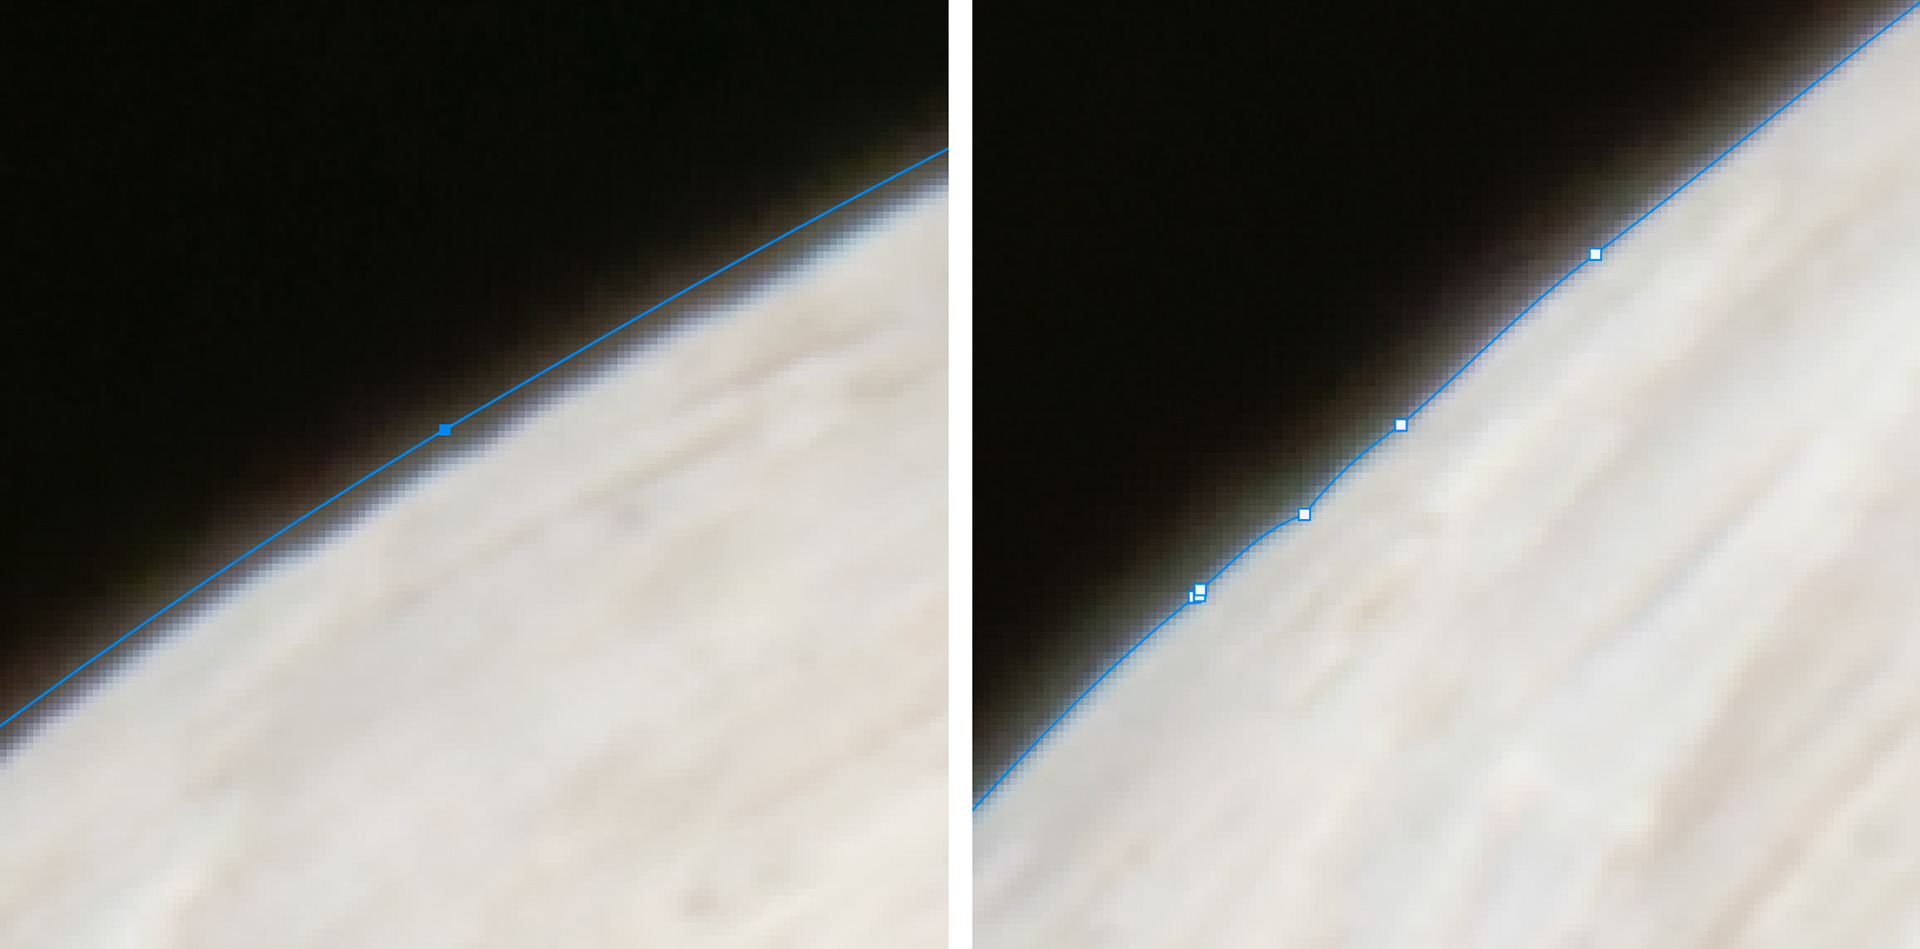
Fig 6a & 6b - Detected edges is affected by the amount of zoom
There are also two settings in the Options bar that affect the edge detection, the Tracing drop-down (which can be set to Normal, Simplified or Detailed) and the Detail slider. Changing either of this will give you a temporary display of the edges detected by Photoshop. Look at Figures 7a and 7b for examples of this temporary edge display, here the difference is the value of the Details slider (47% in Figure 7a and 100% in Figure 7b).
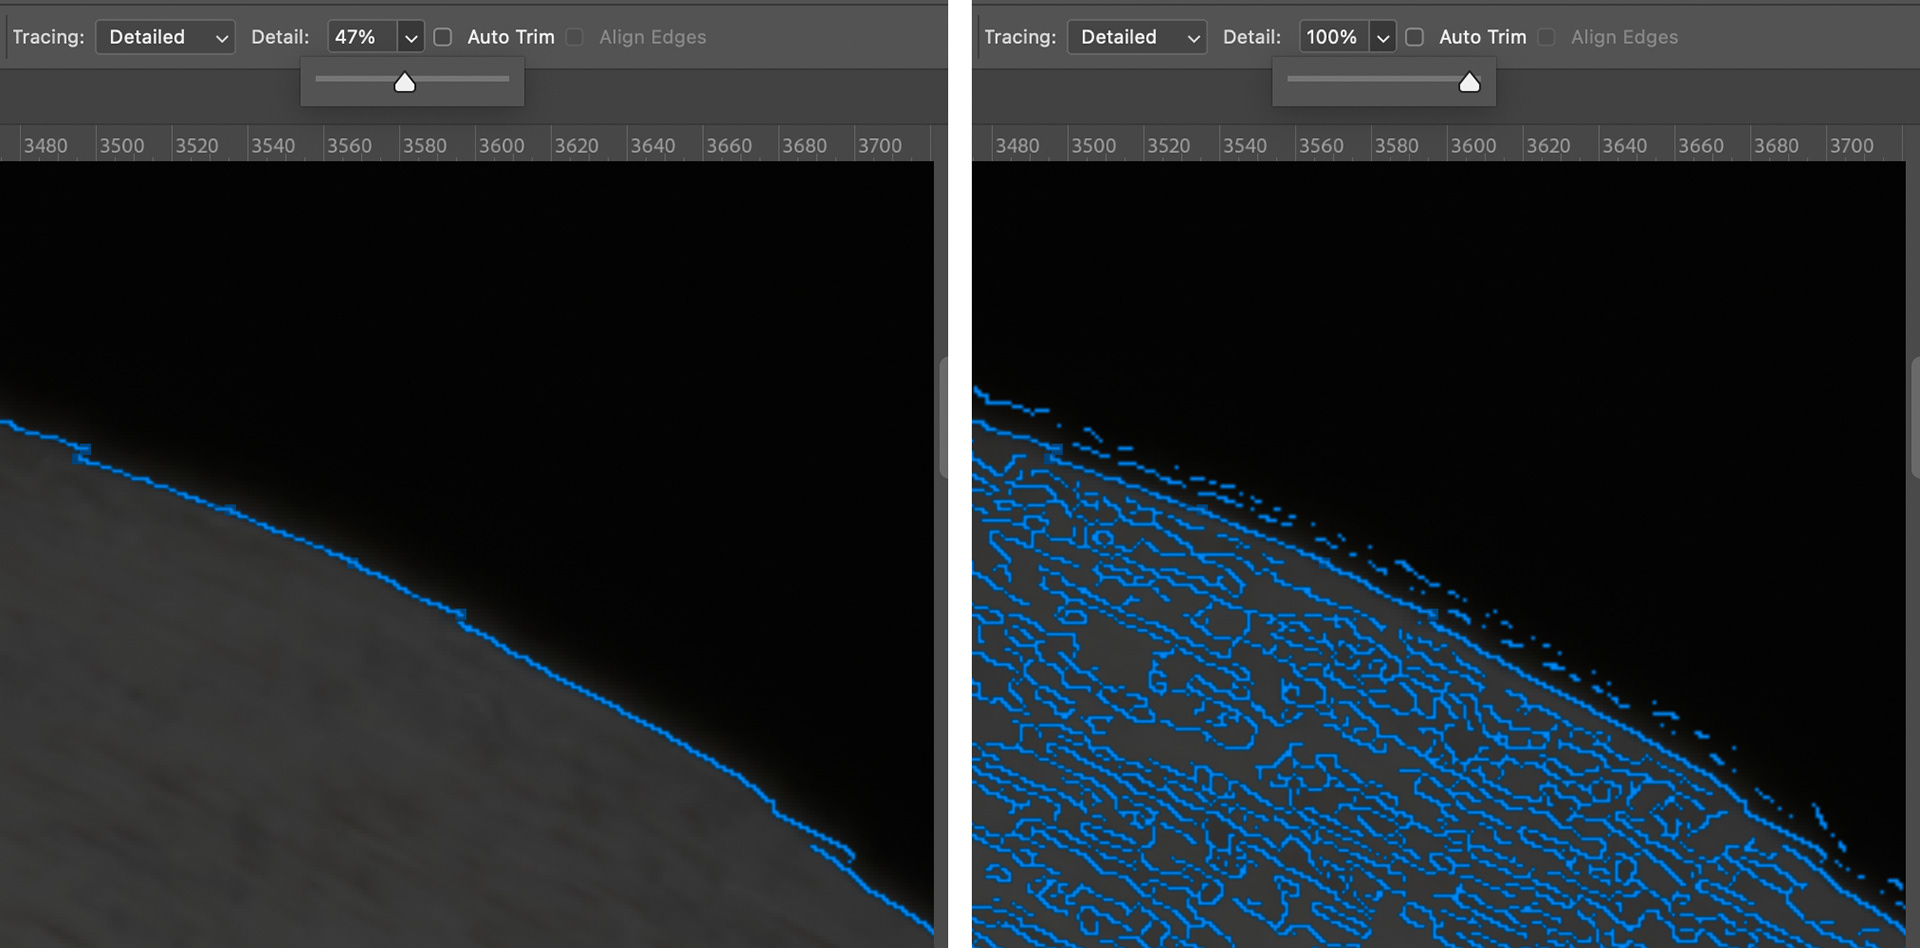
Fig 7a & 7b - Tracing and Detail settings
I would recommend playing with these controls to try and highlight the edges you wish to trace before using the tool. I have had best success by setting Tracing to Detailed and then moving the Details slider until I get as close as I can to what I want.
Of course, as with all the Pen tools you can switch to the normal Pen Tool or the Curvature Pen Tool to extend your path or use the Path Selection Tool or Direct Selection Tool to modify the path you have created, and then use the same techniques as you always have to convert the path to a selection, vector mask or shape.
I personally think this tool is a little beauty and hope you do too.
This article was first published in the May 2022 issue of Artists Down Under magazine.