Adjusting your image can often have unwanted effects. Darkening or lightening your image, or increasing or decreasing the contrast, can create unwanted changes to the colour. For example dodging and burning can create unwanted changes to your colours if not approached carefully.
Similarly, making changes to the colour in your image can have unwanted effects on the luminosity.
The usual way to control this is with blend modes.
Use Luminosity blend mode on adjustment layers where you want to restrict the adjustment to only affect the luminosity. For example, using lightening or darkening Curves layers set to Luminosity blend mode and a low-flow brush on a black layer mask, is a good way to conduct your dodging and burning.
Use Color blend mode on adjustment layers where you want to restrict the adjustment to only affect the colour. For example, use Color blend mode on Hue Saturation or Selective Color adjustment layers to make colour adjustments that don’t affect the luminosity.
If you are someone who loves using Curves (or Levels) for colour and luminosity changes I strongly recommend creating two layers, one set to Luminosity blend mode and one set to Color blend mode, then use these to adjust luminosity and color separately, it gives you much more control.
The Luminosity / Colour Split
Here's another way to achieve the ultimate control that I’ve tried with some success for some of my abstract work where I want to make very careful adjustments, it involves splitting the image into two layer components, the luminosity and the colour, and then using clipped adjustment layers to target these layers individually to make your adjustments.
Here's how to do it;
• Add a Solid Color adjustment layer and set the colour to 50% grey (H = 0, S = 0, B = 50% or hex code #808080).
• Change the blend mode of this layer to Color.
• Press Cmd+Shift+Opt+E (Mac) or Ctrl+Shift+Alt+E (Windows) to create a stamp visible layer and name this layer Luminosity. This layer contains the Luminosity values for your image. Leave it at Normal blend mode.
• Make the Luminosity layer invisible by clicking the eye next to it in the layer panel.
• Change the blend mode of the 50% grey layer to Luminosity.
• Press Cmd+Shift+Opt+E (Mac) or Ctrl+Shift+Alt+E (Windows) to create a stamp visible layer and name this layer Colour. This layer contains the Color values for your image.
• Change the blend mode of this Colour layer to Color and drag it above the Luminosity layer.
• Turn on the visibility of the Luminosity layer.
• You can now discard (or make invisible) the 50% grey layer.
You’ll be left with a layer stack similar to that shown in Figure 1a, with the luminosity data on one layer and the colour data on another.
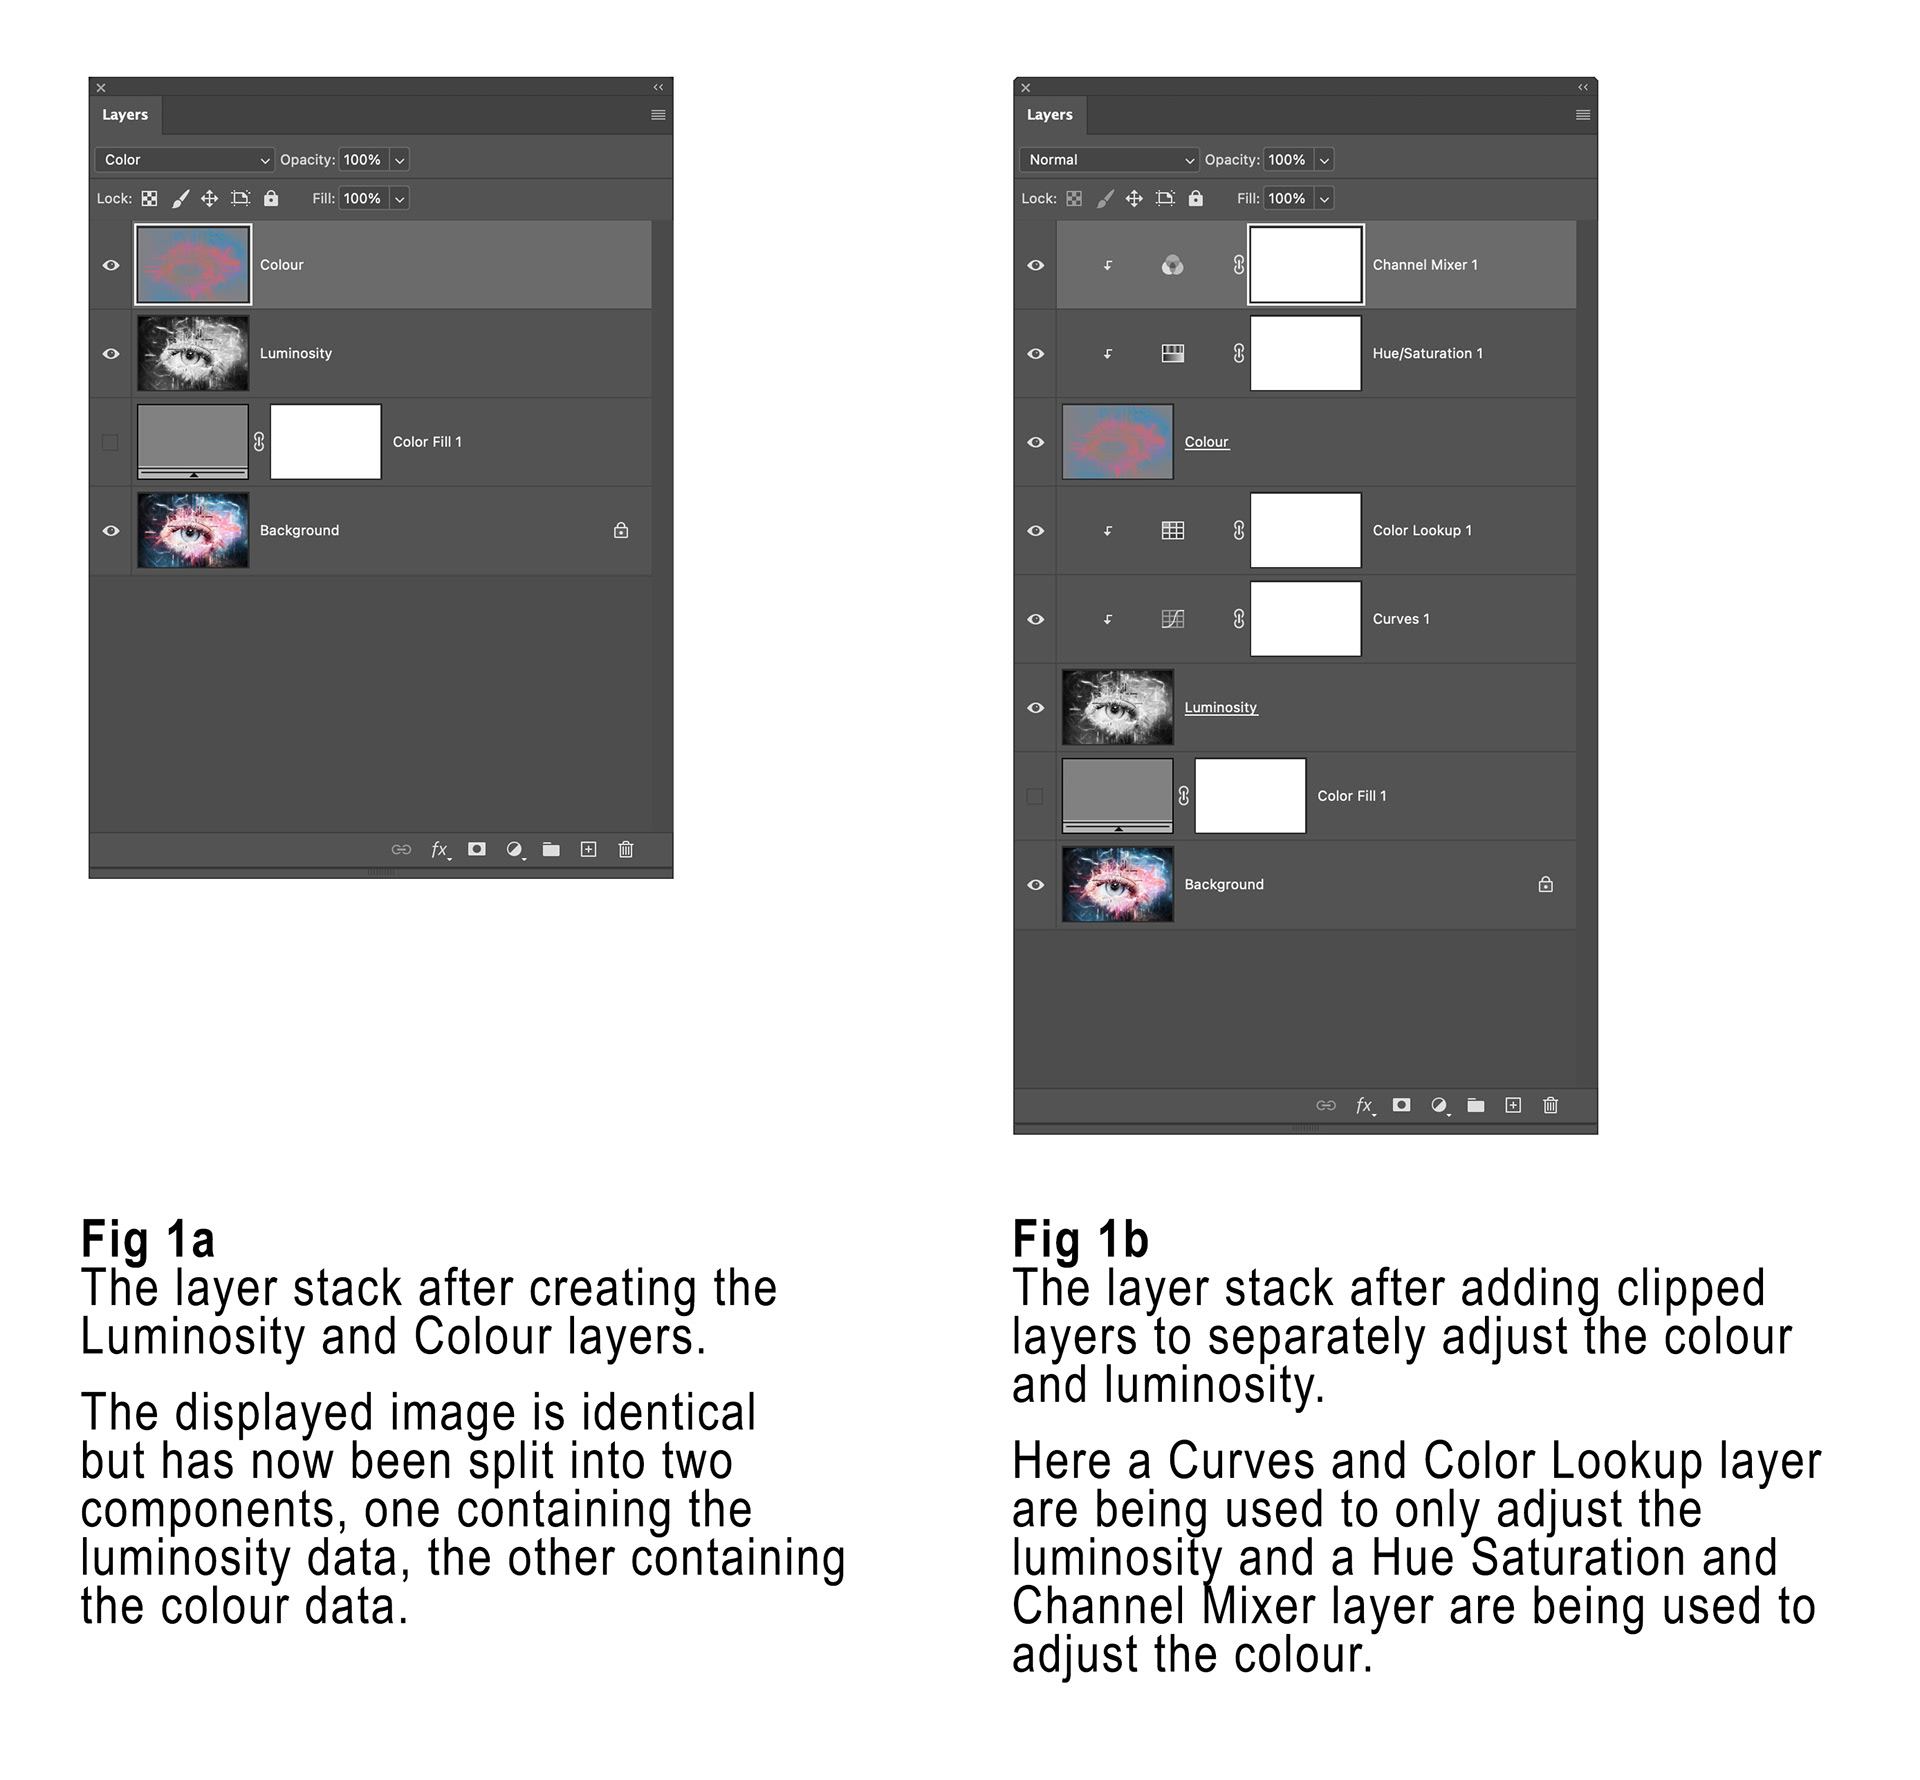
Fig 1 - The Luminosity Colour Split
Now you can “clip” adjustment layers that you only wish to affect the luminosity to the Luminosity layer, and “clip” adjustment layers that you only wish to affect the colour to the Colour layer. Figure 1b shows an example of this.
Figure 2 shows an example of what these split layers look like.
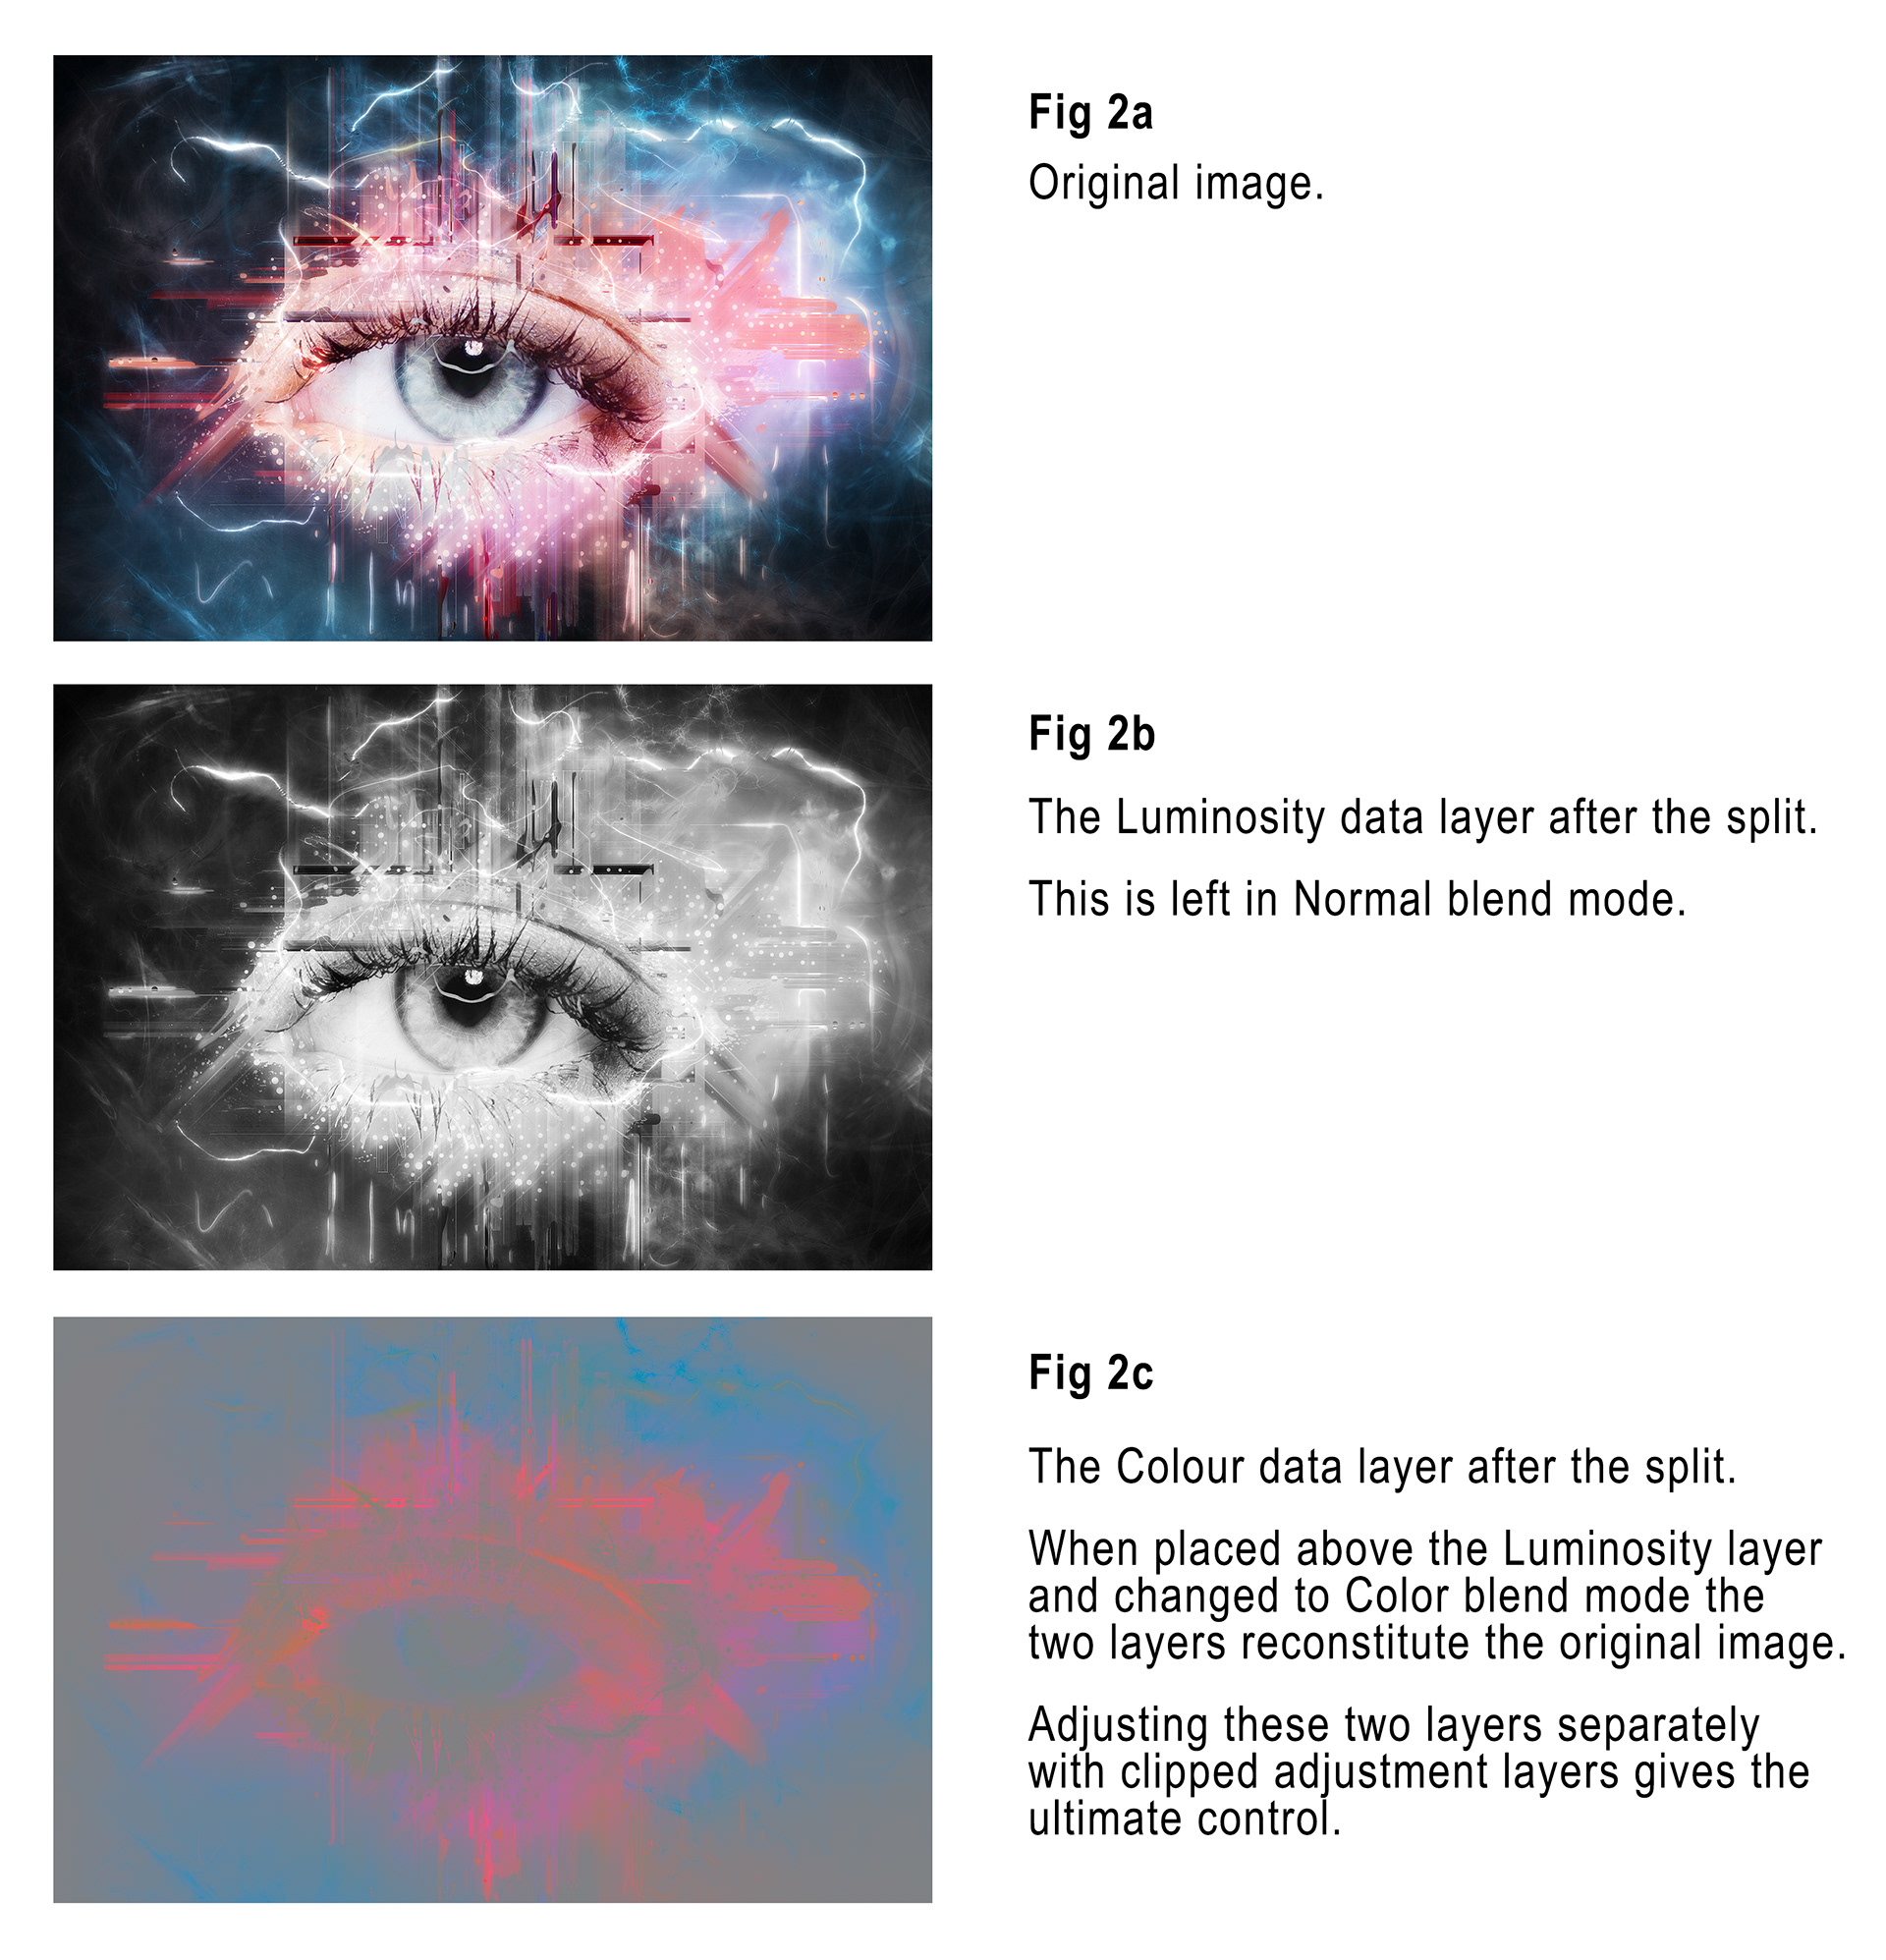
Fig 2 - Example of the split layers
As many of you know, I create many abstract digital art pieces involving gradients. Adjusting these can often cause banding and artifacts if not done carefully. Using this “split” method has worked well for extreme control over luminosity and colour.
This article was first published in the March 2025 issue of Artists Down Under magazine.