When you create a mask using a Control Point in any of the NIK Collection filters the mask is not only determined by the outer edge of the circle defined by the Control Point, but also by the colour (chrominance) and brightness (luminance) of the part of your image directly under the centre point of the Control Point circle. Essentially areas of the image inside the outer circle that are close to the colour and brightness of the area under the centre point are selected. Refer to Figure 1 for an example.
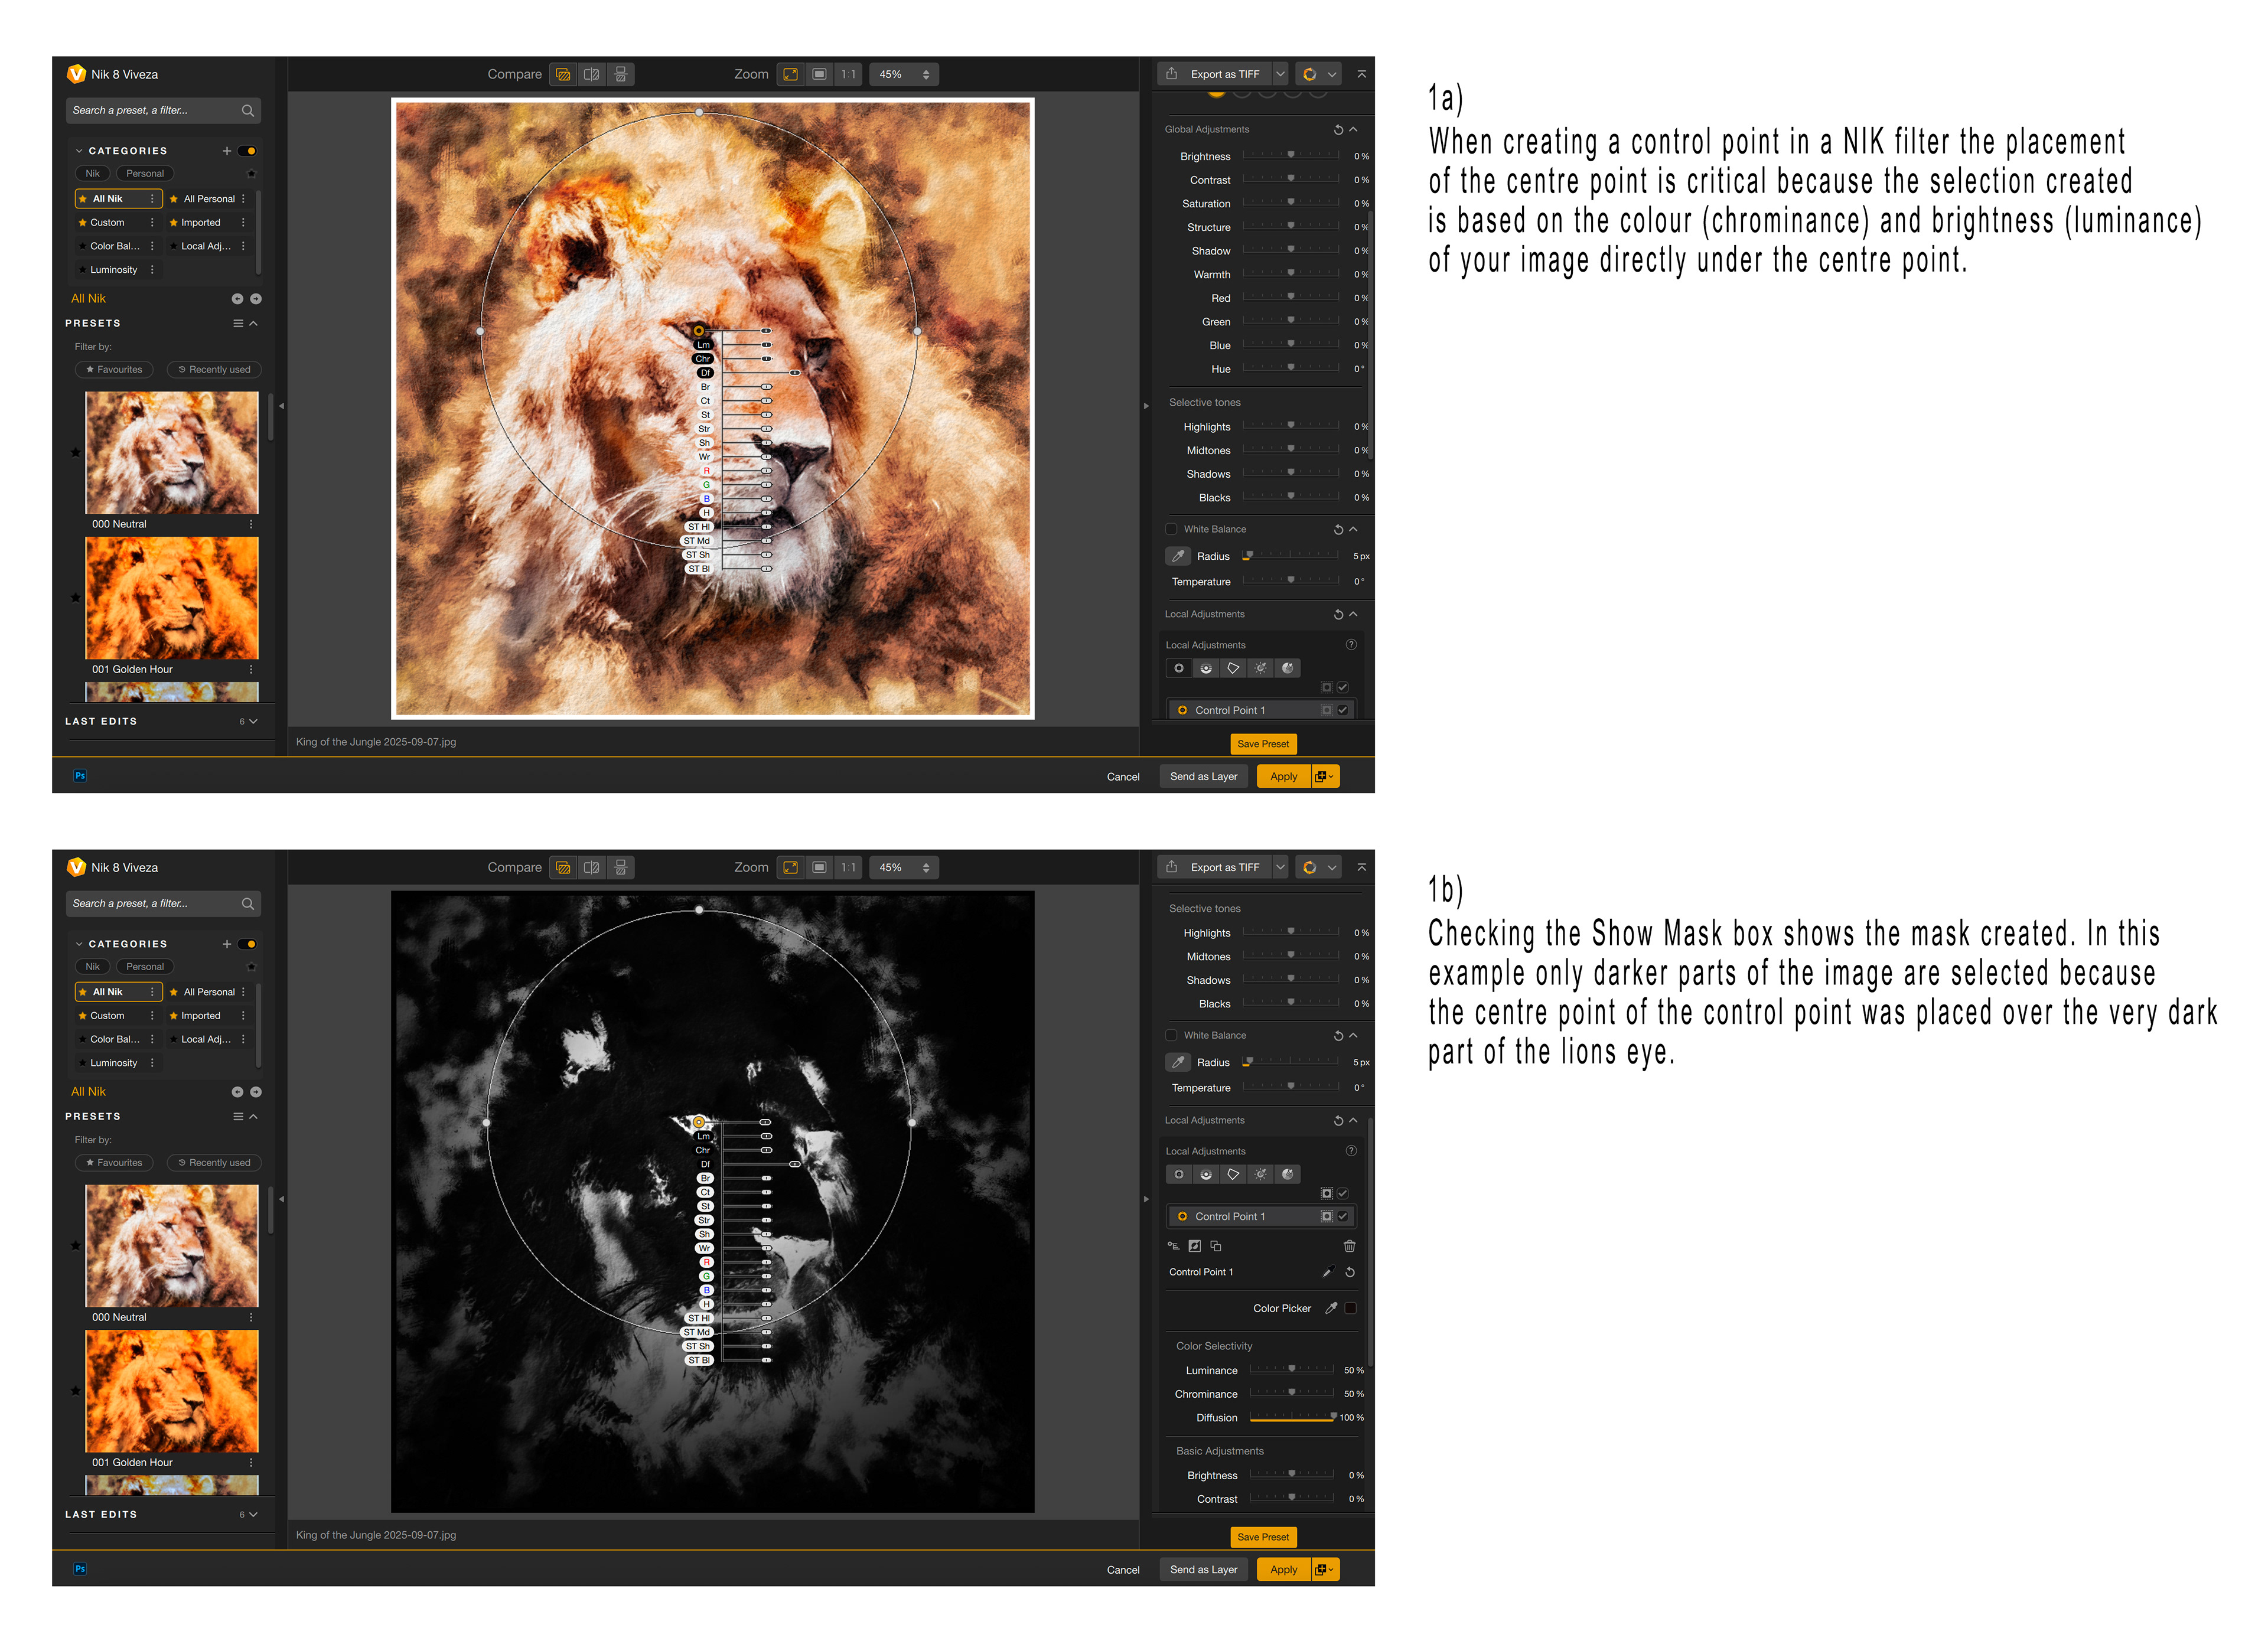
Fig 1 - NIK Control Point
What if you want just a plain old radial gradient?
This is where the Luminance and Chrominance sliders are useful. These sliders determine how sensitive to the brightness and colour under the centre point the masks are.
If you move the Luminance and Chrominance sliders all the way to the left (0%) the mask becomes a pure radial gradient (that is, the brightness and colour under the centre point are ignored). See Figure 2a for an example.
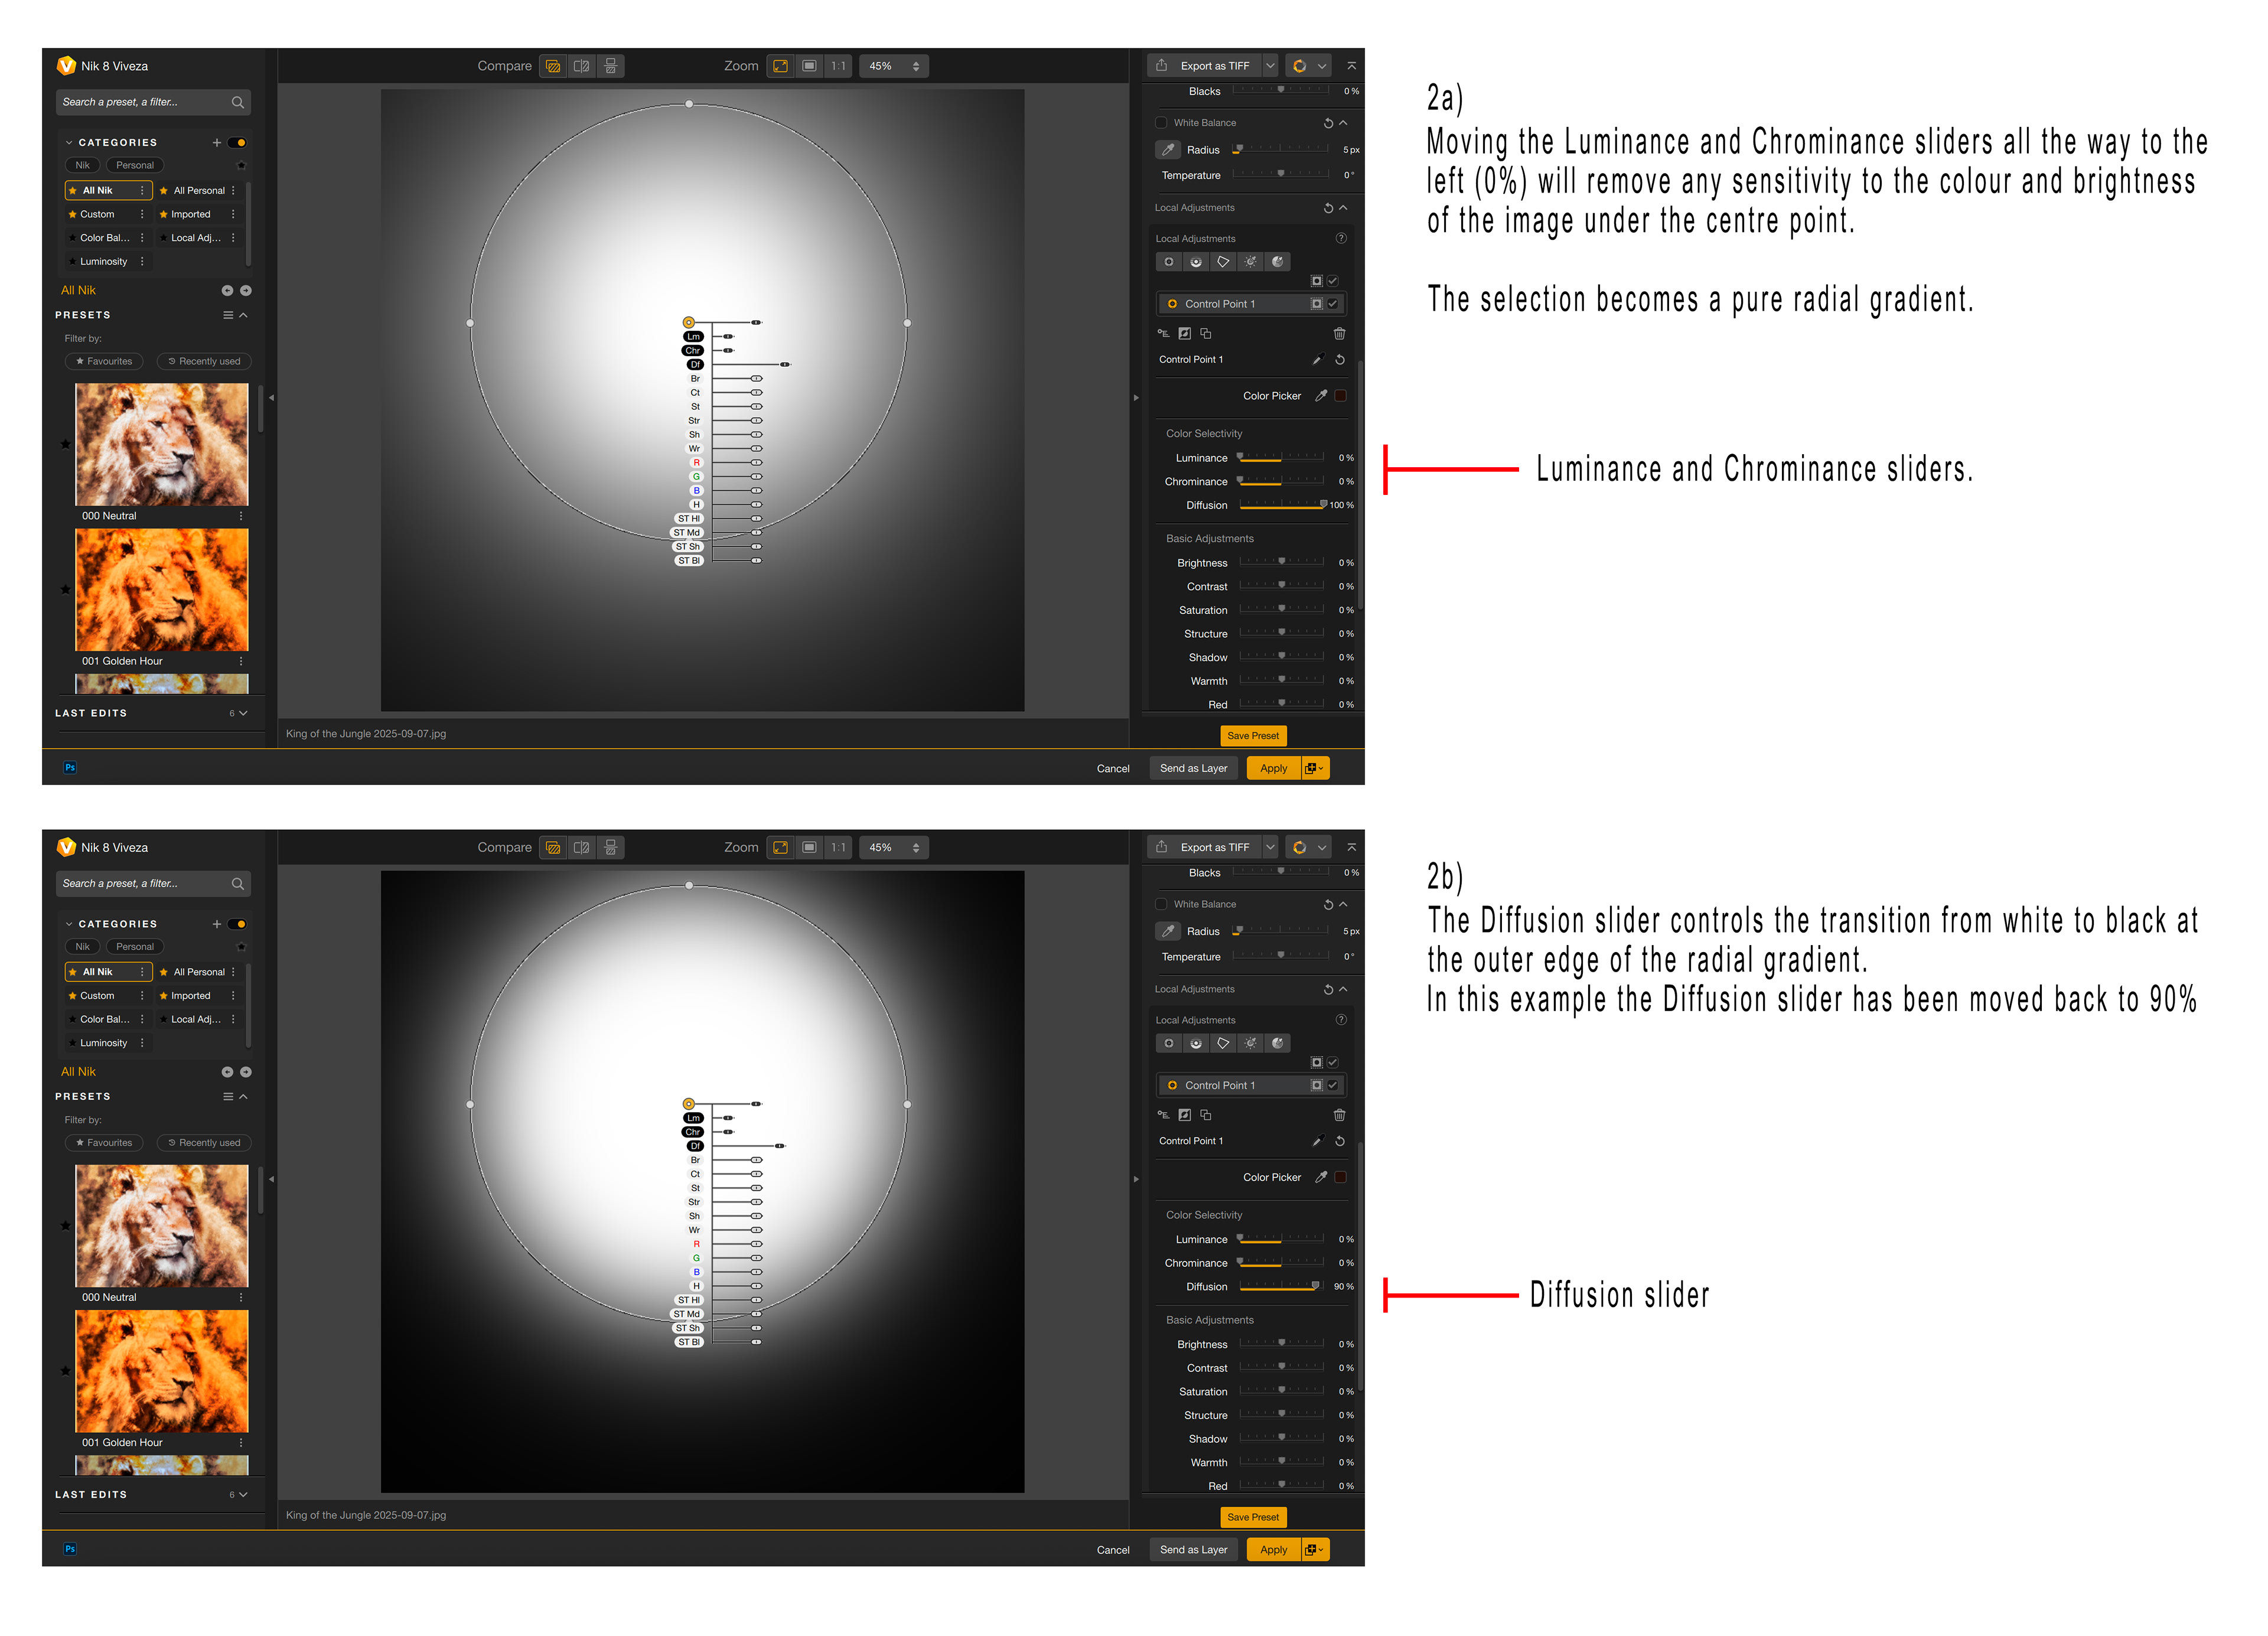
Fig 2 - Creating a Radial Gradient
Change the size of the radial gradient by dragging any of the four solid circles inwards or outwards.
You can then use the Diffusion slider to control the transition from white to black at the outer edge of the radial gradient (see Figure 2b).
You can reshape the radial gradient to an ellipse rather than a circle by dragging one of the four solid circles on the outer edge of the Control Point. You also rotate the elliptical radial gradient by positioning the mouse just outside one of the solid circles (the mouse pointer will change to a curved arrow) and dragging the mouse.
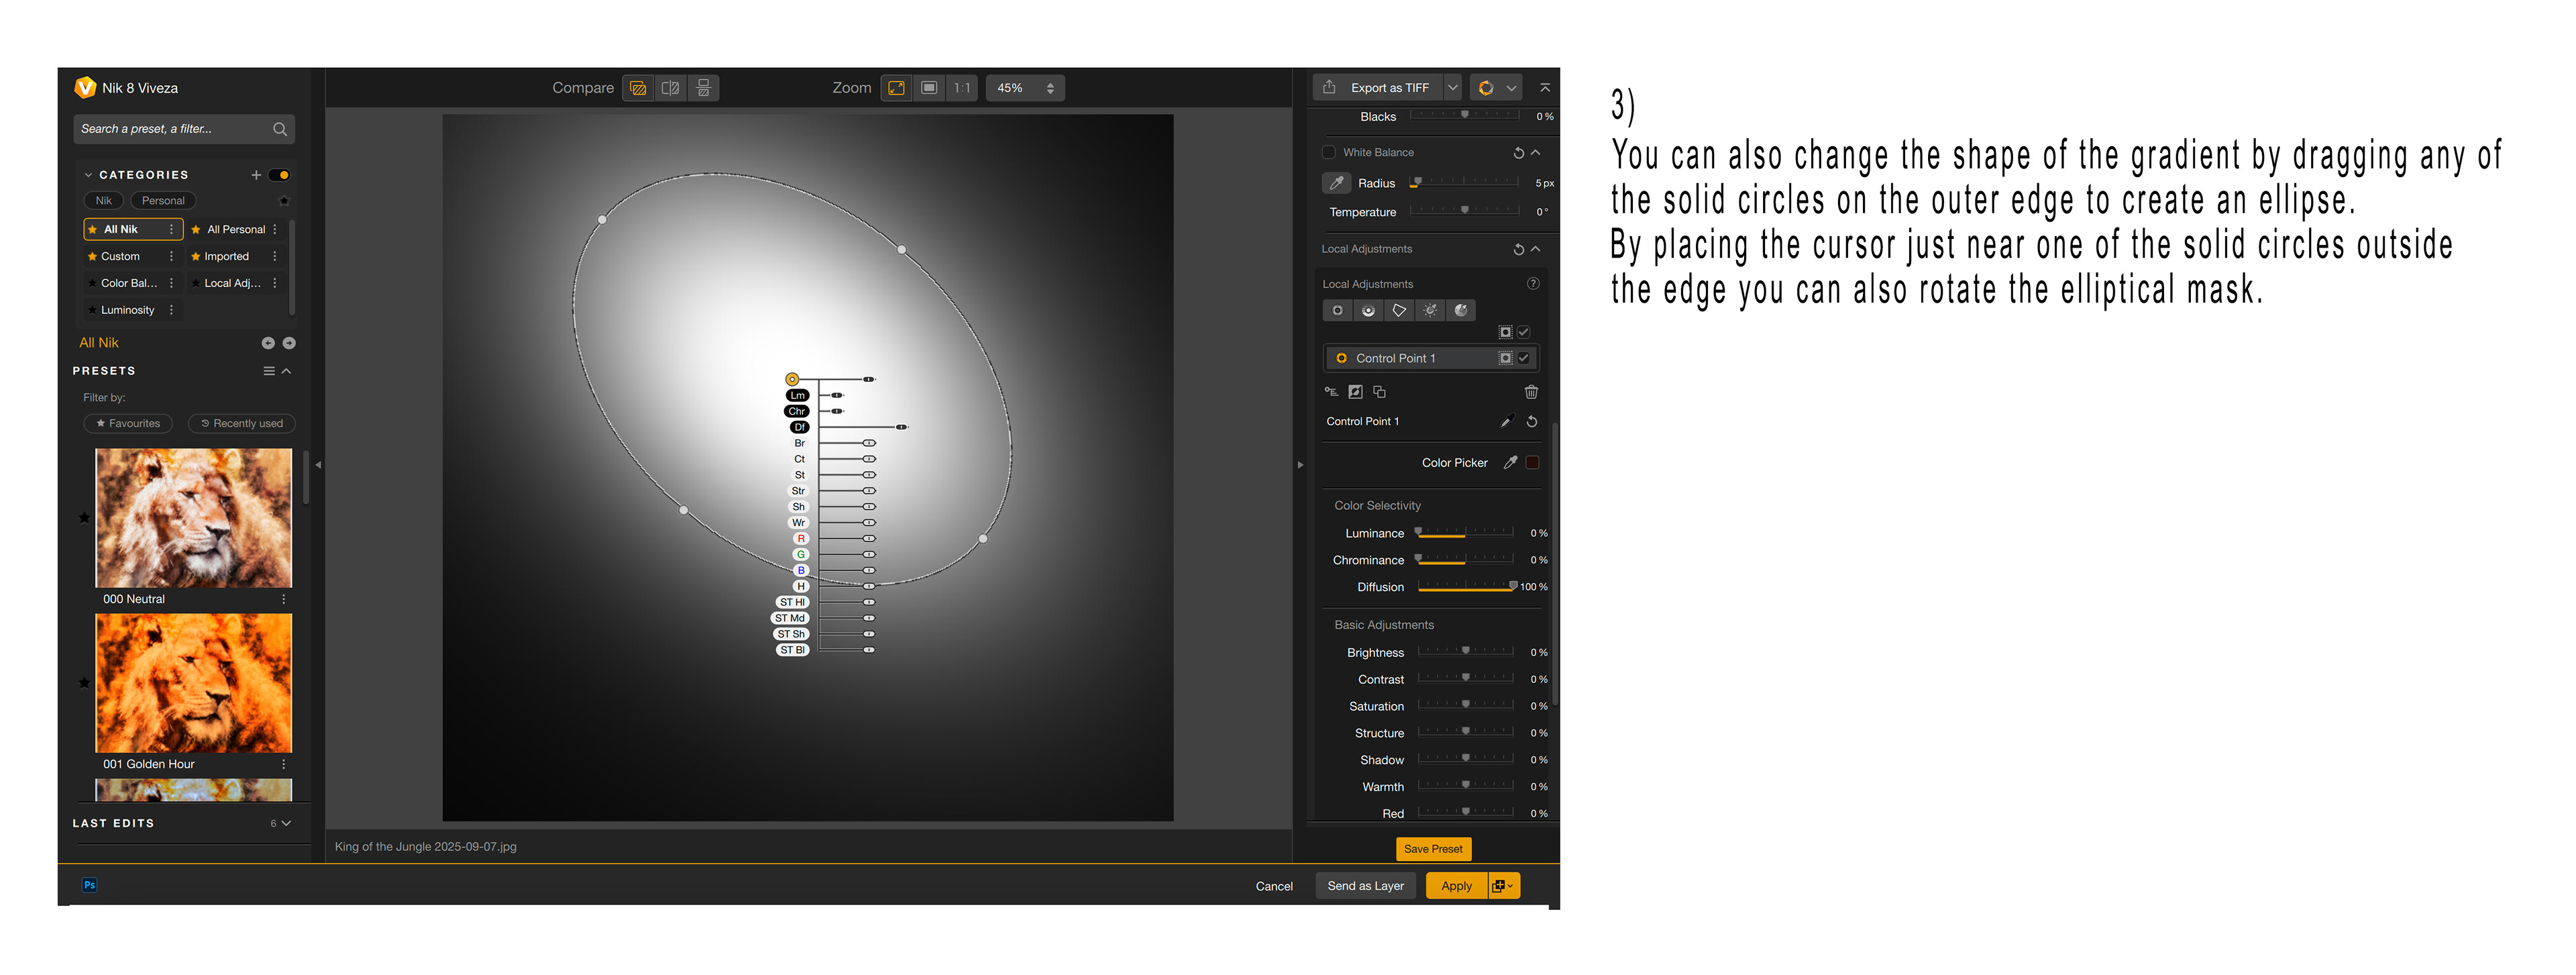
Fig 3 - Reshaping the Radial Gradient
Similarly, when creating a Control Line, the mask created is sensitive to the colour and brightness of your image under the colour picker circle. As for the radial gradient above, you can change this to a plain linear gradient by moving the Luminance and Chrominance sliders all the way to the left (0%) – see Figure 4.

Fig 4 - Creating a Linear Gradient Mask
You have another couple of ways of doing this too. The first is to make your adjustment in the NIK Collection and then apply a gradient mask to the layer after returning to Photoshop. The second is to create a gradient mask in Photoshop and then pass that mask to the NIK filter, however I think the method outlined in this article is superior because you can adjust the position and transition of the gradient whilst modifying the adjustments you’re making in the NIK filter giving you more control and flexibility.
This article was first published in the November 2025 issue of Artists Down Under magazine.