Have you ever wanted to create adjustments or run filters on your image in Photoshop that affect the background parts (or foreground parts) of your image more than the rest of the image? If so, then this article will show you how.
There is a hidden feature in Photoshop that will allow you to create a depth map that does precisely that. It is hidden away in one of the Photoshop Neural Filters.
Choose Filters / Neural Filters and then choose Depth Blur.
This filter is designed to let you blur the background (and make other adjustments) to your image.
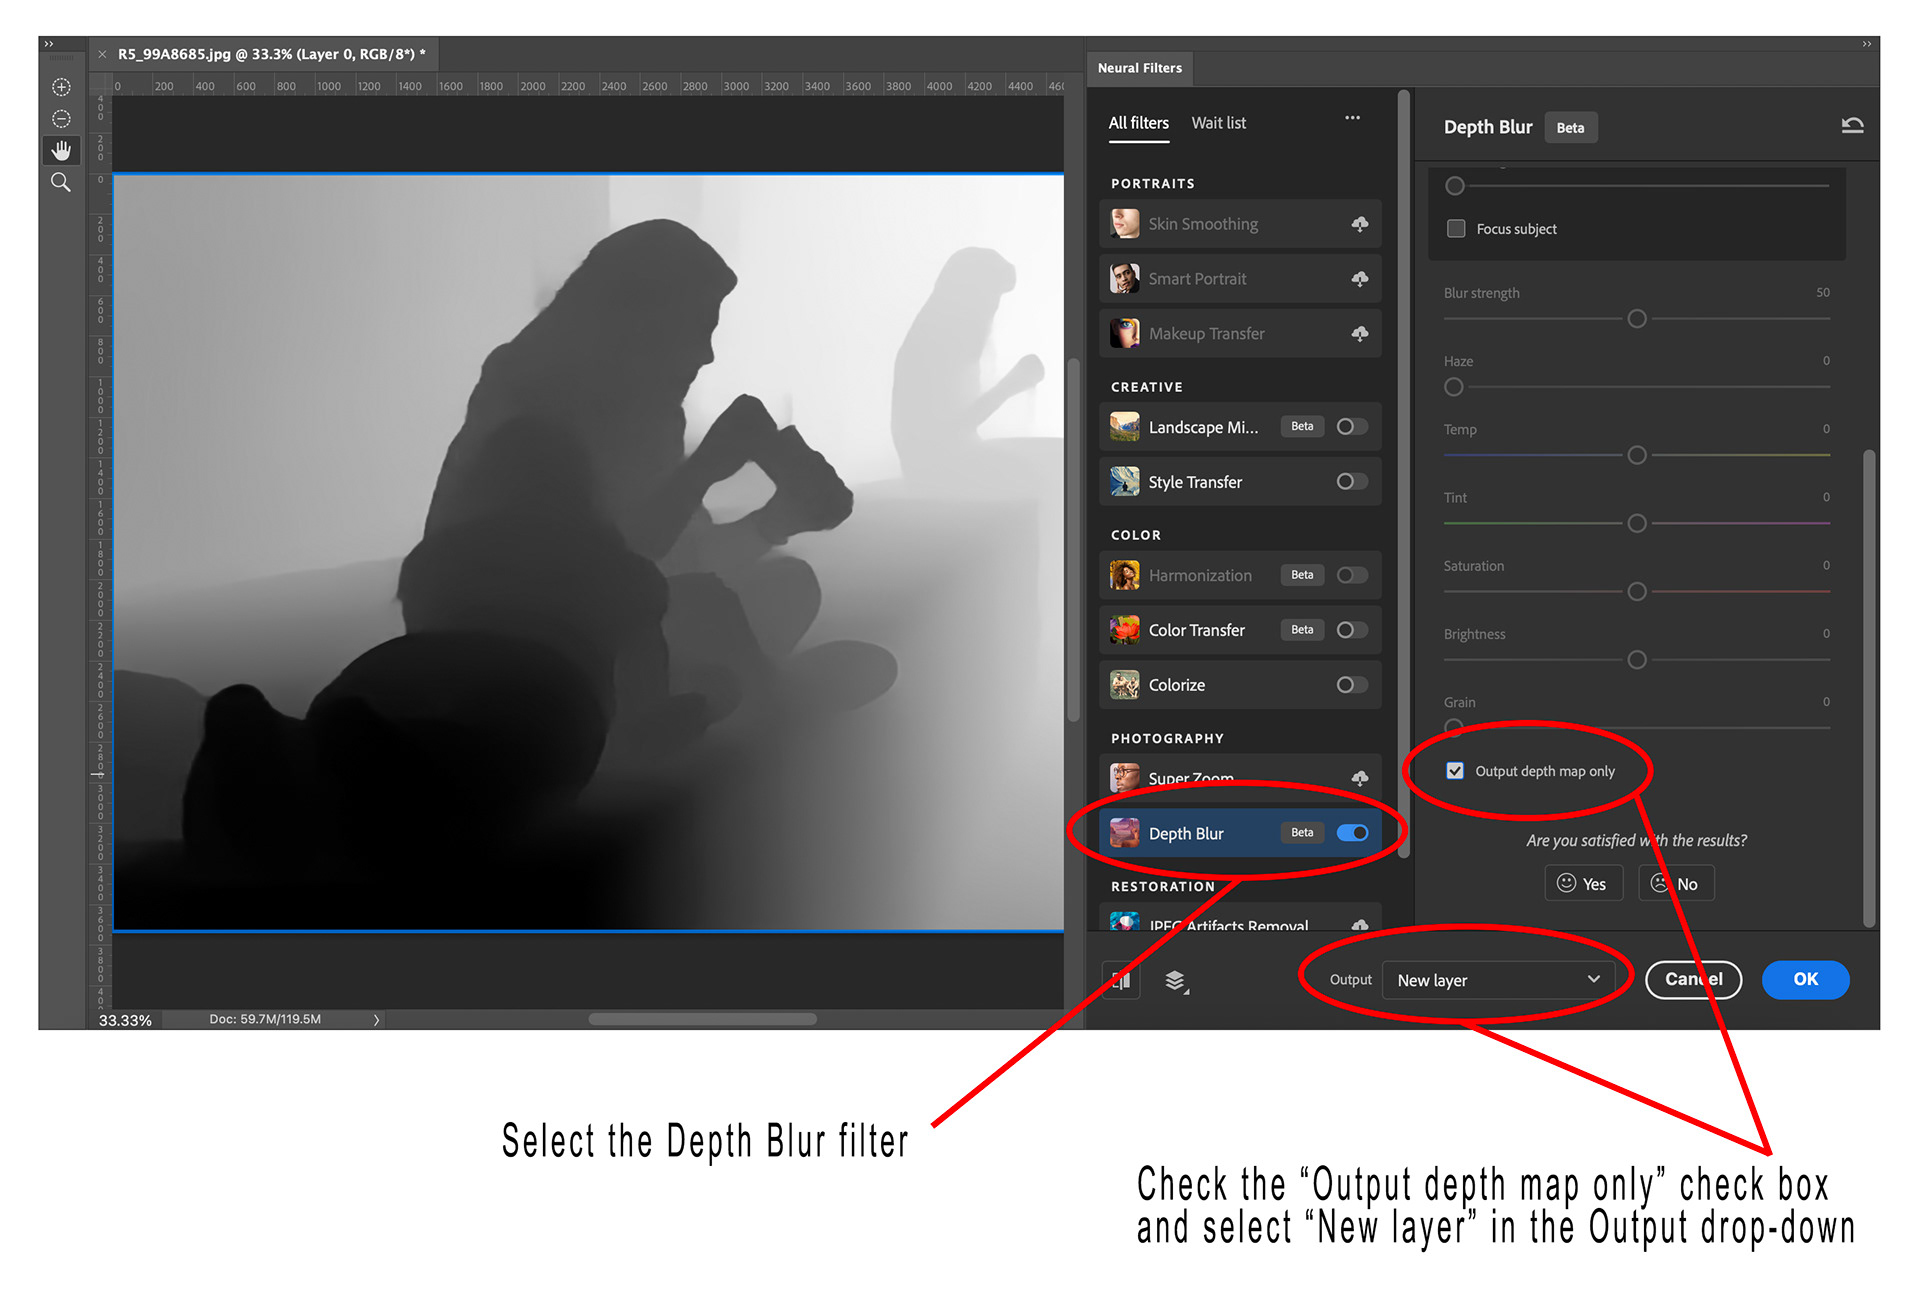
Fig 1 - Using the Depth Blur Neural Filter to Create a Depth Map
Here though we are going to scroll down to the bottom of the Depth Blur sliders and we’re going to check the “Output depth map only” check box. You’ll notice your image now changes to a greyscale image that looks like a layer mask, this is your depth map, things closer to the front of the image will be darker (black), those furthest away will be lighter (white).
Make sure the Output setting is set to “New Layer” and press OK.
You will be returned to your document and there will be a new layer present that contains the depth map.
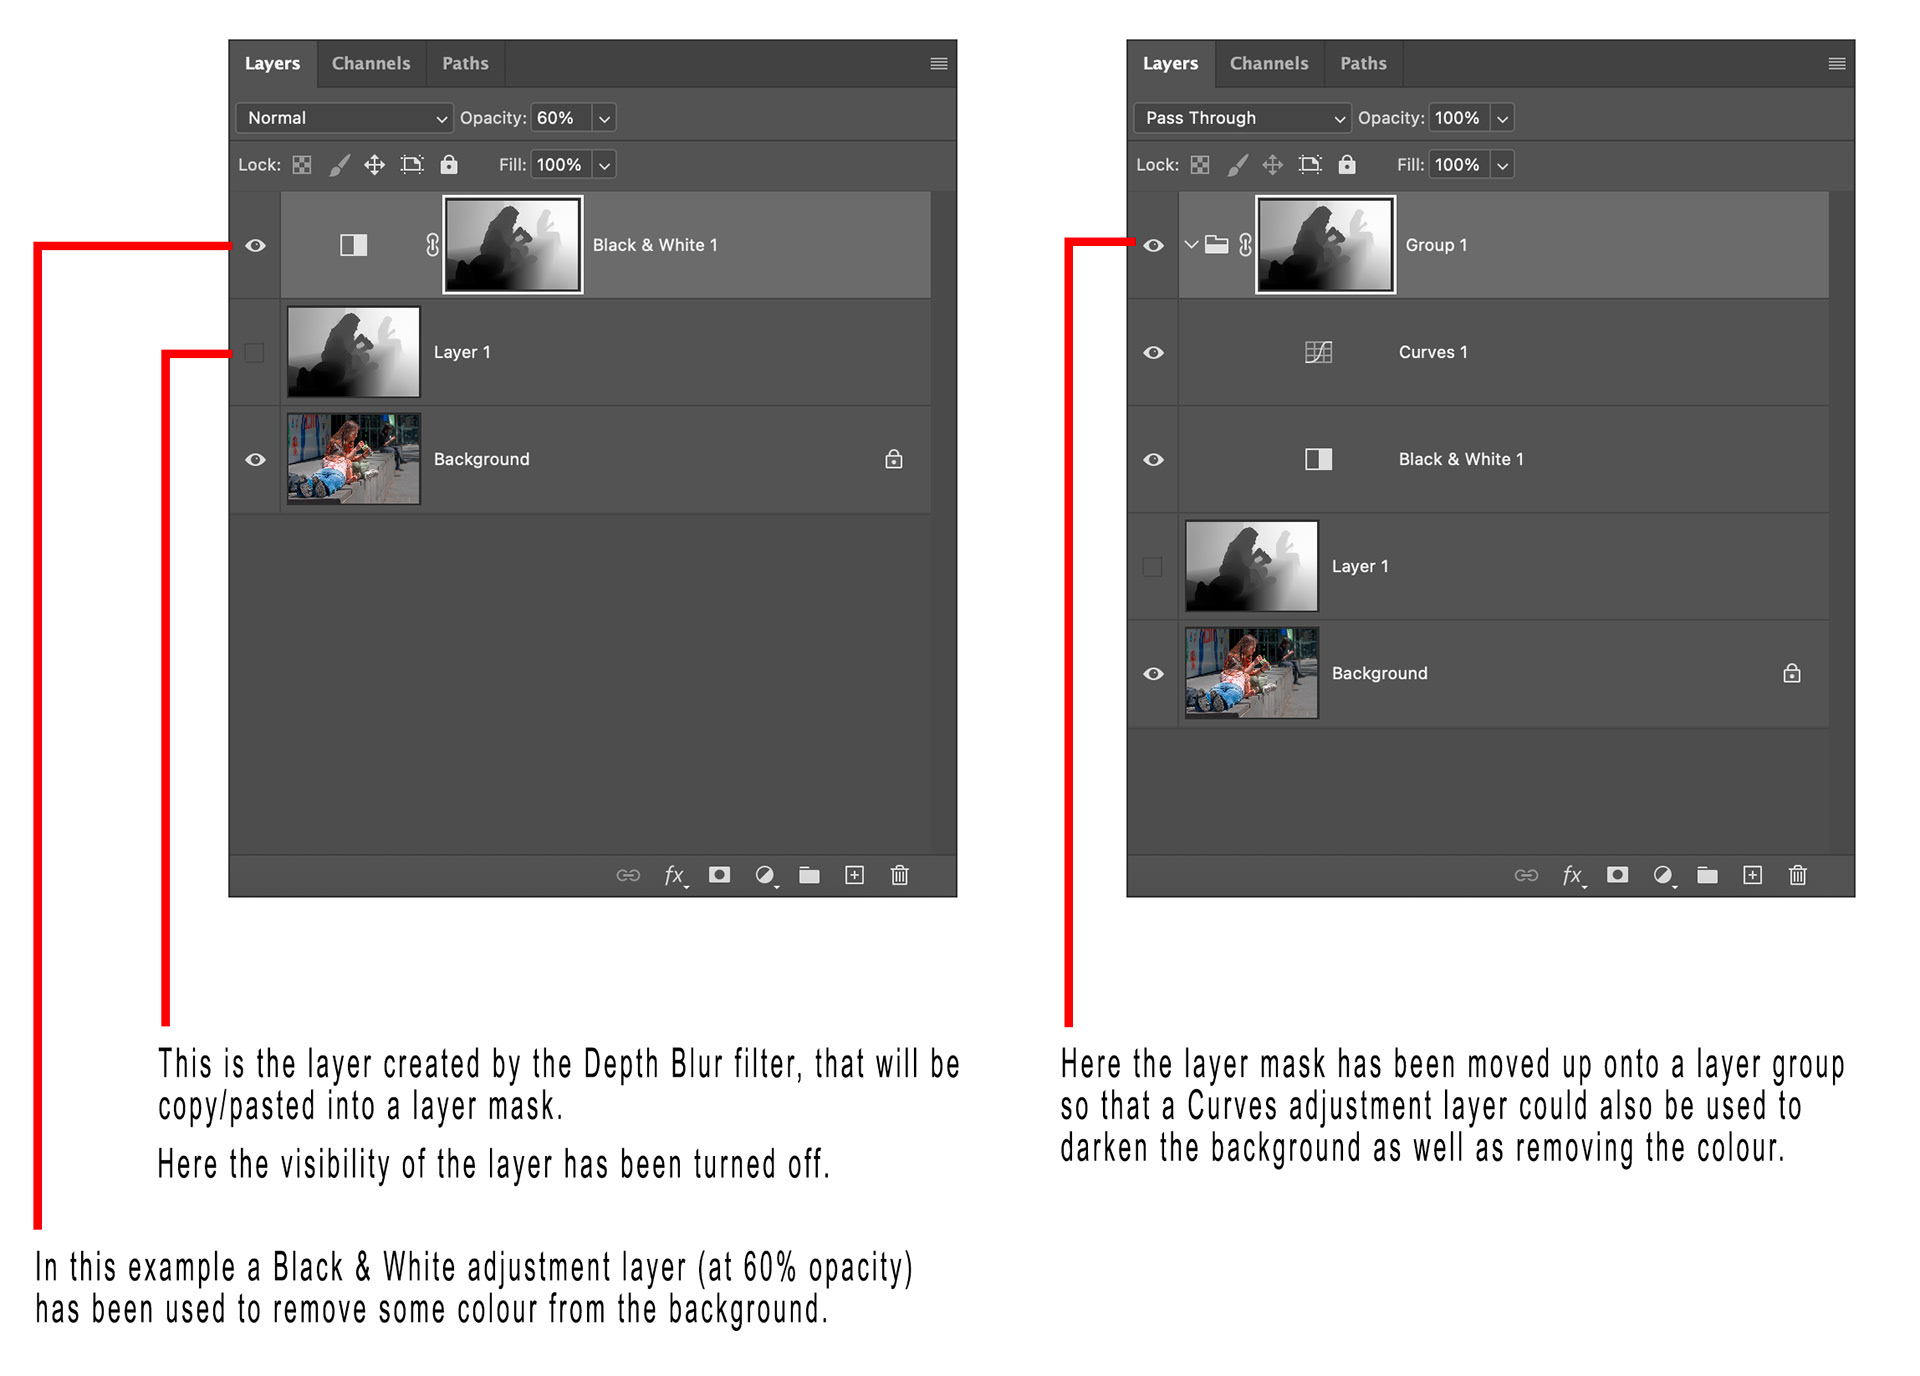
Fig 2 - Depth Map layer mask example
To convert this to a layer mask follow these steps;
1.
Create an adjustment layer to achieve whatever adjustment you want.
Create an adjustment layer to achieve whatever adjustment you want.
In the example shown in Figure 2a a Black and White adjustment layer has been added (at 60% opacity) to reduce colour in the background.
2.
Select the depth map layer and choose Select / All or press Cmd+A (Mac) or Ctrl+A (Win) to select the whole image.
Select the depth map layer and choose Select / All or press Cmd+A (Mac) or Ctrl+A (Win) to select the whole image.
3.
Choose Edit / Copy or press Cmd+C (Mac) or Ctrl+C (Win) to copy the depth map to the clipboard.
Choose Edit / Copy or press Cmd+C (Mac) or Ctrl+C (Win) to copy the depth map to the clipboard.
4.
Turn off the visibility of the depth map layer.
Turn off the visibility of the depth map layer.
5.
Hold down the Opt (Mac) or Alt (Win) key and click the layer mask on your adjustment layer. The white layer mask of the adjustment layer will be displayed.
Hold down the Opt (Mac) or Alt (Win) key and click the layer mask on your adjustment layer. The white layer mask of the adjustment layer will be displayed.
6.
Choose Edit / Paste or press Cmd+V (Mac) or Ctrl+V (Win) to paste the depth map into the layer mask.
Choose Edit / Paste or press Cmd+V (Mac) or Ctrl+V (Win) to paste the depth map into the layer mask.
7.
Hold down the Opt (Mac) or Alt (Win) key and click the layer mask on your adjustment layer to redisplay your image rather than the layer mask.
Hold down the Opt (Mac) or Alt (Win) key and click the layer mask on your adjustment layer to redisplay your image rather than the layer mask.
The depth map is now controlling your adjustment so that it is affecting the background of the image more than the items closer to the foreground.
In the second example in Figure 2 the layer mask has been moved onto a group that contains a Curves adjustment layer as well as the Black and White adjustment layer.
You can create the “reverse” mask to make your adjustments affect the foreground more than the background by inverting the mask (select the layer mask and press Cmd+I (Mac) or Ctrl+I (Win).
Like any layer mask you can also use a levels adjustment to refine the mask (make the light parts lighter or the dark parts darker).
Have fun playing with depth maps!
This article was first published in the December 2025 issue of Artists Down Under magazine.