There are three automatic tone and colour adjustments available on the Photoshop Image menu, these being Auto Tone, Auto Contrast and Auto Color. The only problem with using these commands is that they are destructive. You can perform the same adjustments non-destructively and with further options using the Auto button on the Curves and Levels adjustment layers.
For this article I will use the Curves adjustment layer as my example but the features are identical with Levels.
When you press the Auto button in the Curves adjustment layer Properties panel (see Figure 1) the Curves are automatically adjusted using one of four algorithms.
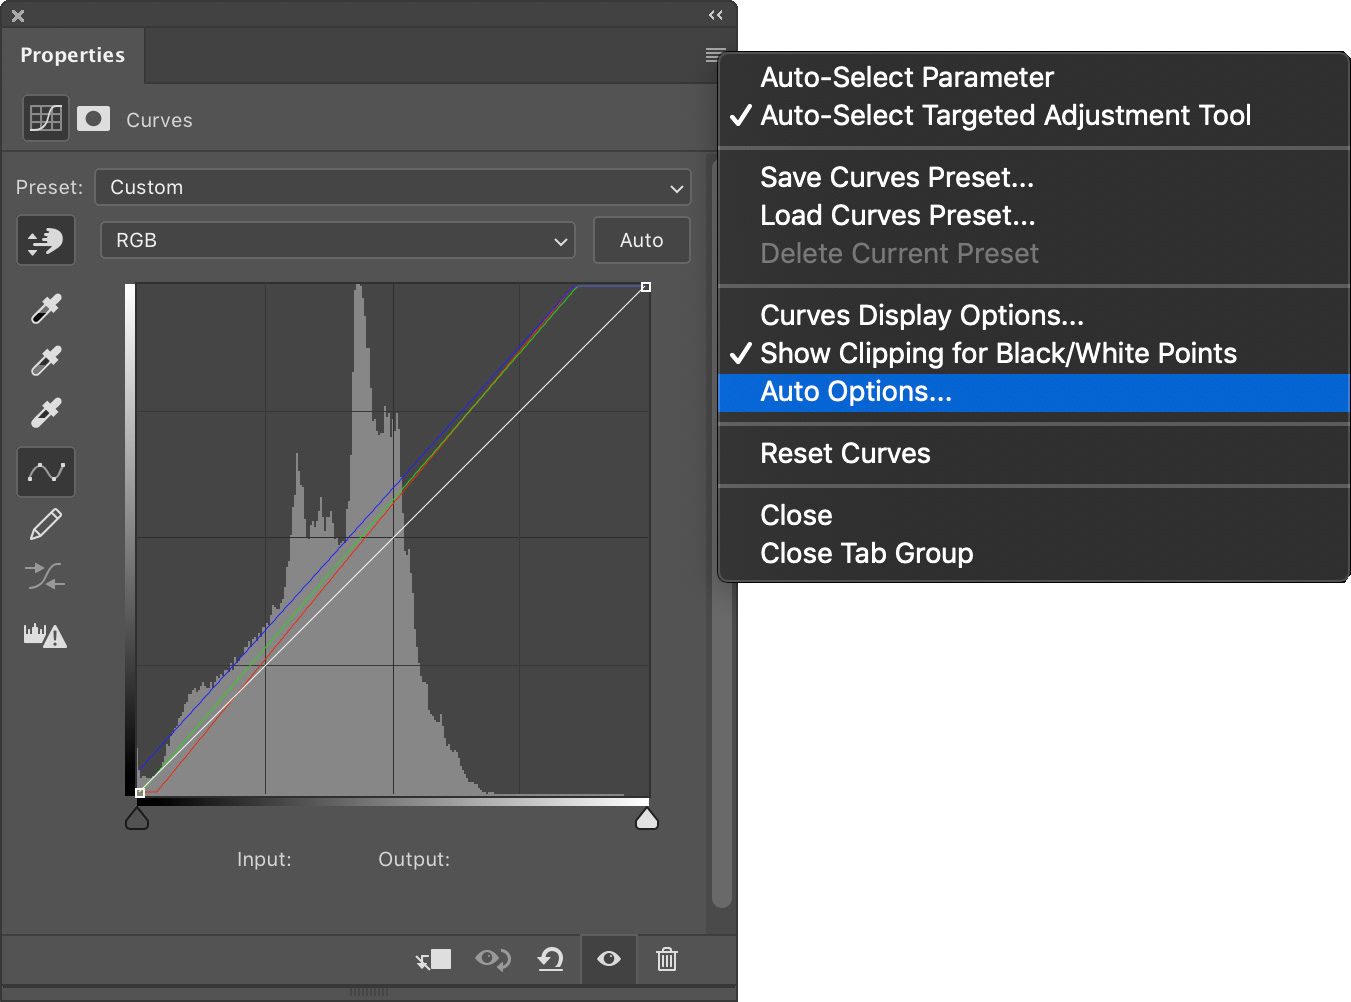
Fig 1 - Curves adjustment layer with drop-down menu
Which of the four algorithms is used is determined in the Auto Colour Correction Options dialog box (see Figure 2). This dialog box can be invoked in two ways; choosing Auto Options from the menu that is displayed by clicking the four horizontal lines at the top-right of the Curves Properties panel, or by holding down the [Alt / Option] key while clicking the Auto button.
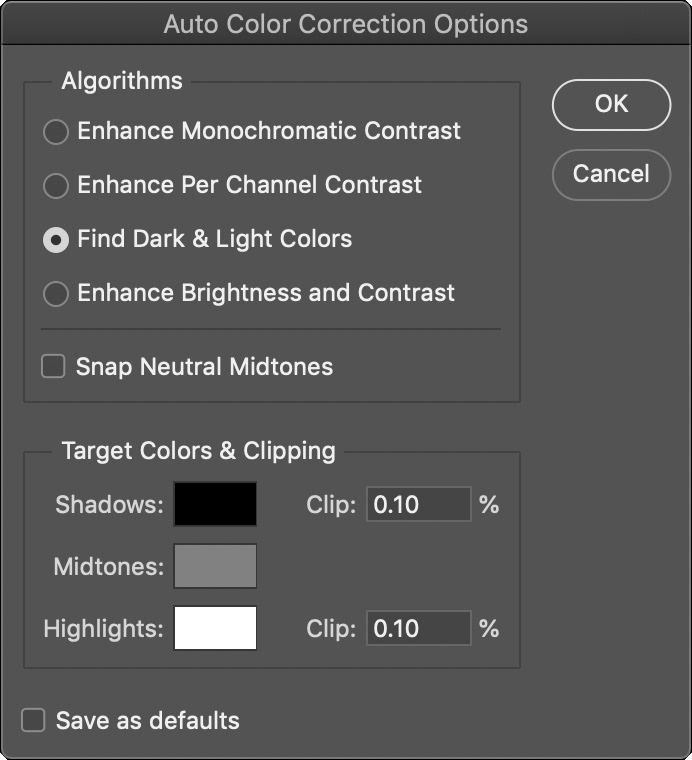
Fig 2 - Auto Color Correction Options
The four algorithms are these;
1. Enhance Monochromatic Contrast
This is equivalent to the Image / Auto Contrast command and clips each of the colour channels identically to enhance contrast while preserving colour.
2. Enhance Per Channel Contrast
This is equivalent to the Image / Auto Tone command and clips the colour channels independently to enhance contrast and alter colour casts.
3. Find Dark & Light Colors
This is equivalent to the Image / Auto Color command and analyses the image to find the analyses the image to find the dark and light colours and uses these as the shadows and highlight colours.
4. Enhance Brightness and Contrast
This algorithm analyses the image to perform content-aware monochromatic enhancement. This will often brighten the image significantly.
For the first three options you have further control with the following options.
The Snap Neutral Midtones will cause the midtone values to be mapped toward the Midtones target colour shown in the Target Colors & Clipping section of the dialog box.
You can adjust the amount of clipping performed for the highlights and shadows by changing the clipping percentages.
You can adjust the target colours for the highlights, midtones and shadows by clicking on the colour swatches.
Checking the Save as Defaults check box will make your selected options the default whenever the Auto button is pressed.
You can cycle between the four algorithms and make changes to the target colours and clipping and see the changes reflected live in your image.
Obviously because the changes are made using a Curves or Levels adjustment layer you can modify the effect using the layer opacity or a layer mask, by changing the blend mode of the Curves/Levels adjustment layer (I will sometimes choose Luminosity to remove any effect to colour) or by manually adjusting the curves or levels.
My personal favourite of the four algorithms (and therefore my default) is the Find Dark & Light Colours algorithm but have a play with these and see what you think.
This article was first published in the September 2021 issue of Artists Down Under magazine.