Have you ever flattened your layered Photoshop image, or perhaps just created a Stamp Visible Layer, and the appearance of the image has changed somewhat?
There are two reasons that I know of for this to happen and I will try and explain why, and to a degree what you can do to avoid the issues, in this article.
The first reason has to do with the way that Photoshop renders the image you see on the screen. When you are viewing your image zoomed out smaller than 100% Photoshop is blending “image previews” in order to speed up the screen rendering. In most cases this will look identical to the “actual image”, but in some cases there will a slight difference. What this means is that to get a true render of your image you should view it at 100% and tweak it to where you want it before flattening it.
Often the differences will be very subtle, but occasionally can be very noticeable. See Figures 1-4 for a recent example I came across. Note the quite extreme differences on the doors and side of the car in the example, between the layered (unflattened) image at 63% and all the other examples, which are identical.
Thanks so much to Penny de Jong for bringing the example to my attention and for allowing me to use it in this article.

Fig 1 - Layered file at Fit Screen size
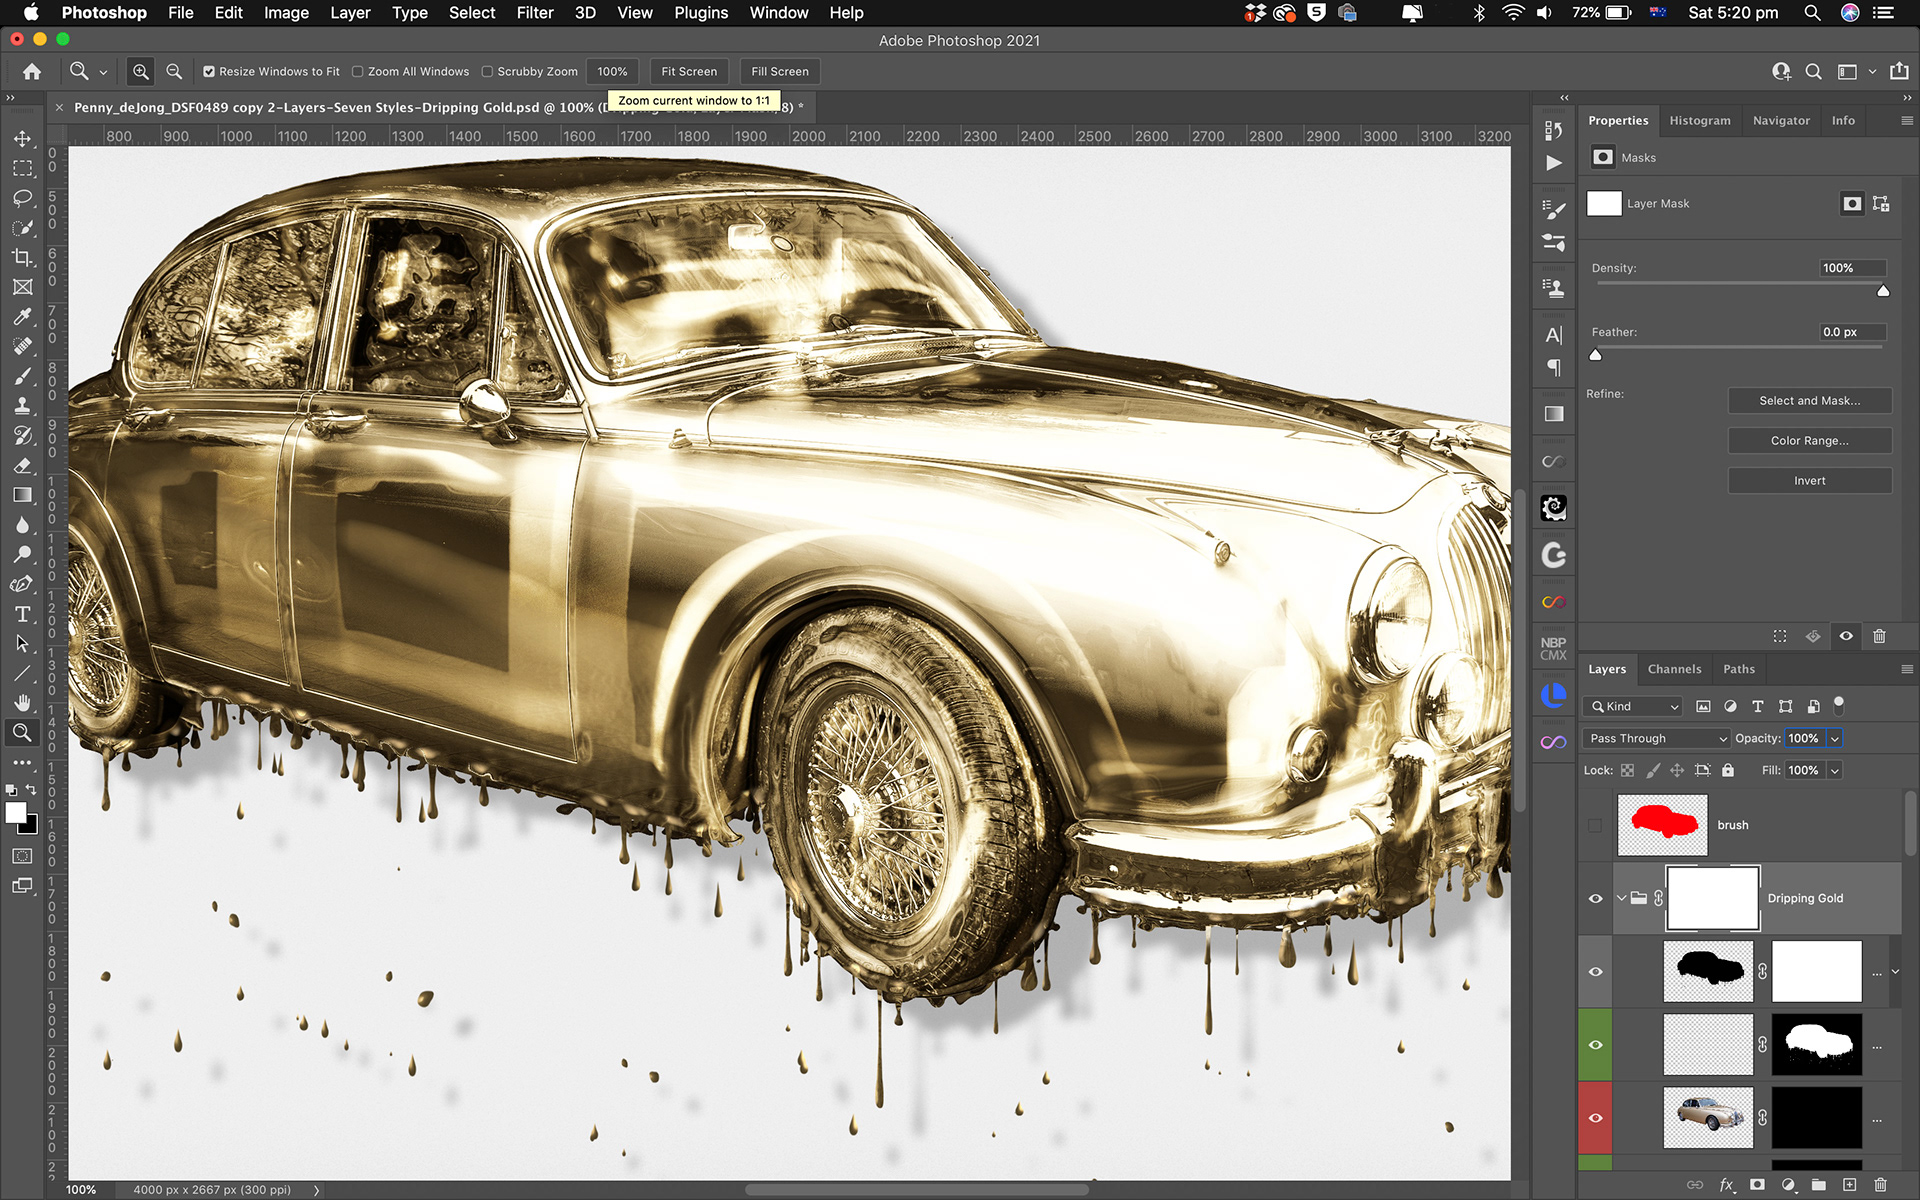
Fig 2 - Layered file at 100% size
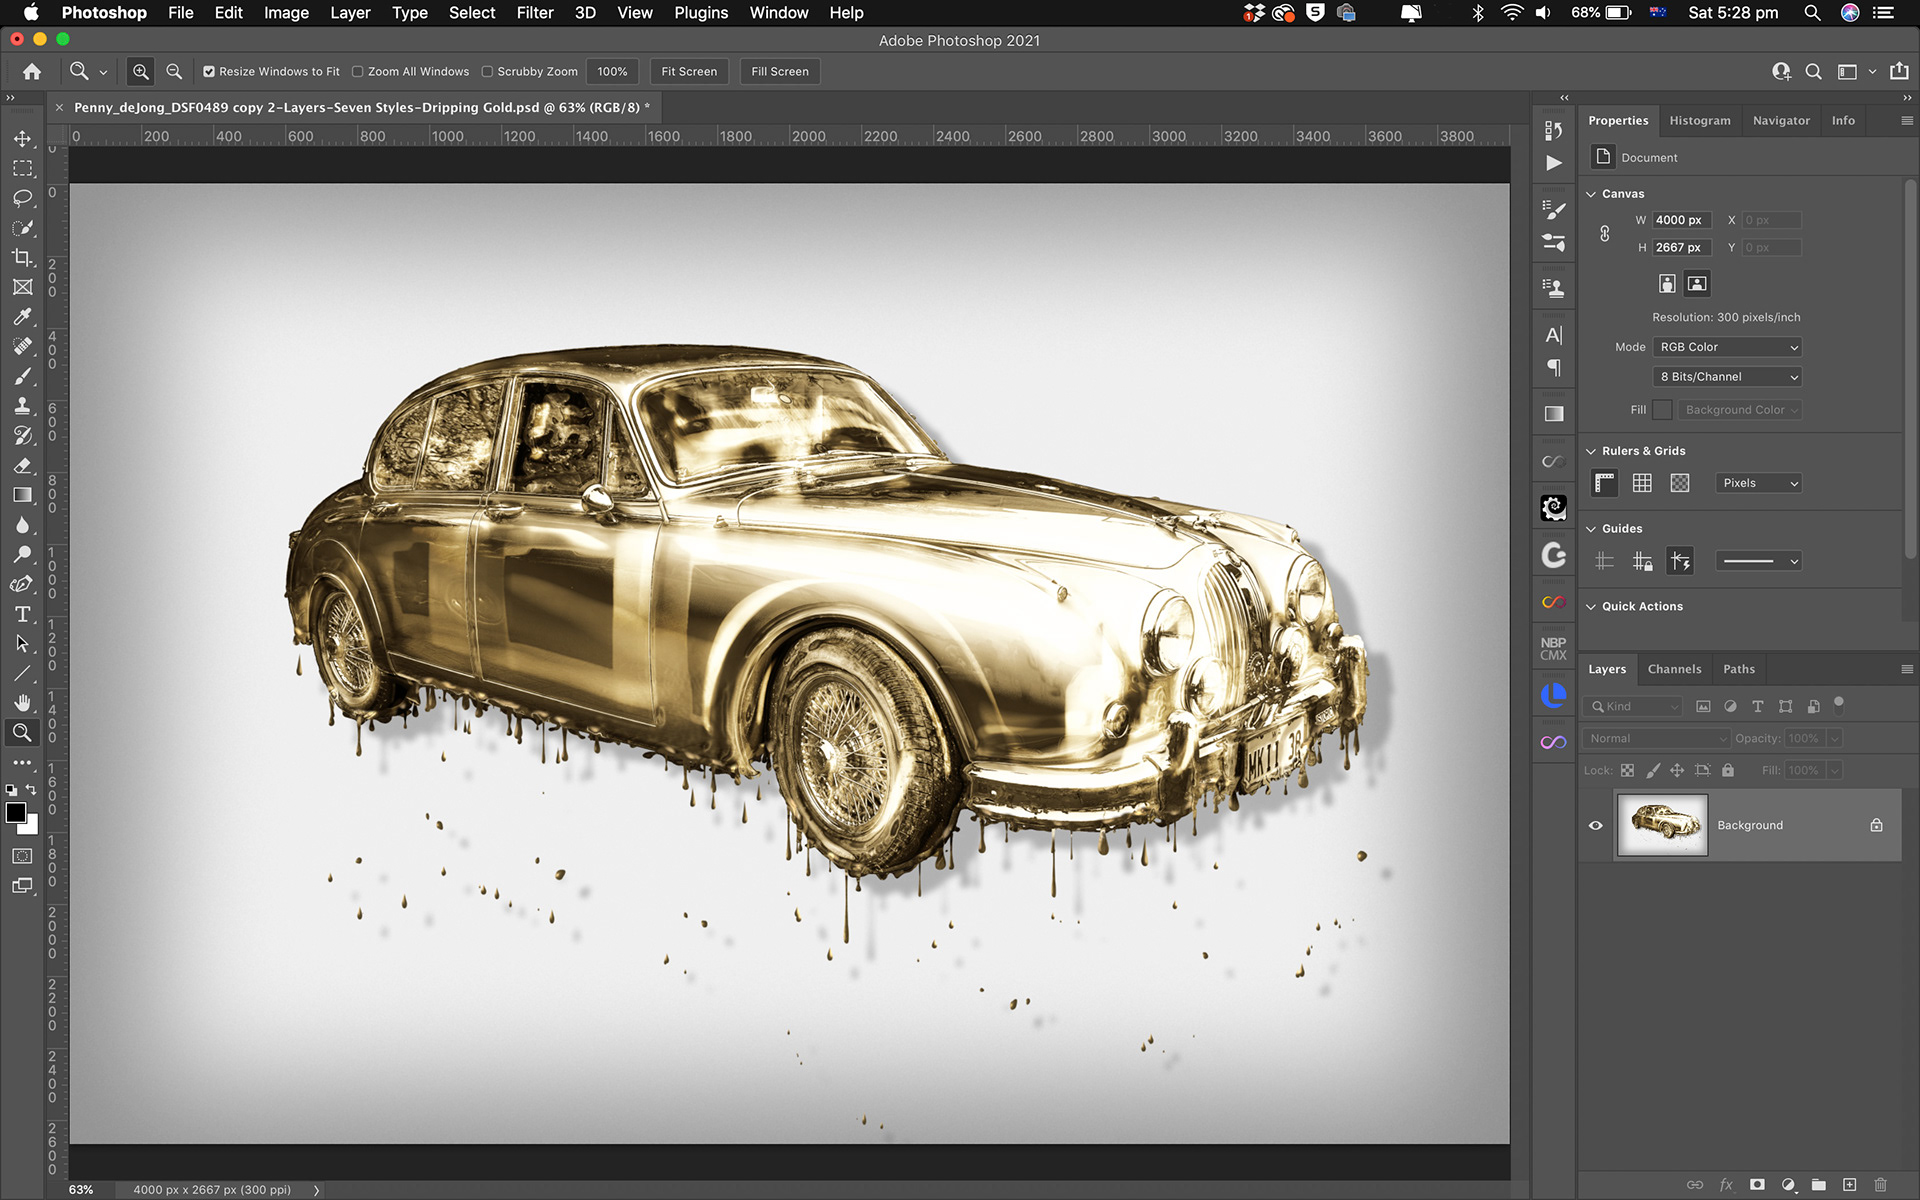
Fig 3 - Flattened file at Fit Screen size
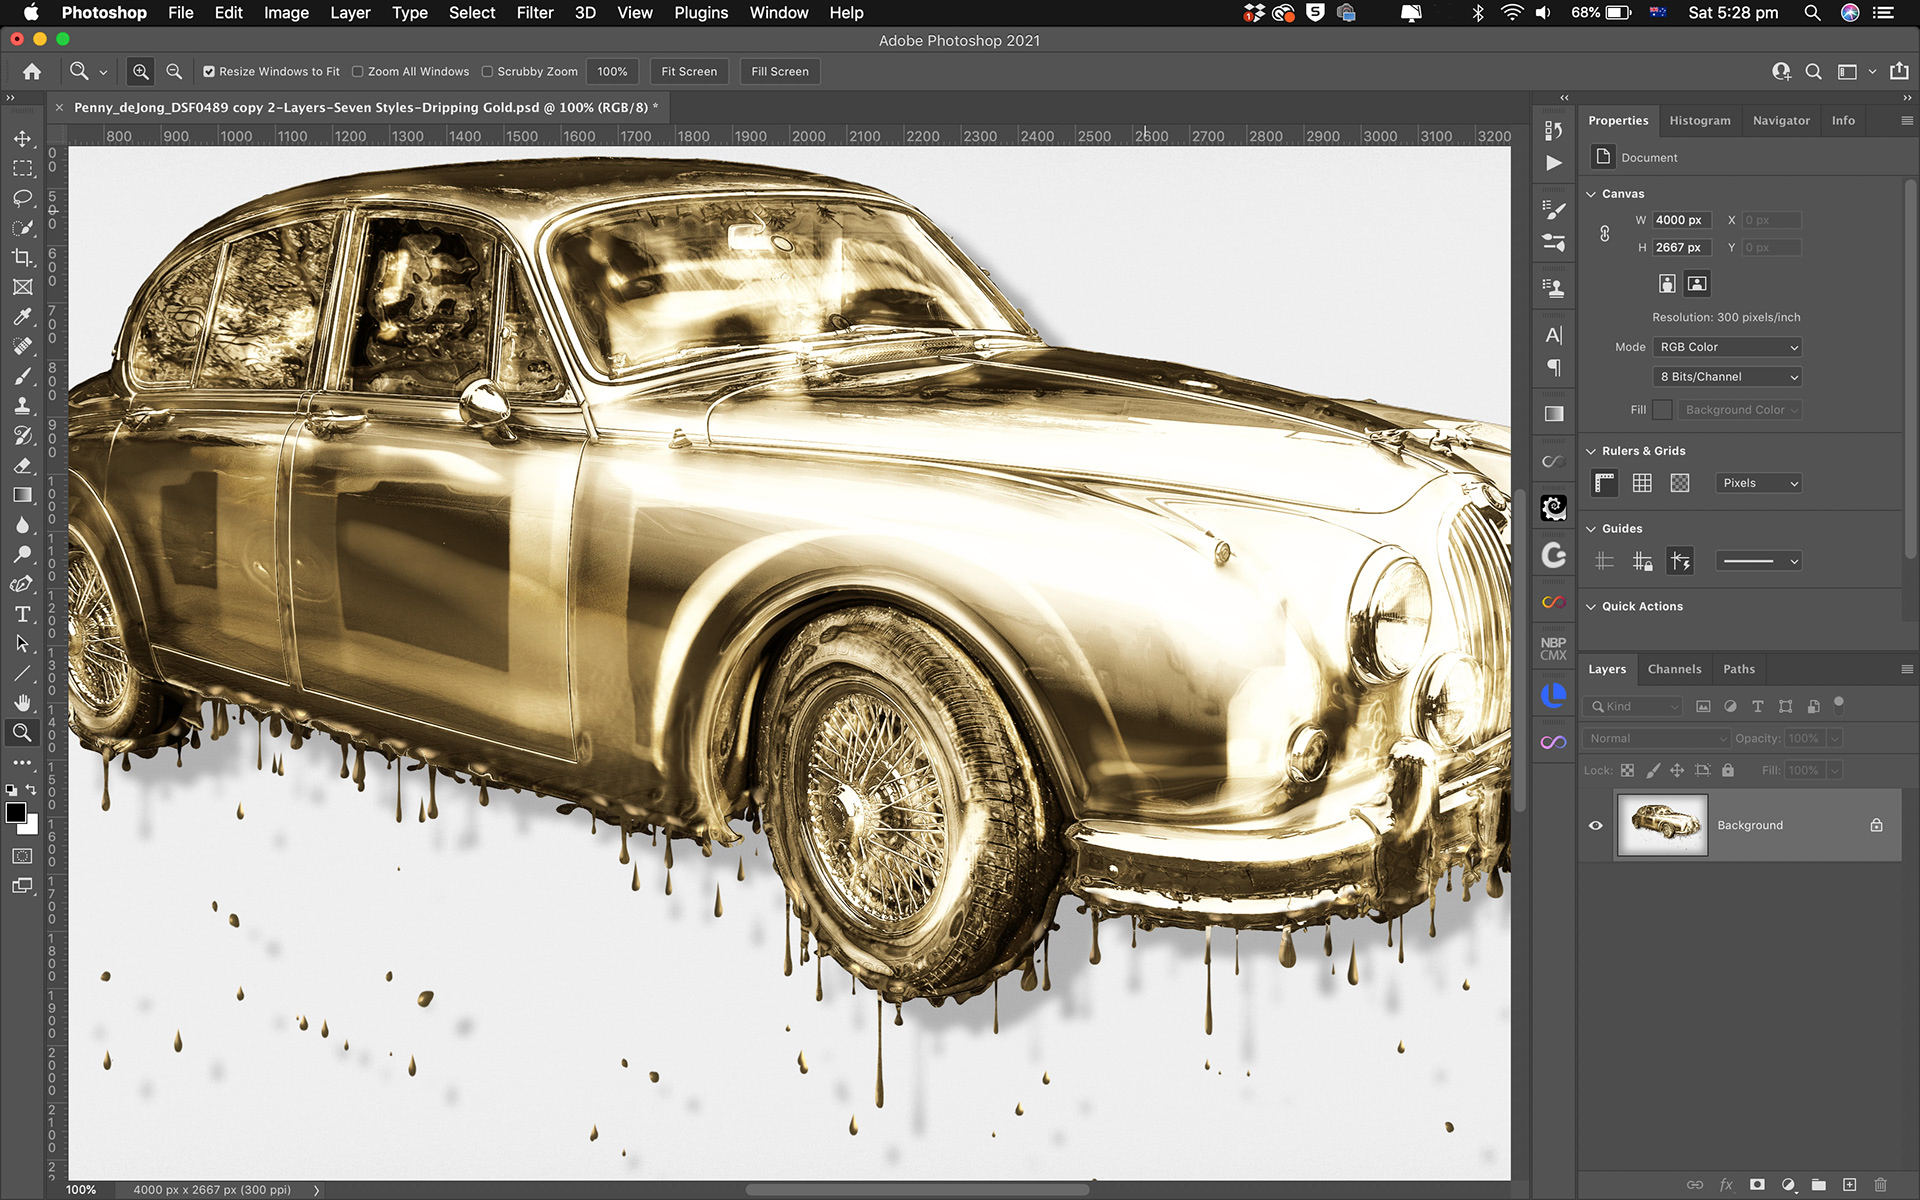
Fig 4 - Flattened file at 100% size
What this means is that only the image viewed at 100% can be taken as a reliable version of the true image. Get into the habit of checking your images at 100% before flattening them, or before creating Stamp Visible layers (which are the same as a flattened image).
The second way that your image can potentially change when you flatten it is if you still have some areas of partial transparency in your image. When you flatten an image, transparent areas are filled with white. Any pixels that are partially transparent (set to an opacity less than 100%) without an opaque background behind them will change in appearance.
The best way to demonstrate this is with a quick example. The four layer file shown in Figure 5a consists of;
- a transparent bottom layer,
- a second layer where one half is white and the other transparent,
- a third layer with a rectangle of black pixels on a transparent background that is set to 75% opacity overlays some of the white pixels and some of the transparent background
- a fourth layer simply provides a thin black border using a layer mask
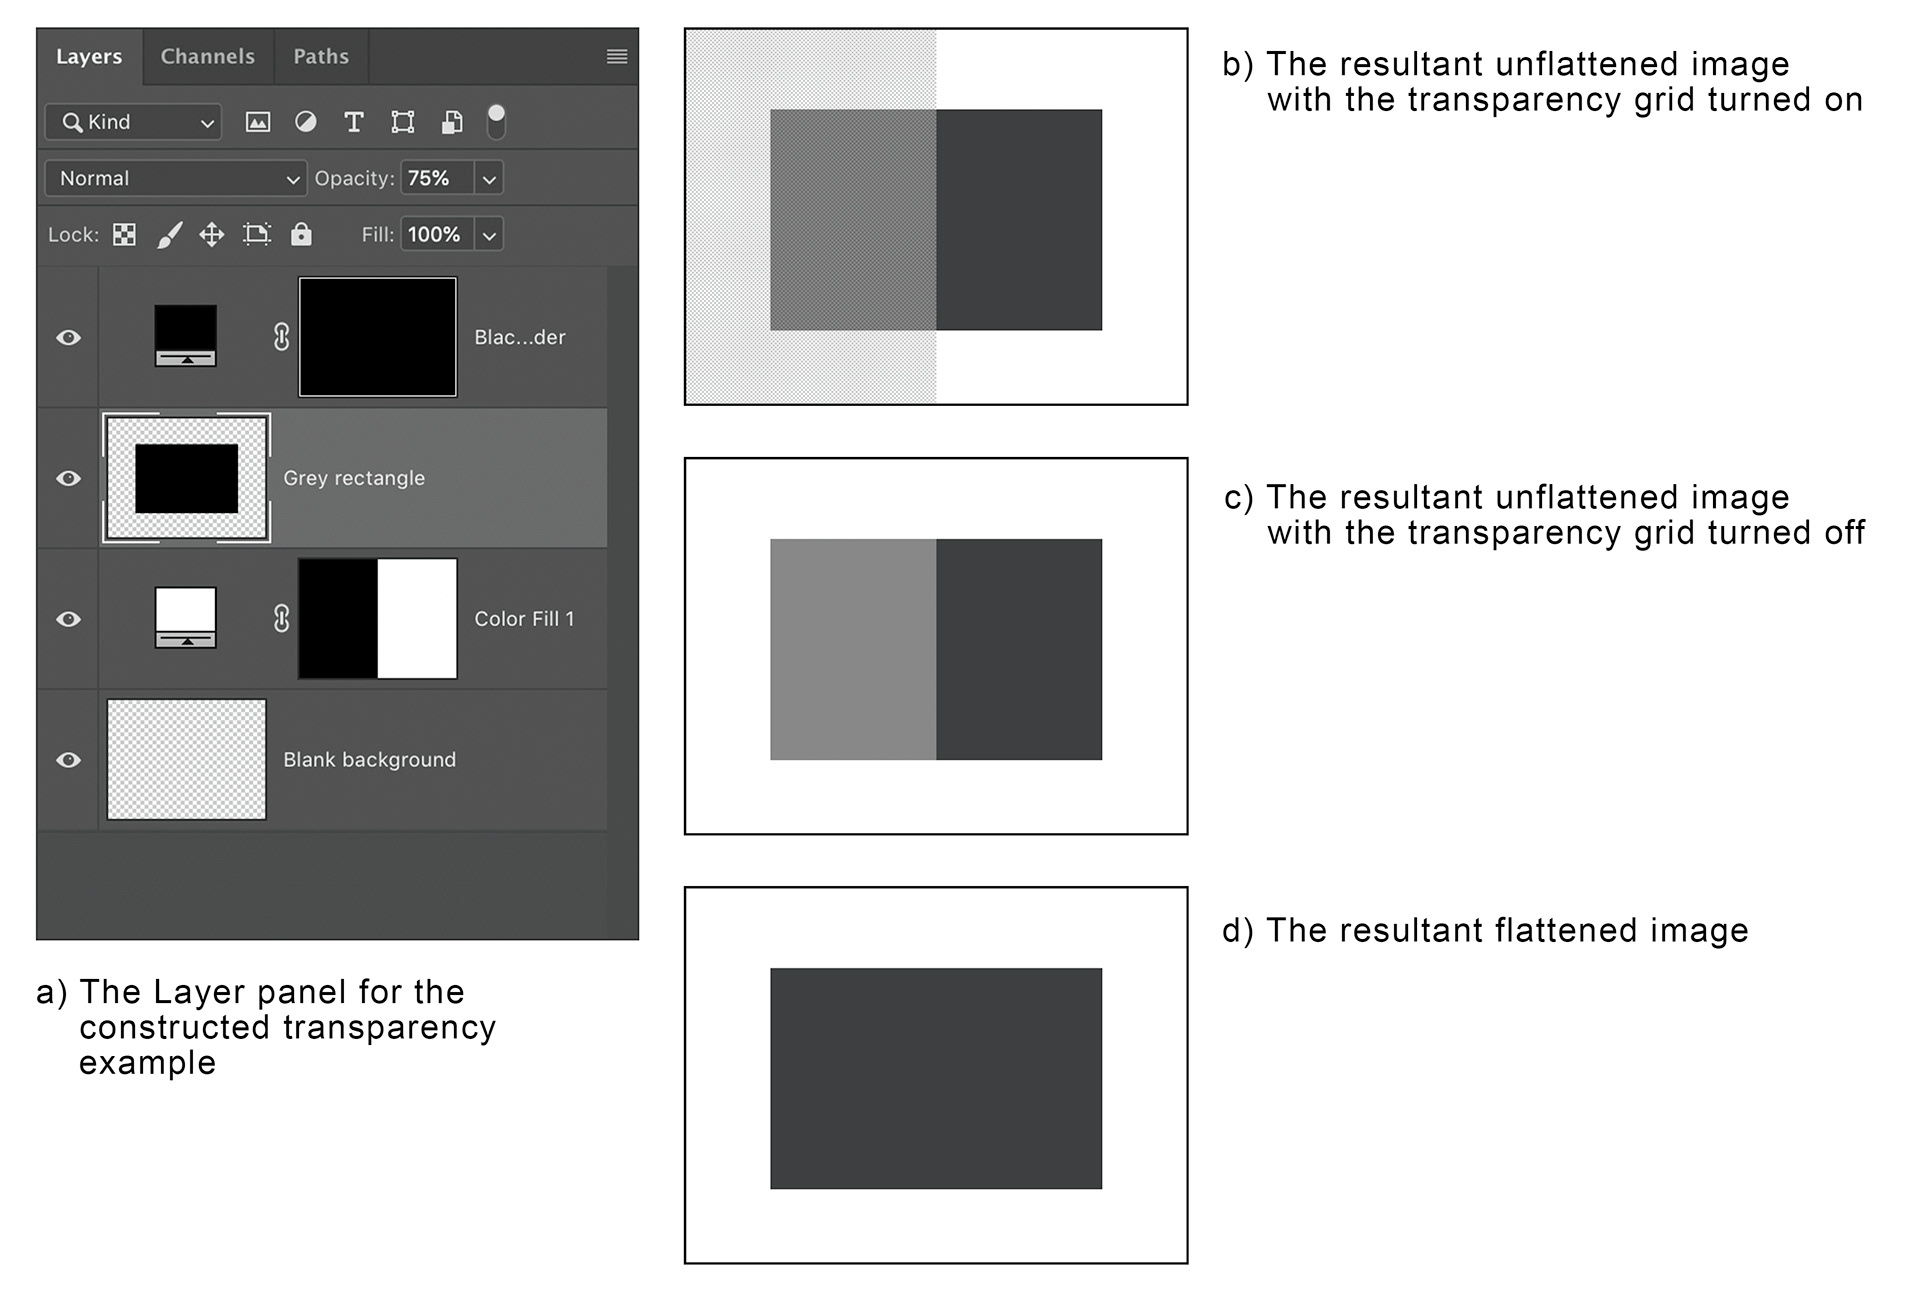
Fig 5 - Transparency example
Figure 5b and 5c show the resultant image before flattening it (with both the transparency grid turned on and off). You’ll note that the black pixels at 75% opacity on the white and transparent backgrounds look distinctly different shades of grey. When the image is flattened (see Figure 5d) the different shades disappear and the whole rectangle appears the same.
This example is quite simple, contrived and obvious, but if you are in the habit of starting off your images with a blank layer, then building up layers with potentially not fully opaque areas, then it is possible that flattening your image will result in changes in tone and colour. Obviously one way to avoid this is to start off with an opaque background, like a plain white background, rather than a transparent one.
If you weren’t aware that the Transparency Grid can be turned off, as well as changed in size and colour, this can be done in the Transparency & Gamut section of the Photoshop preferences (see Figure 6).
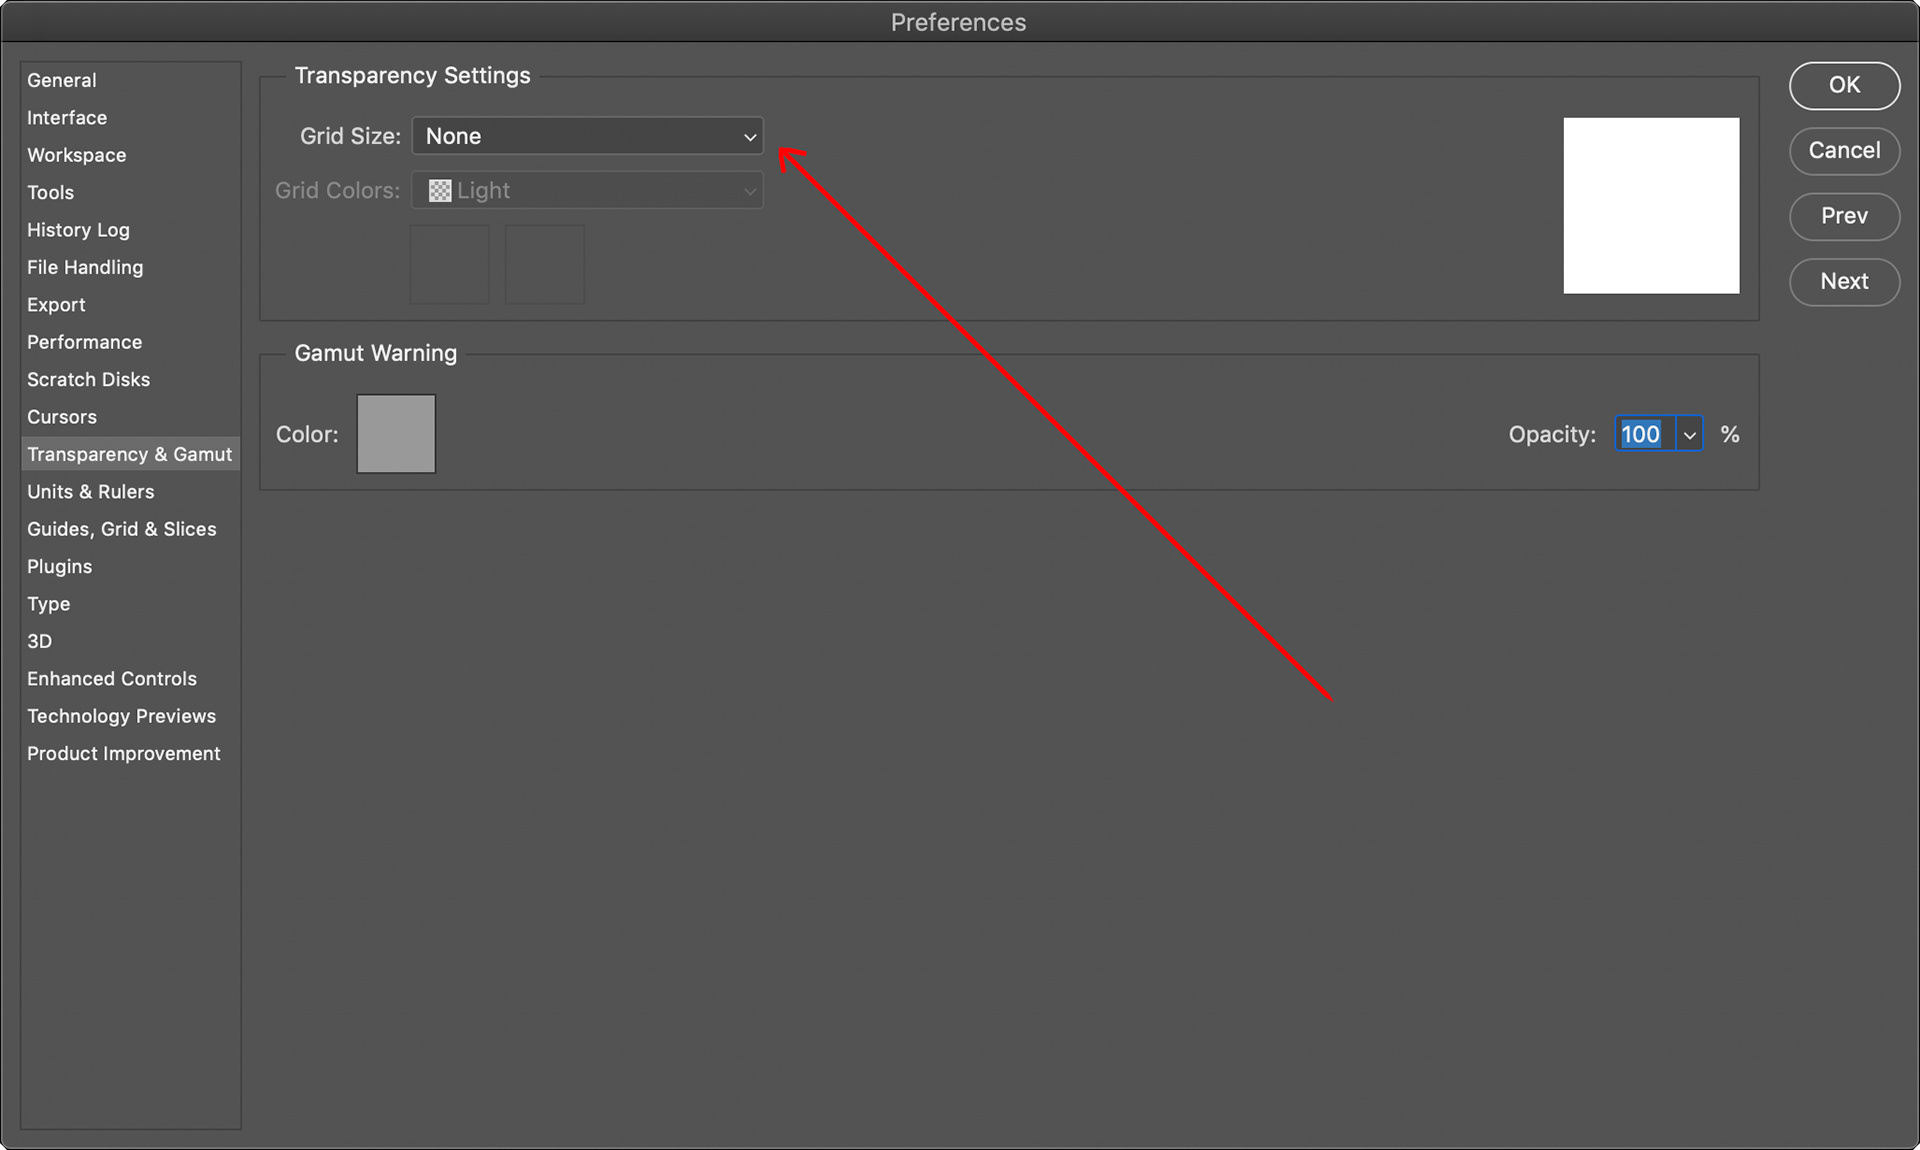
Fig 6 - Removing the Transparency Grid
This article was first published in the November 2021 issue of Artists Down Under magazine.