In the April 2025 release of Photoshop (version 26.6) Adobe announced some improvements to the Hue Saturation Adjustment Layer that increase its functionality and ease of use.
When a pixel layer is active, you’ll notice the first new feature in the Contextual Task Bar, the Adjust Colors button (see Figure 1a).
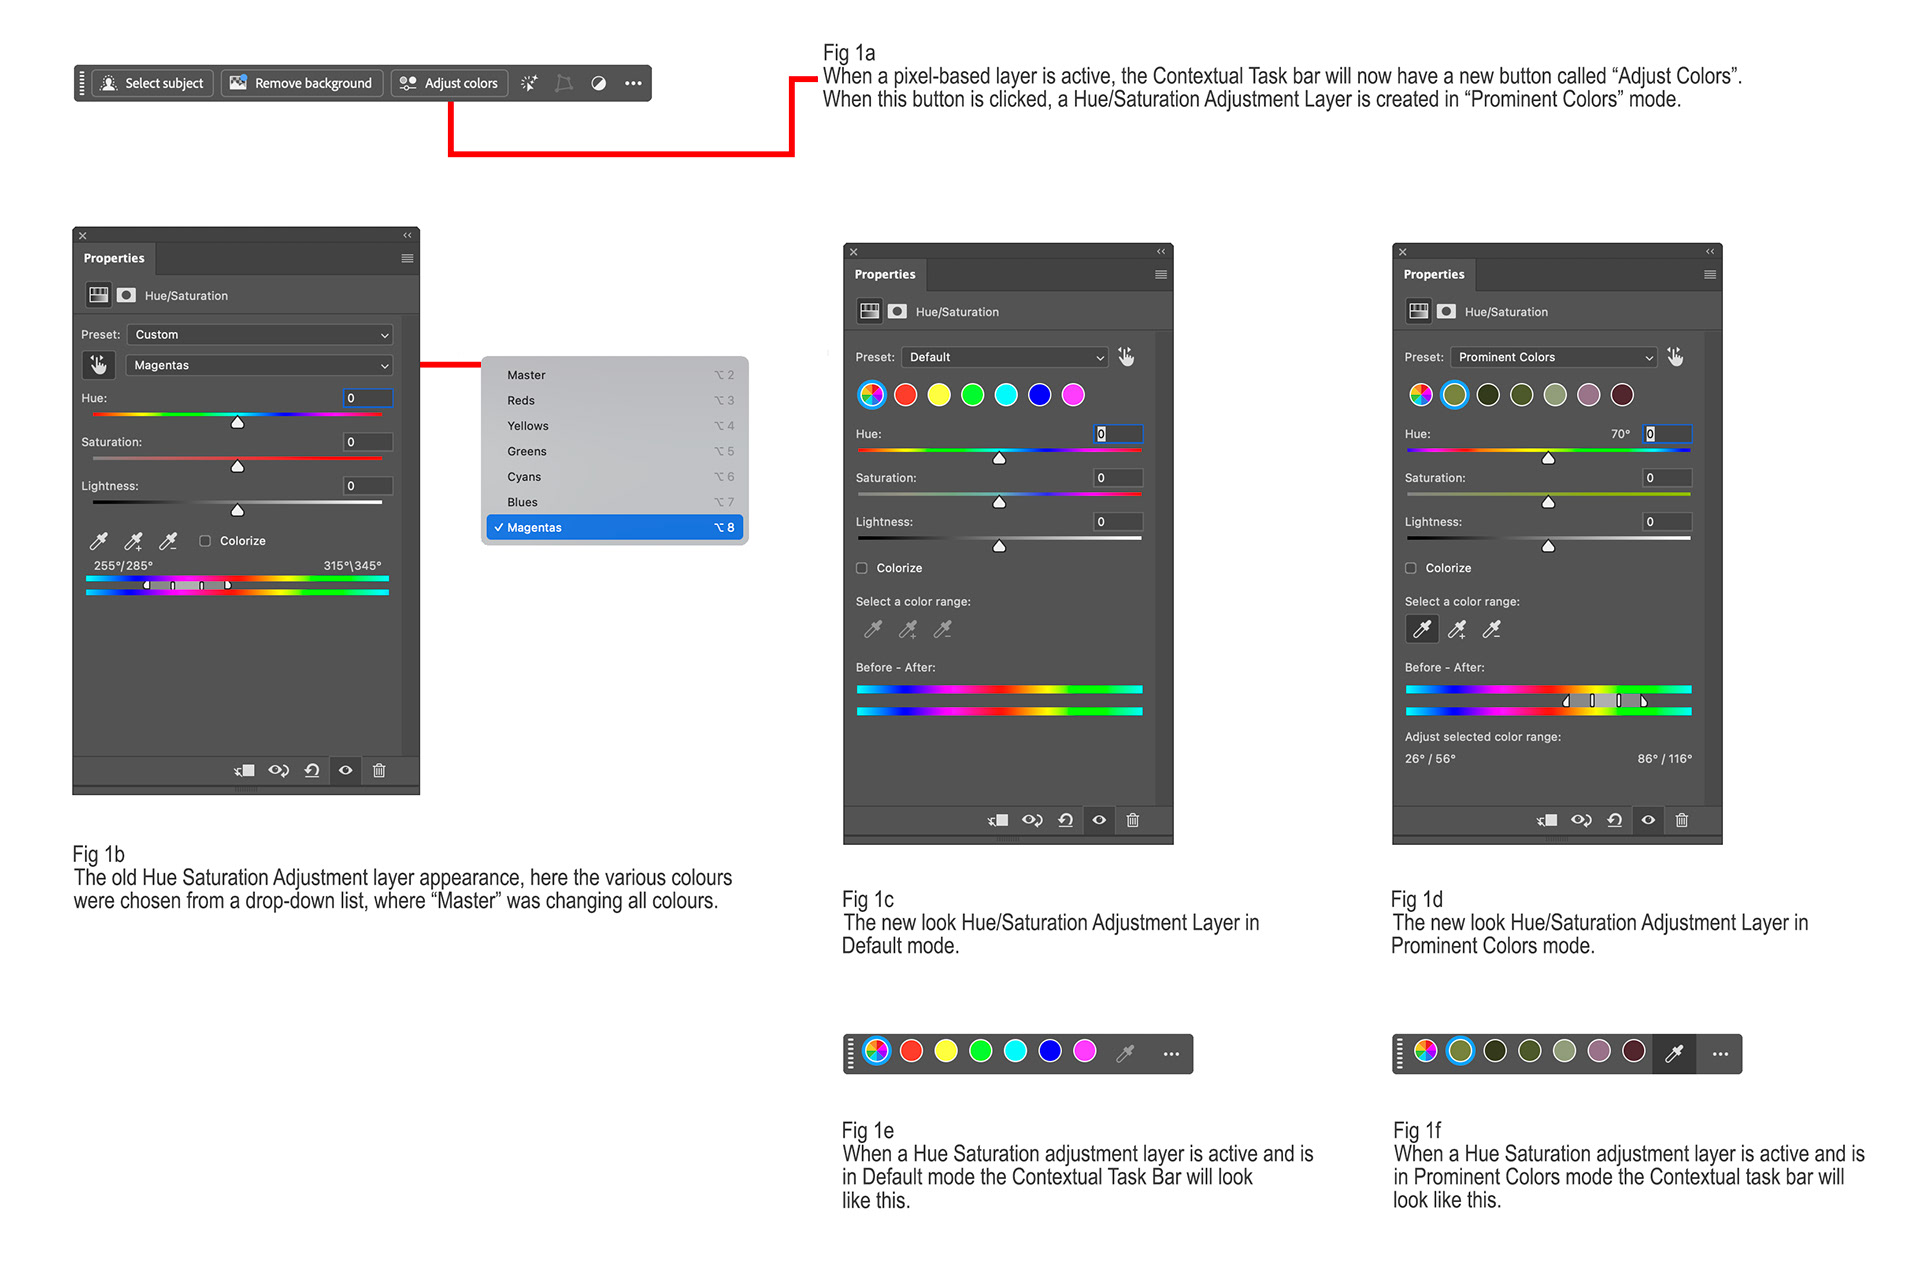
Fig 1 - HSL Adjustment Layer Changes
Pressing this button will cause Photoshop to analyse your image and identify the prominent colours, it will then create a Hue Saturation Adjustment layer in “Prominent Colors” mode (see Figure 1d) and the Contextual Task Bar will also show the six selected prominent colours (see Figure 1e).
You can choose which colour you wish to adjust by clicking one of the six colour swatches in the Contextual Task Bar and when you do so you’ll get a drop-down dialog where you can adjust the Hue, Saturation and Lightness of the selected colour (see Figure 2).

Fig 2 - Adjusting colours via the Contextual Task Bar
The same Prominent Colors swatches are shown in the Properties panel for the Hue Saturation Adjustment Layer as well, and you can adjust the colours there as well if that is your preference.
When a Hue Saturation adjustment layer is created via the Layer / New Adjustment Layer menu, or via the icons at the bottom of the Layer Panel, it will be created in Default mode, showing the standard Red, Yellow, Green, Cyan, Blue and Magenta colours in the swatches (see Figure 1c) and these will also be shown in the Contextual Task Bar (see Figure 1e).
In the Properties Panel these colour swatches have replaced a drop-down list in the previous Photoshop versions.
You can switch a Hue Saturation Adjustment layer from Default to Prominent Colors mode using the Presets drop-down menu in the Properties Panel but be aware that when you do that all the sliders are reset to default (ie you will lose any colour adjustments made in that adjustment layer).
When you have adjusted colours using the sliders, the relevant colour swatch (in both the Contextual Task Bar and the Properties Panel) will show a white dot underneath the swatch, and the lower half of the swatch will change to show the adjusted colour (see Figure 2).
If the colour you want to adjust is not automatically chosen as one of the prominent colours you can choose a colour manually using the Contextual Task Bar. First, click one the colour swatches you are not using, then click the dropper and choose the required colour from your image (see Figure 3). The colour swatch will change to the selected colour, and you can now adjust it using the sliders.
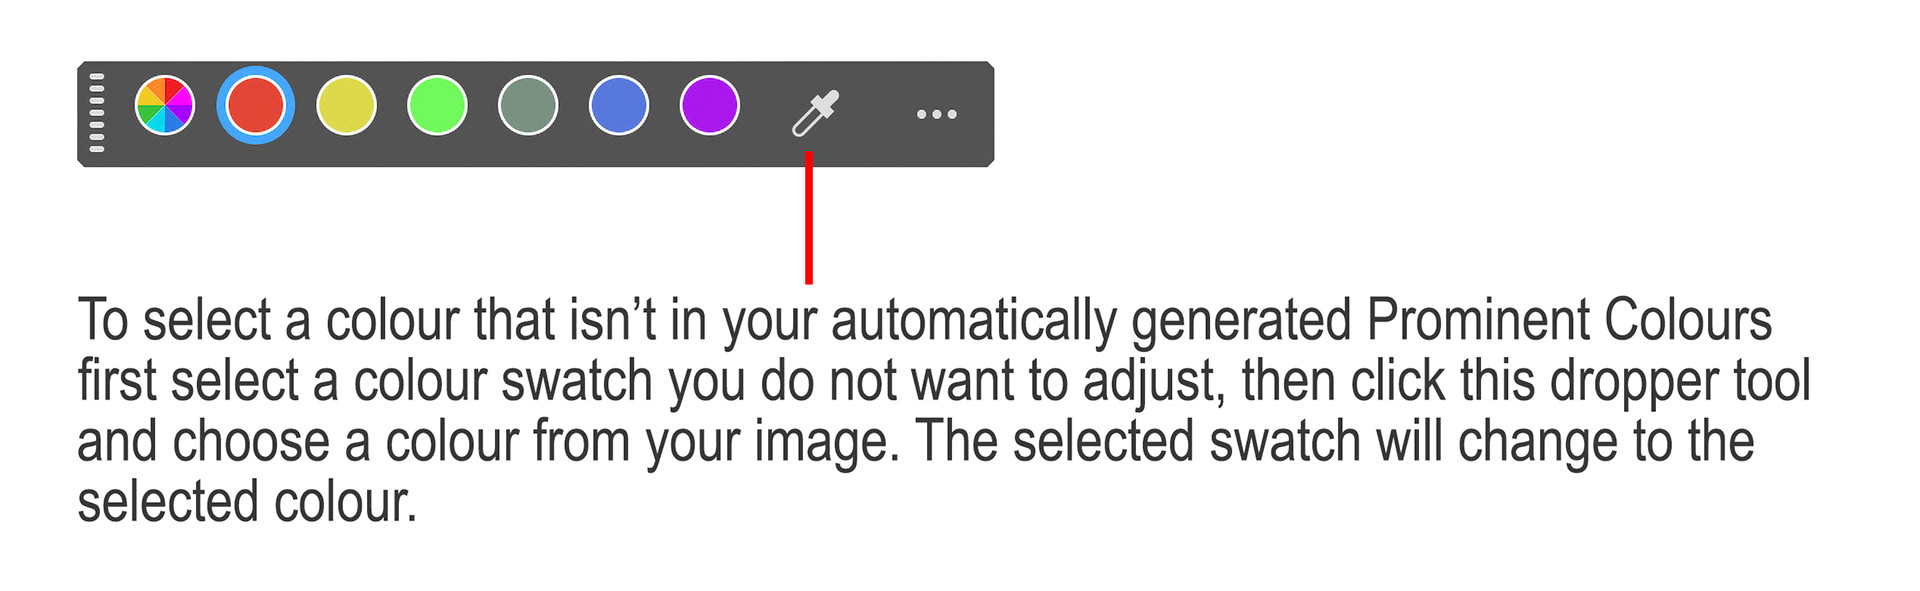
Fig 3 - Selecting a new Prominent Colour
Another improvement is that the degree position on the Hue wheel of the selected and the adjusted colour has been added to the Properties Panel of the Hue Saturation adjustment layer (see Figure 4).

Fig 4 - Hue wheel degree position now shown
You can fine-tune the selected colour using the slider between the Before / After colour bars near the bottom of the Properties panel. This has been made larger in this release making it easier to use (see Figure 5).
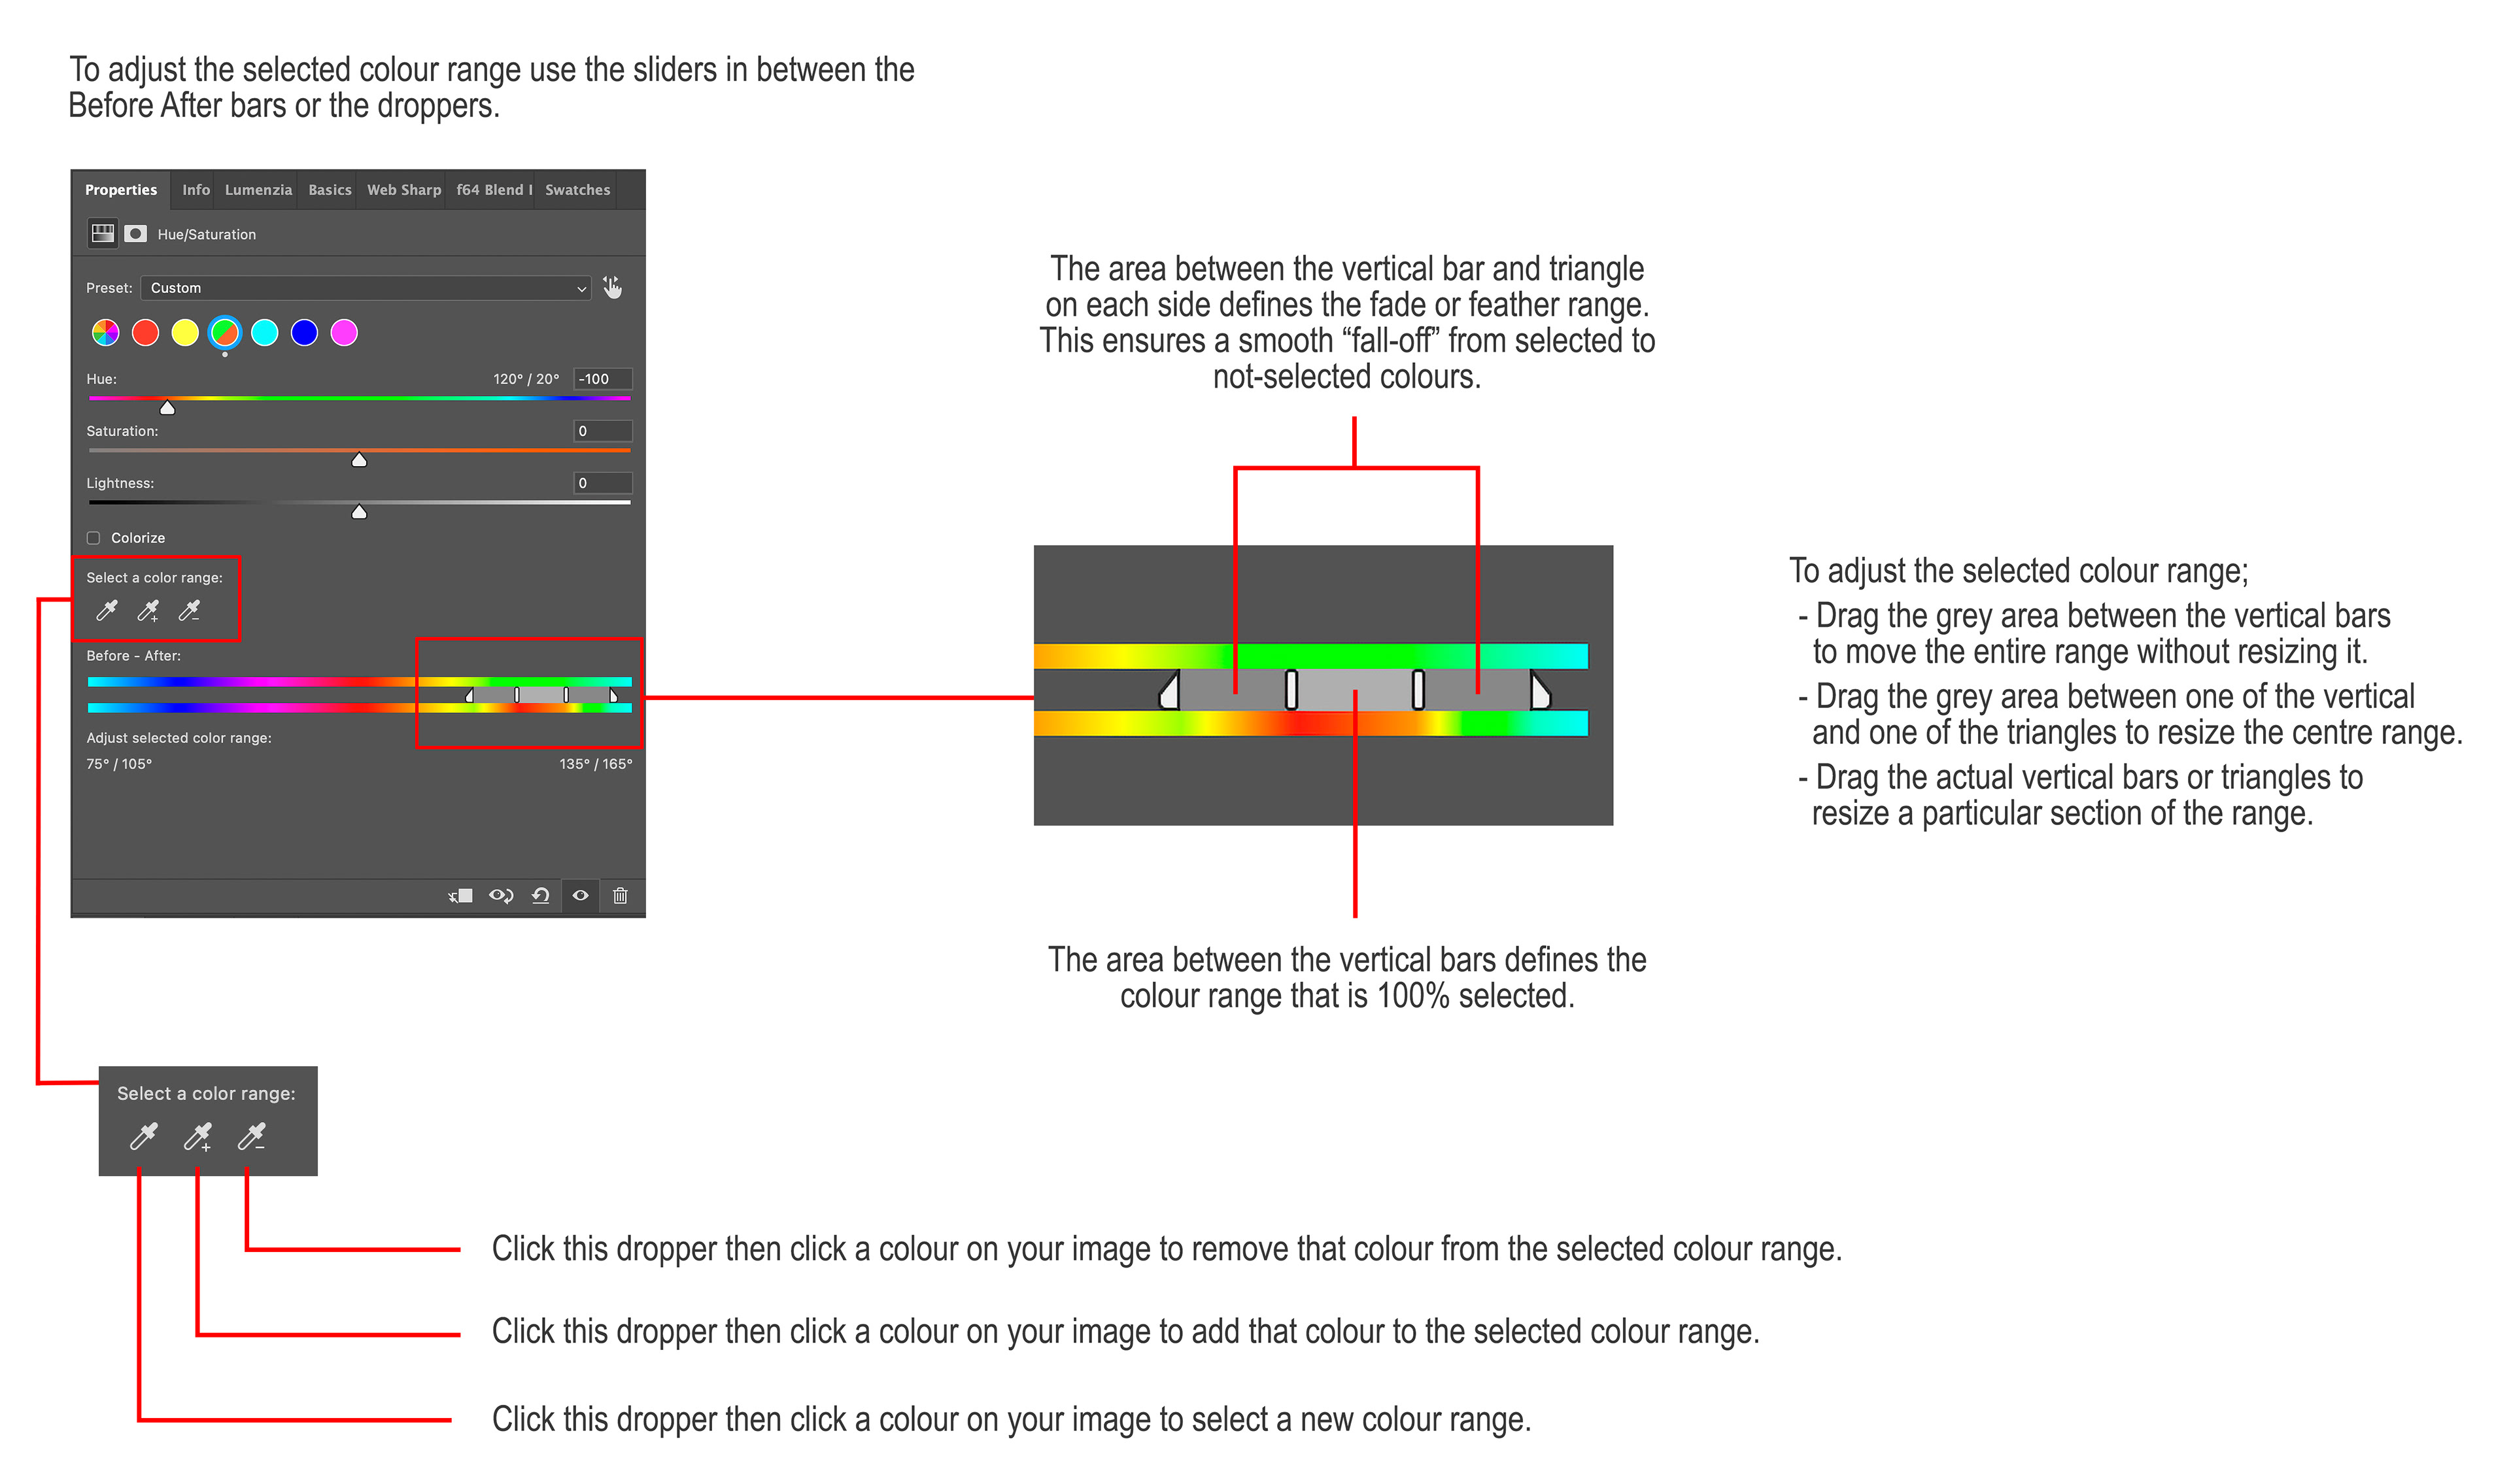
Fig 5 - Adjusting the selected colour range
The top colour bar shows the selected colour; the bottom colour bar shows the adjusted colour.
Once a colour has been selected you will see a grey area between the Before / After colour bars. The lighter grey area between the vertical bars shows the colour spectrum that is 100% selected, the darker grey area on either side of this, between the triangle and vertical bar shows the colour spectrum that fades off or is feathered to ensure a smooth transition from selected to not-selected colours.
To adjust the selected colours, you can;
- Drag the area between the vertical bars to move the range without resizing it
- Drag the area between the vertical bar and triangle to resize the centre range
- Drag either of the vertical bars or triangles to resize a particular part of the range.
- Drag the area between the vertical bars to move the range without resizing it
- Drag the area between the vertical bar and triangle to resize the centre range
- Drag either of the vertical bars or triangles to resize a particular part of the range.
You can also use the three droppers to select a new colour, add a colour to the selected range or remove a colour from the selected range (see Figure 5).
It is good to see Adobe improving legacy functionality as well as just concentrating on the new, largely AI-based functionality.
This article was first published in the August 2025 issue of Artists Down Under magazine.