The latest versions of Adobe Camera Raw (ACR) and Lightroom CC (October 2022) have further improved the masking features. The diagrams in this article show ACR, but the features are very similar in Lightroom.
Options have been added to automatically select the image Background, and to select Objects. In addition, Adobe AI will automatically identify people in the image and give you the option of selecting all of them, or selecting them individually.
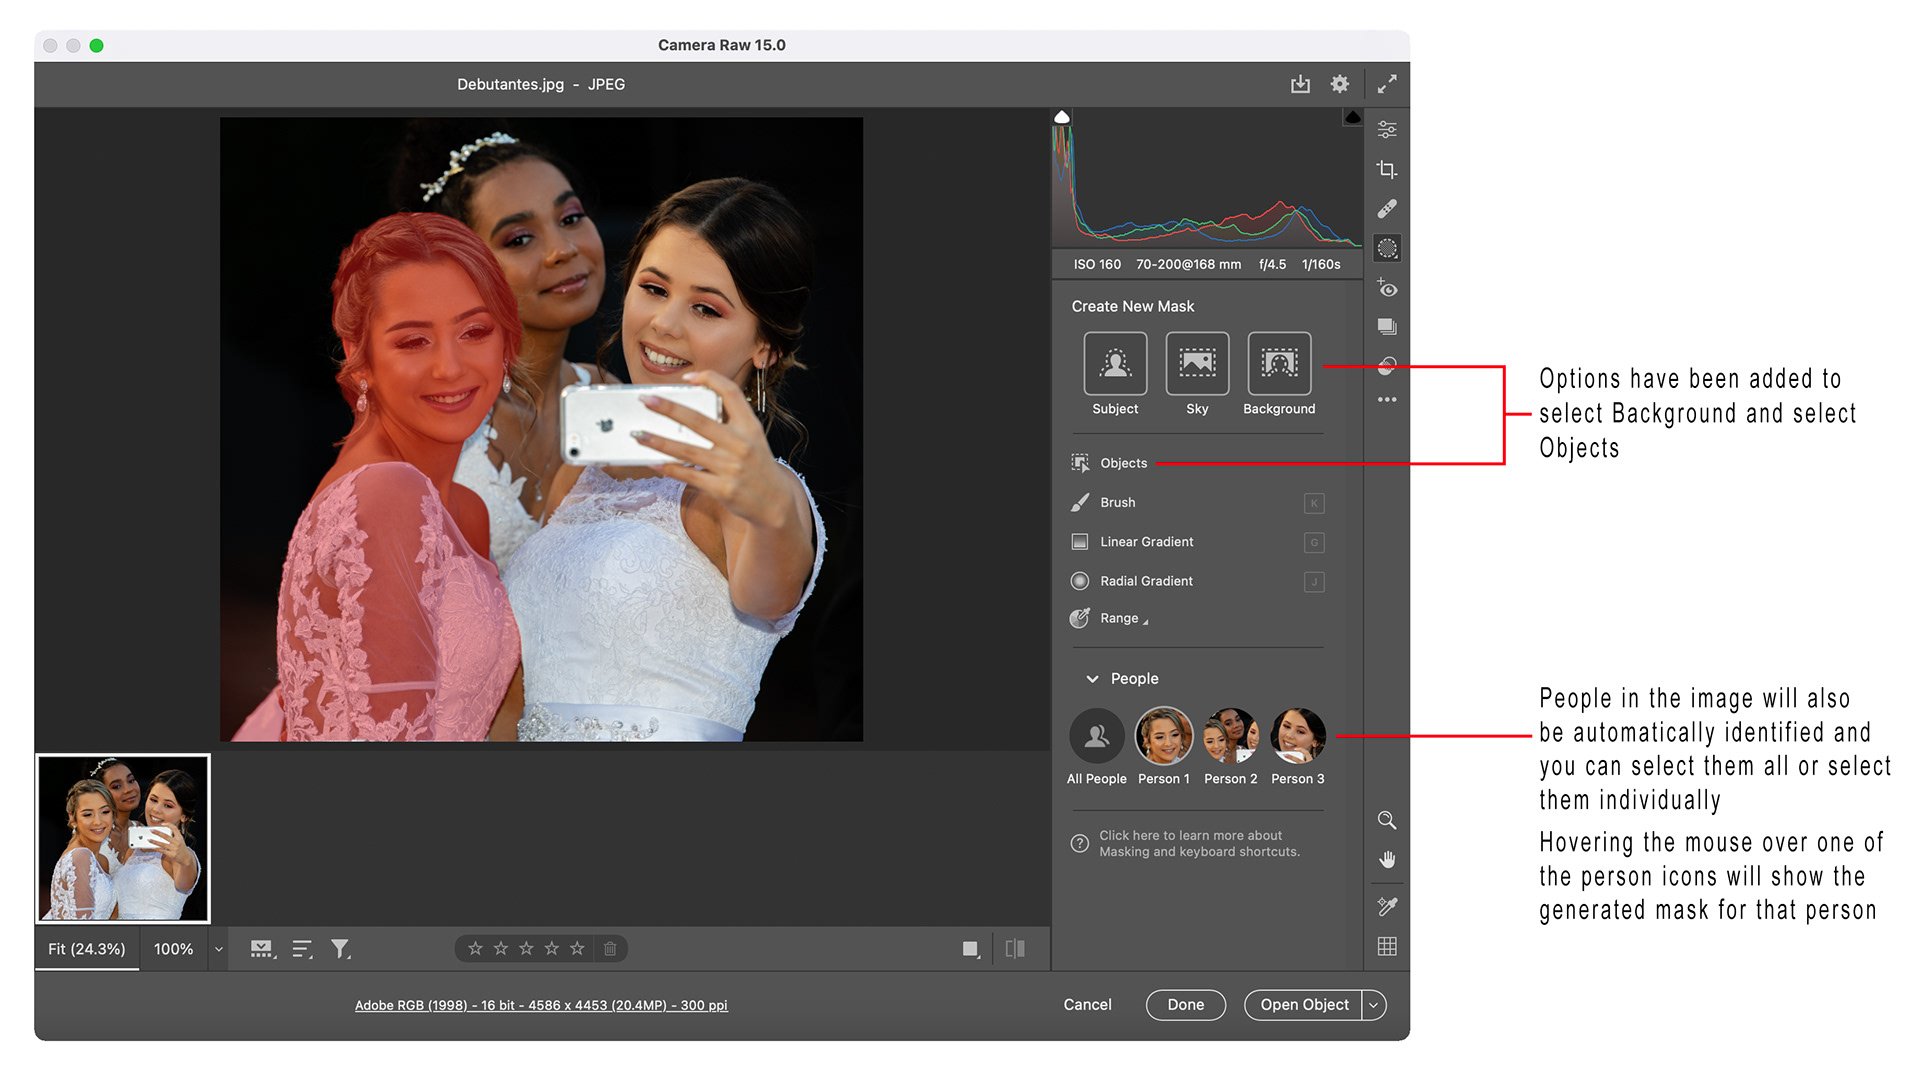
Fig 1 - New masking features
When you choose People, a secondary screen is displayed allowing you to add additional people (if you only chose one on the first screen) and also allowing you to decide if you want to select the entire person(s) or individually choose any or all of Face Skin, Body Skin, Eye Brows, Eye Sclera (whites), Iris and Pupil, Lips, Teeth and Hair. If you choose individual items you then can also choose whether you want individual masks for each item, or just one combined mask for all of them (see Figure 2).
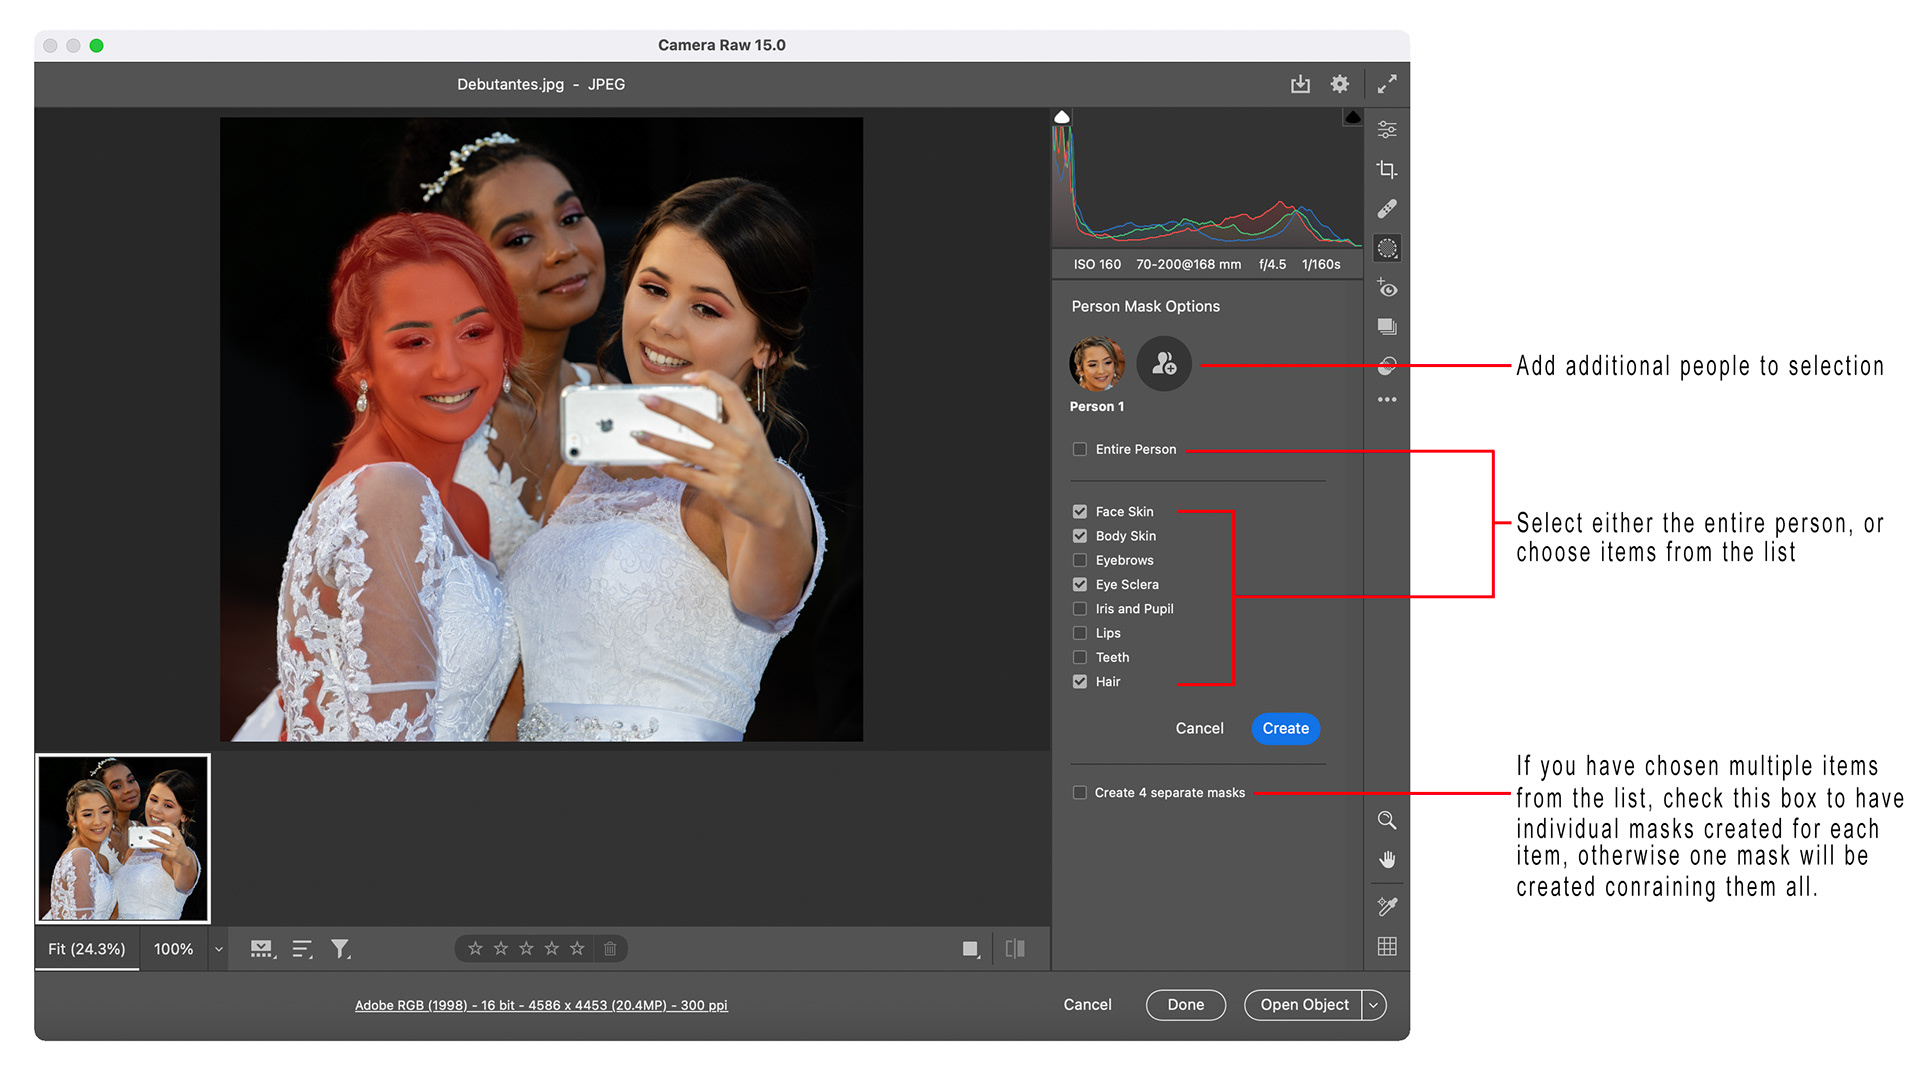
Fig 2 - People masking
Pressing the Create button will then create the masks (see Figure 3).
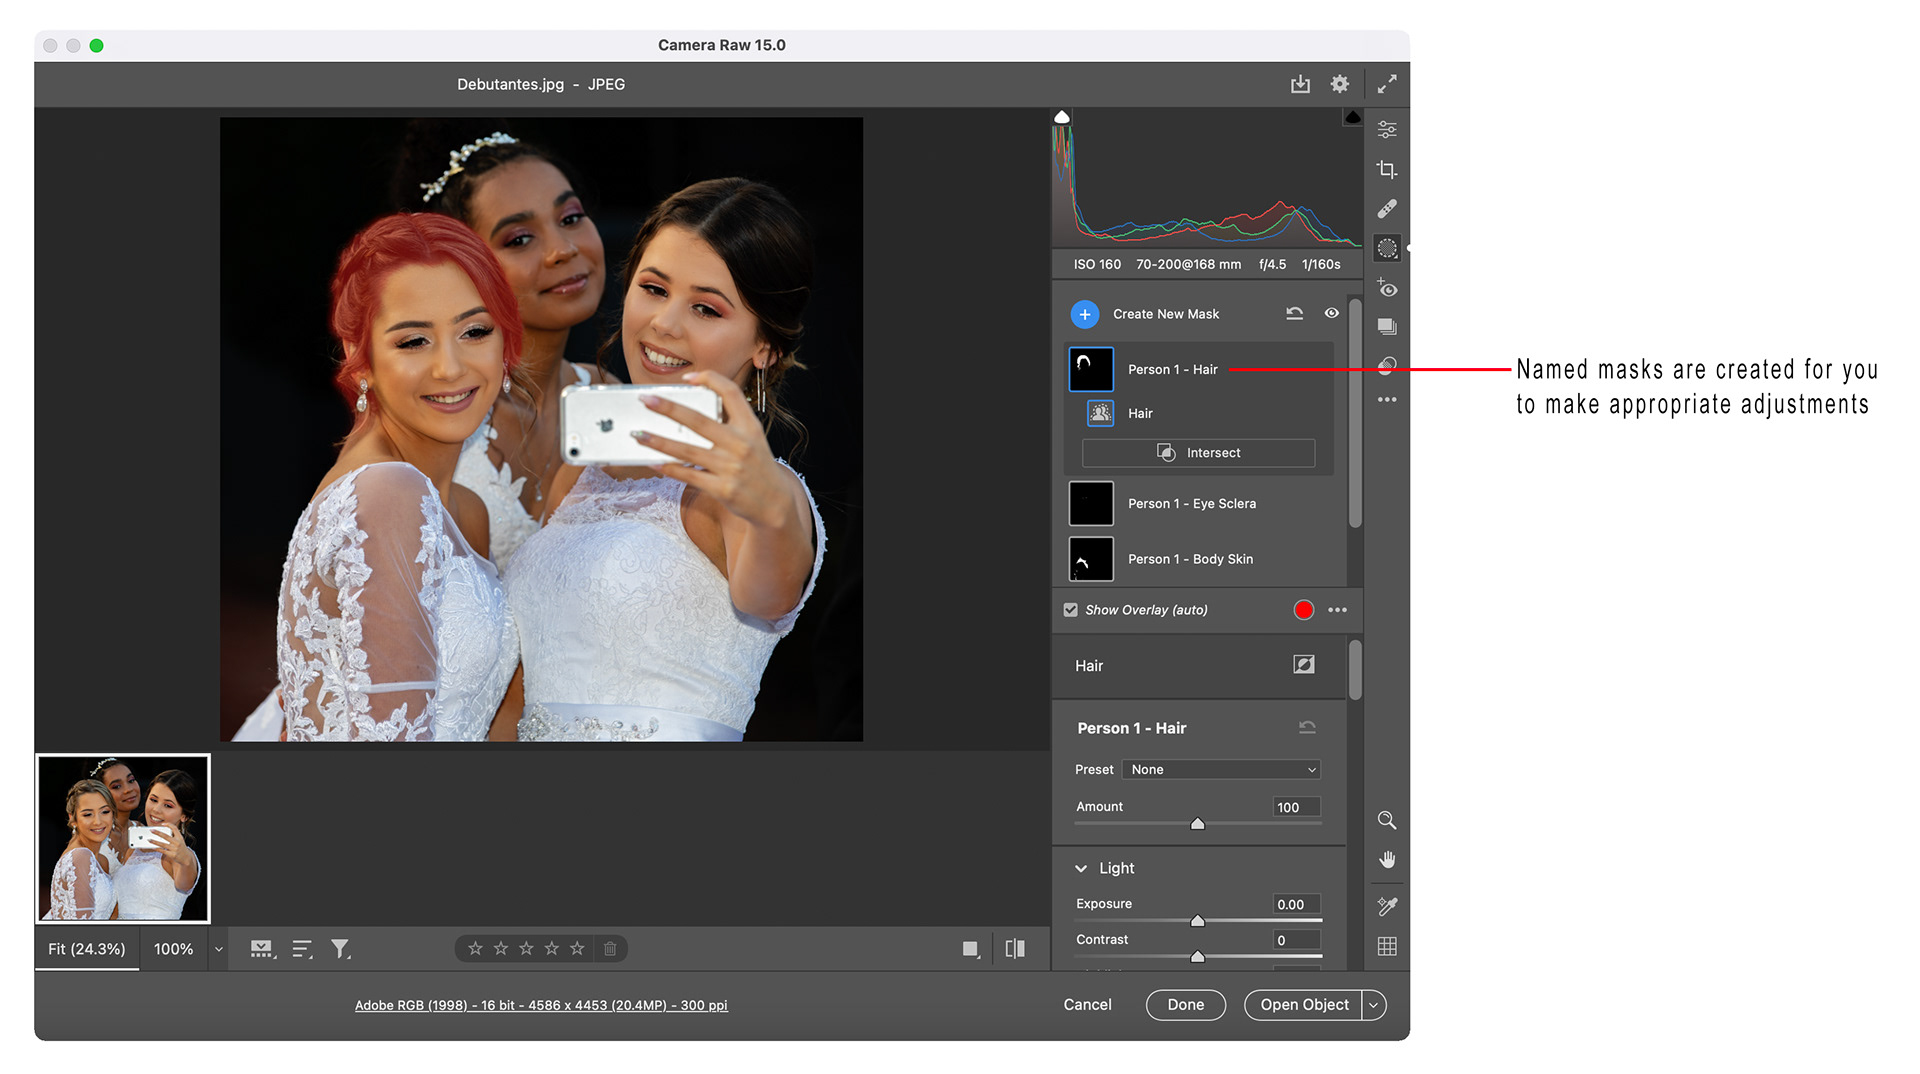
Fig 3 - People masks created
With any mask, you can use the Add and Subtract buttons to adjust the mask by adding to or subtracting from the mask with any of the tools (Subject, Sky, Background, Objects, People, Brush, Linear Gradient, Radial Gradient, Color Range or Luminance Range).
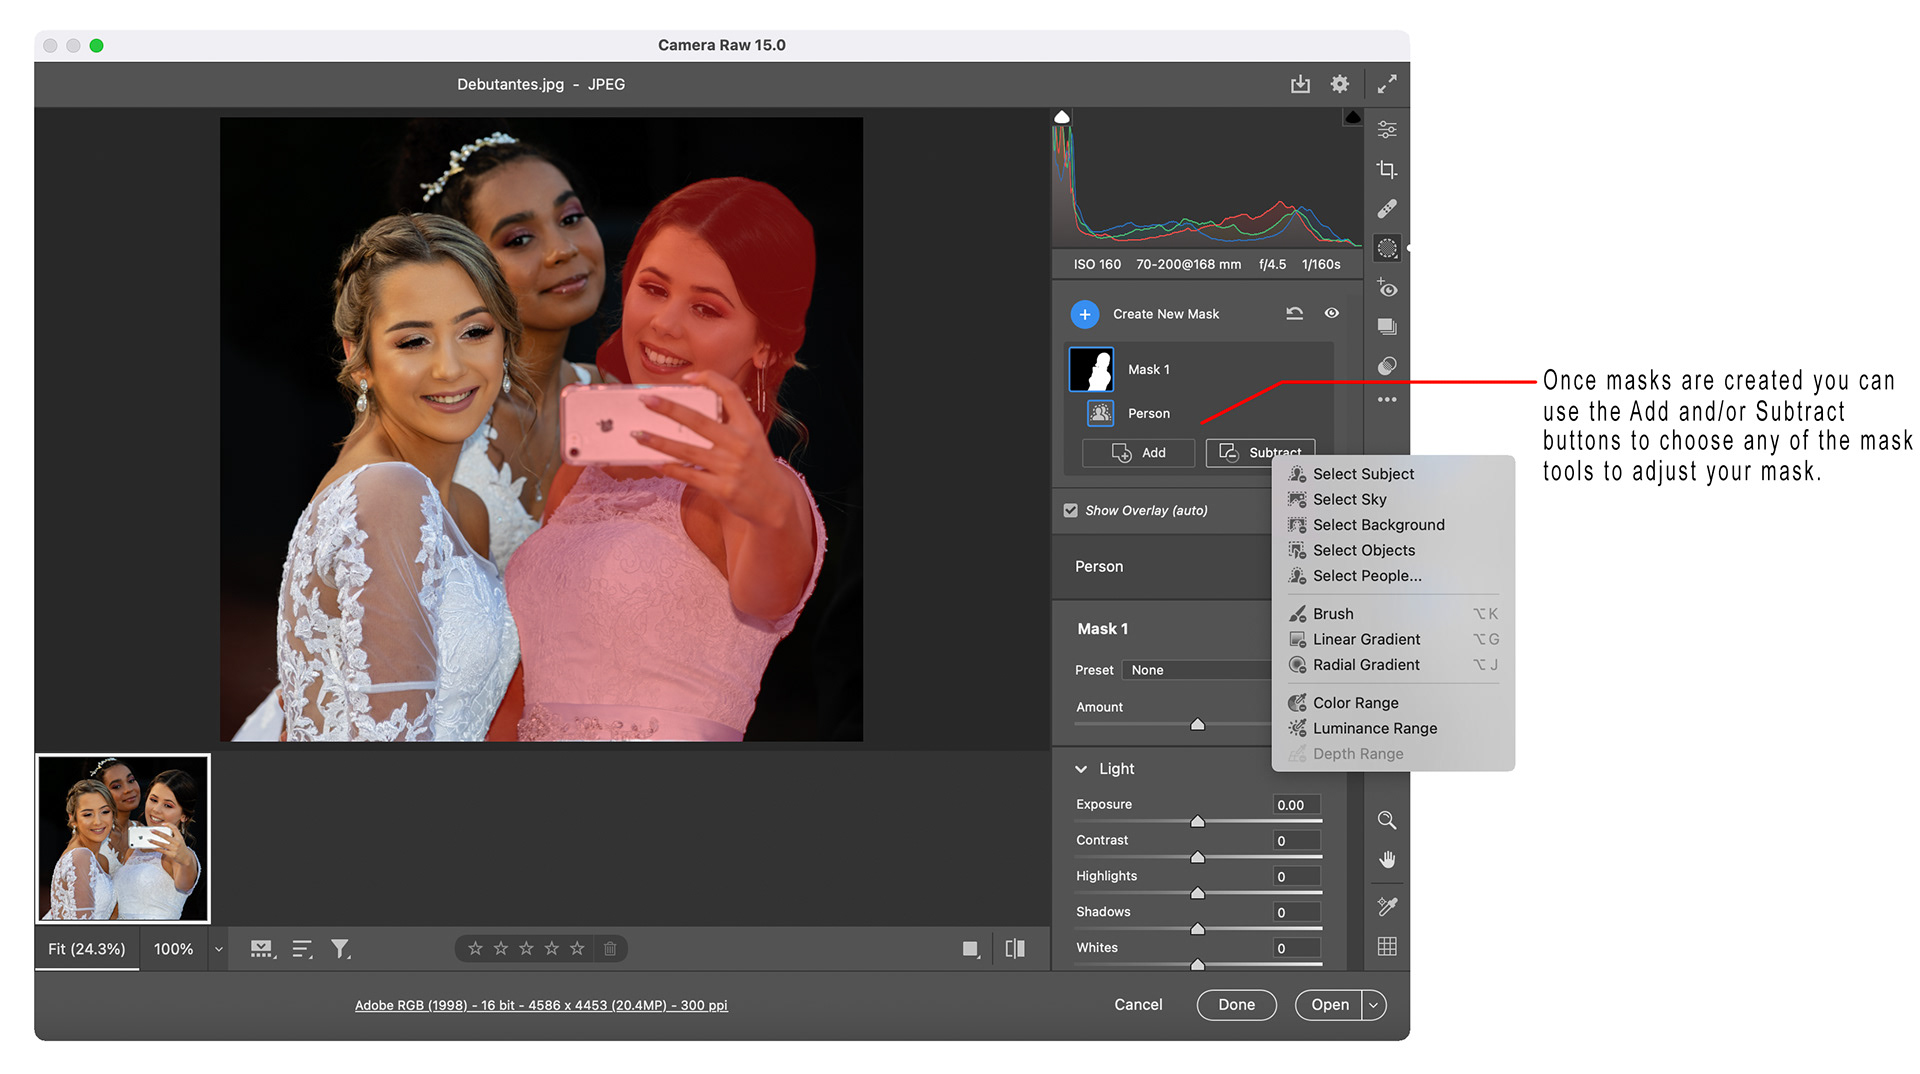
Fig 4 - Adjusting masks with the Add or Subtract buttons
Holding down the Shift key will cause the Add and Subtract buttons to be replaced with an Intersect button, allowing you to update the current mask by intersecting it with another mask created by any of the tools mentioned in the last paragraph. This can be very powerful when intersecting with the gradient and range tools.
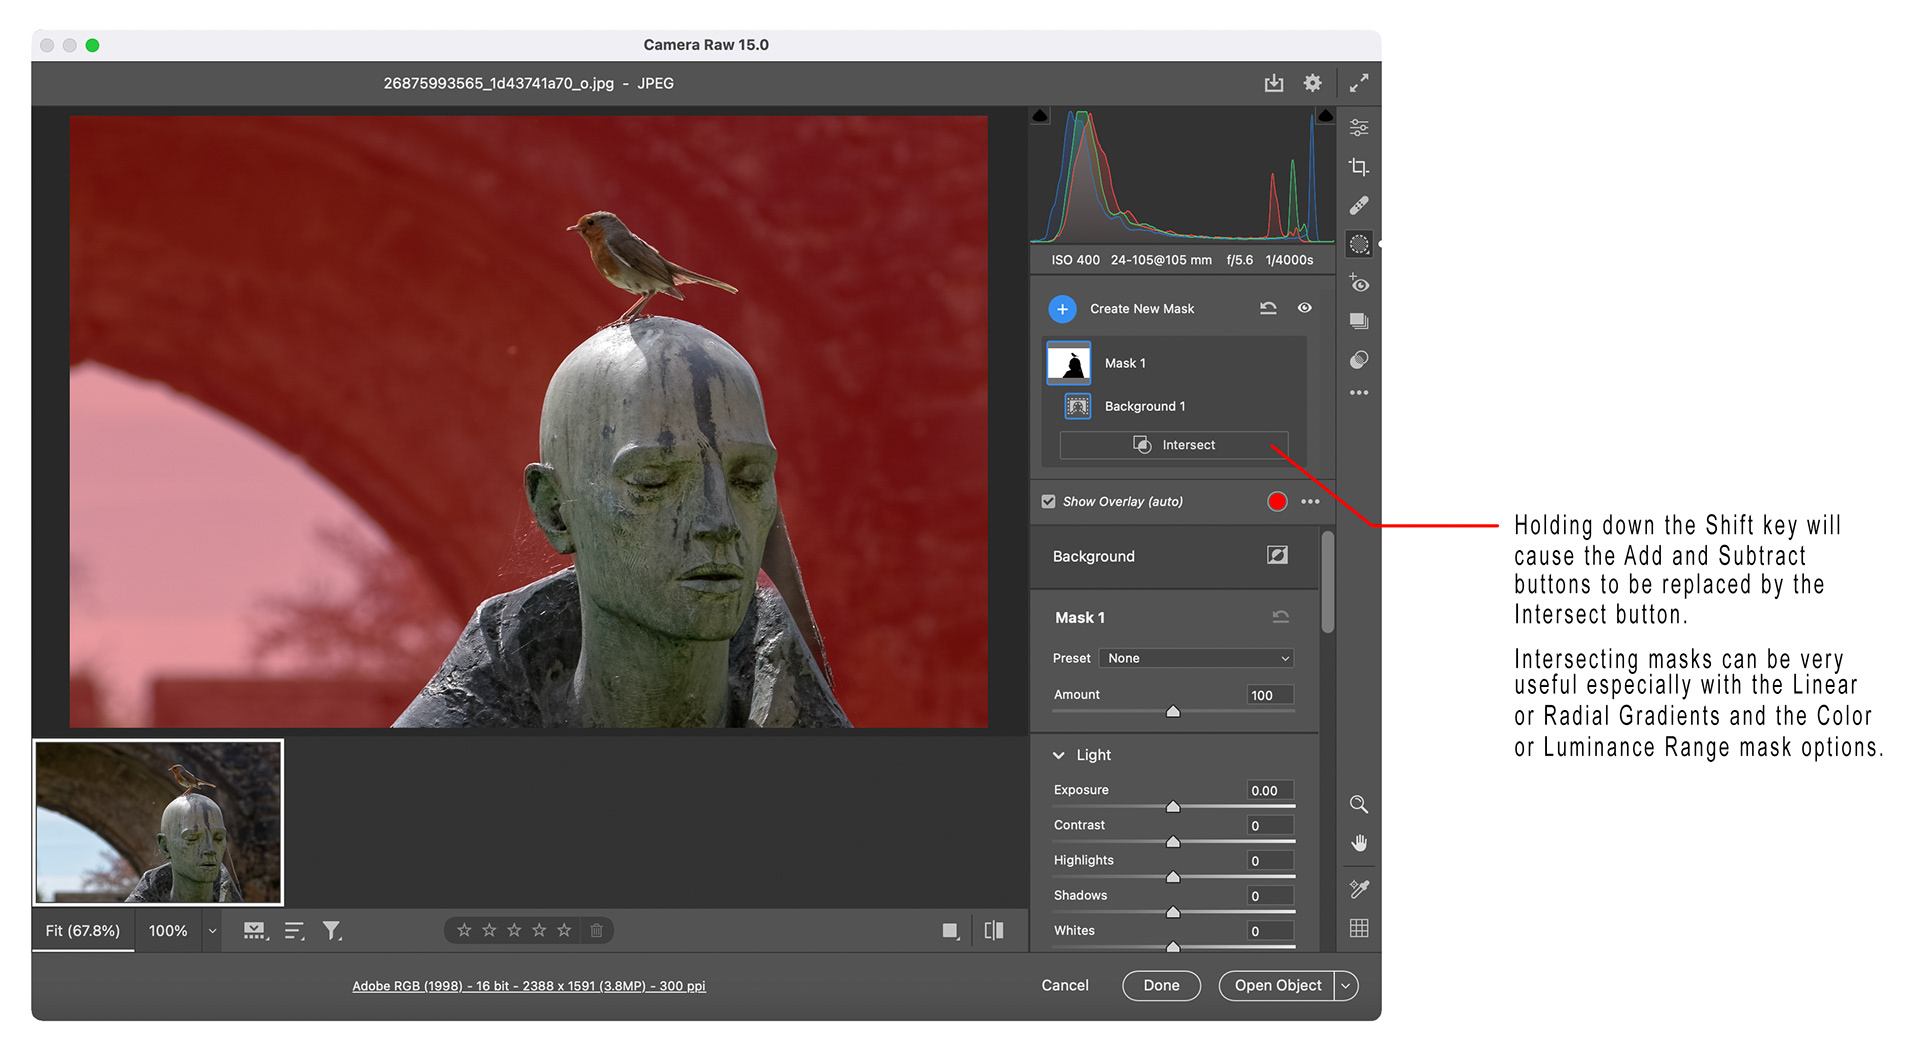
Fig 5 - Adjusting masks with Intersect
The new Select Background essentially is the same as an inverted Select Subject mask.
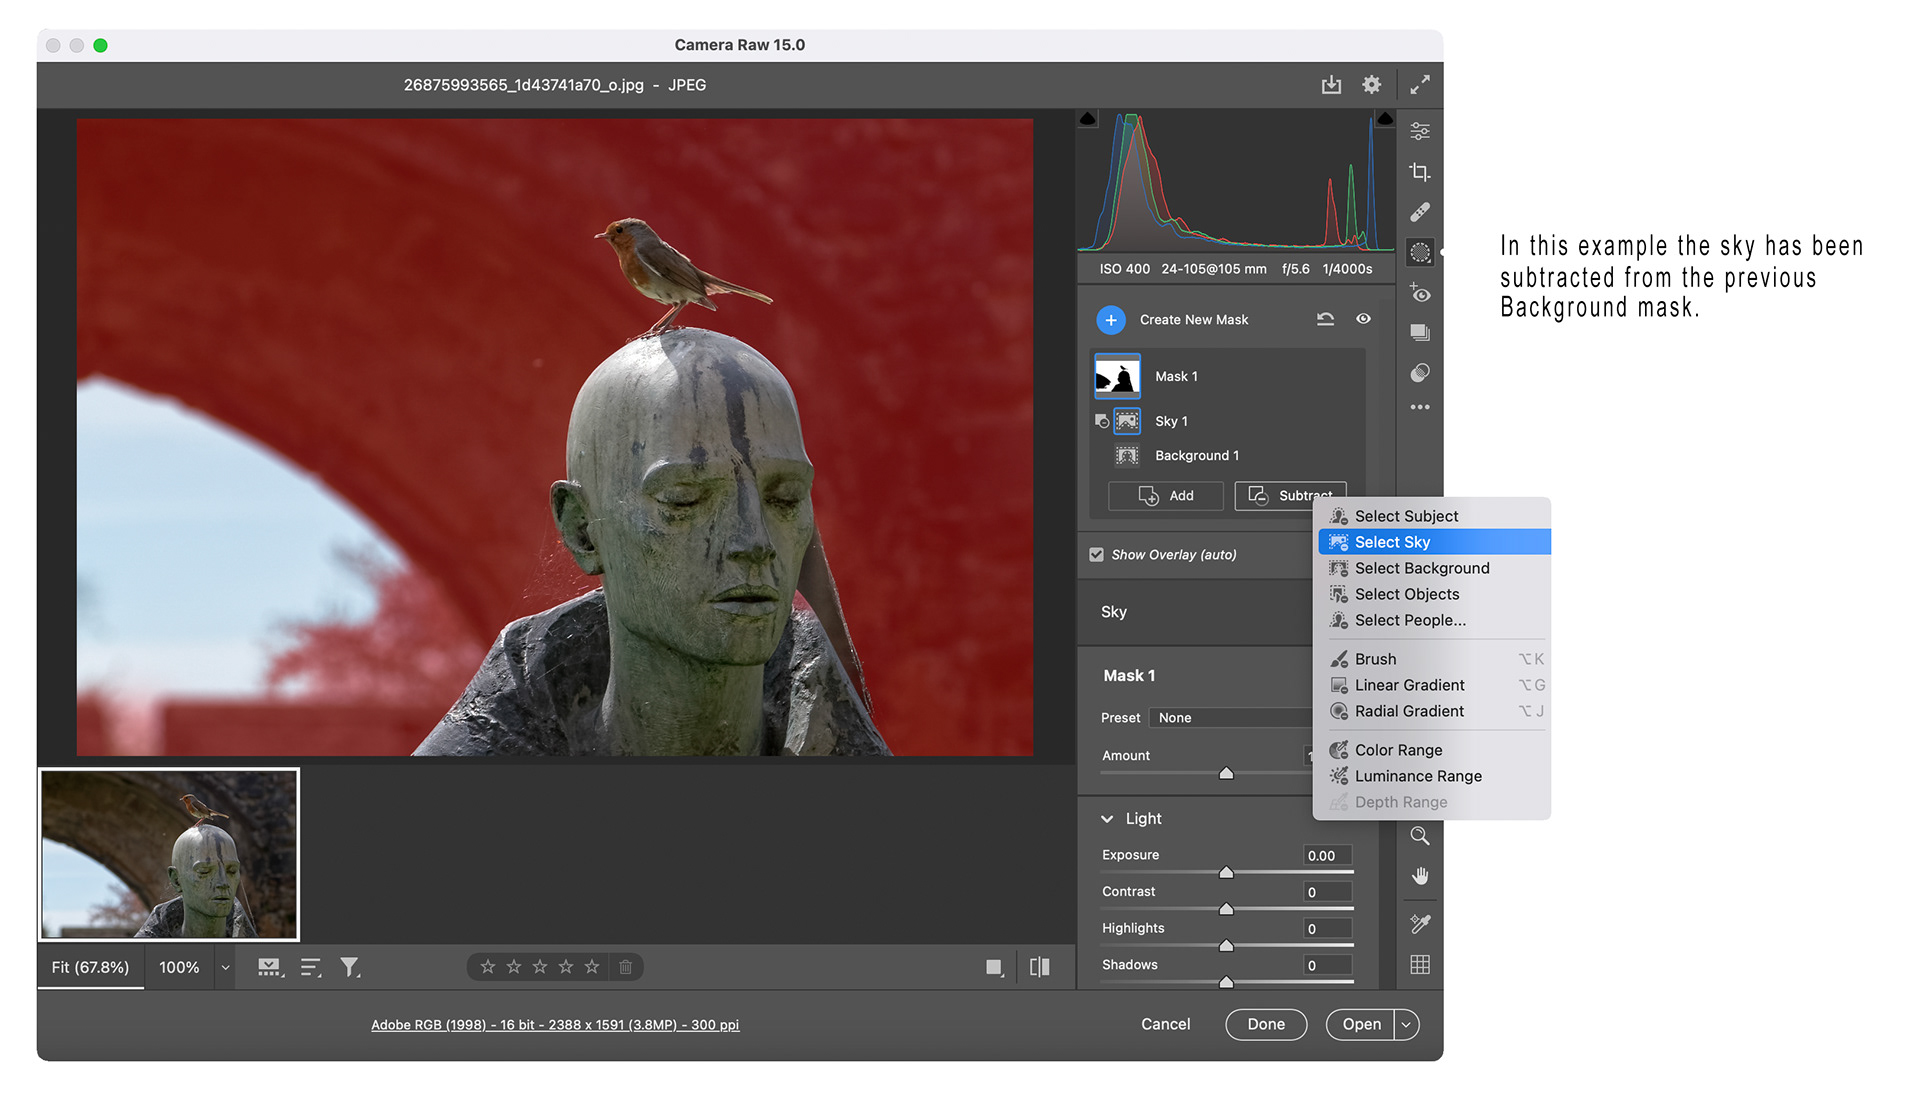
Fig 6 - Select Background
The new Select Objects allows you to use either a brush or a rectangular marquee to roughly select an object in your image and then Adobe’s AI will accurately select the object for you.
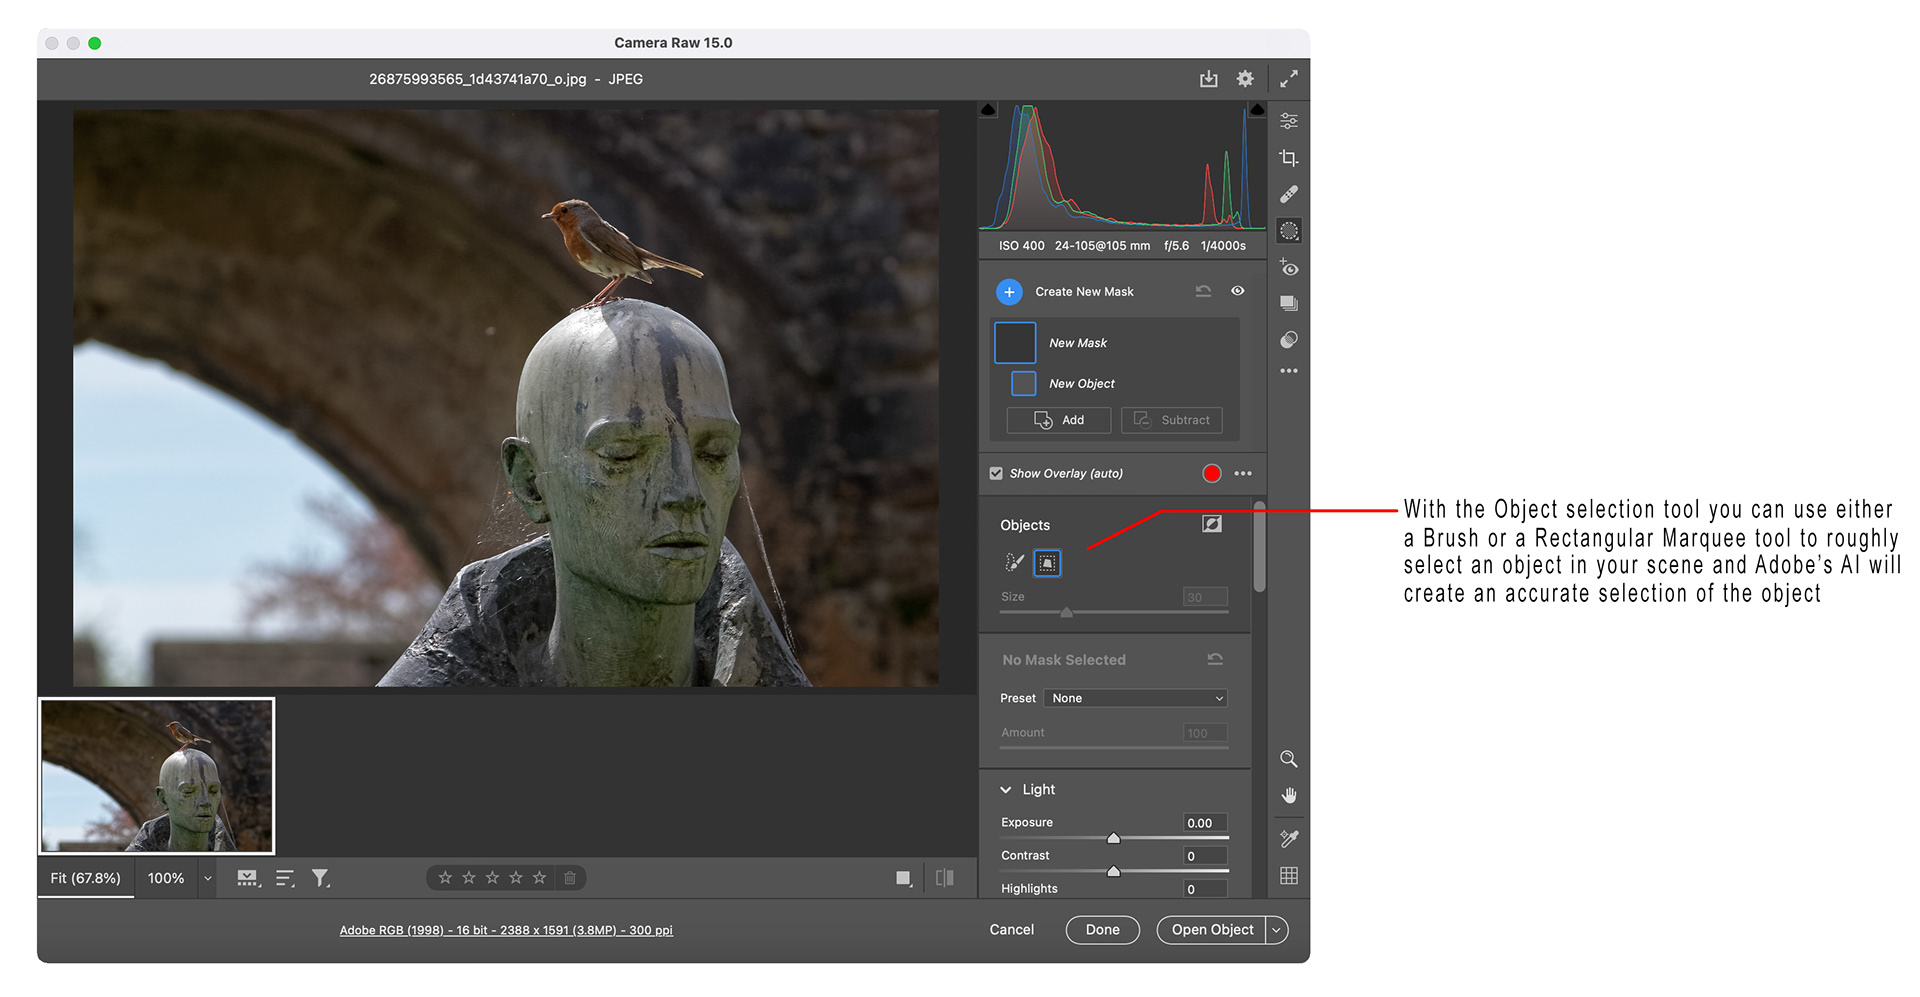
Fig 7 - Select Objects
Adobe have also added the Curve panel into the possible adjustments that can be made for any of your masked areas. This provides another powerful tool for image adjustments.
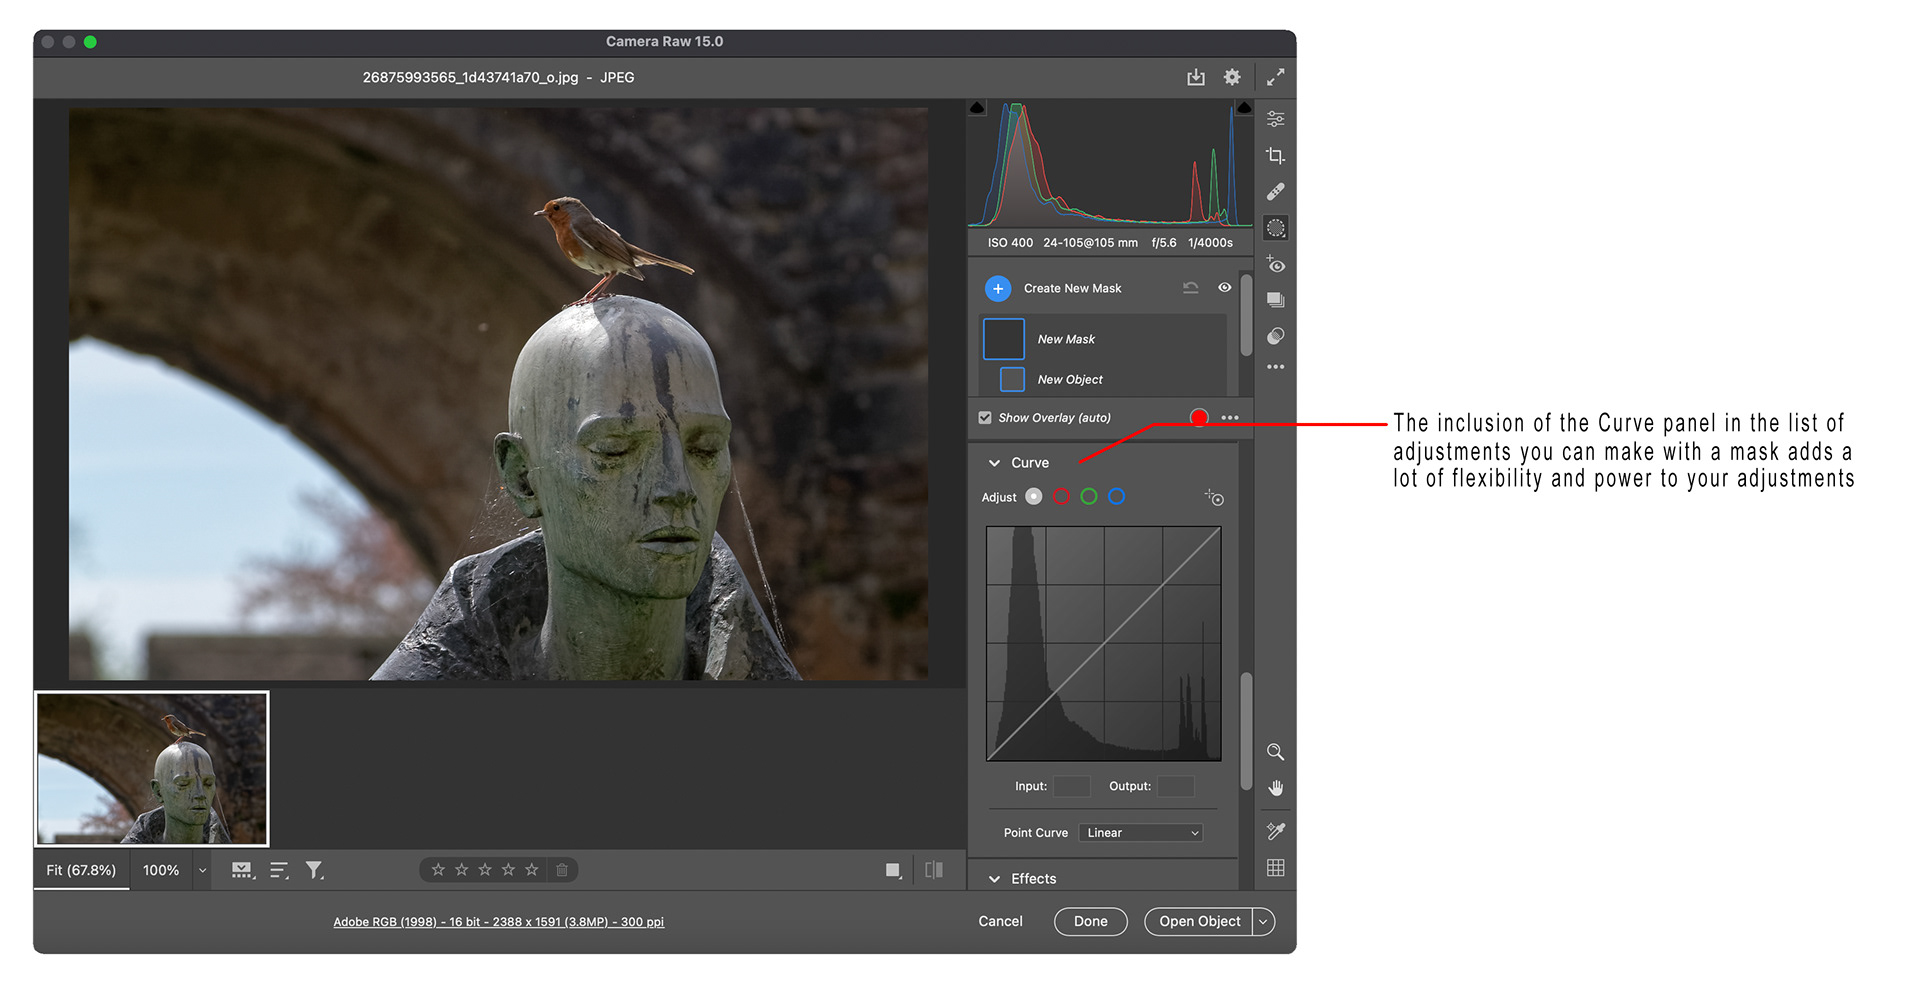
Fig 8 - Curve panel
Clicking the ellipsis (three dots) to the right of any mask will display a drop-down menu with options to rename, invert, duplicate and invert, intersect, duplicate, hide, delete or reset the adjustments for the mask.
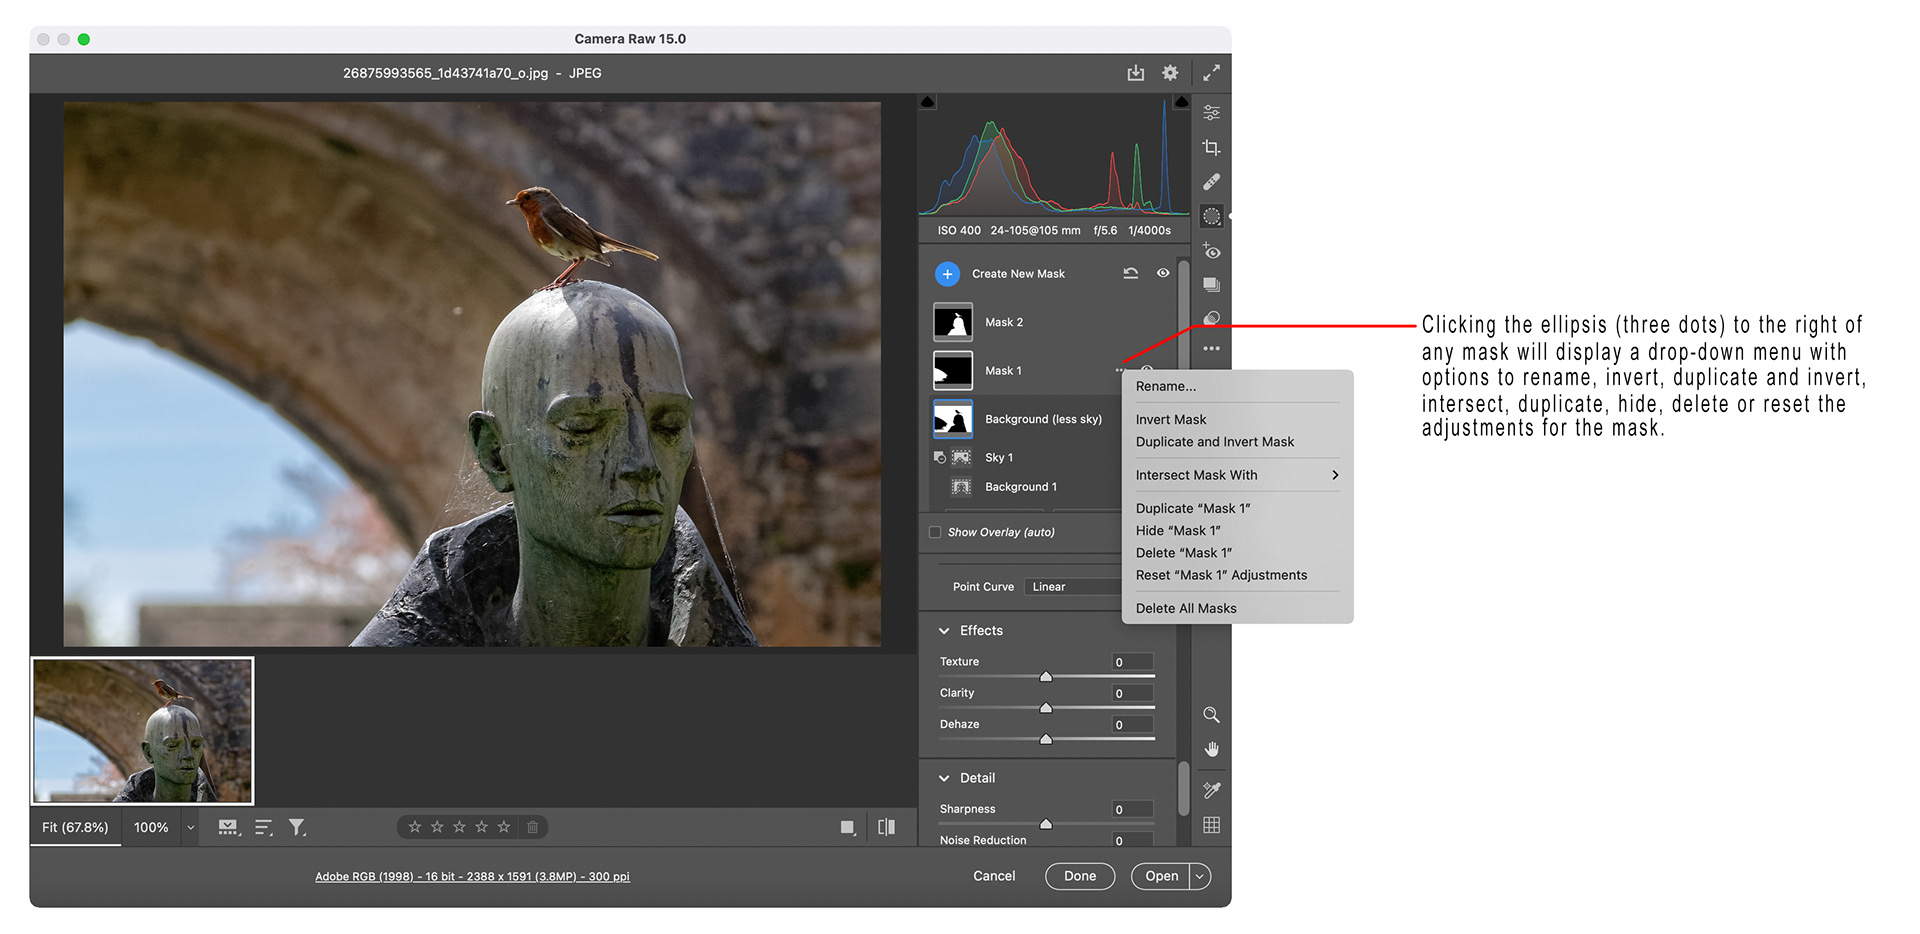
Fig 9 - Mask drop-down menu
Clicking the ellipsis at the bottom of the right navigator (see Figure 10) reveals a drop-down menu that includes an option to create a preset. These presets can include your masks.
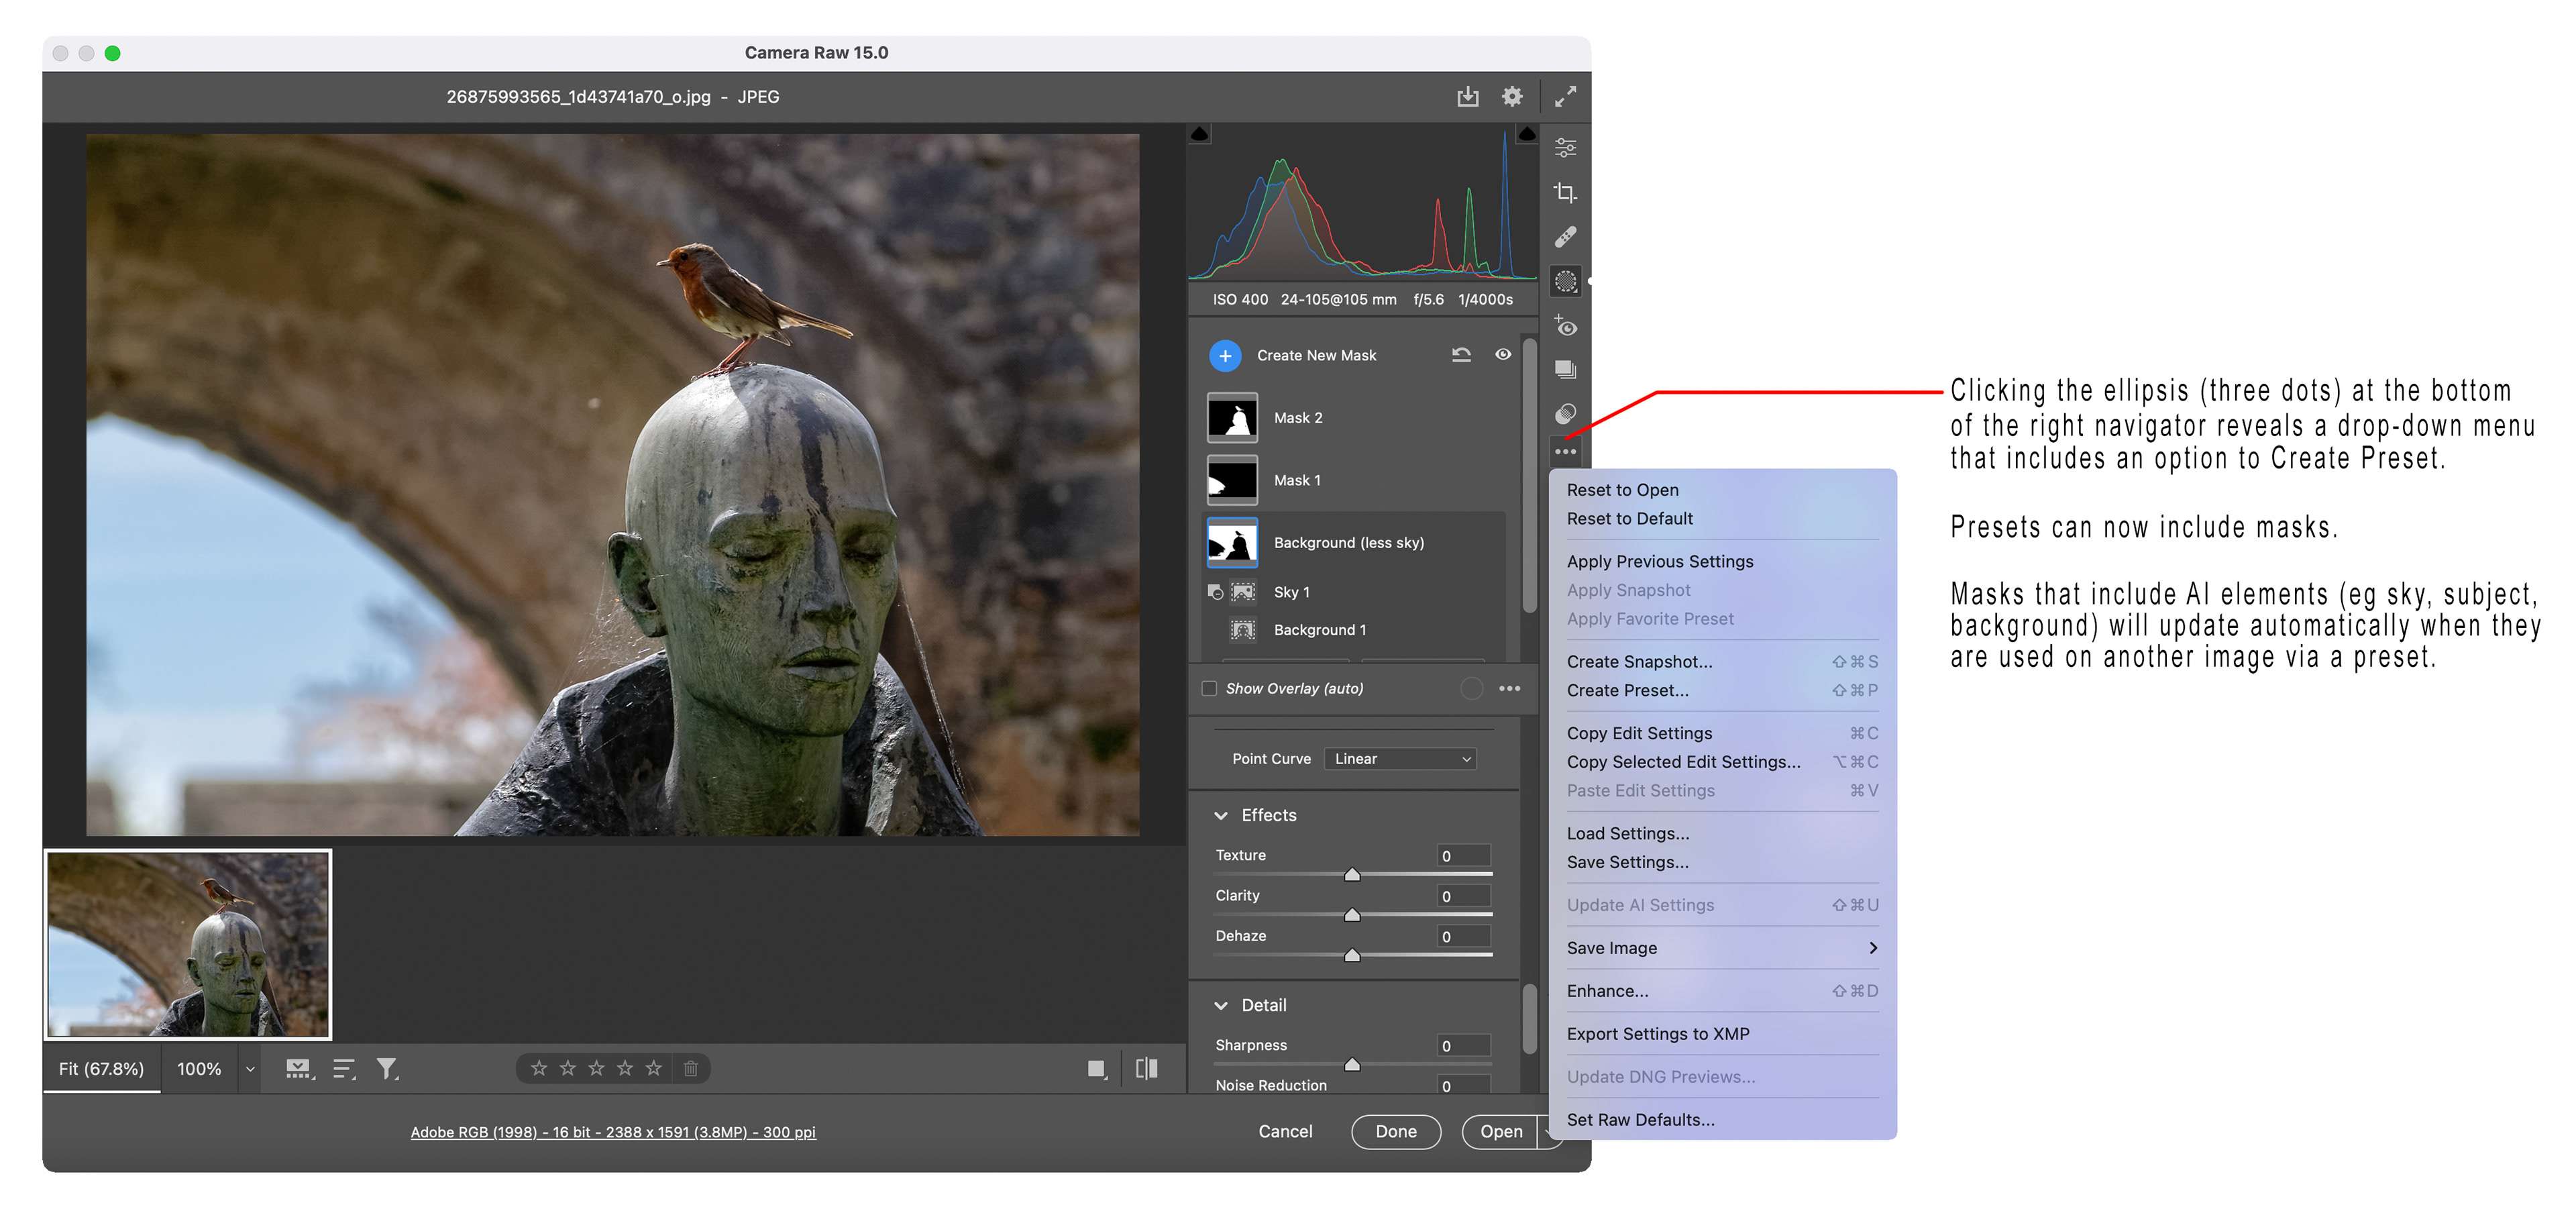
Fig 10 - Masks can now be included in presets
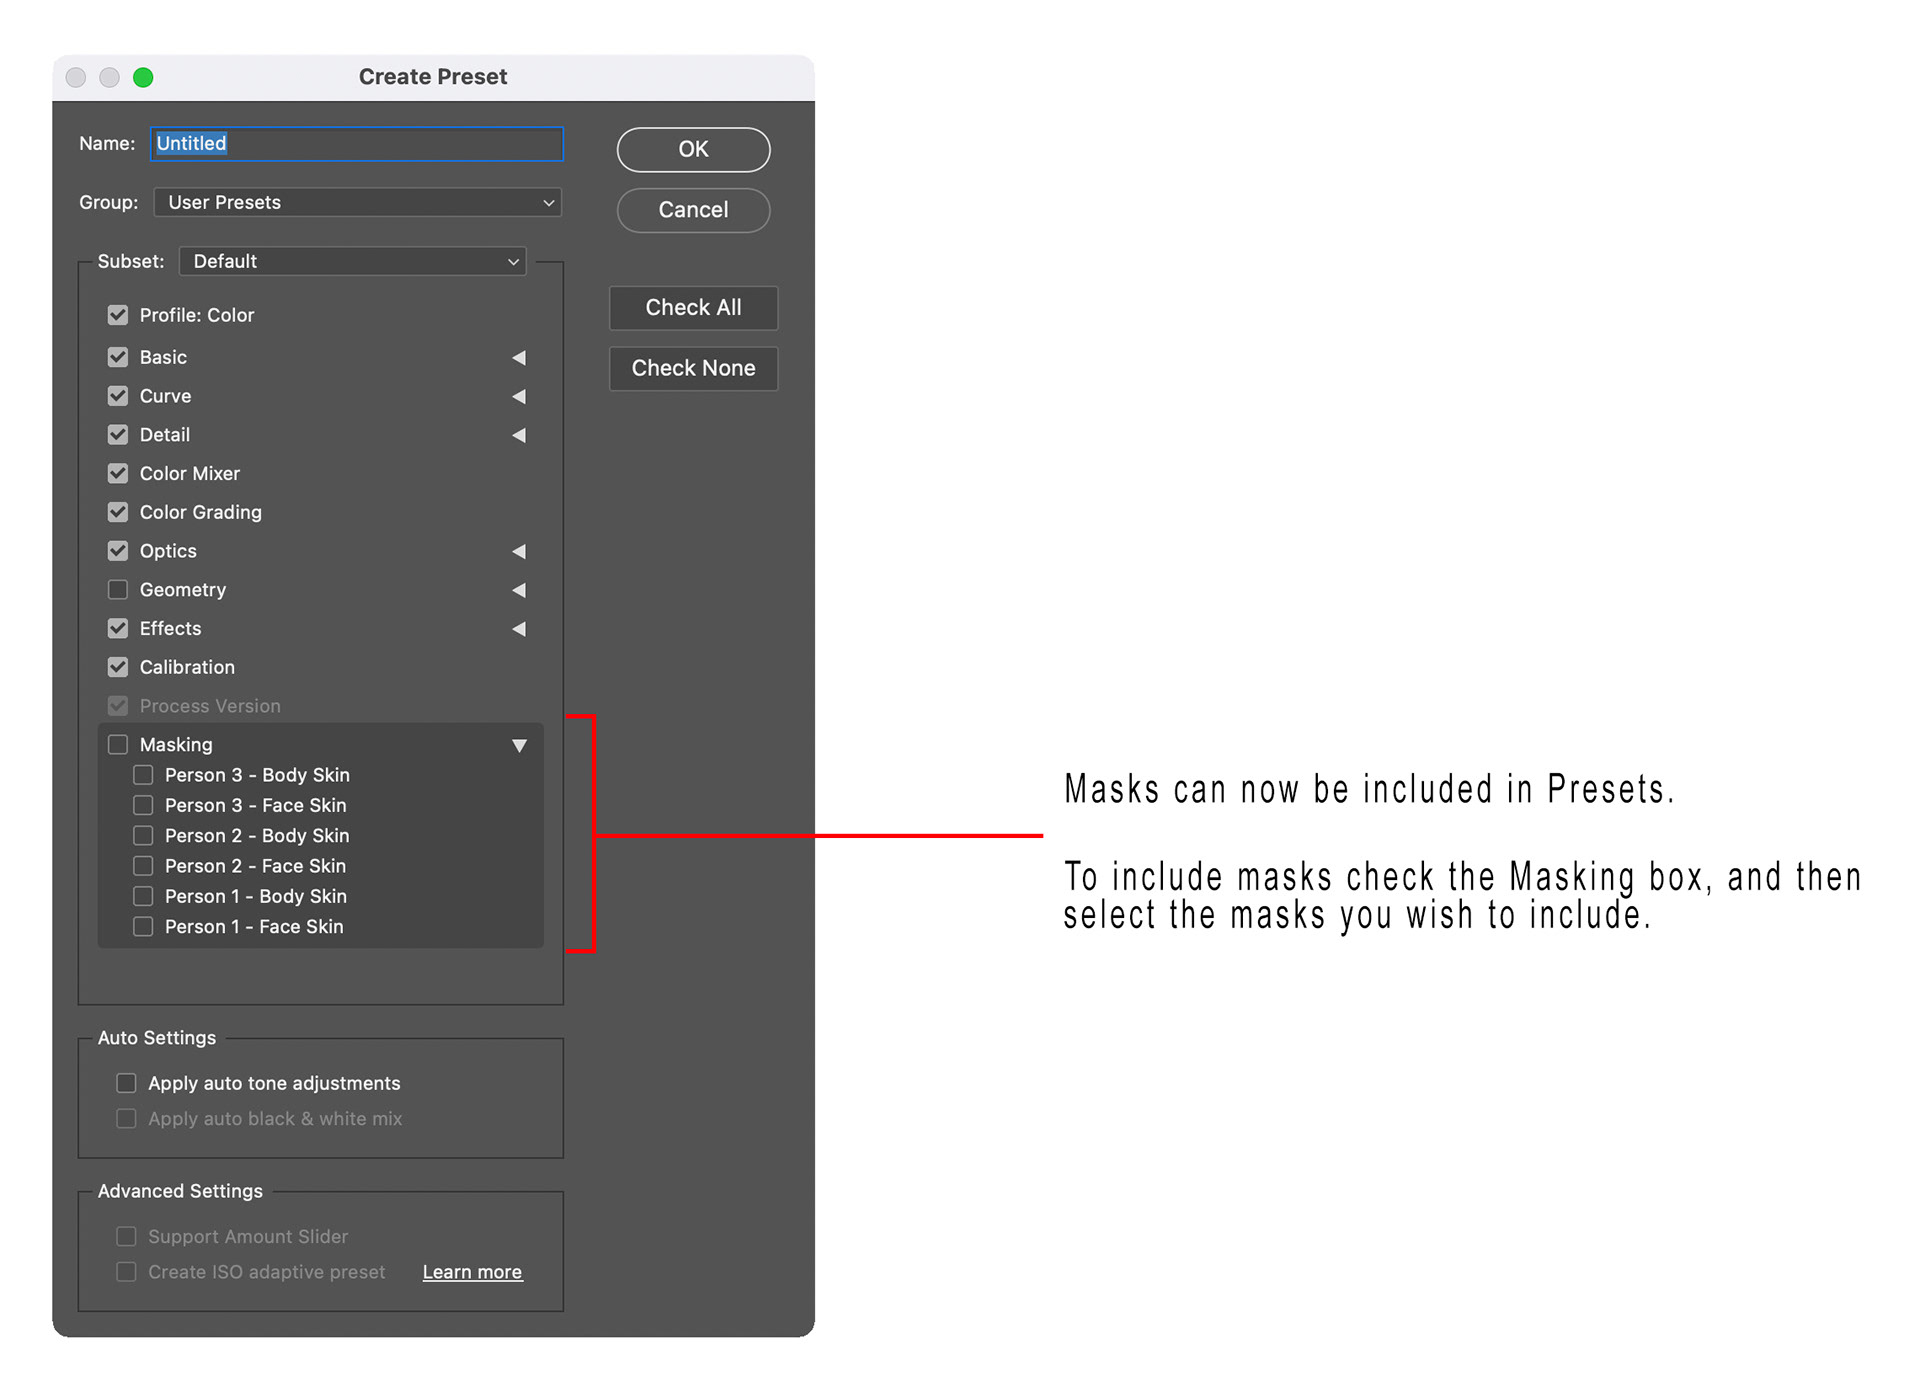
To include any masks with the preset click the Masking check box on the Create Preset dialog (see Figure 11) and then select the masks you wish to include.
Note that any masks that include any AI features (Sky, Background, Subject etc) will update automatically to reflect the different sky or background etc when they are used on a new image.
The masking in Adobe Camera Raw and Lightroom are now incredibly powerful. Over the last two major upgrades my usage of masking in ACR (as opposed to doing it in Photoshop) has gone from almost never to almost every image.
I strongly encourage you to look at the masking features and working out how to take advantage of them for your images.
This article was first published in the December 2022 issue of Artists Down Under magazine.