For this month’s article, here’s five simple Photoshop tips that you may not be aware of.
1. Cycle through all open documents
When you have multiple documents open in Photoshop you can use the [Ctrl]+[Tab] shortcut key to move between them (cycle through from one to the next). To do so in the reverse order you can use [Shift]+[Ctrl]+[Tab].
Please note that this is the [Ctrl] key for both Windows and Mac.
2. Temporarily change tools
When using a tool in Photoshop, and you want to quickly use another one and return back to the original tool, many of us will use the slow way of clicking the tools in the toolbar to switch tools and switch back again. There is a quicker way.
Just hold down the shortcut (for the new tool you wish to change to) and use the mouse to use the new tool (while still holding the shortcut key), then when you release the shortcut key you will be returned to the original tool.
For example, let’s assume you are using the Brush tool, and want to temporarily use the Lasso tool to select an area, then want to keep brushing. Just hold down the L key (the Lasso shortcut) while selecting the required area with the mouse, then when you release the L key you will return to using the Brush tool.
3. Rotating the canvas
Sometimes when you are doing certain things like drawing, or painting brush strokes it makes it much easier to rotate the canvas (or view) you’re working on. This is different to rotating the image using the Transform tool, it is just a temporary rotation of the canvas, like turning a sheet of paper you’re drawing on.
Hold down the R key and drag the mouse clockwise or counter-clockwise to rotate the canvas. A compass indicator will appear in the centre of the image window while doing this, and the angle of rotation is shown in the Options bar (see Figure 1).
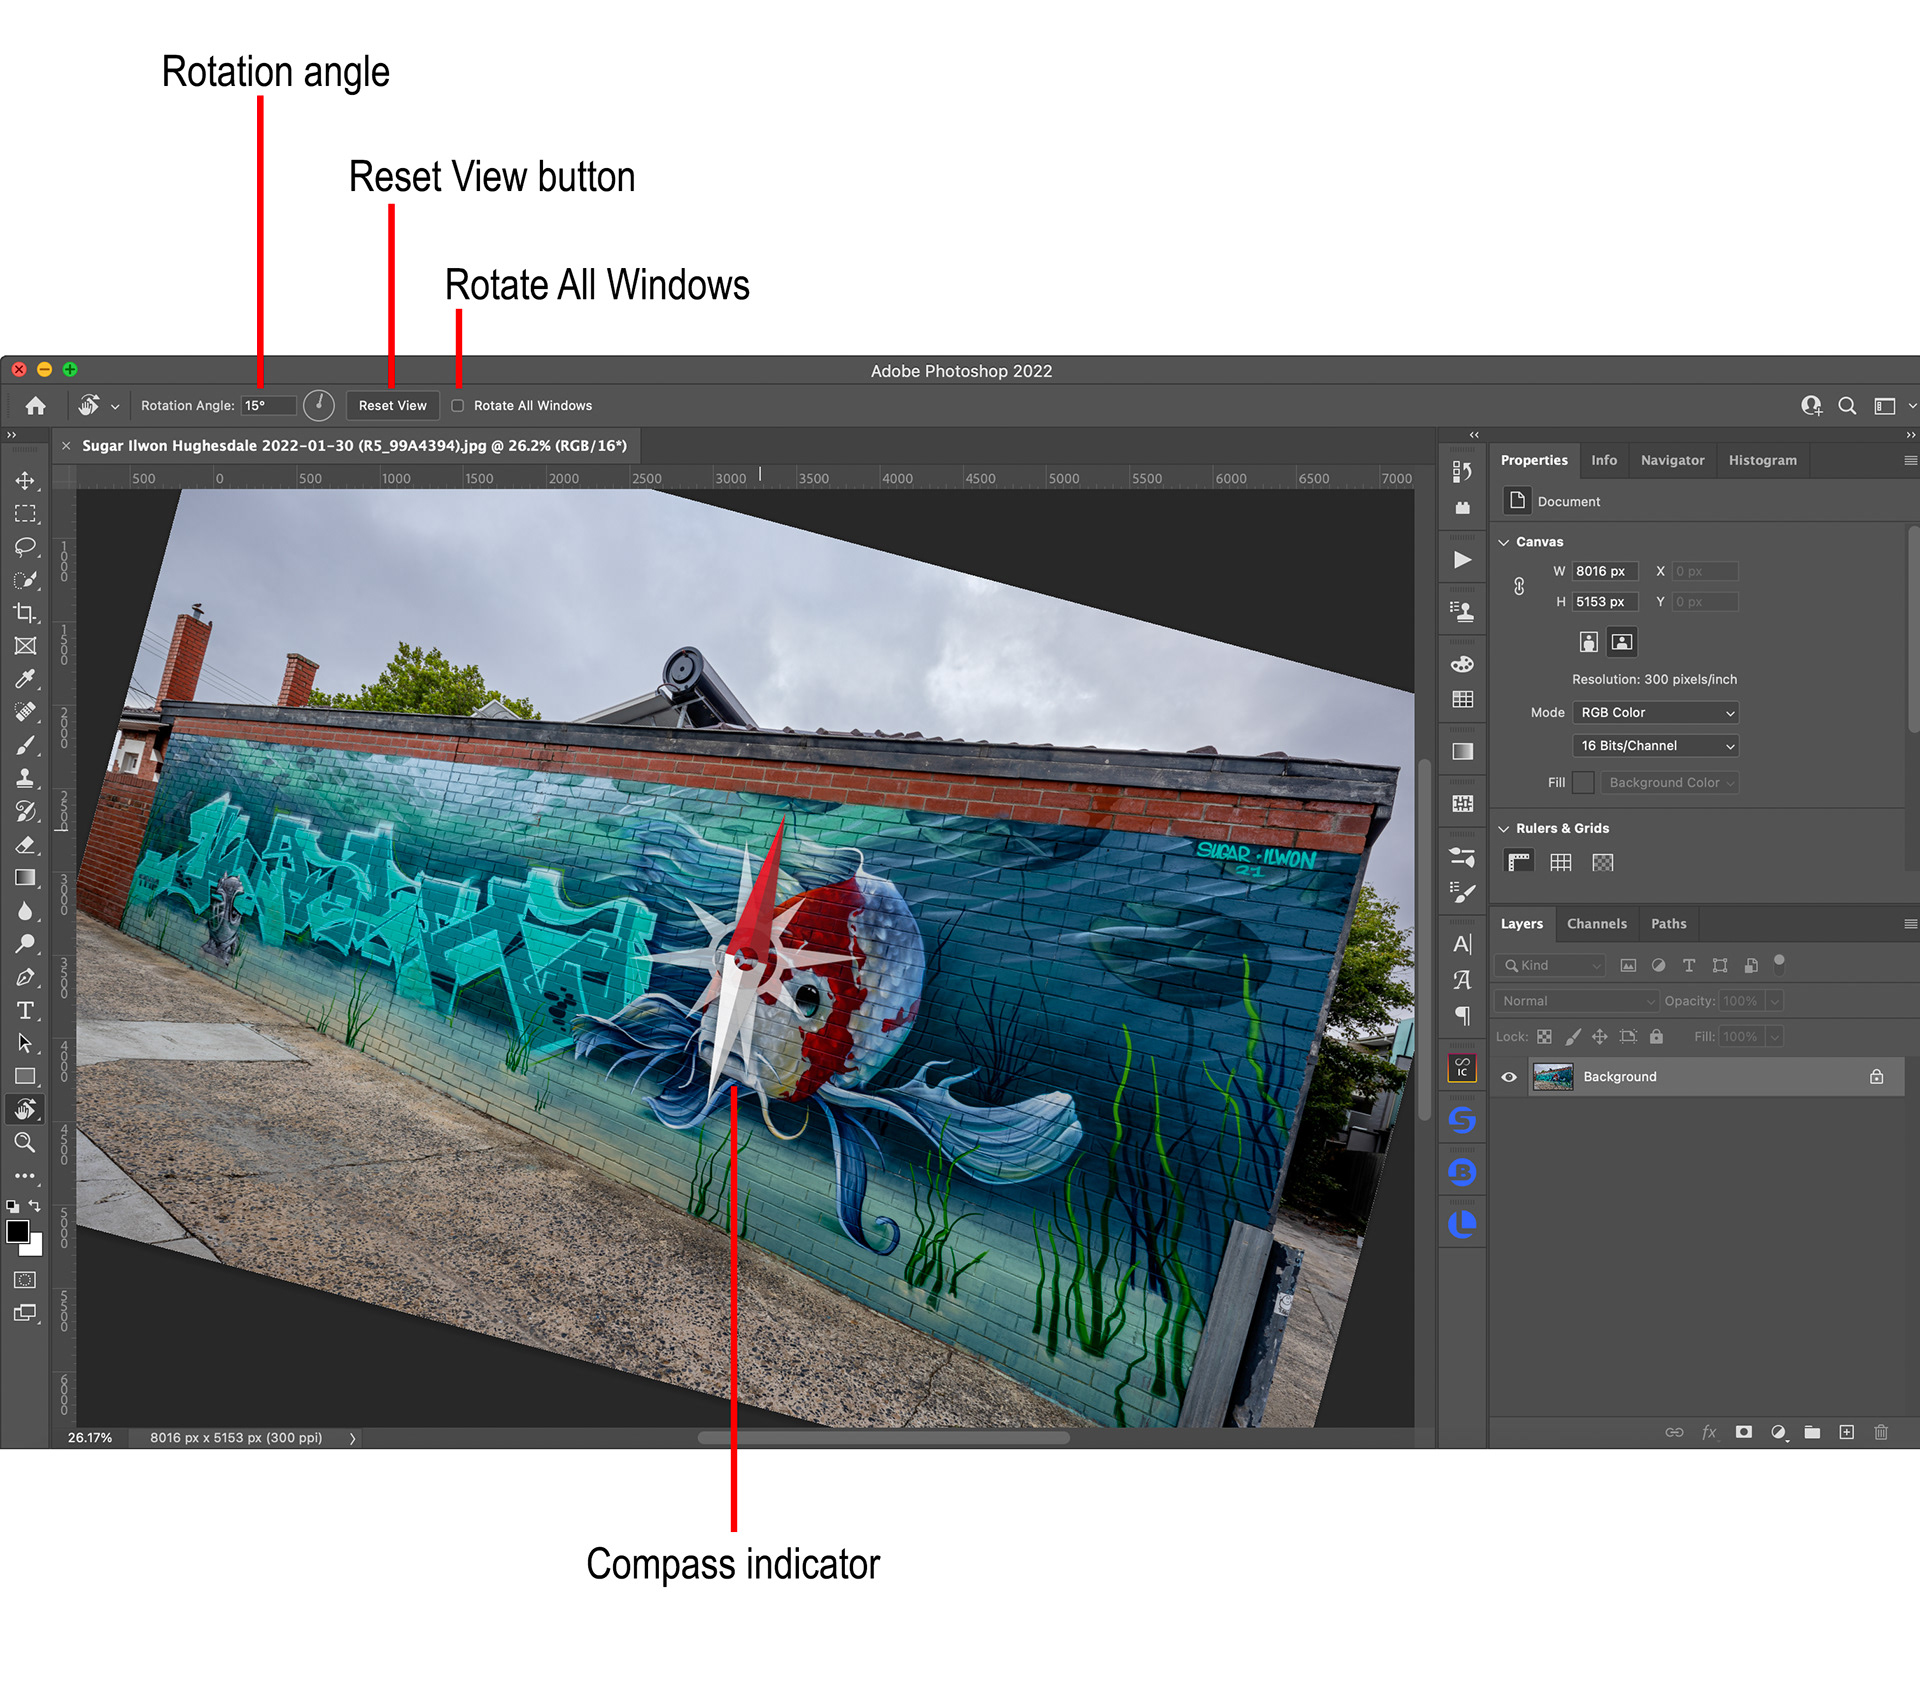
Fig 1 - Using the Rotate Tool
When you release the R key, the canvas will remain in its new position until you rotate it again.
You can quickly return the canvas to its original position by clicking the Reset View button that is shown in the Options bar when holding down the R key.
If you have multiple documents open and wish to rotate them all the same, you can check the Rotate All Windows check box in the Options bar.
4. Slow down or speed up the scrubby sliders
We are all familiar with the many “scrubby sliders” in Photoshop. These are the numeric sliders where you can hover the mouse over the label next to the numeric value and drag your mouse left or right to decrease or increase the value.
One example is the Opacity slider in the Layer panel. You can click the drop-down, then select the slider and drag it, or you can hover your mouse over the Opacity label and drag left and right.
You’ll notice the mouse pointer changes to a pointing hand with left and right arrows to show you that you’re in scrubby slider mode (see Figure 2).
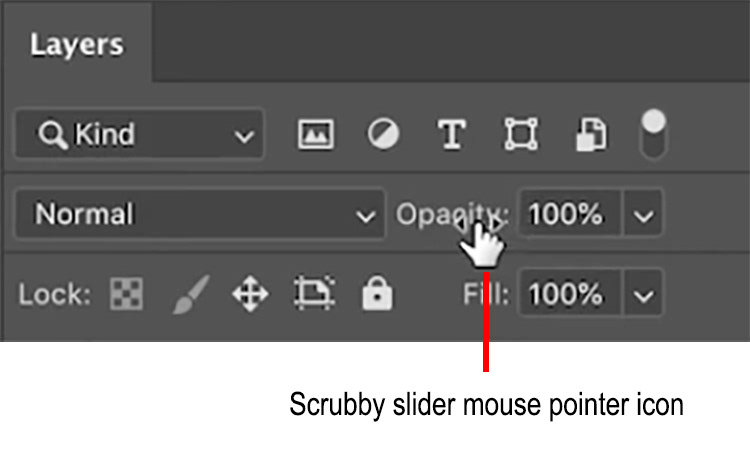
Fig 2 - Scrubby slider for Layer Opacity
There are two modifier keys that you can hold down to speed up or slow down the change in the numeric values.
Hold down [Shift] while dragging to speed up the change (eg if you wanted to get the opacity right back up to 100% quickly).
Hold down [Alt/Option] while dragging to slow down the change (for example if you want more precision to get the slider to a specific numeric value).
5. Birds-eye view
If you are zoomed in working on a document and want to move to a different part of your canvas, birds-eye view is a good way to do this.
Hold down the H key while holding down the left mouse button and the birds-eye view will appear showing a highlight rectangle (see Figure 3), while still holding the H key move the mouse to move the rectangle to the part of the image you wish to traverse to, when you release the mouse button the image will be zoomed in to the region of the image you moved the rectangle to. It’s a nifty way to move around a “zoomed in” image.
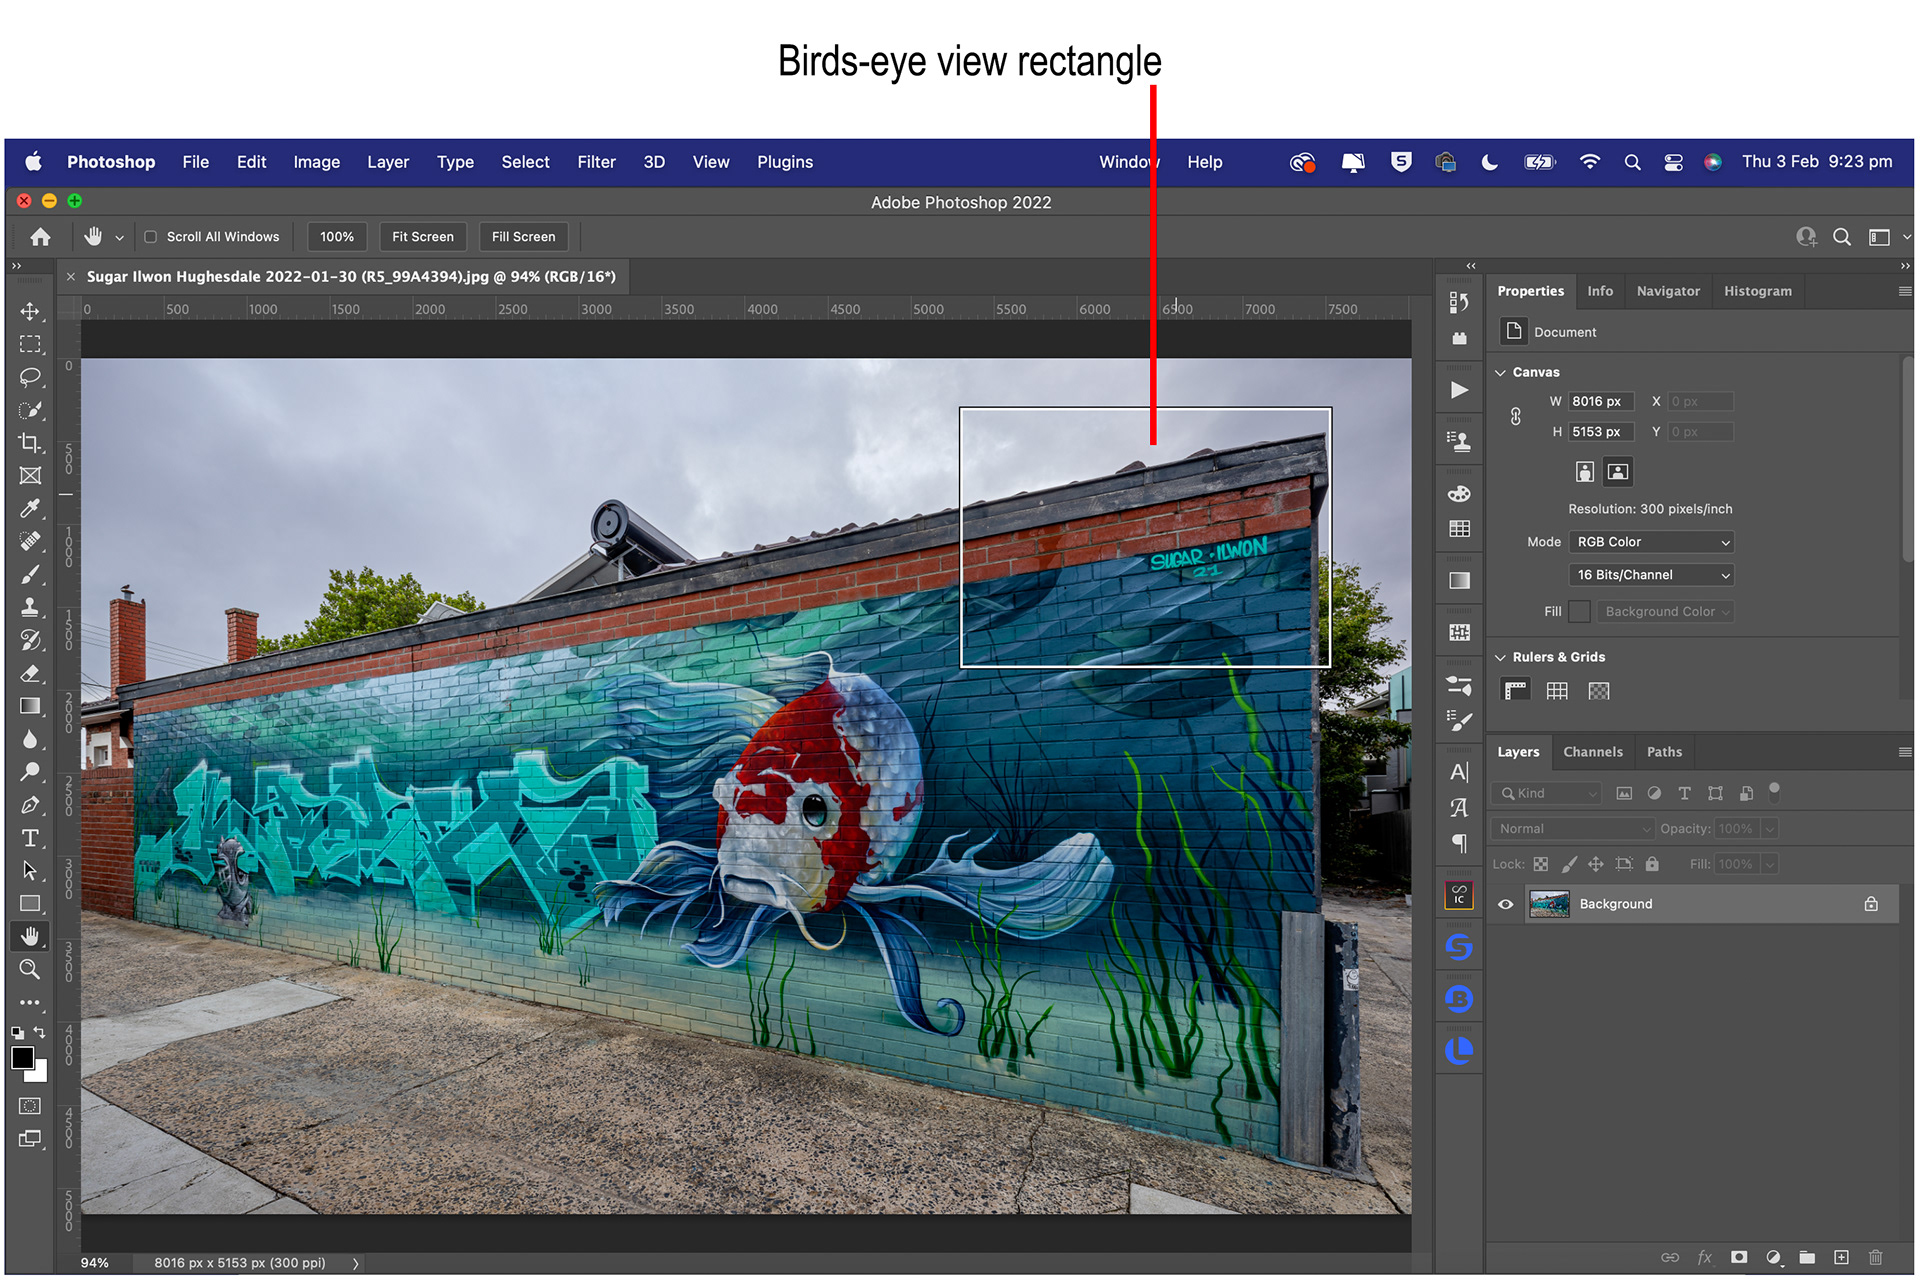
Fig 3 - The Birds-eye view rectangle
I hope there was a tip amongst these that was useful to you.
This article was first published in the March 2022 issue of Artists Down Under magazine.