Frequency Separation is a post-processing technique often used by portrait retouchers for removing blemishes and uneven colour patches from skin but it can be used for so many other types of edits.
The frequency separation process separates your image into two separate layers. The first layer is the colour and tone information (low frequency) the second is the detail or texture information (high frequency).
The process for creating these layers from your image is somewhat complex, and involves the following steps
- making two copies of the image
- blurring one copy enough to remove the detail/texture (this becomes the “Colour” layer)
- subtracting the blurred layer from the original image (using Apply Image) to create a layer that looks a lot like a High Pass sharpening layer (this becomes the “Detail” layer)
- setting the blend mode on this detail layer to Linear Light
You don’t need to worry about the detailed method above though, because the link below will allow you to download a free Photoshop action to create the frequency separation layers.
This video, featuring Aaron Nace from PHLearn, is a great introduction to creating and using frequency separation layers. Look for the link in the video to download the free action. If you want to skip the stuff about how to manually create the layers and only watch the bits about actually using them, you can skip to about 5:50 in the video.
“The Amazing Power of Frequency Separation Retouching in Photoshop” video from PHLearn can be found here - https://www.youtube.com/watch?v=ldhG9fmgC7o
You will note that the action folder contains two different actions, one for 8-bit images and one for 16-bit images, so run the correct action depending upon the bit depth of your image. Once the image runs you will be presented with an information box where you will have to press Continue, and then the Gaussian Blur dialog will be shown. Choose a blur radius that causes the detail to disappear (I usually find the default value presented by the action is fine). Press OK and then one more information box will be presented, press Continue to complete the action.
You will note that the action folder contains two different actions, one for 8-bit images and one for 16-bit images, so run the correct action depending upon the bit depth of your image. Once the image runs you will be presented with an information box where you will have to press Continue, and then the Gaussian Blur dialog will be shown. Choose a blur radius that causes the detail to disappear (I usually find the default value presented by the action is fine). Press OK and then one more information box will be presented, press Continue to complete the action.
You will notice that a group containing two layers has been added to the top of your layer stack (see Figure 1). The HF layer contains the detail of your image, the LF layer contains the colour and tones of your image.
You can edit these separately now to give yourself much better editing control. Watch the PHLearn video for a detailed explanation.
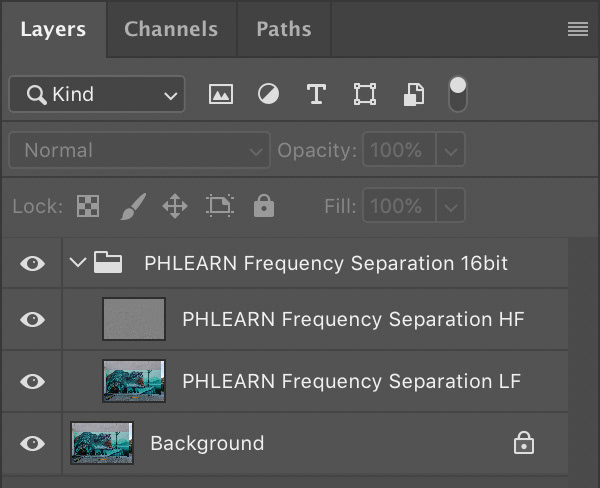
Fig 1 - PHLEARN Frequency Separation layers
You can use tools like the Healing Brush and Clone Stamp tools on the HF layer to adjust the textures and detail of the image.
You can use tools like the Healing Brush, Clone Stamp and Brush tools on the LF layer to adjust the tones and colours of the image. The video also details another method to effectively even out colours by selecting, feathering and blurring areas of the LF layer.
Please note that when using the Healing Brush, Clone Stamp or similar tools on these frequency separation layers you must ensure they are set to only affect the selected layer (ie set them to Sample: Current layer).
Try Frequency Separation as a way to improve the accuracy of your editing and remember the technique does not have to only be used on portraits.
This article was first published in the August 2021 issue of Artists Down Under magazine.