The dynamic range in an image is the range of light levels from the lightest part of the image to the darkest part of the image. The human eye can see a dynamic range many times wider than even the best current DSLR, the eye and the brain do a magnificent job of recognising and distinguishing the many different levels of brightness in a scene – your DSLR is much less capable.
Therefore in a single exposure of a scene with a wide dynamic range you will inevitably lose detail in your highlights or shadows (or both).
High Dynamic Range (HDR) photography involves taking multiple exposures of a scene (eg one at normal exposure, one brighter exposure and one darker exposure) and then using software to blend them together.
HDR got a bit of a bad name a few years back because photographers (and yes, I was one of them), used HDR to create really bad, unnatural looking, sometimes almost cartoon like images. It has also become a lot less necessary with increasingly capable camera sensors, more people shooting in RAW and software that is becoming better and better at pulling detail out of the highlight and shadow areas of a photo.
There is however still a place for HDR where you have wide dynamic range and it can be made to look natural.
Taking the Images
Most DSLRs will allow you to “automatically” take these multiple exposures.
Look for a feature called “Exposure Bracketing” or “Auto Exposure Bracketing”.
Different cameras will allow different numbers of images in the bracket (eg 3, 5, 7 or 9) and you will be able to select the exposure (number of stops) gap between images.
On some cameras if you also set the “drive mode” to delay or burst mode the images will be taken with a single press of the shutter.
Most HDR software will align the images well, but your results will be much better if your camera is solidly mounted (eg a good tripod). In good light it is possible to take “hand-held” bracketed exposures.
Good HDR software will also perform “ghost removal” to eliminate objects that have moved between the bracketed images. However the less movement between brackets the better your result will be. Consider using a remote release and mirror-lockup (or LiveView) to eliminate all camera movement.
Ensure that your camera is in “Aperture Priority” or “Manual” mode. You want all the bracketed images to have the same aperture and vary the shutter speed.
Shooting in RAW is highly recommended - there is more dynamic range and detail captured in each image in RAW mode.
Processing in Adobe Camera Raw or Lightroom Classic
In Adobe Camera Raw version 9 and Lightroom CC 2015 Adobe added a HDR Merge feature that allows you to merge your multiple exposure brackets. This functionality is much better, and creates a more natural looking result than the old version that still exists within Photoshop.
Figure 1 is the final result of a HDR merge of 7 exposures, of an image taken inside the old Woodlands Homestead in Woodlands Historic Park in the northern suburbs of Melbourne. The room is quite dark, but with brighter light coming in the window, and extremely bright light sources from the two brightest lamps. For the cameras normal exposure, detail was lost in the window and both bright lamps were just white blobs.
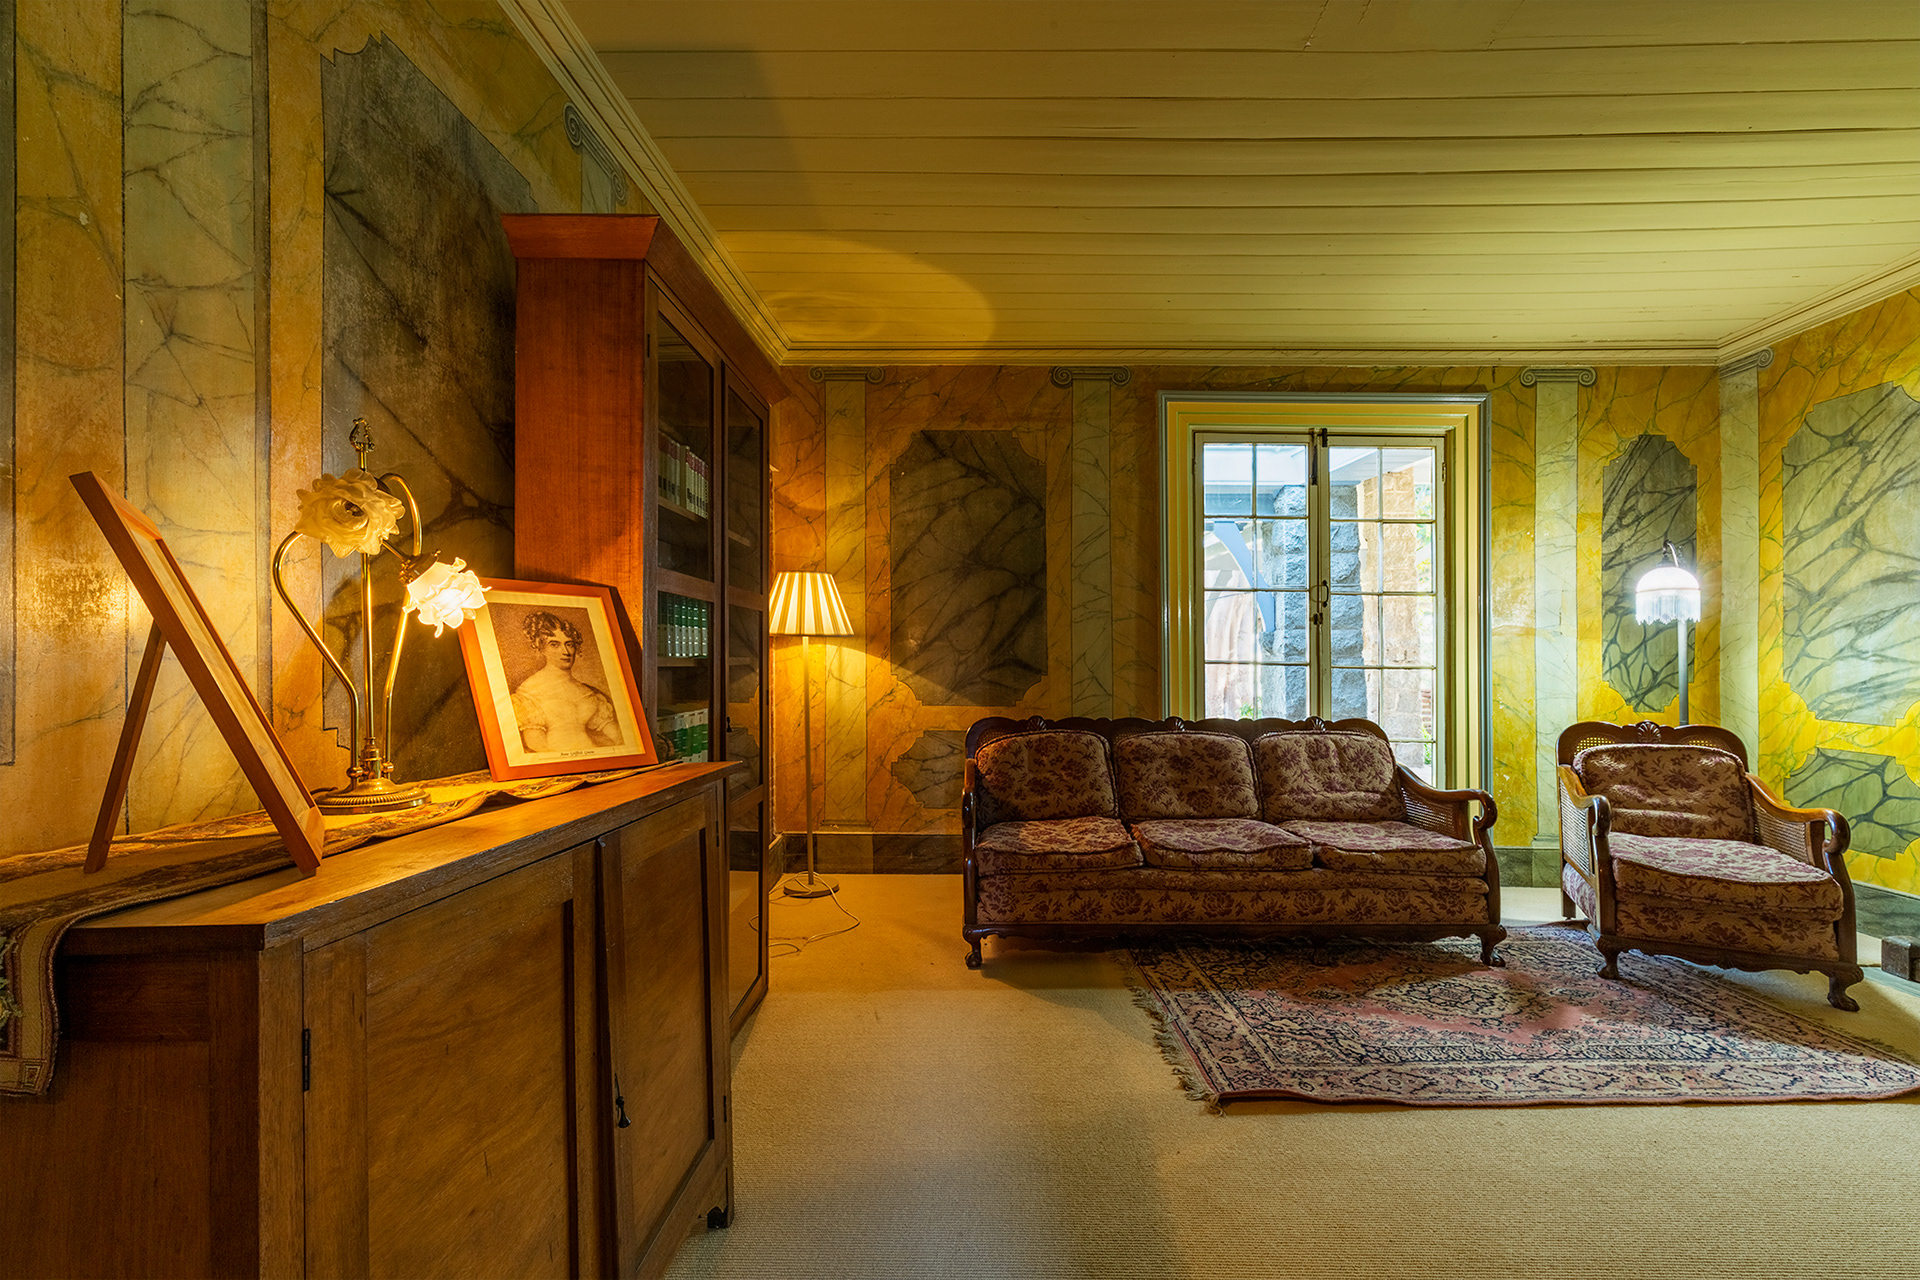
Figure 1 - The final merged image
To capture detail in the lamps, I had to go right down to 5 stops underexposed, so my exposures I used for the merge were -5, -4, -3, -2, -1, normal and +1.
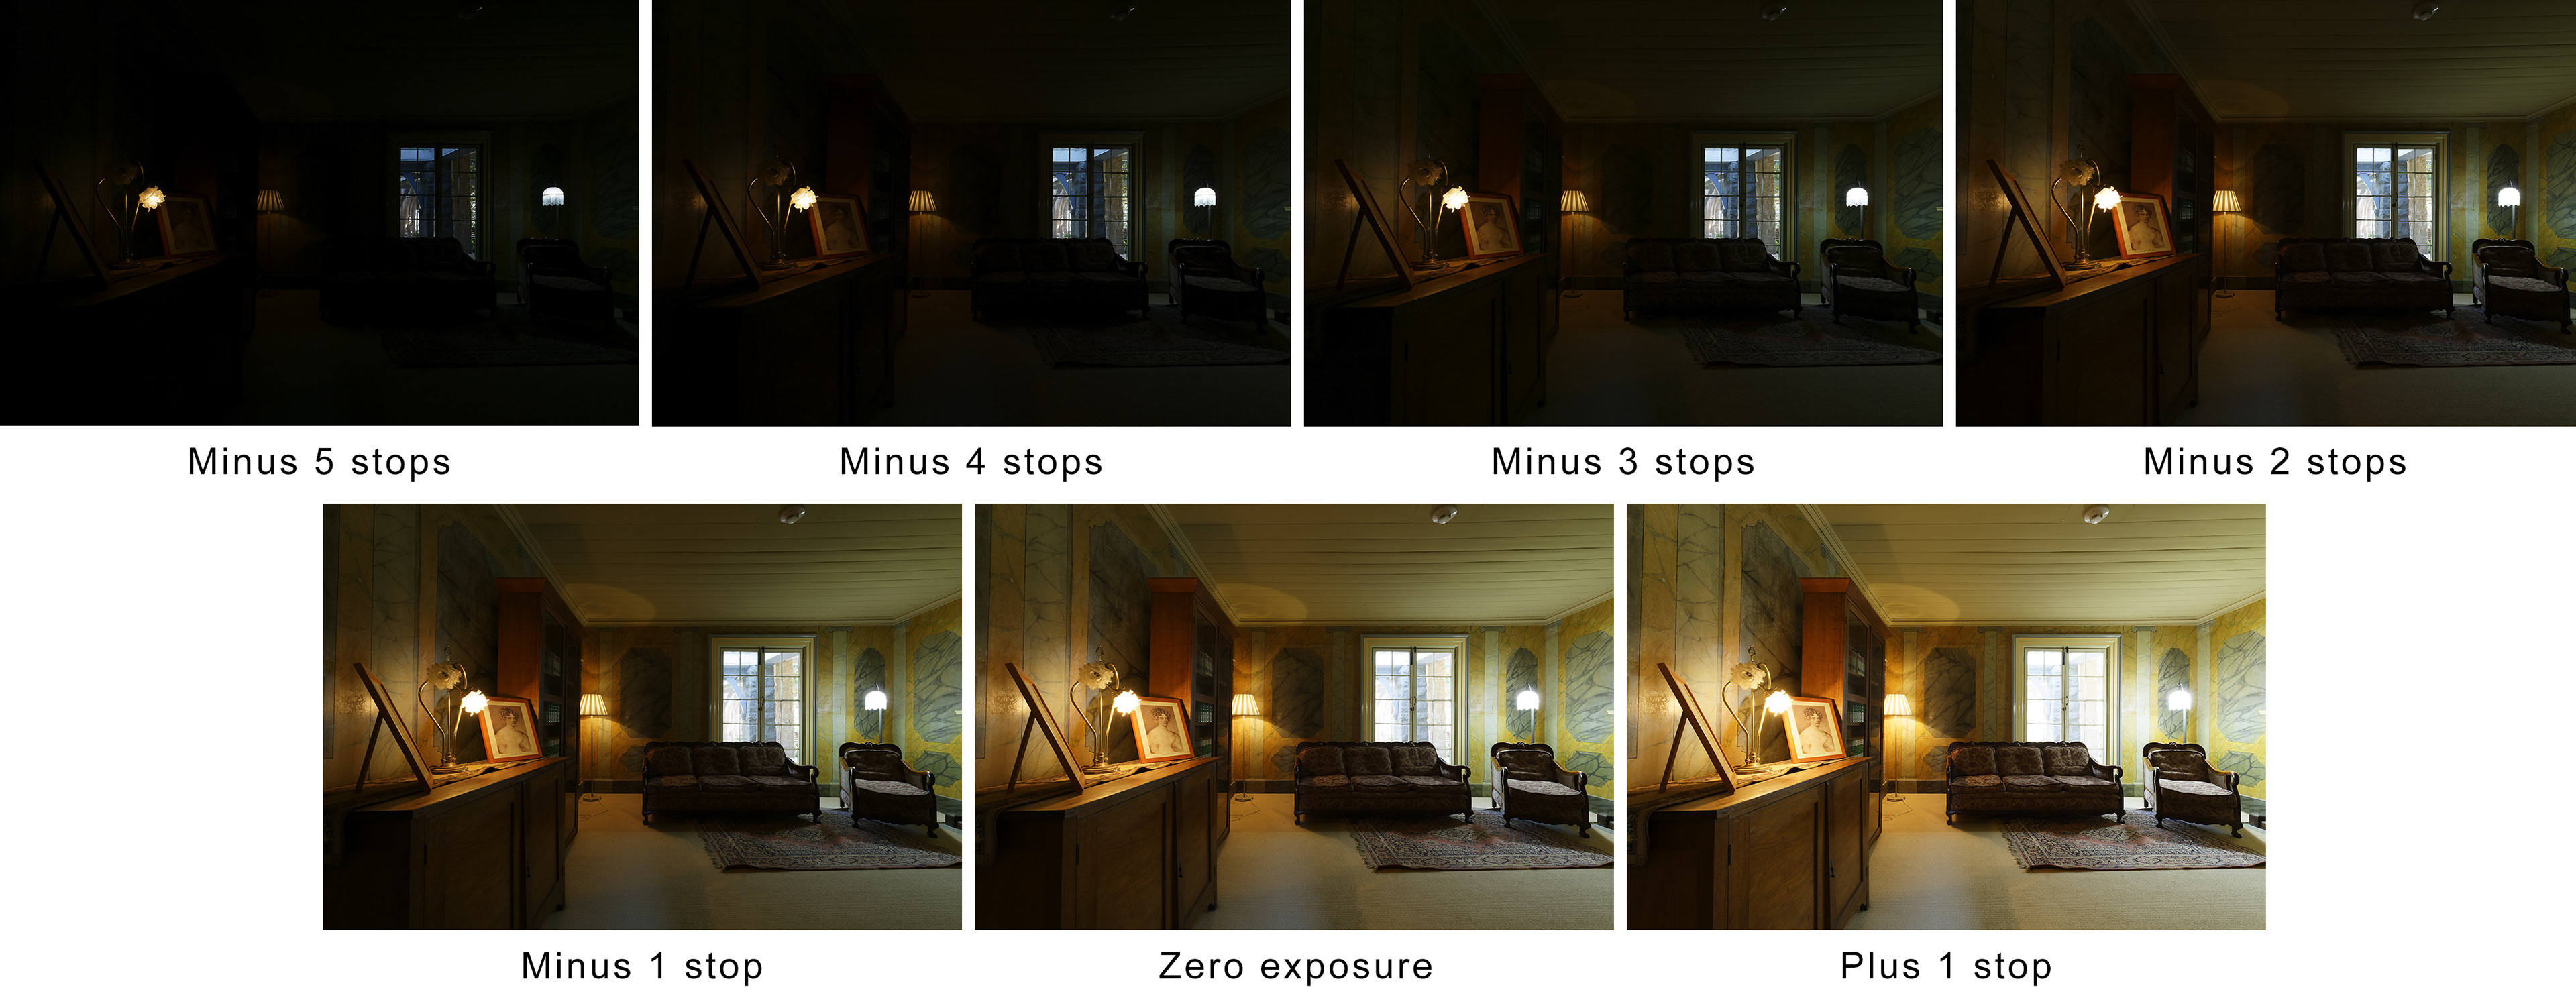
Figure 2 - The seven captured exposures
The merging process is quite simple. First load all of the Raw images into ACR.
Select all the images in the Filmstrip and make sure that you have enabled Lens Profile Corrections and Remove Chromatic Aberration (these are the only adjustments I would make at this stage). Click the drop-down menu right next to the word Filmstrip at the top of the Filmstrip and select Merge to HDR.

Fig 3 - The ACR Filmstrip drop-down menui
After a short processing delay the HDR Merge Preview window will be displayed. I usually leave Align Images and Apply Auto Tone and Color Adjustments ticked.
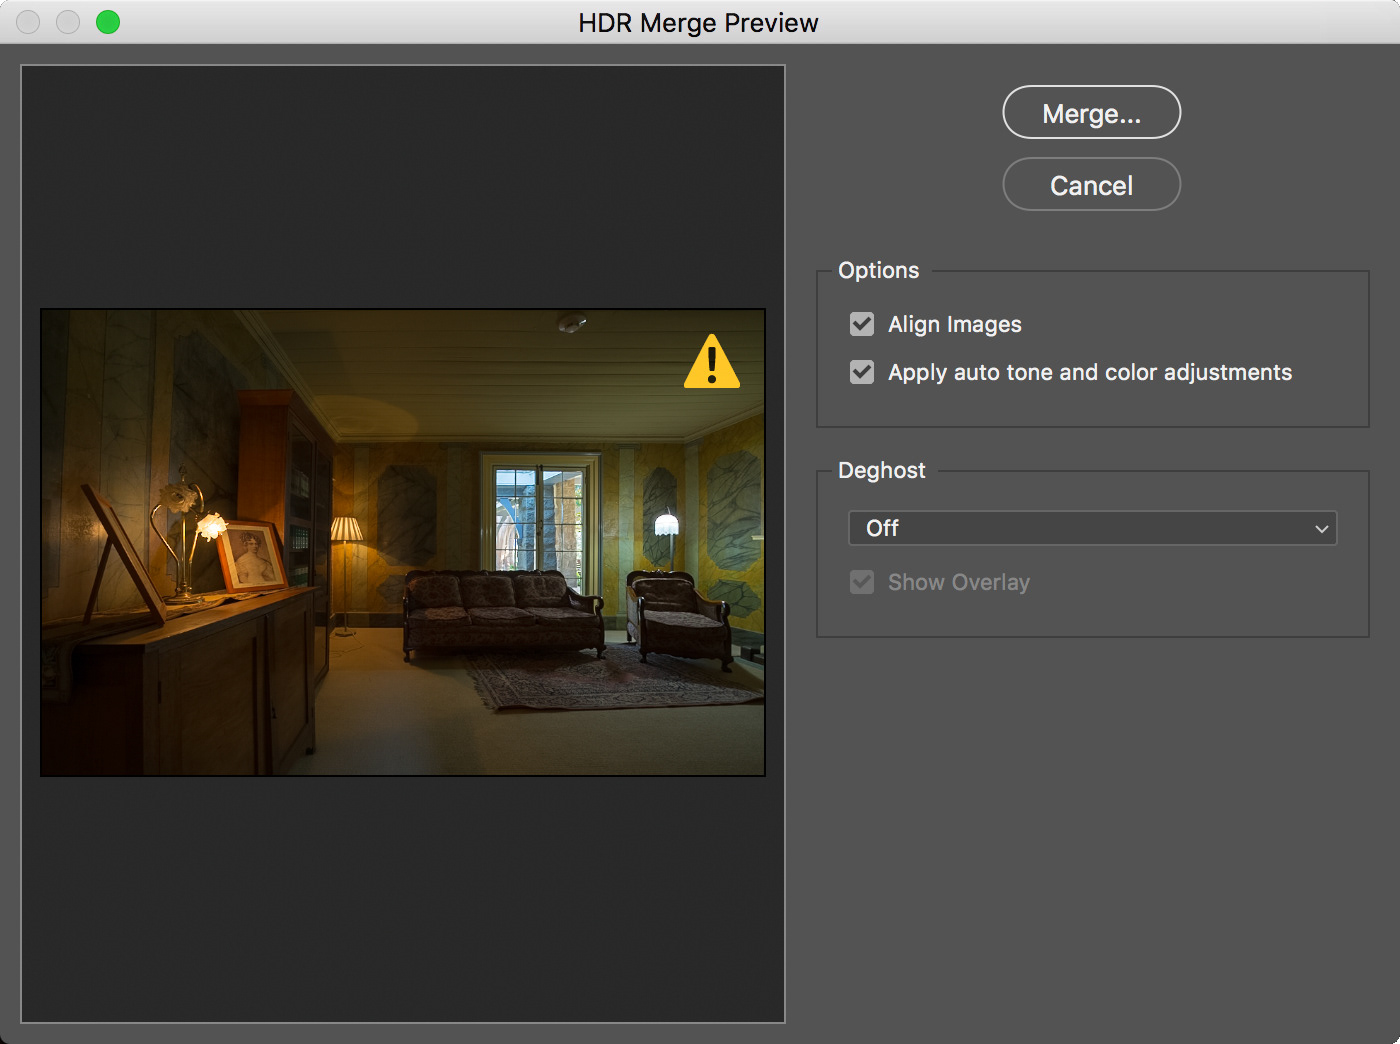
Fig 4 - The Merge Preview window
If you had objects that moved between the bracketed exposures you can select one of the Deghost levels, if you didn’t you can leave it off. If you choose to Deghost, some more processing will occur and if you have Show Overlay ticked you will see a mask overlay indicating where the software found, and will try to remove the movement.
When you click the Merge button, the software will present you with a standard file save dialog box and you can choose a name and location for the merged file. The merged file will be a Raw file in the Adobe .DNG (digital negative) format.
You can Alt(Option)+Click the Merge button to accept the default file name and store it in the same location as the bracketed exposures.
The new merged Raw file will be added into the Filmstrip of ACR, and once processing has finished you can now process as normal using all the standard methods, but with a file that will have much more dynamic range (details in the highlights and shadows).
Lightroom Classic
As I am sure most of you know, the Develop module in Lightroom is essentially Adobe Camera Raw, so the process is almost identical in Lightroom.
To perform a merge in Lightroom, select all the bracketed Raw files, right-click and choose Photo Merge / HDR.
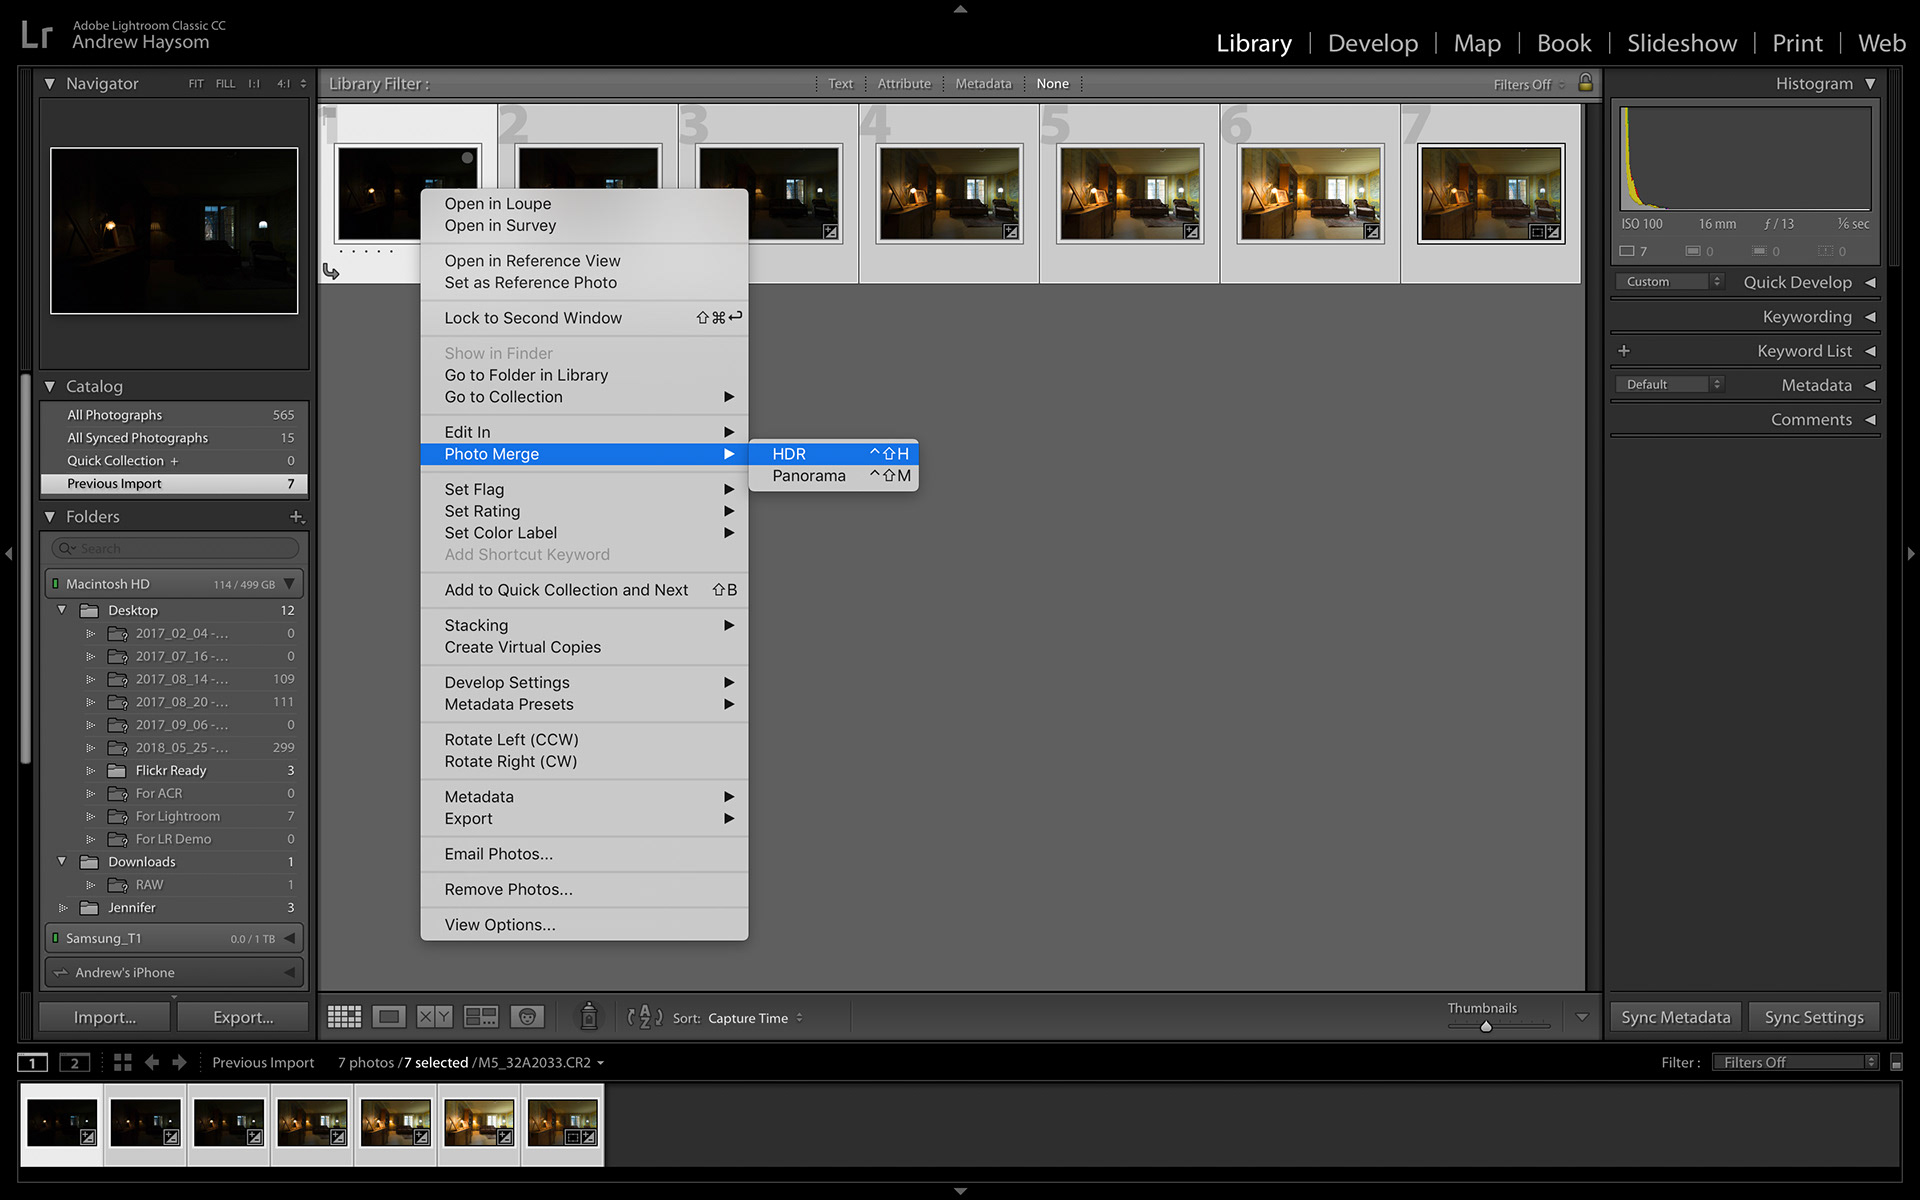
Figure 5 - Merging in Lightroom Classic
Summary
So, next time you find yourself in a challenging light situation, consider shooting some brackets and trying a little bit of HDR.
Have fun!
This article was first published in the July 2018 issue of Artists Down Under magazine.