It is possible to add artificial lens flare to your image in Photoshop using the Filter / Render / Lens Flare command. This article explains a hidden little trick that allows you to very accurately place the lens flare on your image.
I will always add my lens flare to a new layer that is filled with black and has the blend mode set to Screen. This allows the change to be non-destructive and allows you to make changes later to the flare like opacity, brightness or colour if you so desire.
To use this tip, before invoking the lens flare filter, activate the Info panel (Window / Info) and move the mouse pointer to the exact position you would like to centre the lens flare. In Figure 1 I have moved the mouse pointer over the eye socket in my image, and I have noted the X and Y coordinates (3005, 1888) in the Info panel.
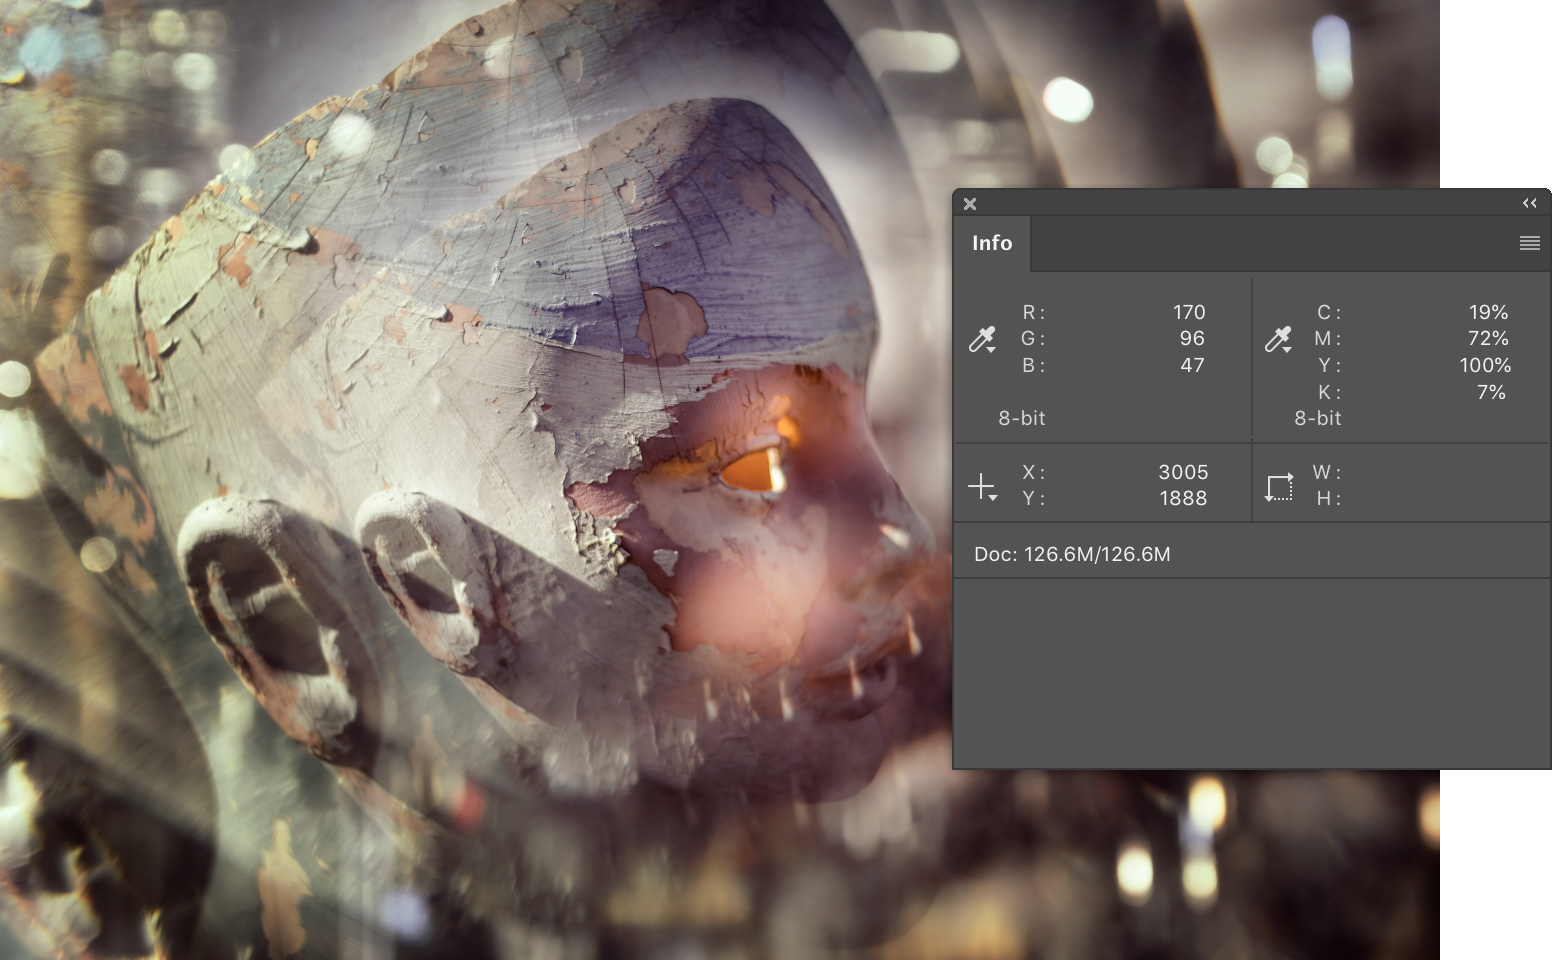
Fig 1 - Info panel
Now invoke the Filter / Render / Lens Flare command, the Lens Flare dialog will be displayed (see Figure 2). Without knowing the little tip I’m discussing here, you would place the lens flare by moving the cross-hair within the preview window, but it is difficult to do so accurately using this method.
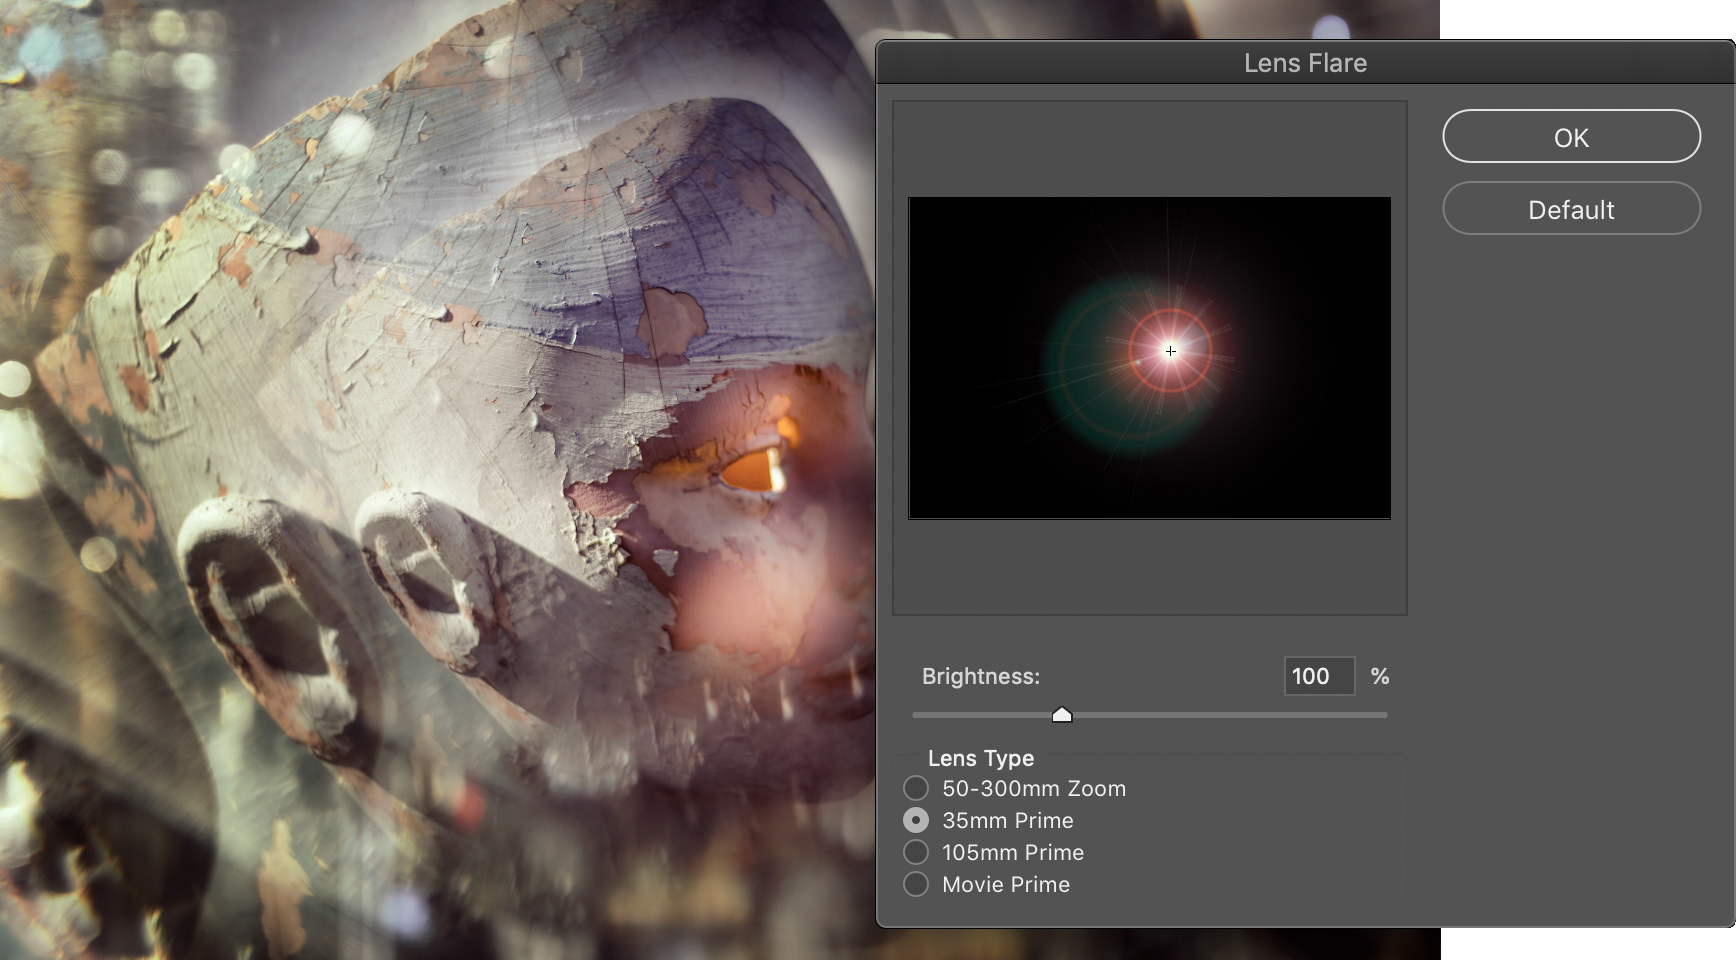
Fig 2 - Lens Flare dialog
Instead of moving the cross-hair, hold down the Alt (Windows) or Option (Mac) key, and click on the preview window in the Lens Flare dialog. The Precise Flare Centre dialog is displayed (see Figure 3).
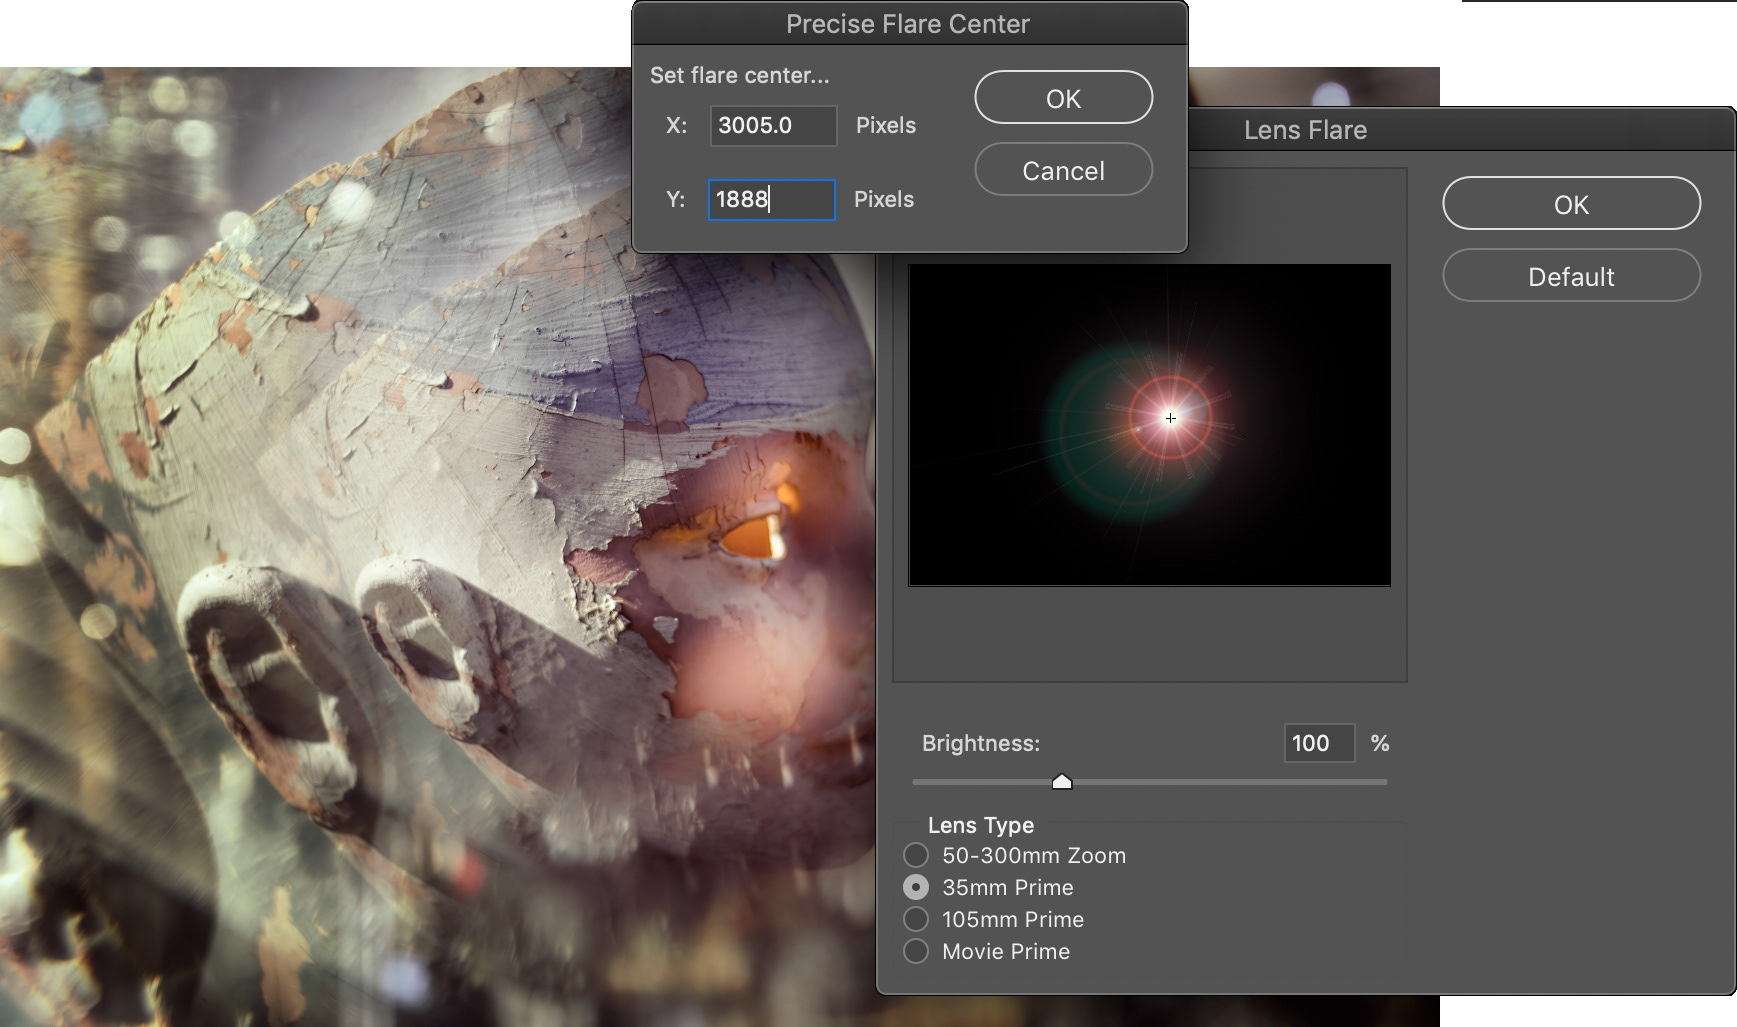
Fig 3 - Precise Flare Center dialog
Enter the X and Y coordinates you noted from the Info panel earlier and press OK, your flare is now positioned exactly where you want it. Once you have chosen the Brightness and Lens Type you need, press OK again to place your lens flare.
Remember, because you have placed your flare on a separate layer you can use clipped adjustment layers, or the opacity of the layer to adjust the flare to exactly what you want.
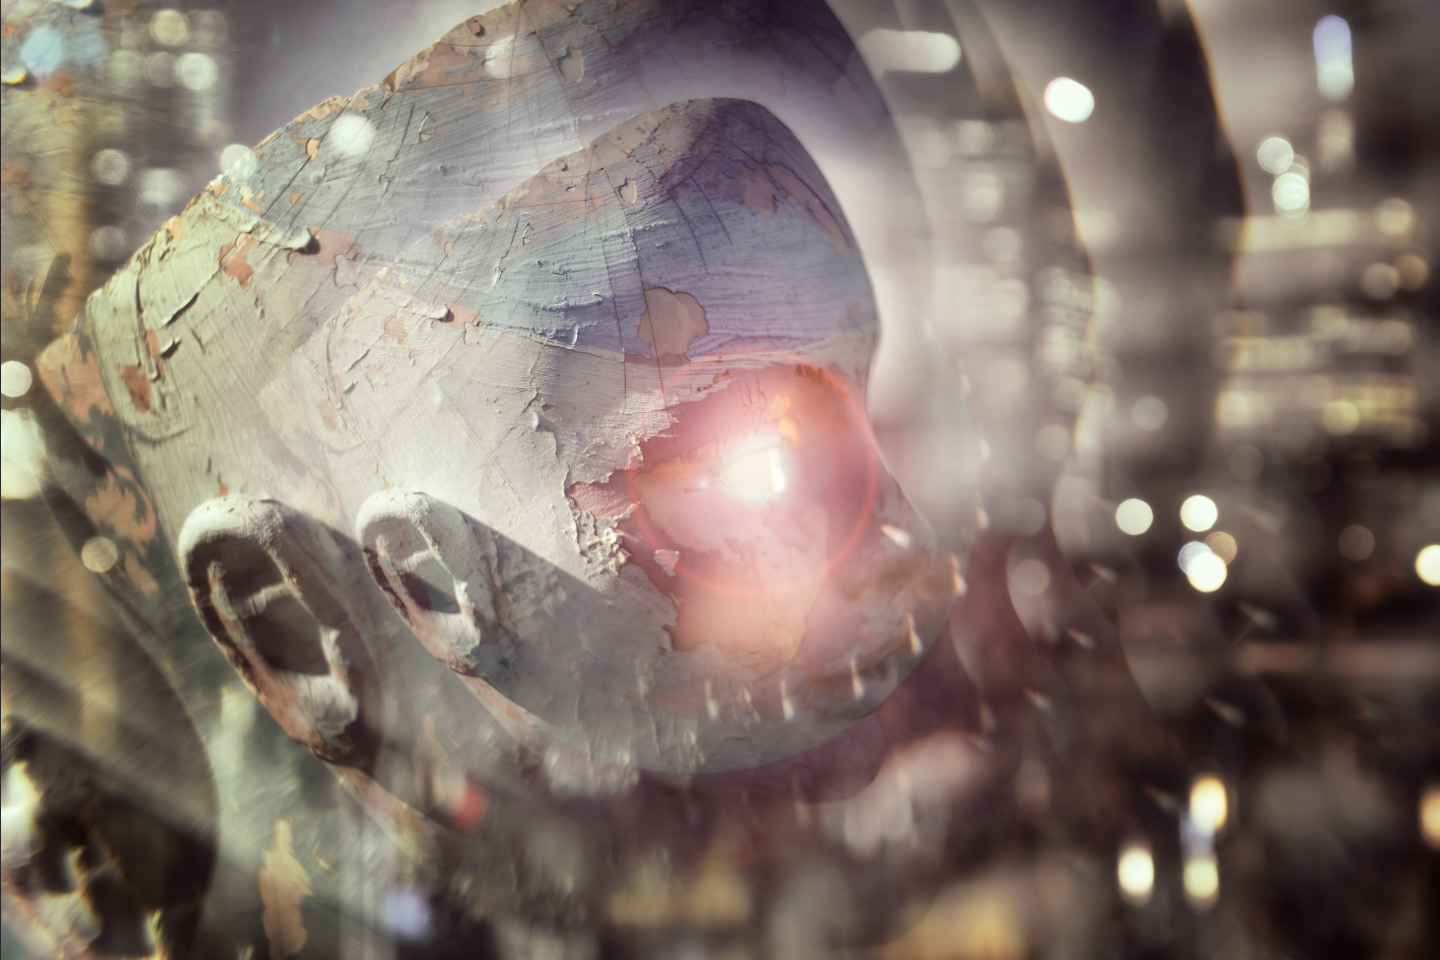
Fig 4 - Final image
This article was first published in the September 2020 issue of Artists Down Under magazine.