With version 12.2 of Adobe Camera Raw (ACR) in February 2020, Adobe introduced some improvements to how you can set up default image processing settings for your Raw files.
A new dialog has been added in the ACR Preferences screen. To open the ACR Preferences screen, click the Preferences icon in the ACR tool bar (see Figure 1).

Fig 1 - Camera RAW Toolbar
Choose Raw Defaults from the navigator at the left of screen and the new Raw Defaults dialog is displayed (see Figure 2).
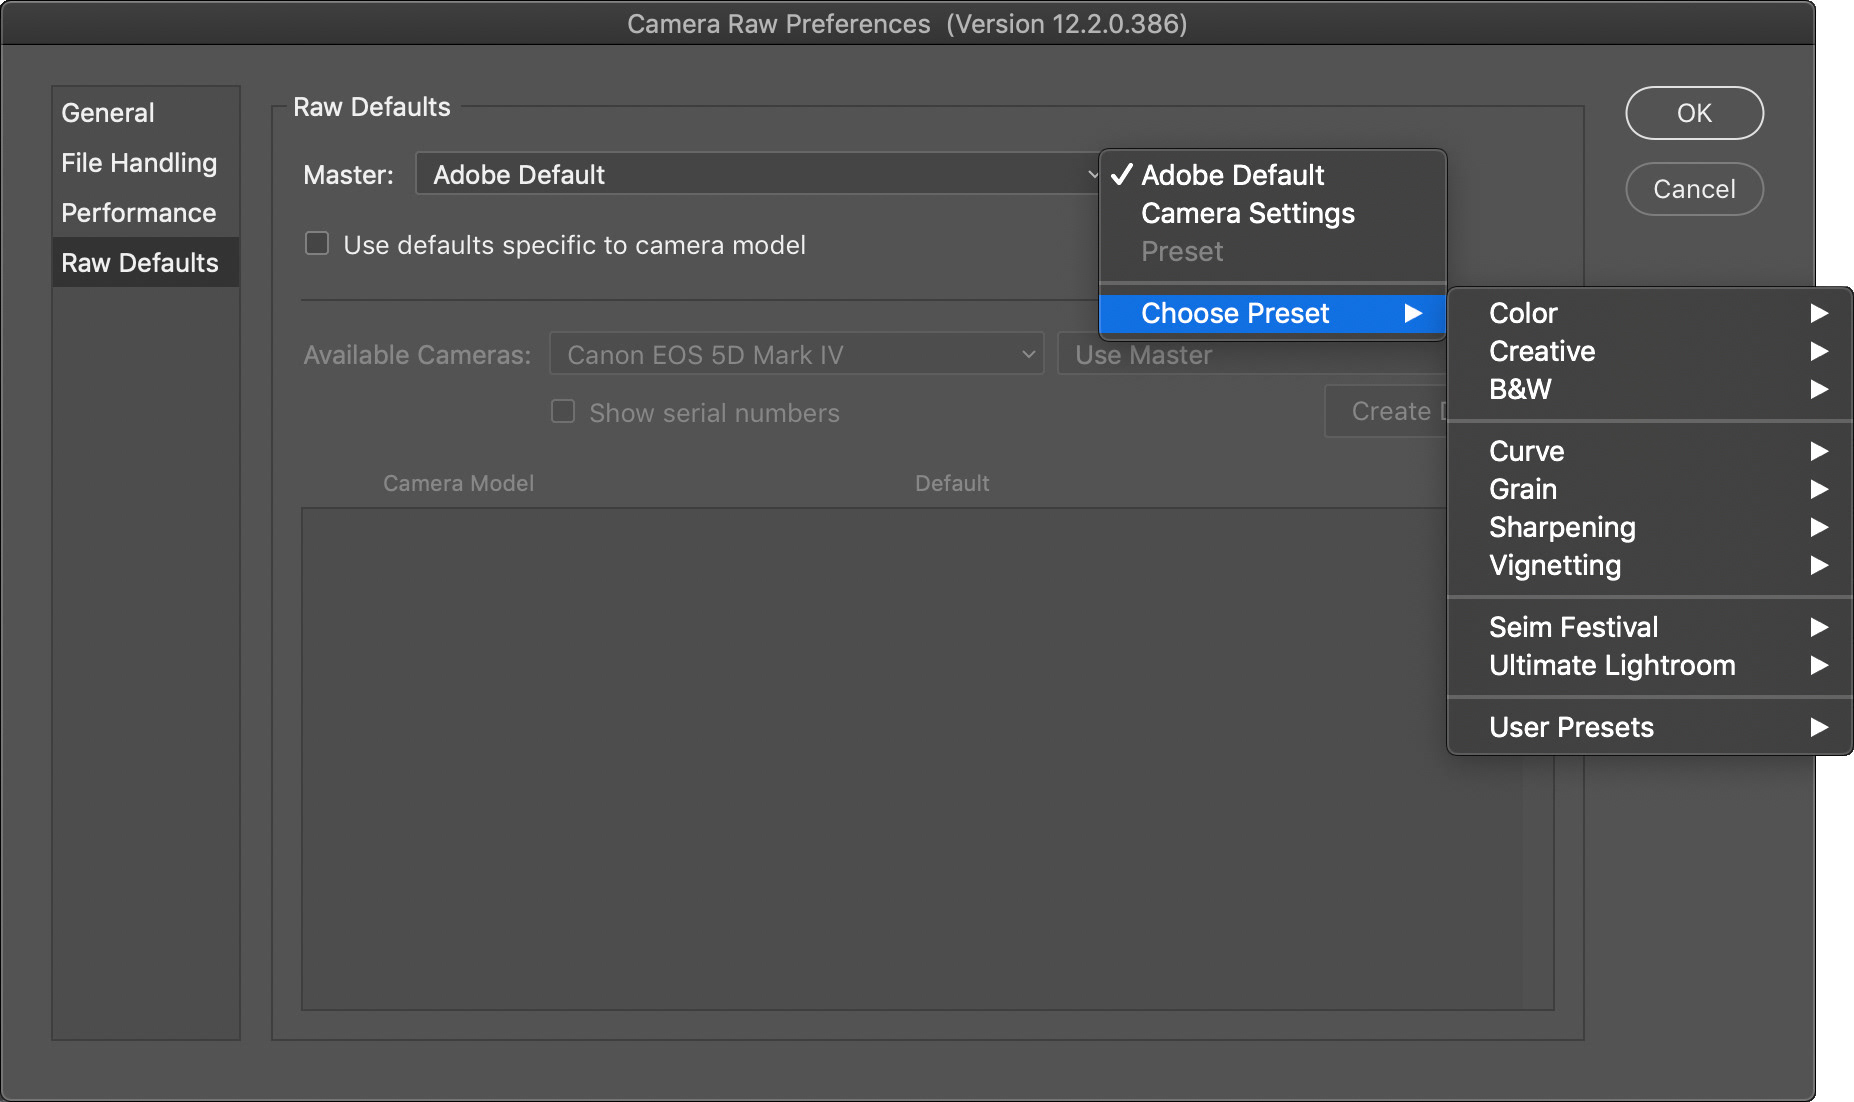
Fig 2 - Camera Raw Preferences (Raw Defaults)
If the Master drop-down is left at Adobe Default, the standard defaults will be used, that is Adobe Color as the default profile, and most settings will be zeroed out.
If the Master drop-down is set to Camera Settings, it is the same as Adobe Default except ACR will try to choose a profile to match your in-camera Picture Style setting.
Lastly, you can choose a previously saved preset as your default settings, and now that saved preset will be used each time you open a Raw image.
Checking the “Use Defaults specific to camera model” check box allows you to choose a different preset for each different camera model. Please note that when this check box is checked the Available Cameras drop-down will automatically be populated with the camera models based on the Raw images currently open in ACR. Therefore it follows that to set a default for a camera, you must have a Raw image from that camera open.
To change the setting for a particular camera, choose the camera in the Available Cameras drop-down then choose either Adobe Default, Camera Settings or a particular preset in the adjacent drop-down, then click the Create Default button. The new default will be shown in the table below (see Figure 3).
To update the setting for a particular camera, select it in the table and click the “…” at the right of the table.
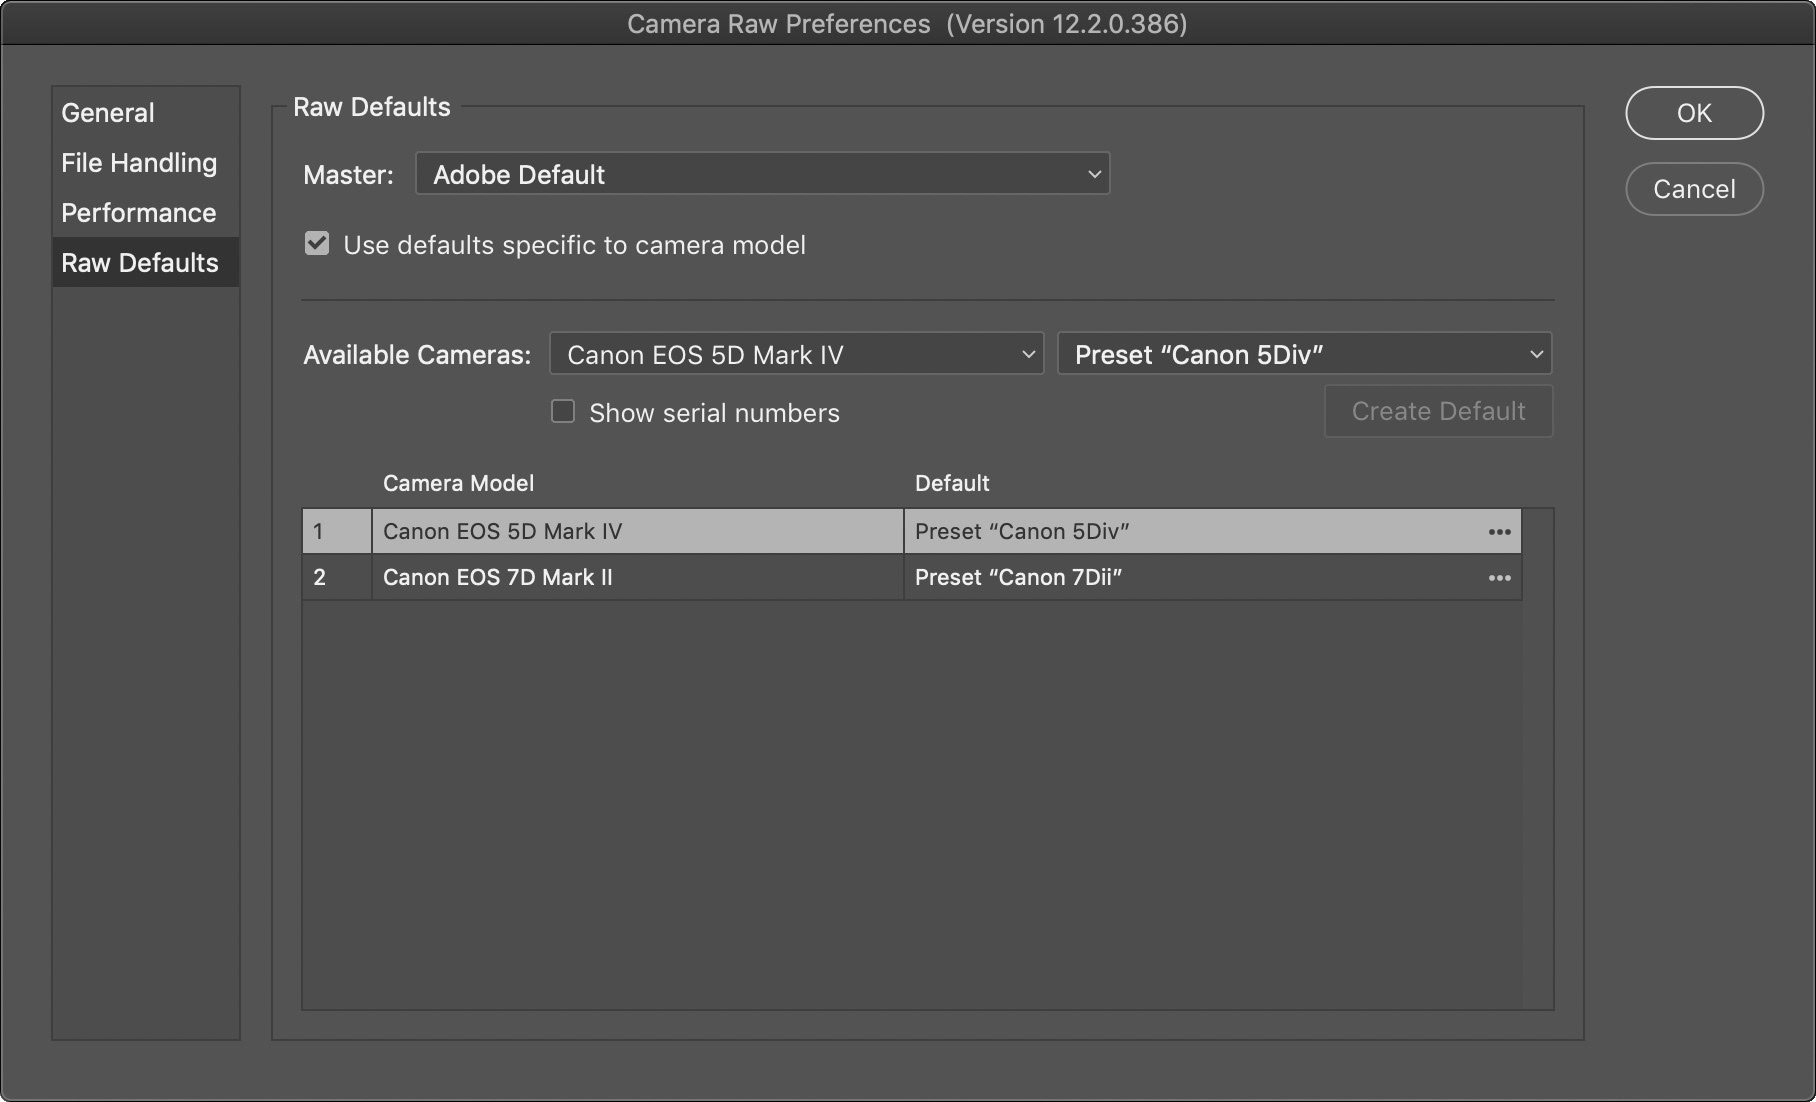
Fig 3 - Camera Raw Preferences (Raw Defaults) - with camera presets
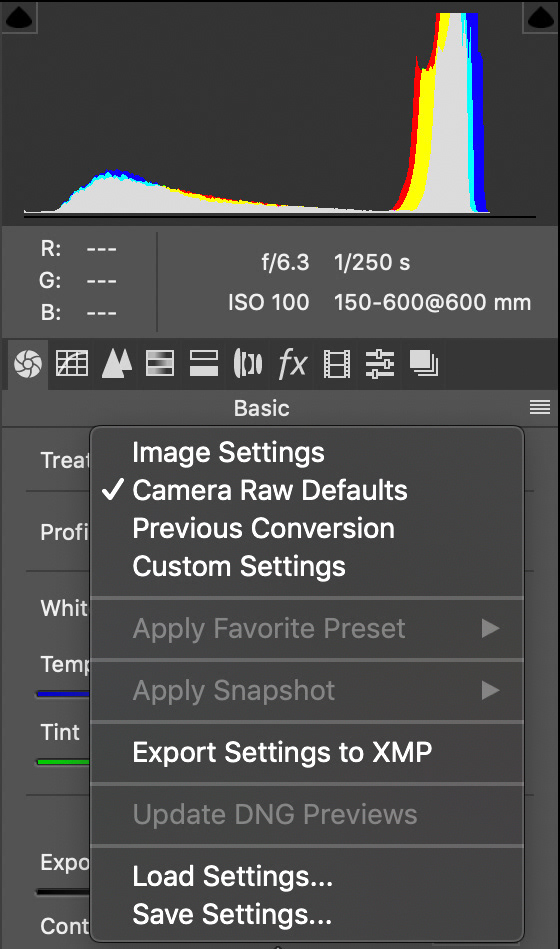
To create a preset, simply set all of the ACR settings to where you want them, and click the menu icon at the right hand side of the screen and choose Save settings (see Figure 4).
The Save Settings dialog will be presented (see Figure 5).
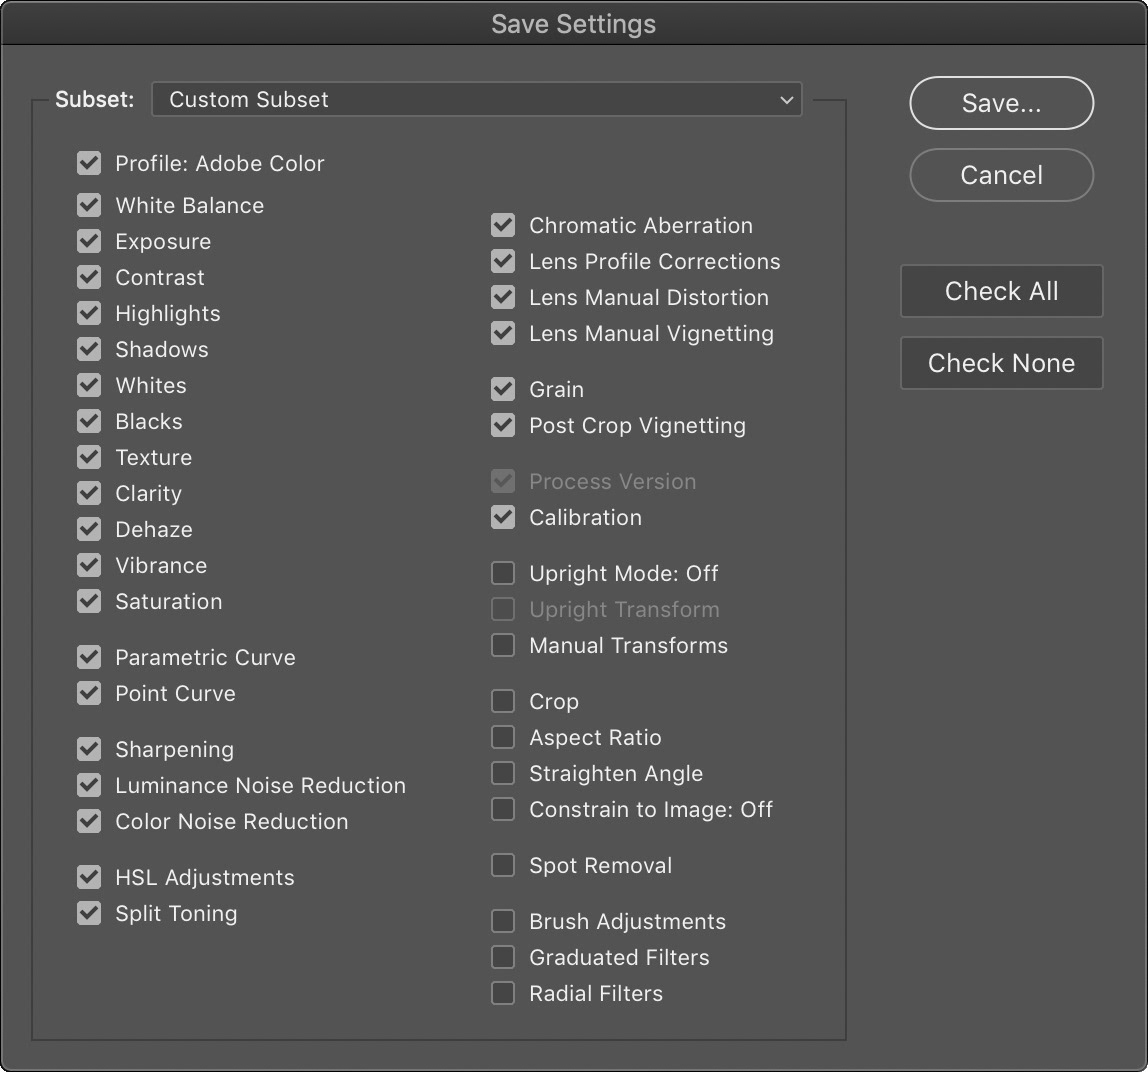
Fig 5 - Save Settings dialog
Here you can select which of the available settings you want to save as part of this preset. Generally, you would want to avoid saving the settings that are usually very specific to an image (eg transforms, cropping, straightening, spot removal and local adjustments) – these are at the end of the list, so make sure they are unchecked.
Two settings that I would nearly always make sure are in my default for every camera (or in a master preset if you choose not to have different presets for different cameras) are the “Remove Chromatic Aberration” and “Enable Profile Corrections” check boxes found on the Lens Correction tab. I can’t think of a reason why these should not always be on.
If you are a Lightroom user there are very similar changes available in Lightroom Classic (which uses the Adobe Camera Raw image processing engine). Look for the Presets tab in Lightroom Preferences. Note also that Preset Defaults changes made in ACR will also be reflected in Lightroom (and vice versa).
This article was first published in the April 2020 issue of Artists Down Under magazine.