The use of gradient maps in Photoshop for colour correction is a well-known technique. They are often used specifically for correcting uneven skin tones in portrait retouching and correcting colour casts.
The Infinite Unify Photoshop plugin panel from Infinite Tools (see Figure 1) makes this often-difficult process incredibly easy.

Fig 1 - Infinite Unify main panel
There are two primary ways to use the panel, the first is just to click the Create button. In this case the Unify panel will automatically detect skin tones in your image, select 15 data points and create a gradient from them, and then create a Gradient Map layer with a mask revealing the detected skin tone areas.
Alternatively, you can select the area you wish to be used to create the gradient using any of the selection tools and then click the Create button. The Unify panel will sample the 15 data points from within the selected area and create a gradient from them, the Gradient Map layer will then be created with either a white or black mask depending on whether you have the Create Black Mask option selected (see Figure 1).
So, in the example where you have some areas of a portrait displaying a colour cast, you could use the Lasso tool to select some areas of skin that are unaffected by the colour cast, making sure you select a good range of highlights, shadows and midtones. Then once the Gradient Map layer is created just apply the gradient map to the colour cast affected areas using the mask.
With the Gradient Map layer selected you can adjust the gradient using a number of methods. If there are any sampled colours that are “out of place” you can click them in the 15-stop Gradient line of the main dialog to remove them, the panel with replace them with something “more appropriate” smoothing the colour transitions. You can also [Alt/Option]-click multiple colour squares, then click one of them to replace multiple “outliers” if you wish, this method of changing multiple squares can be used if you find that one outlier colour won’t change when you click on it.
You can also select Hue, Luminosity or Saturation on the main dialog screen and then use the slider to adjust the gradient.
The Gradient Editor gives you even more control (see Figure 2).
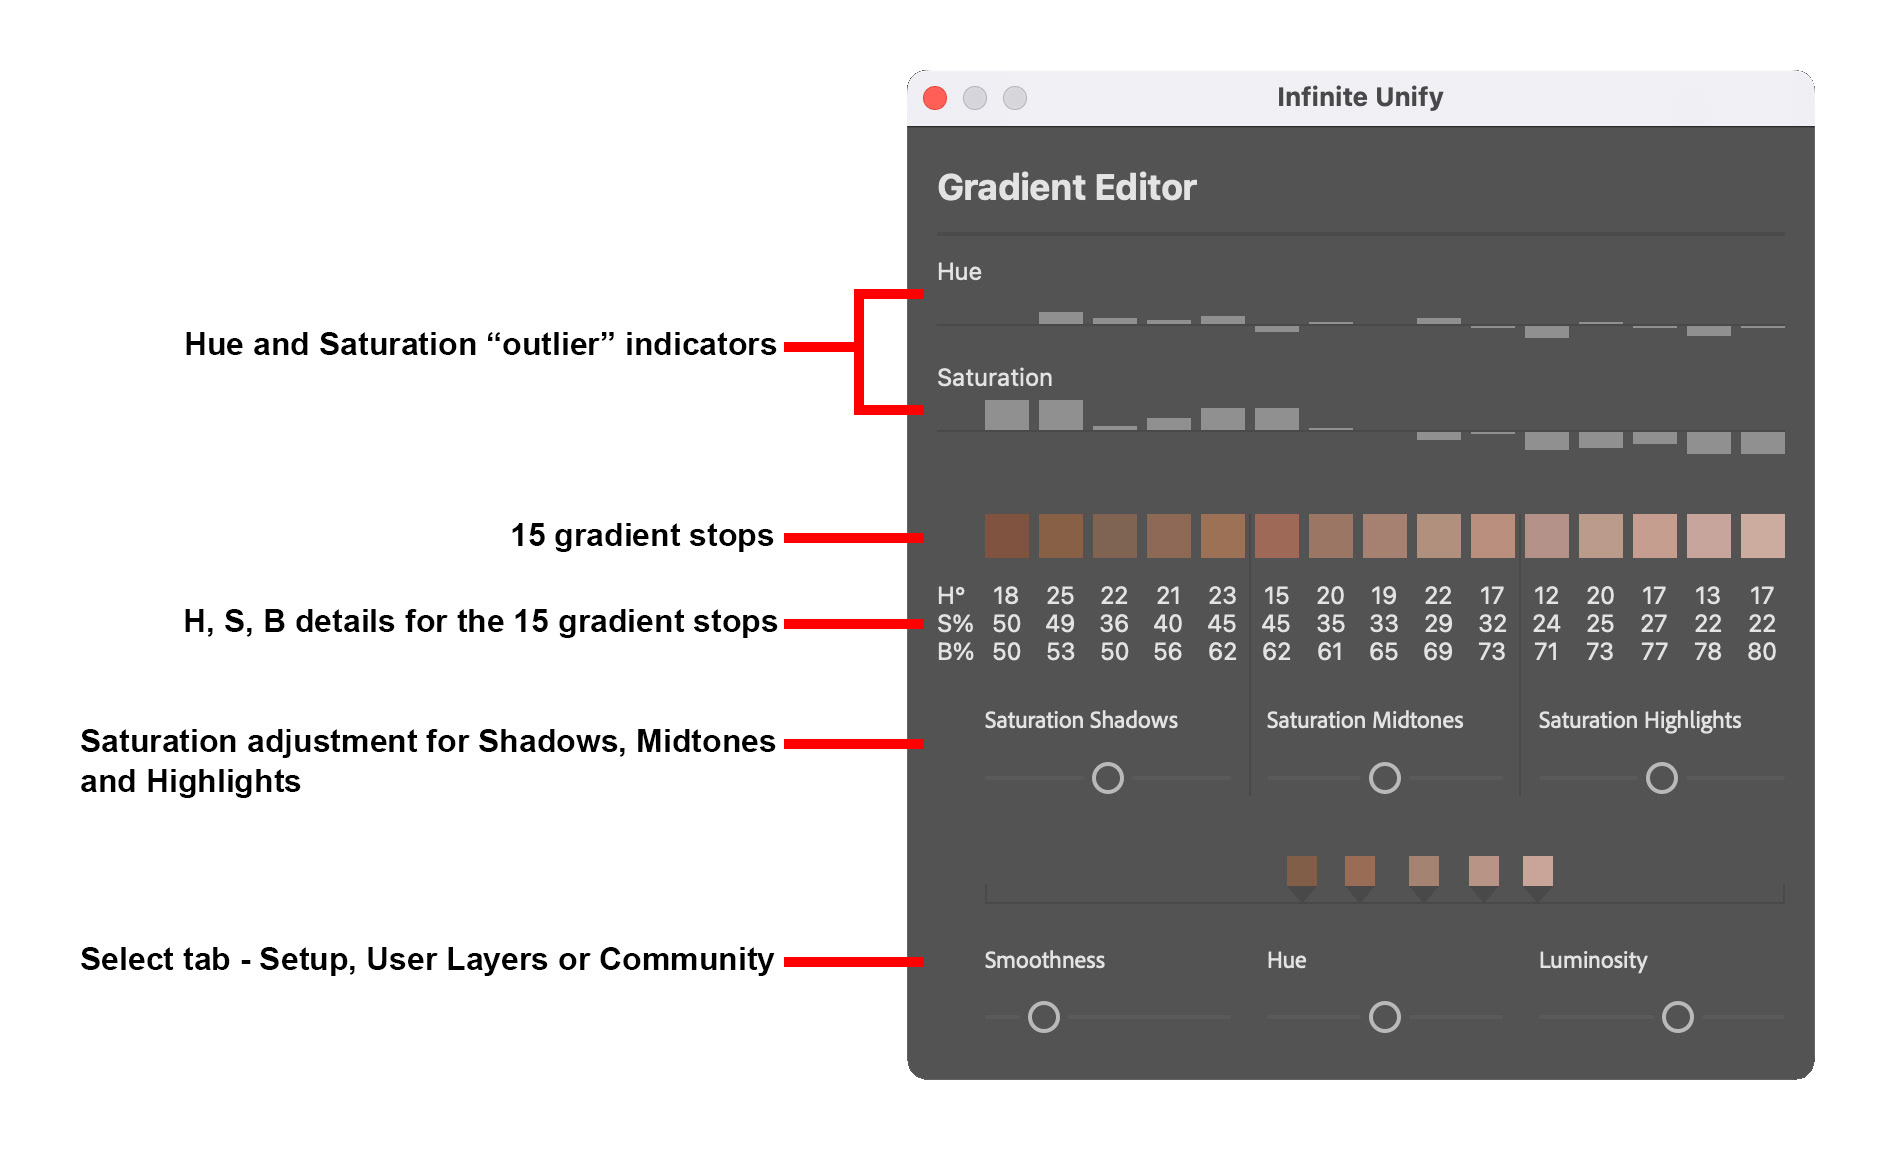
Fig 2 - Unify Gradient Editor
To enter the Gradient Editor, right-click one of the colour squares in the 15-stop gradient line. Alternatively you can have the Auto Open Gradient Editor option selected if you want to always enter the Gradient Editor when a gradient is created.
The first two lines in the Gradient Editor dialog show the variances from the average Hue and Saturation between the 15 colour stops, they make it easy to spot if any of the 15 colour stops are “off”. As on the main screen, you can click one of the 15 colour stop squares to remove it and have it automatically replaced, and [Alt/Option]-click to replace multiple colours.
The Hue and Luminosity sliders at the bottom act the same as the slider on the main screen. For Saturation you have a little more control with separate saturation sliders for Highlights, Shadows and Midtones.
There’s also a Smoothness slider that allows you to control the smoothness of the colour transitions along the gradient.
As you make adjustments here, or on the main screen, the Gradient Map is adjusted live and you can see the effect on your image.
Right-clicking the Create button on the main dialog takes you to the Preferences dialog (see Figure 3). This can be used to change the default colour, name and opacity of the Gradient Map layers created by the panel.
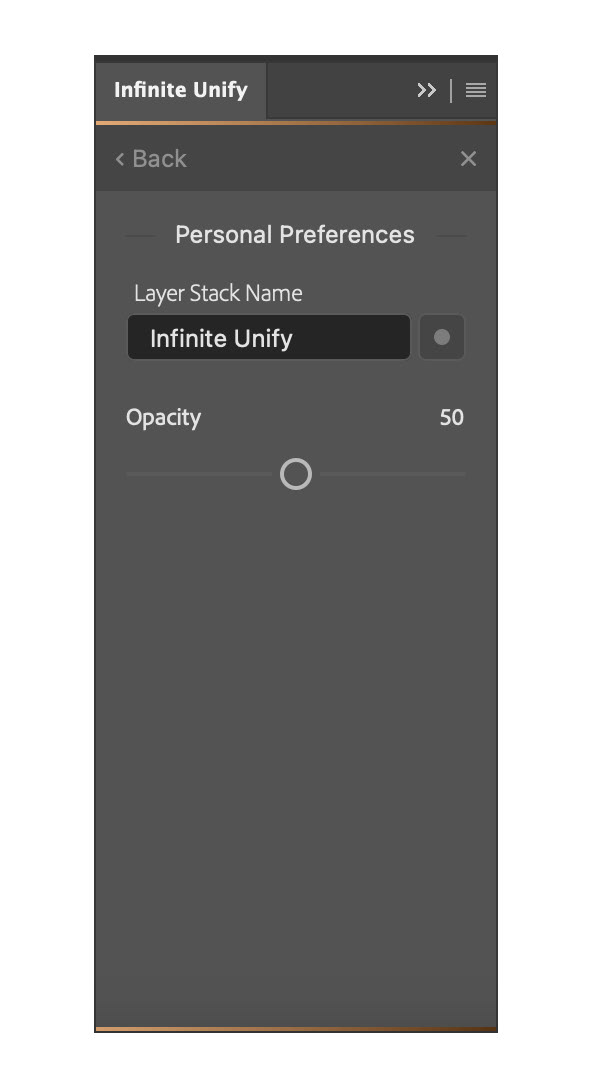
Fig 3 - Preferences dialog
You can have multiple Unify layers in a single document, to create a new Unify layer hold down the [Alt/Option] key when you click the Create button. Then, make sure you select the Unify layer in the layer stack that you want to update/adjust, the Unify panel will then change to show the selected Gradient Map and will update it as required.
The Infinite Unify algorithm filters out certain colours (very saturated, very unsaturated, very bright or very dark colours) when creating gradients. The Dark Medium Bright filters line on the main screen (see Figure 1) allows you to change which colours are filtered out, so if you have a very dark or very bright image you might like to try and click Dark or Bright before creating the gradient.
The Unify panel uses the Colour Range Photoshop feature to select skin tones. You can check the Auto Open Color Selection icon on the main screen to allow you to modify the selection before the gradient is created. This can be helpful for images where there might be other elements of the image very close to the skin tones.
Checking the Apply Blend If icon on the main screen will cause Unify to apply a Blend If to the Gradient Map layer to protect shadows and/or highlights.
Clicking the Layer Blend Mode icon on the main screen will change the blend mode of the Gradient Map layer, cycling between Color, Hue and Saturation with each click.
The Preview eye is very useful for checking the created gradient. Clicking the Preview eye temporarily raises the opacity of the Gradient Map layer to 100%, temporarily removes any Blend If settings and temporarily disables the layer mask. This allows you to get a clear look at the effect of the Gradient Map. Clicking the Preview eye again returns the opacity and Blend If settings to their previous values and re-enables the layer mask.
Clicking the cog icon enters the Settings dialog (see Figure 4) where you can see if you have the latest version (and update if you haven’t), and access Infinite Cloud. The Infinite Cloud is a feature that works on a number of the tools from this team. It allows you to save the way you have set up the panel (eg the icons you have checked across the bottom and the Preference settings) and then retrieve these from the cloud should you have to re-install the panel or use it on another computer.

Fig 4 - Settings dialog and Infinite Cloud dialog
The User Layers tab is used to save (and retrieve) gradients you create and the Community tab allows you to use gradients saved by other users (see Figure 5).
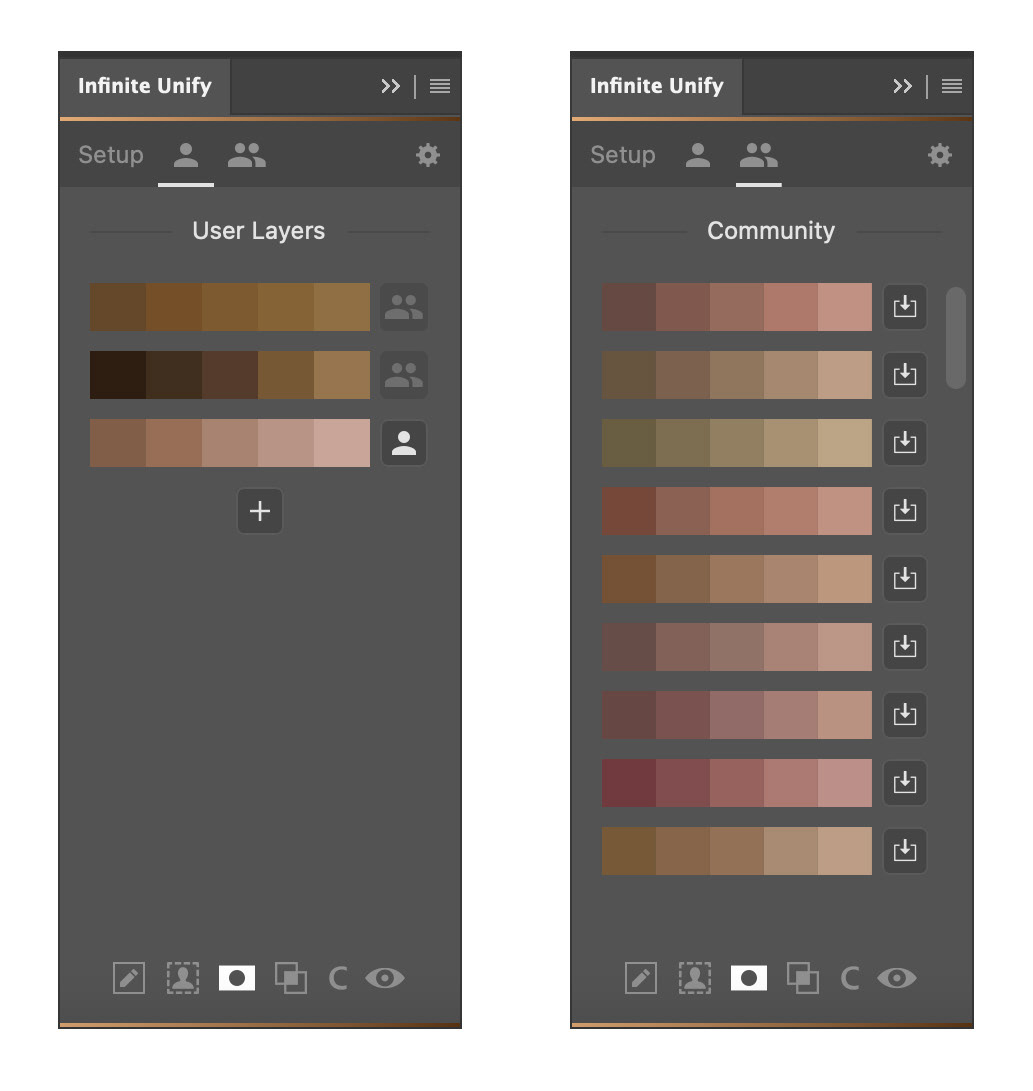
Fig 5 - User Layers dialog and Community dialog
Gradient Maps you save for yourself on the User Layers tab are automatically saved in the cloud, so they will appear in multiple instances of the panel if you have it installed on more than one computer.
If you access the Community dialog after you have created your own Unify layer then the Community gradients you are presented with are automatically matched to the luminosity of the one you created. You can then scroll through clicking the shared gradient maps to see their effect on your image.
This is a wonderfully put together little panel. Ease of use and elegant design seem to be the hallmark of the panels produced by this team (I have and love a few others of their tools as well).
Please do not think that this tool won’t be useful if you’re not really into portraits or retouching, because personally I am not really, but am enjoying using the tool on all sorts of images from evening out the colour in backgrounds of some of my bird photos, to colourising some of my digital patterns I create.
I love this little panel; it comes highly recommended.
The latest version of the Unify panel is coded in UXP (the modern way to code for Adobe Creative Cloud) and is available for both Windows and Mac (the Mac version is fully compatible with the new M1/M2 chipset).
You can check out the tool in more detail at the Infinite Tools website where they have a lot more information and videos showing how to use the panel.
This article was first published in the September 2022 issue of Artists Down Under magazine.