The Photoshop Info Panel displays a lot of useful information as you use Photoshop. This includes colour information of the point in your image under the mouse pointer / tool cursor, the XY position of the mouse pointer / tool cursor, physical dimensions of selection marquees and crop borders and lots of other useful information.
The information displayed will vary depending on the tool you’re using, some different configurations are shown in Figure 1.
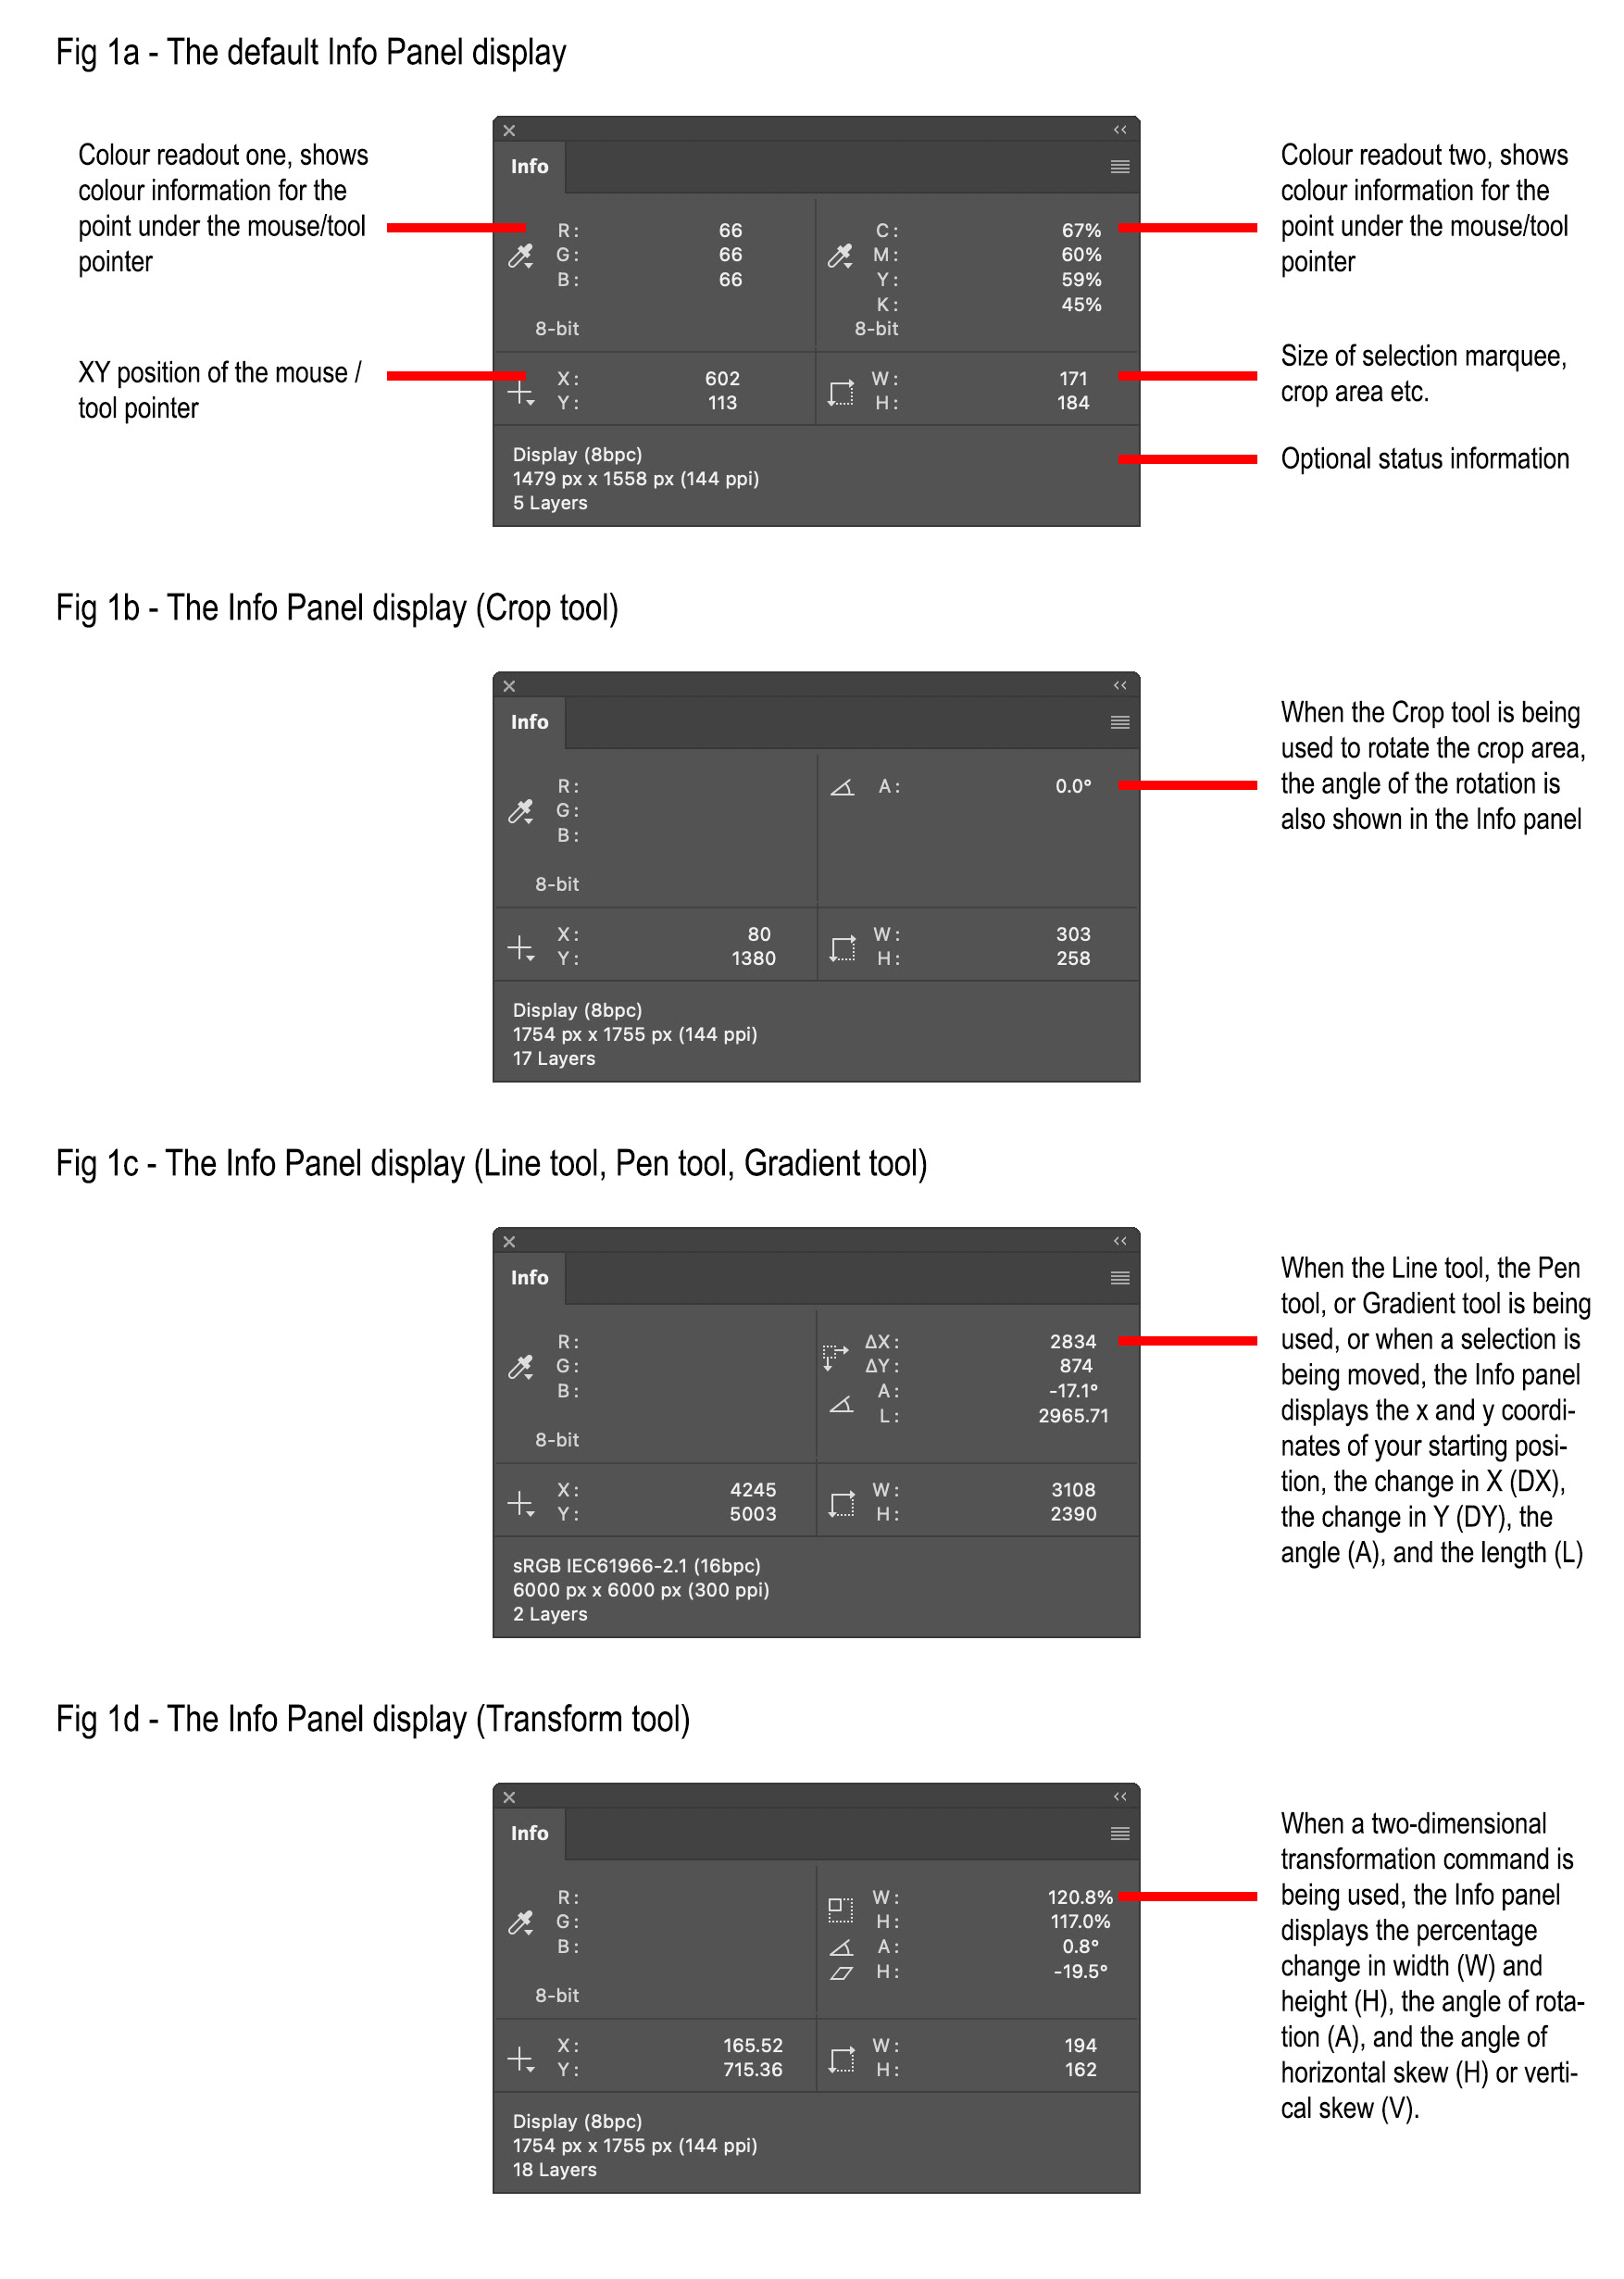
Fig 1 - Info Panel examples
To view the Info panel, choose Window / Info or press F8. If you’re like me, you’ll keep it handy, docked in your side navigator.
Perhaps the most common usage for the Info panel is reading colour information for points in your image. In addition to the two standard colour readouts that appear at the top of the Info panel which show colour information for the area under the mouse pointer / tool cursor, you can use the Color Sampler tool to add up to ten colour sample points to your image, the colour information for these will also appear in the Info panel (see Figure 2).
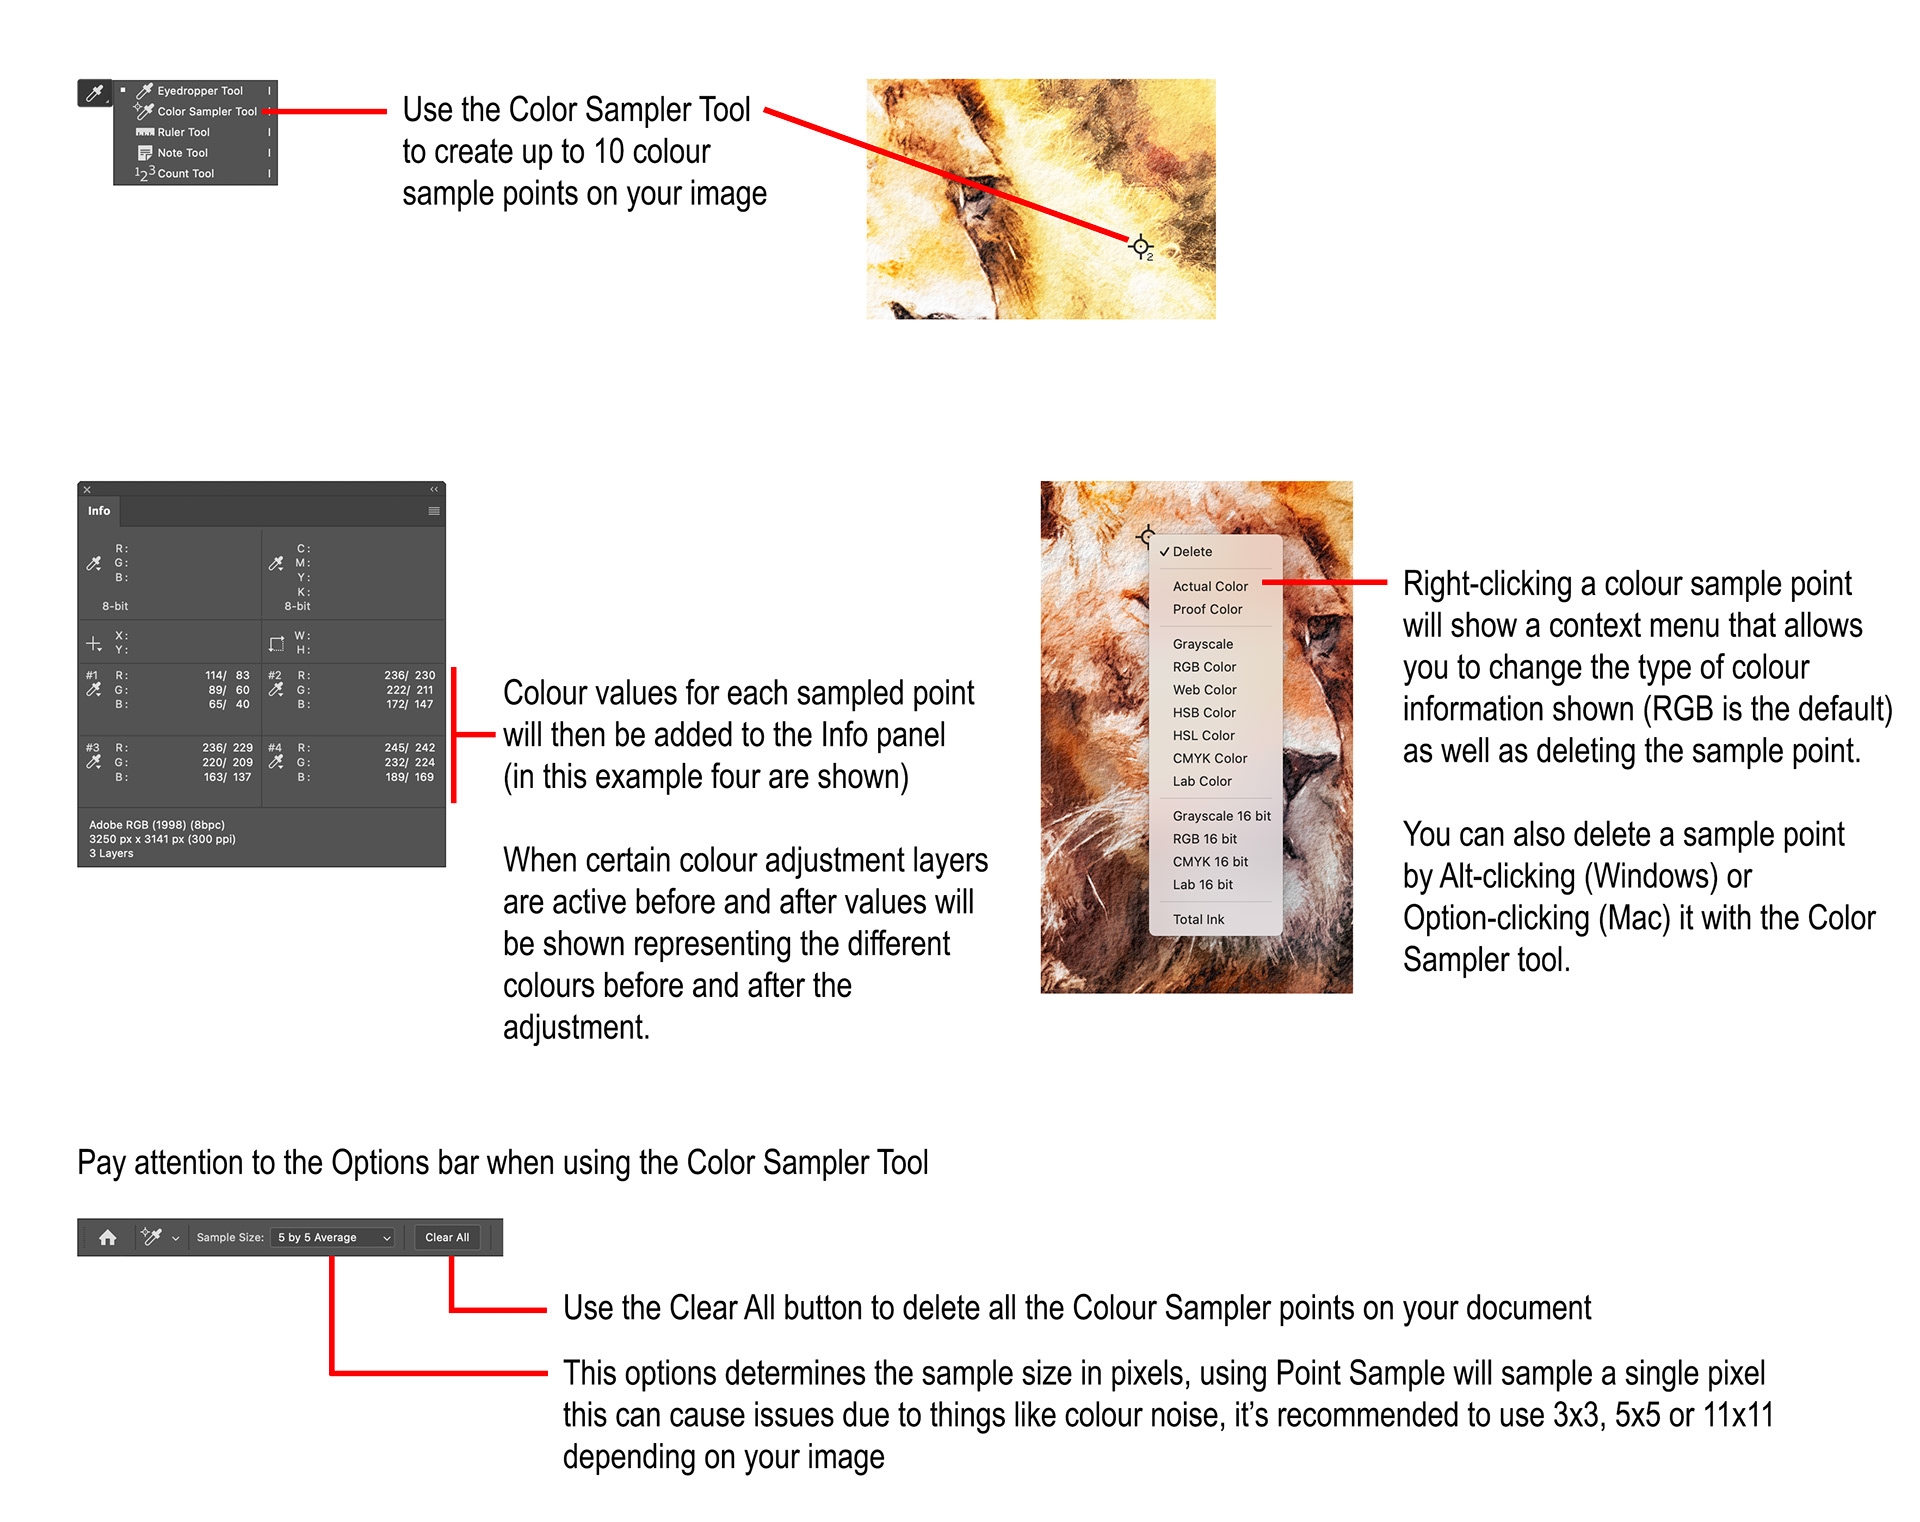
Fig 2 - Using the Color Sampler Tool
Colour information can be incredibly useful for things like colour matching certain parts of your image. You can customise what type of colour information you see by clicking any of the dropper icons next to the colour sample information on the panel (eg RGB, CMYK, HSB, HSL etc) – see Figure 3. For example, if you want to use a Hue Saturation adjustment layer to match colours in your image, changing to HSL will make using that adjustment layer much easier.
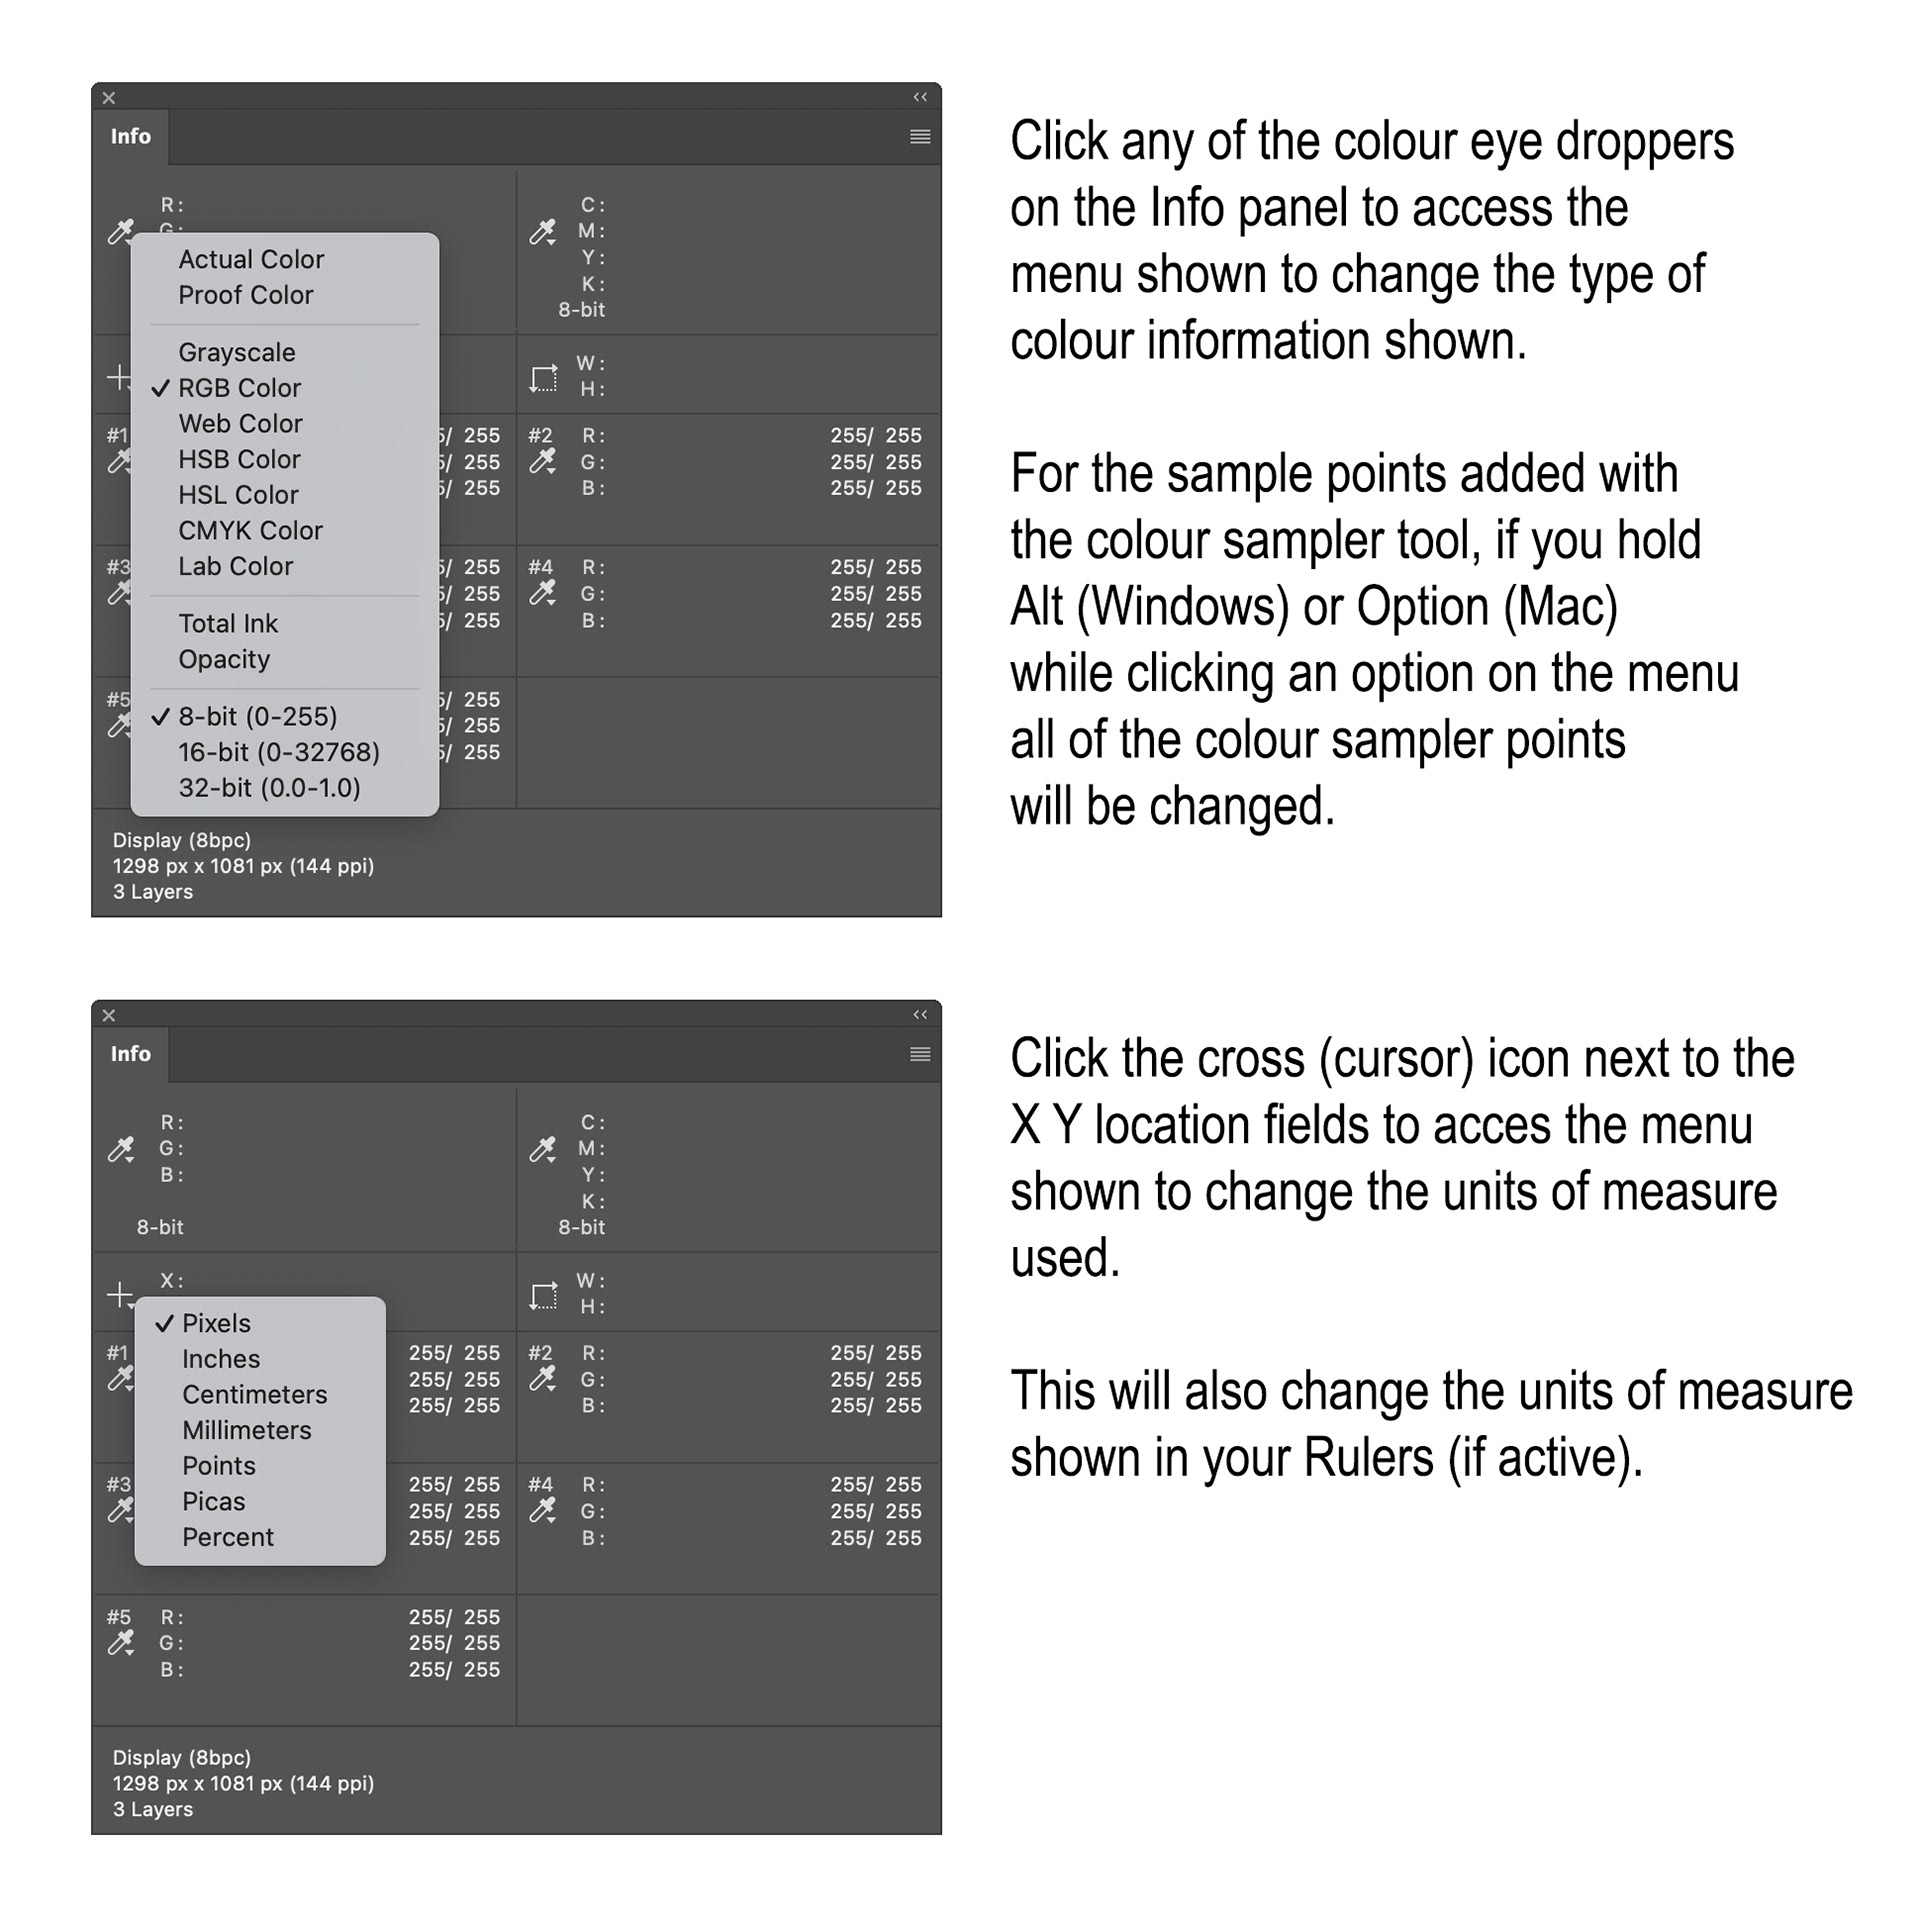
Fig 3 - Info Panel Context Menus
Here you can select several different options to display information about your image at the bottom of the Info panel.
The Info panel can be particularly useful and is well worth a look if you’re not using it.
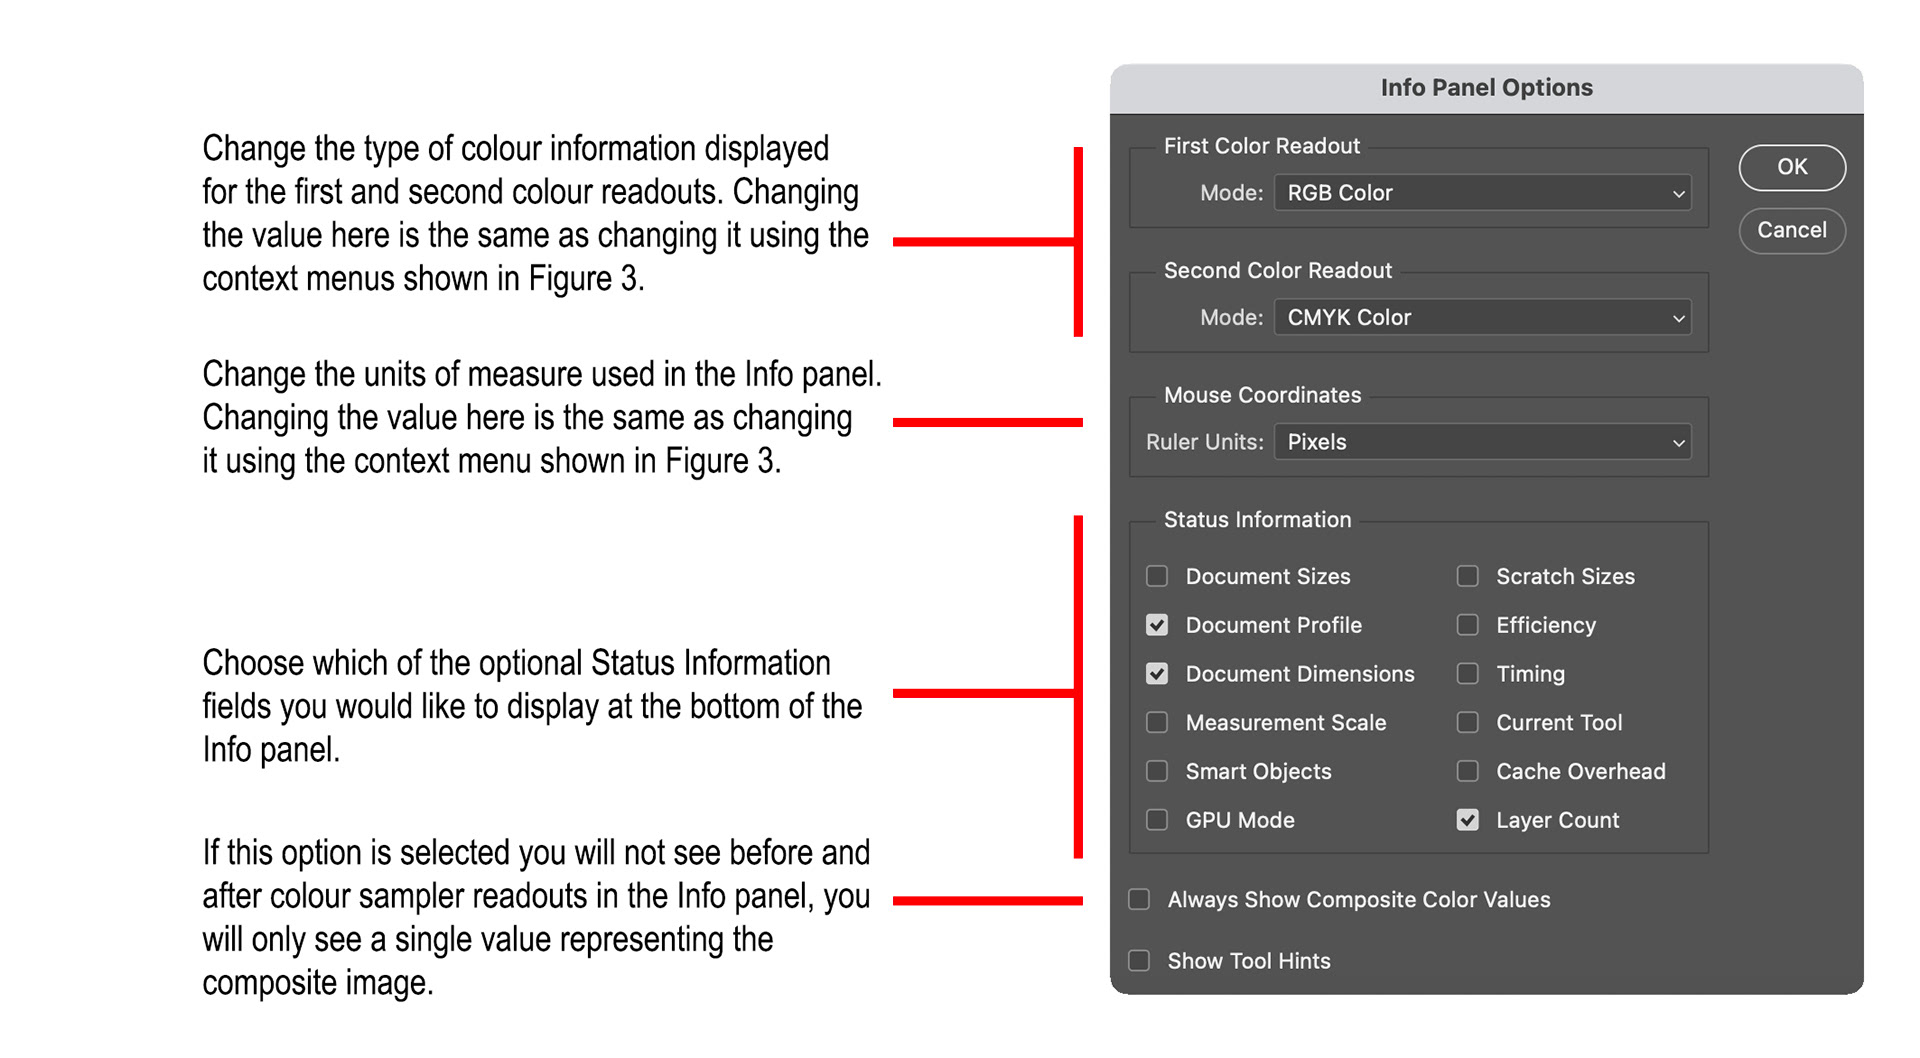
Fig 4 - Info Panel Options
As shown in Figure 3, you can also change the units of measure shown in the other Info panel fields (Pixels, Inches, Centimetres, Percent etc).
Whenever an adjustment layer that changes the colour of your image is active, you will see two colour values for each colour readout and colour sample point, the “before” value and the “after” value. That is, the colour values before the adjustment layer took effect, and the colour values after the adjustment layer took effect.
It is important to note that the colour values you’ll see in the Info panel are sensitive to the active layer, so if you have multiple adjustment layers in your document, as you click each one you’ll see the colour values change, they’ll show the actual change that each adjustment layer made, relative to the layer below.
Clicking the option menu at the top right gives you access to the Panel Options menu (see Figure 4).
This article was first published in the October 2025 issue of Artists Down Under magazine.