A while back I downloaded a Photoshop template and really struggled to see how it was working. It seemed to have masks but didn’t have any masks. It used Knockout layers. I truly didn’t realise the power of these until I watched a few more videos (one linked at the end of this article). I am constantly amazed at the amount of “stuff” hidden in plain sight in Photoshop.
A Knockout layer is a layer that can act like a mask and “knock out” areas of the layers underneath it.
Whereas a layer mask uses black and white to mask, a knockout layer uses opaqueness and transparency, so any transparent part of the layer has no effect on the layers below and the opaque areas are “knocked out” of the layers below.
To create a knockout layer, create a new blank layer, and place something on this layer that represents the area you wanted masked out. This can be simply brushed on pixels, or it can be a shape, text, vector and even a texture where you have converted the background of the texture to transparency.
Then on this layer go into the Layer Style dialog and change the Knockout setting to either Shallow or Deep (we’ll discuss the difference soon), and also set the Fill Opacity to 0% (see Figure 1).
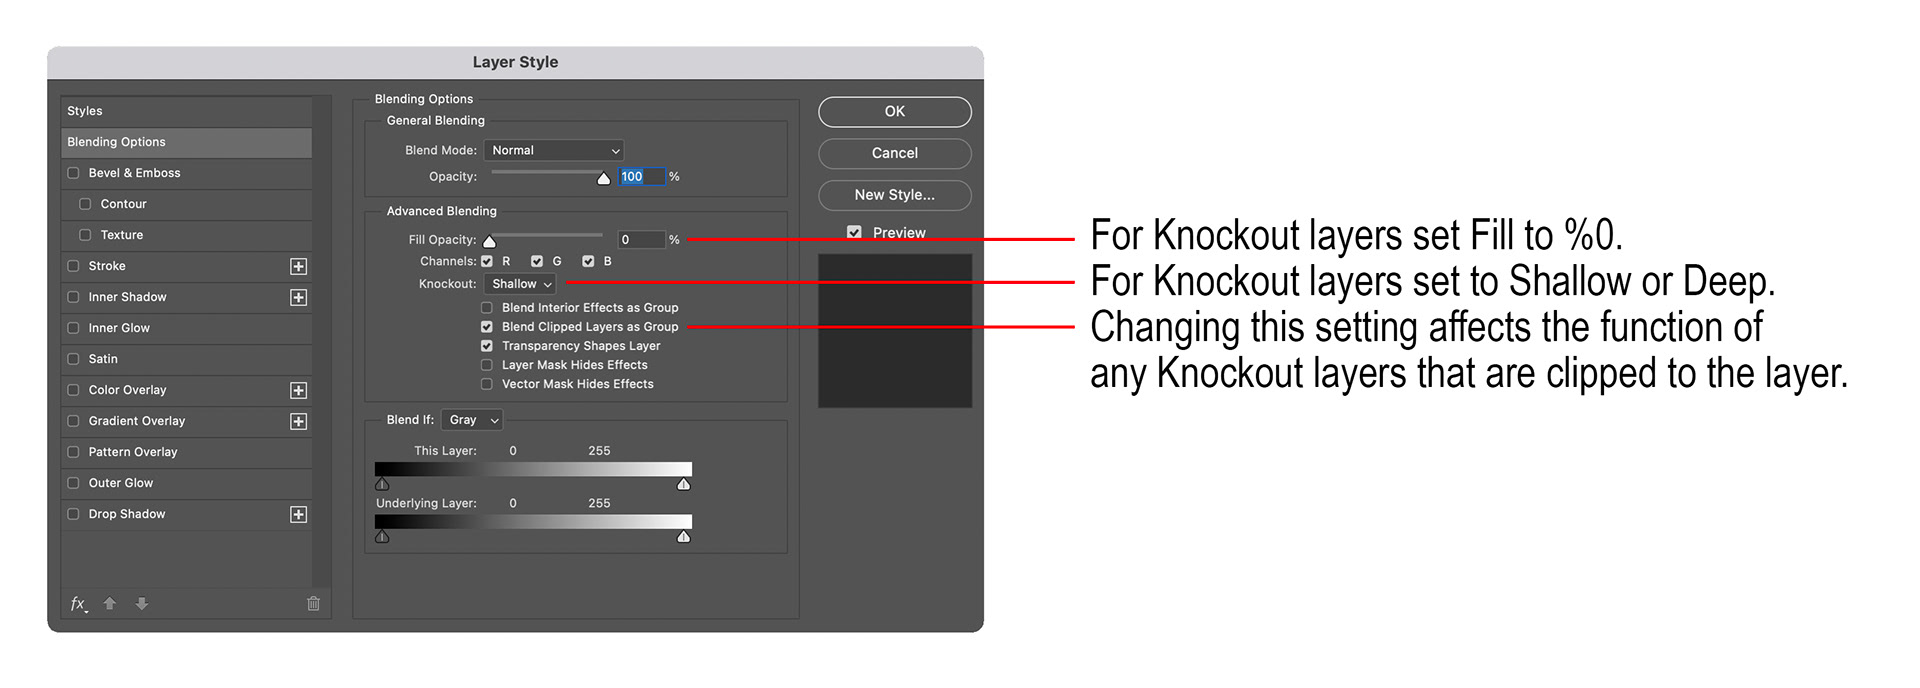
Fig 1 - Layer Style dialog
In the example shown in Figure 2, we have an image of an echidna that is a Background layer, with a second layer that is a white rectangle shape layer covering the right hand side of the image. This layer us set to 40% so that the image is slightly visible through it. The top two layers are both knockout layers, the first is a vertical type layer, the second another slightly smaller rectangle shape that only has a stroke (no fill). You’ll see that both are acting as masks and punching a hole through the white rectangle, revealing the Background layer.
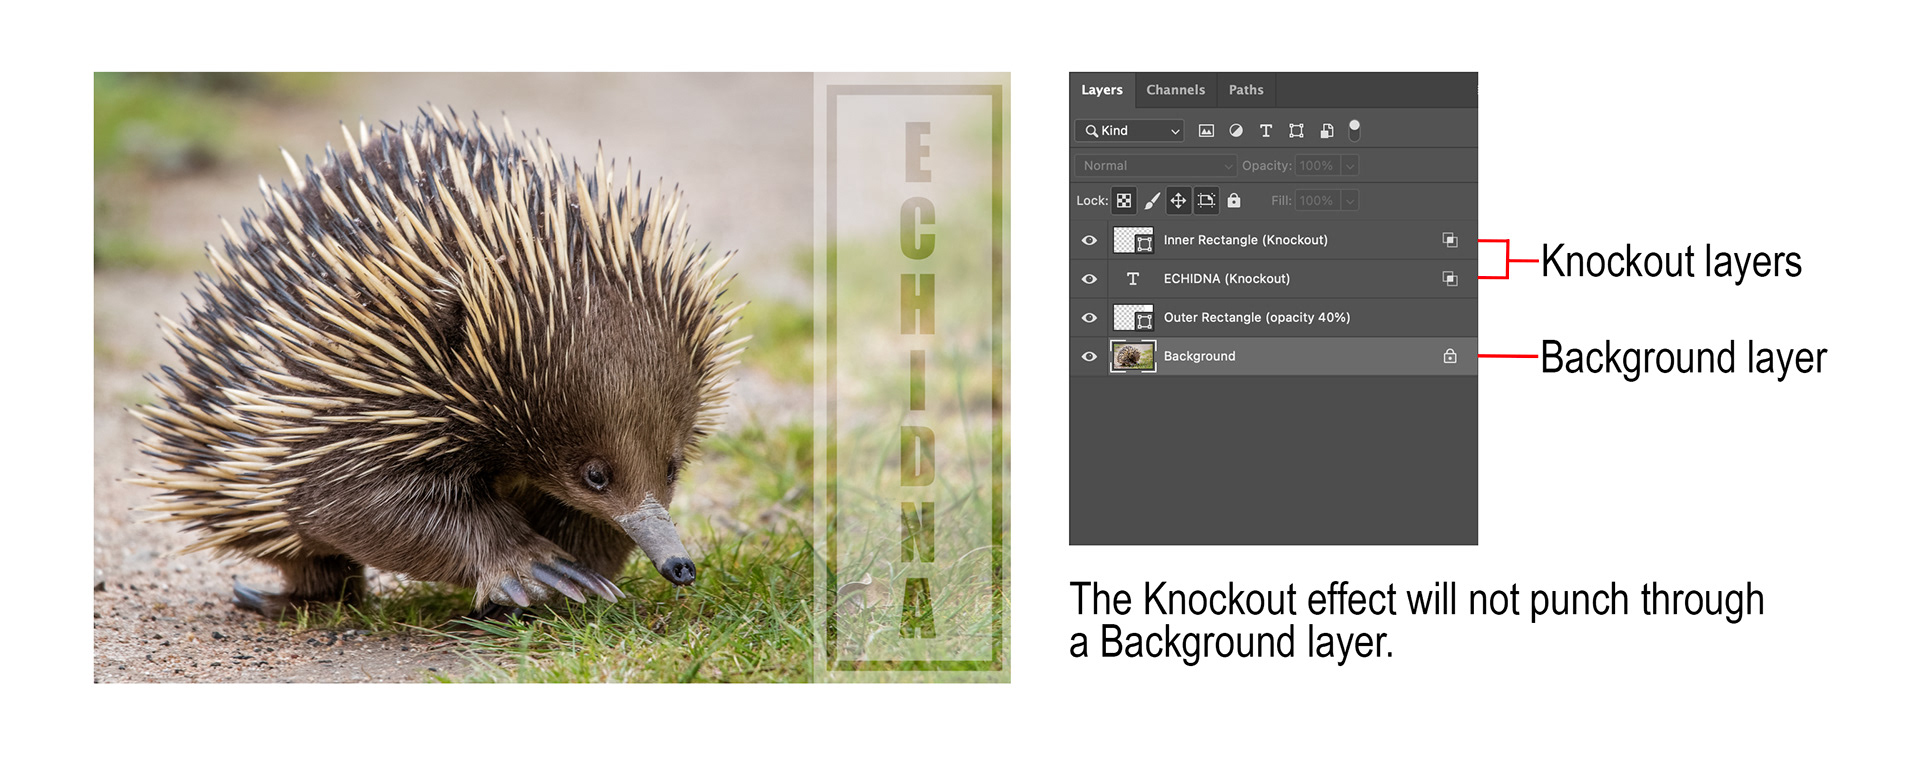
Fig 2 - Knockout layers with a Background layer
The example shown in Figure 3 is the same, but the bottom layer is not a true Background layer, you’ll notice that without a proper Background layer, the knockout layers punch right through creating transparency.
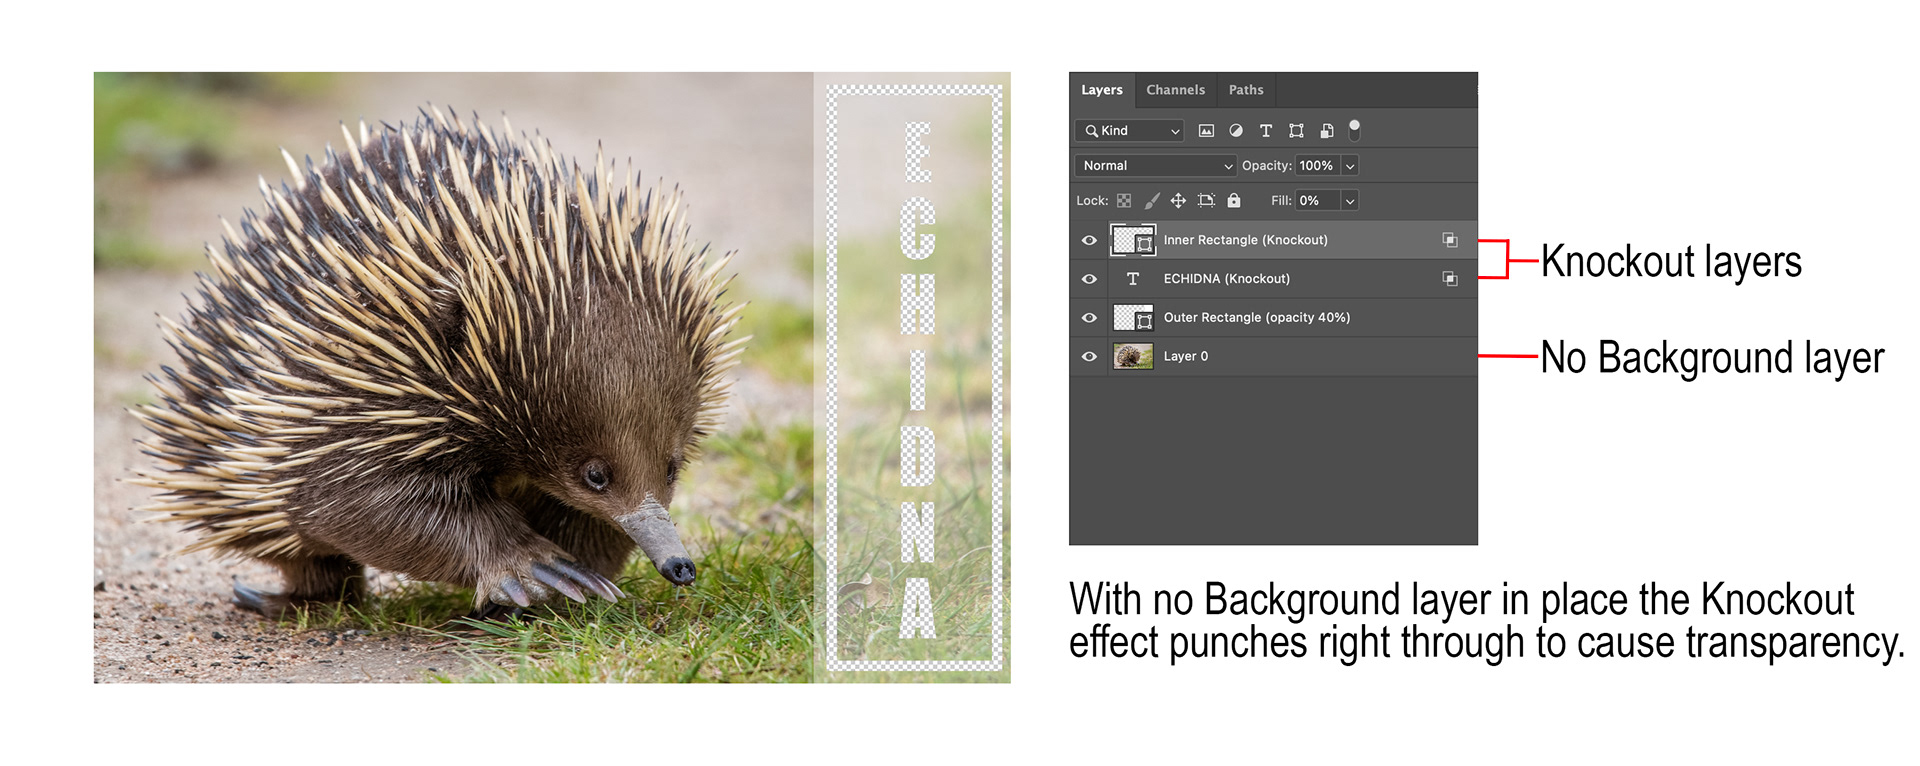
Fig 3 - Knockout layers with no Background layer
Remember, if you want to convert a layer into a proper Background layer you can use the Layer / New / Background from Layer command.
The example shown in Figure 4 illustrates a useful feature when using knockout layers. Even though the contents of the knockout layer are not visible (because Fill has been set to 0%), you can still use other Layer Styles to accentuate the knockouts, in this example a narrow white stroke has been added to the knockout layers.
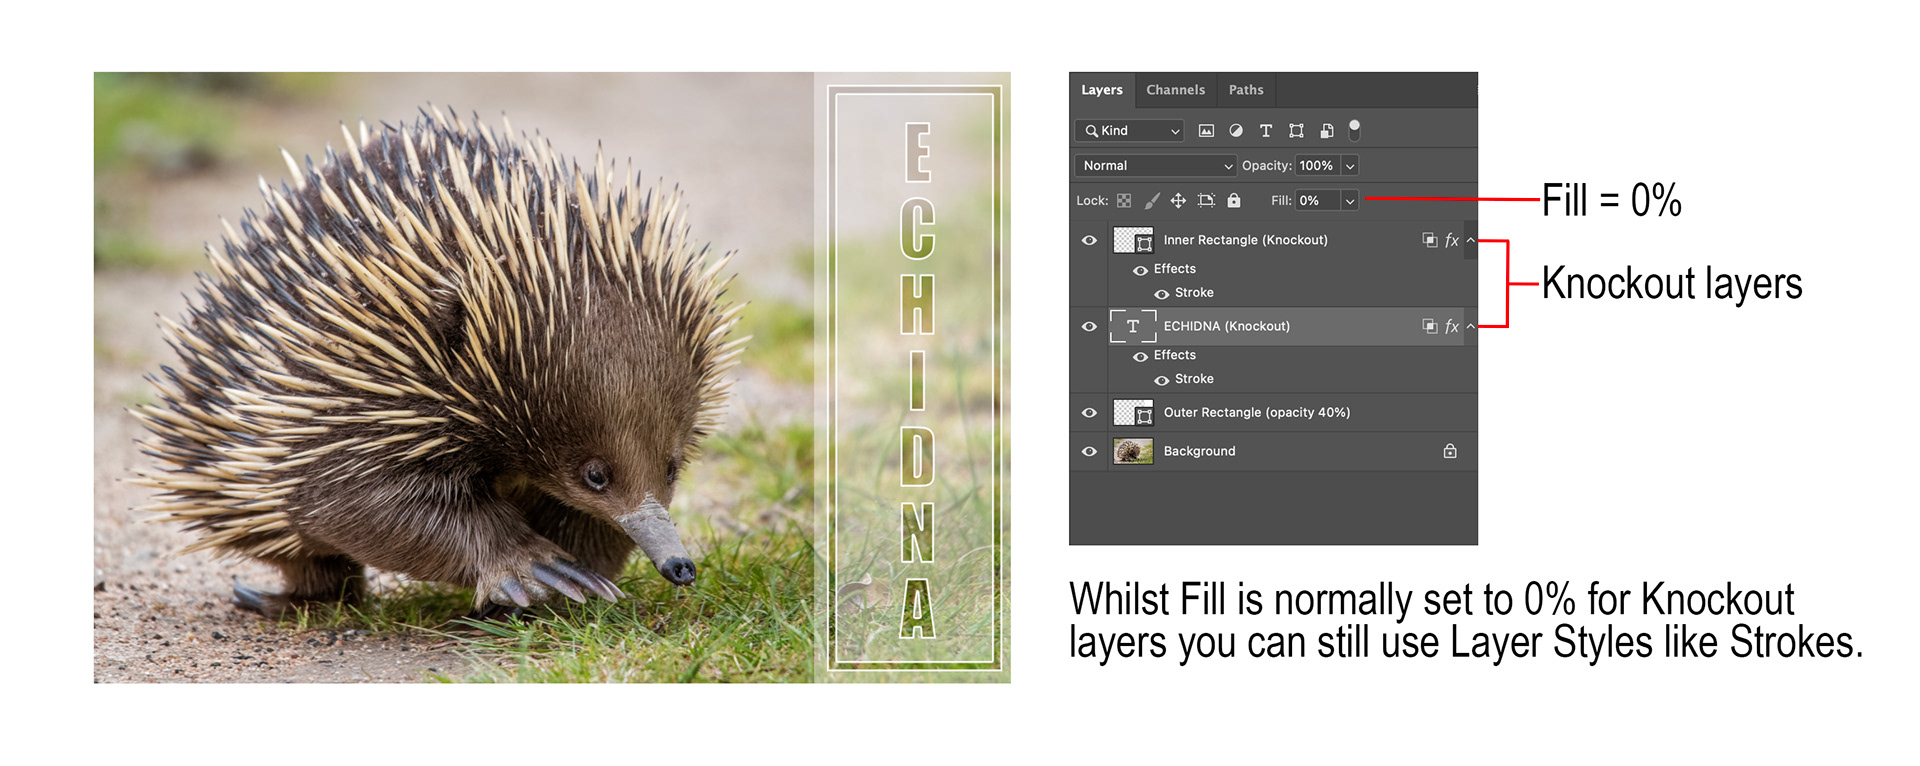
Fig 4 - Using Layer Styles on Knockout layers
Ok, so what is the difference between Deep and Shallow?
If a Knockout layer is set to Deep, it will always mask or knock out all layers below it, right down to the Background layer. If there is no Background layer the knockout will create transparency.
If a Knockout layer is set to Shallow, and is in a group, it will only mask or knock out layers that are also included in the group.
The example shown in Figure 5 consists of a fiery image as the Background layer with a pink gradient layer as the second layer. The third layer is a knockout layer with two unevenly sized white rectangles on either side revealing the background layer, leaving the pink gradient in the central section. Because it is not in a group, the Deep or Shallow setting is irrelevant for this layer as either would have the same effect of knocking out through to the Background layer.
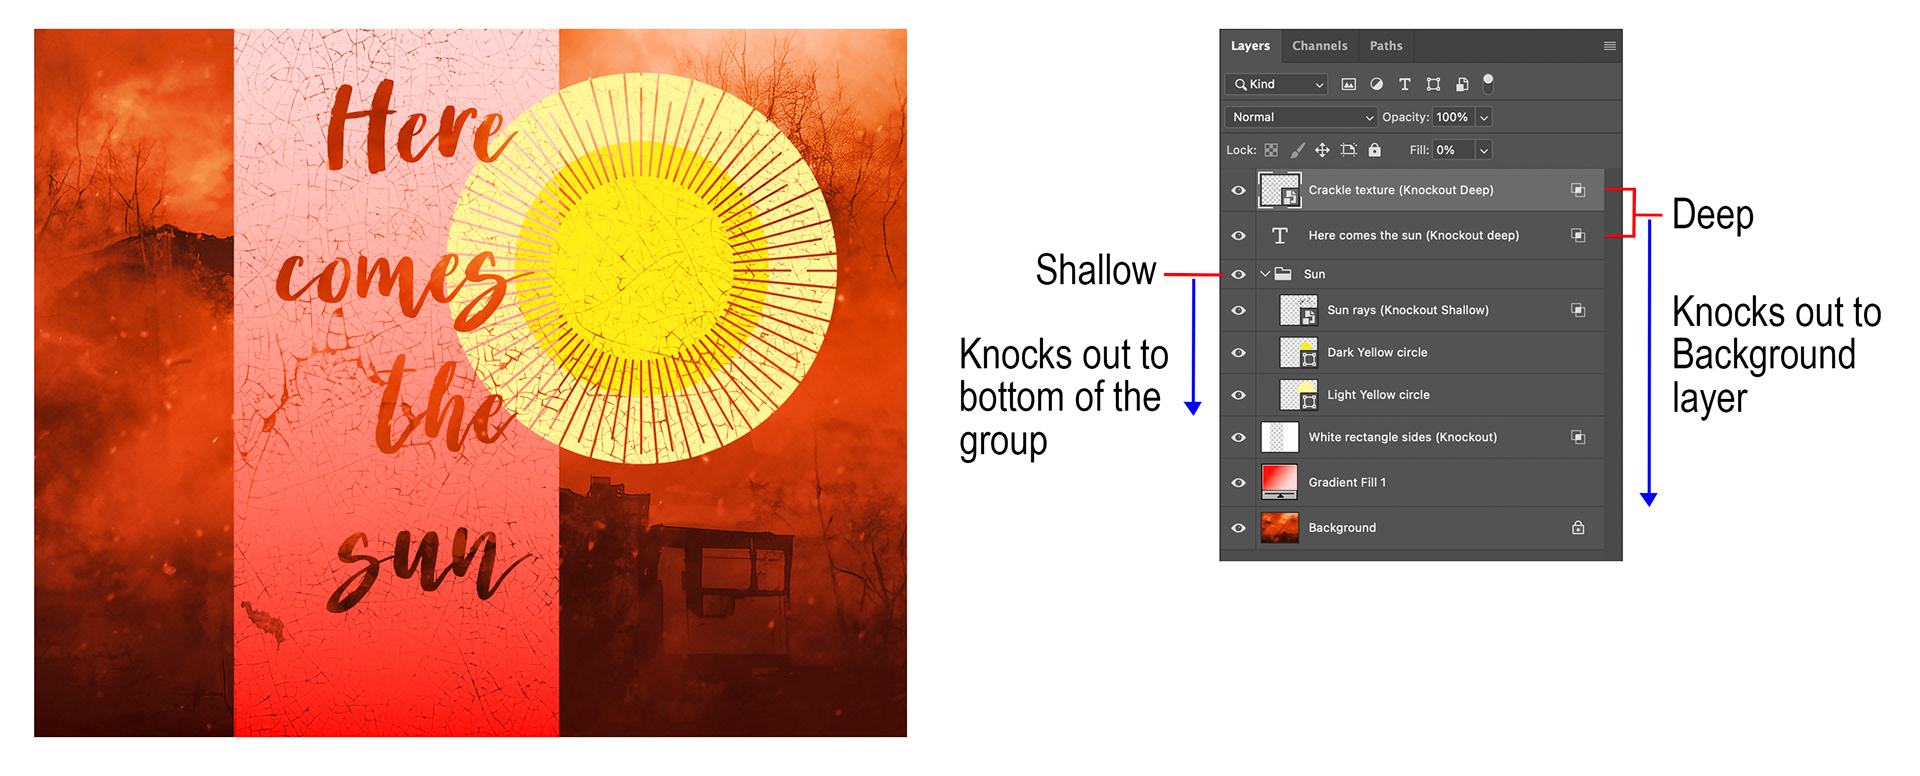
Fig 5 - Deep vs Shallow
The next element in the layer stack is a group containing a dark yellow circle on top of a lighter yellow circle with a knockout layer containing a “sun ray” graphic above them both. This knockout layer is set to shallow so it only knocks out through the two yellow circles in the group.
Then sitting atop the layer stack are two more knockout layouts, both set to Deep, a text layer and a texture layer. Both of these knock through right to the Background image. I hope that this simple example (of some “not so great” art) helps to illustrate the effect of deep vs shallow knockout layers.
Another way to limit the depth of the effect of a knockout layer is to clip it to the layer to be knocked through. In this case there is one additional step, you must uncheck the “Blend Clipped Layers as Group” check box in the Layer Styles dialog of the base layer (the one being “knocked through” not the knockout layer).
You can also clip multiple knockout layers to a single layer if you need multiple “masks”.
The example shown in Figure 6 shows a simple example of this. The text layers “Horizontal” and “Vertical” have a single knockout layer clipped to them to knock out the horizontal and vertical lines respectively. The “Both” layer has copies of both of the knockout layers clipped to it to give the checkerboard effect. In this example, each of the text layers must have the “Blend Clipped Layers as Group” checkbox unchecked.
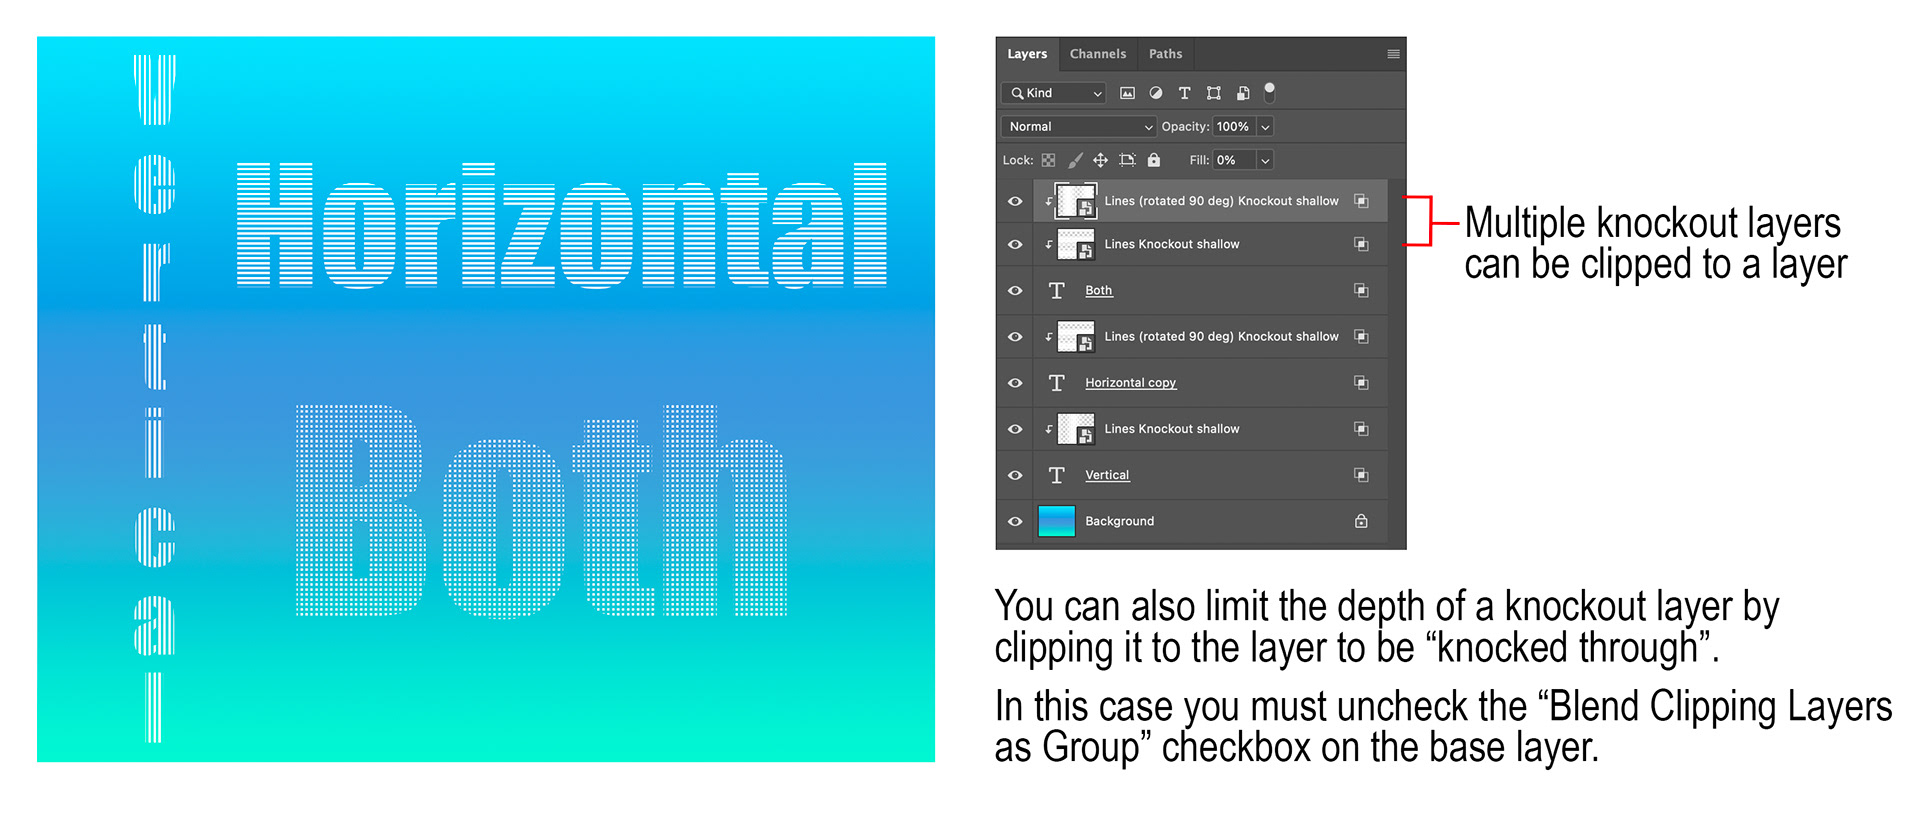
Fig 6 - Clipping Knockout layers
This last example demonstrates one of the big advantages of Knockout layers. As they are just layers they can be converted into SmartObjects. In the example there are four Knockout layers used, but they are all copies of the same SmartObject, with two of them rotated 90 degrees. This means that the file size is a lot smaller than it would be had multiple masks been used (remember a mask is just a pixel layer that is as large as your image, so adding a lot of masks can significantly increase file size).
Also, using SmartObjects means that if your image is resized they will retain image quality, this is not always the case will masks that can pixelate.
Obviously, any text layers or vector shape layers used as Knockout layers remain fully editable throughout, another huge advantage. If using masks you would have to rasterize these (again increasing file size) and you would need to recreate them if you need to change the text or the shape.
If you’re interested to see a great live demonstration of using Knockout layers, I can highly recommend the following video from Brady of TextureLabs.org
Knockout layers have the potential to drastically change your workflow and offer a lot more flexibility. Give them a try.
This article was first published in the July 2022 issue of Artists Down Under magazine.