Like me you probably spend most of your time in Photoshop in RGB colour mode, and perhaps some time in CMYK colour mode if you dabble in printing. These are the two most popular colour modes used in Photoshop.
RGB (Red, Green, Blue) is a colour space based around devices like cameras and computer screens, where colours are specified by the amount of red, green and blue light. In RGB each of the colour channels are specified by a number from 0 to 255. When all channels are at zero (ie there is no red, green or blue light) the result is black, when all channels are at maximum (255) the result is white.
CMYK (Cyan, Magenta, Yellow and Black) is a colour space based around printing, the laying down of ink on a white surface. In CMYK each of the colour channels are specified by a percentage (from 0 to 100). When all channels are at zero (ie there is no cyan, magenta, yellow or black ink) the result is white. The more ink that is laid down the darker the colour, with the cyan, magenta and yellow channels are at 100% the colour is a dark grey. Ink from the black channel needs to be added to achieve dark colours, including true black.
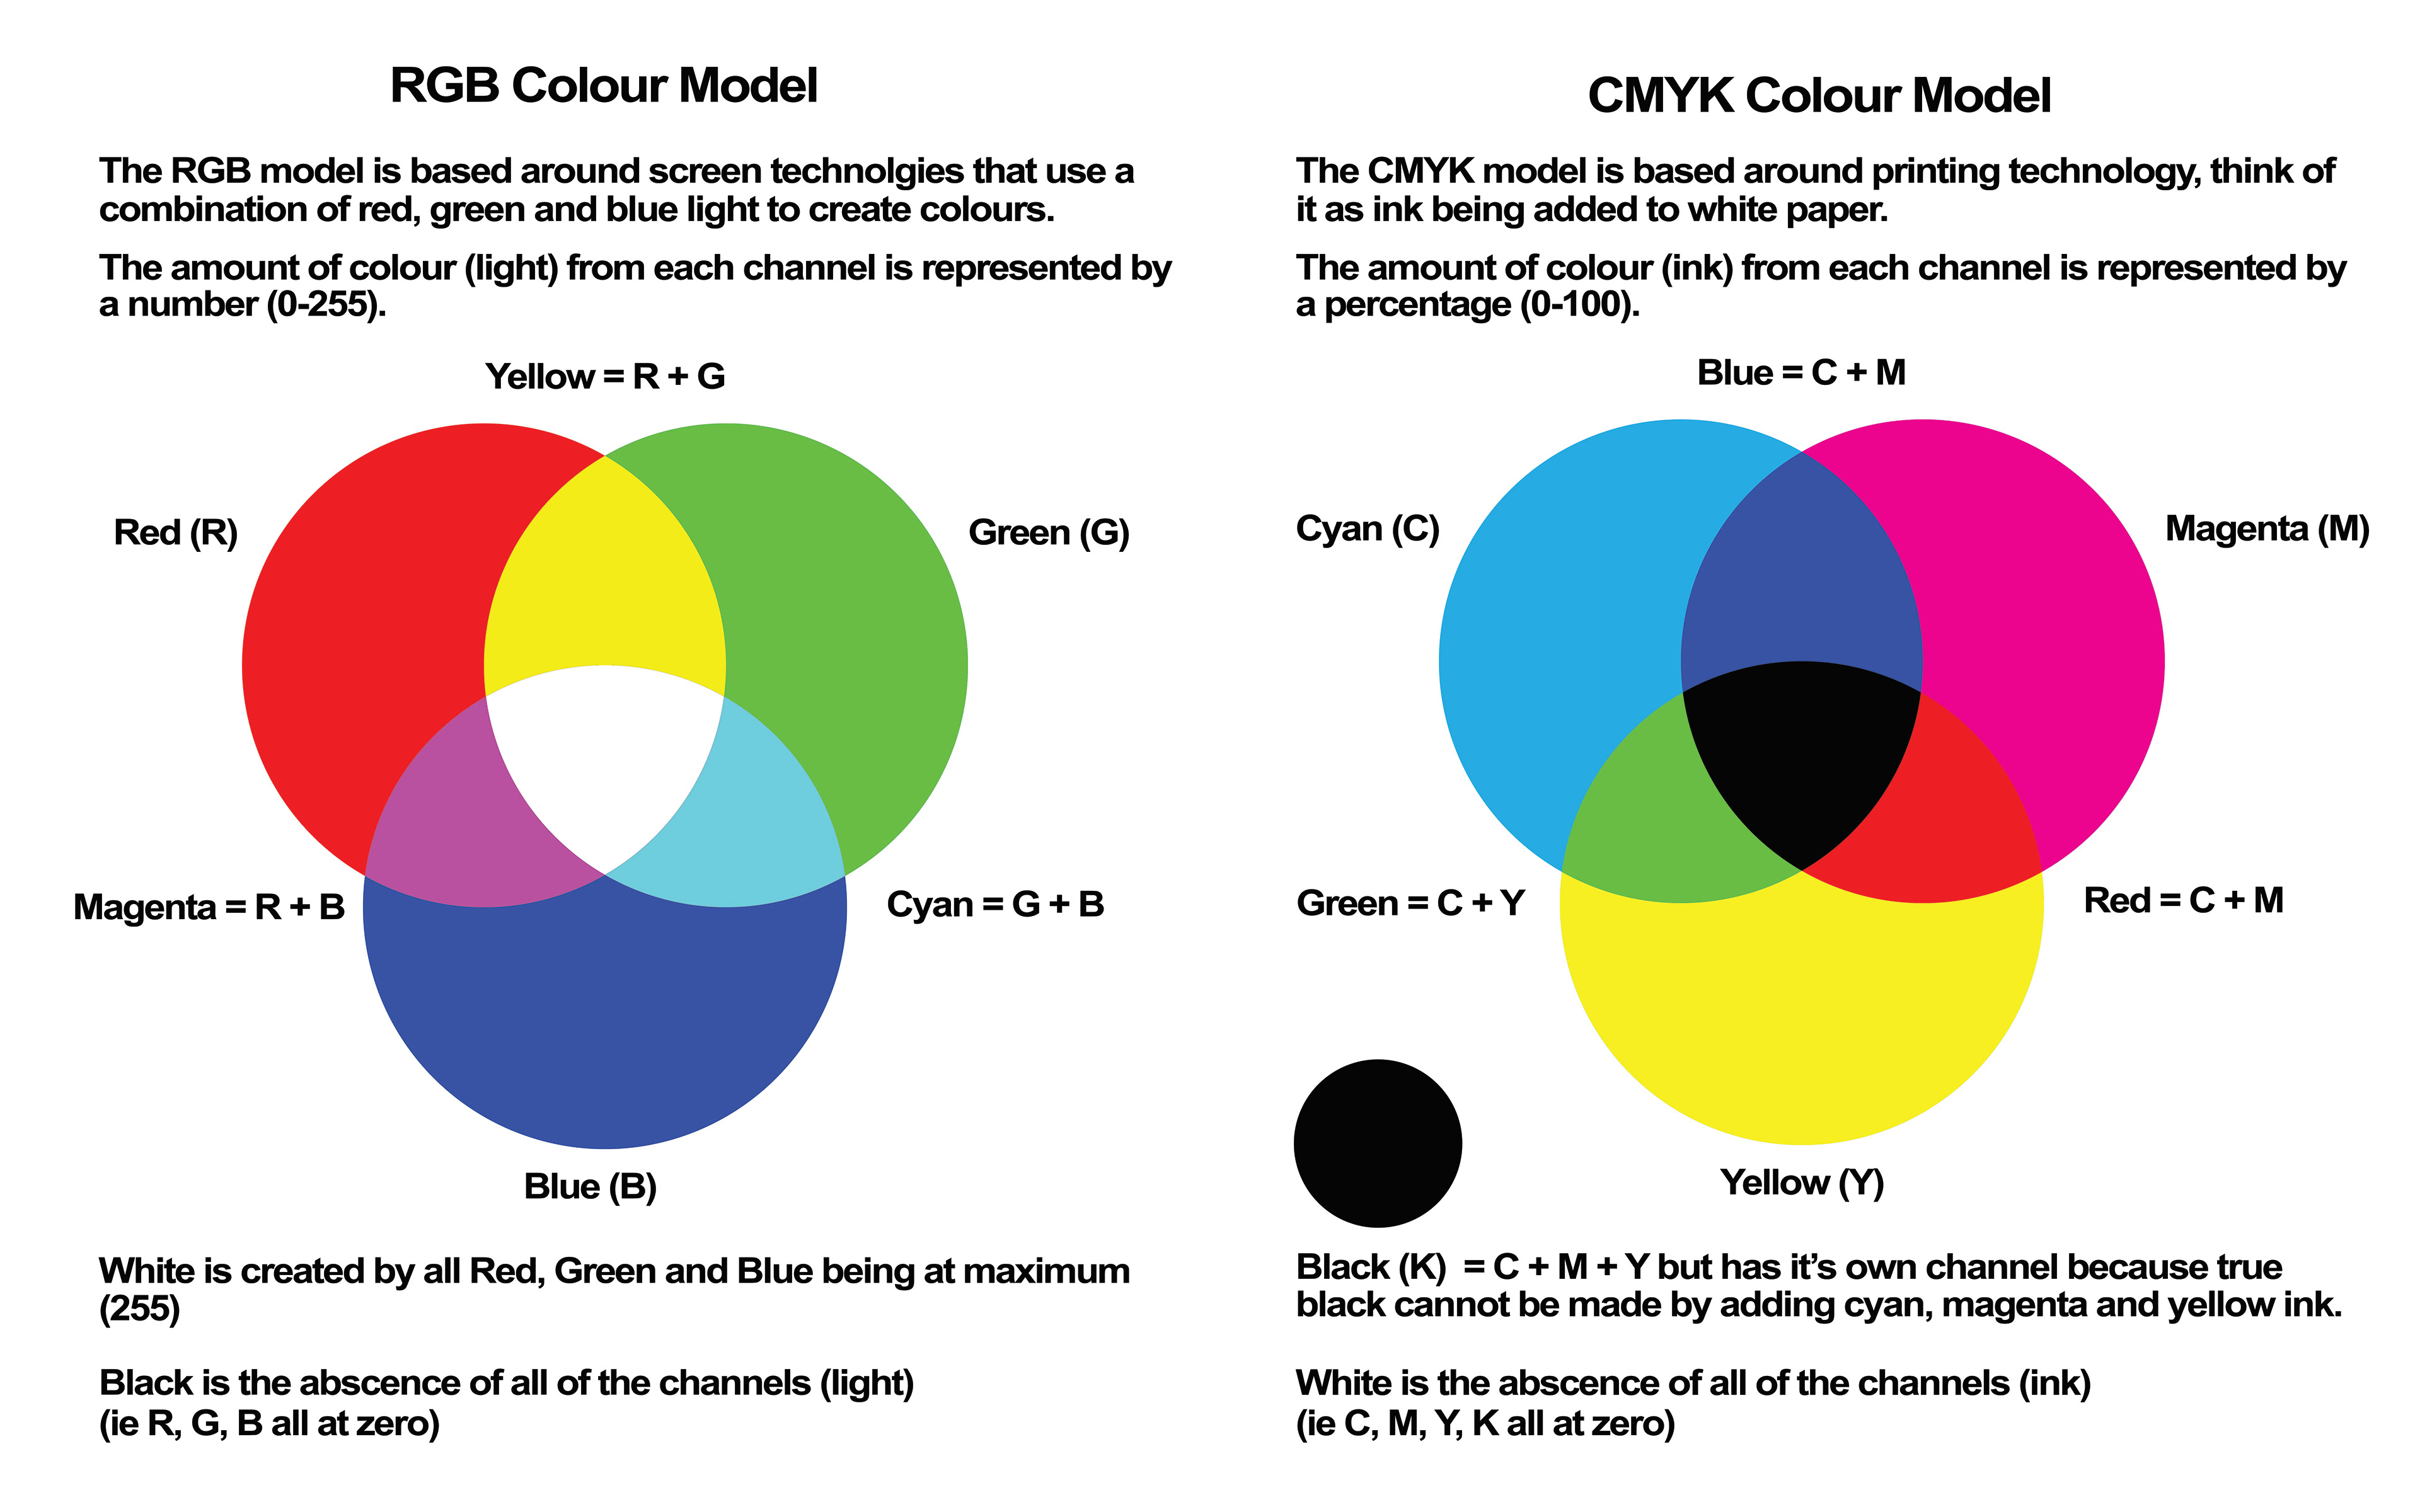
Fig 1 - The RGB and CMYK Colour Models
From the above descriptions it is obvious that the amounts specified in the RGB and CMYK channels not only specify the colour, but also the luminosity, and this can often make manipulating colours in these modes using things like the Curves adjustment tricky. It is very easy to end up with over-saturated or muddy colours when manipulating colours in these modes.
The Lab colour space on the other hand has a separate channel for Luminosity called the Lightness or L channel. In this channel the lightness or luminosity is described with a number from 0 (black) to 100 (white). The colour is specified using two other channels, the “a” and “b” channels. Both of these run from -127 to +127, with the “a” channel specifying green (-127) through red (+127), and the “b” channel specifying blue (-127) through yellow (+127). Eagle-eyed photographers might notice that these colour ranges are somewhat similar to the Tint and Temperature sliders used to adjust White Balance.
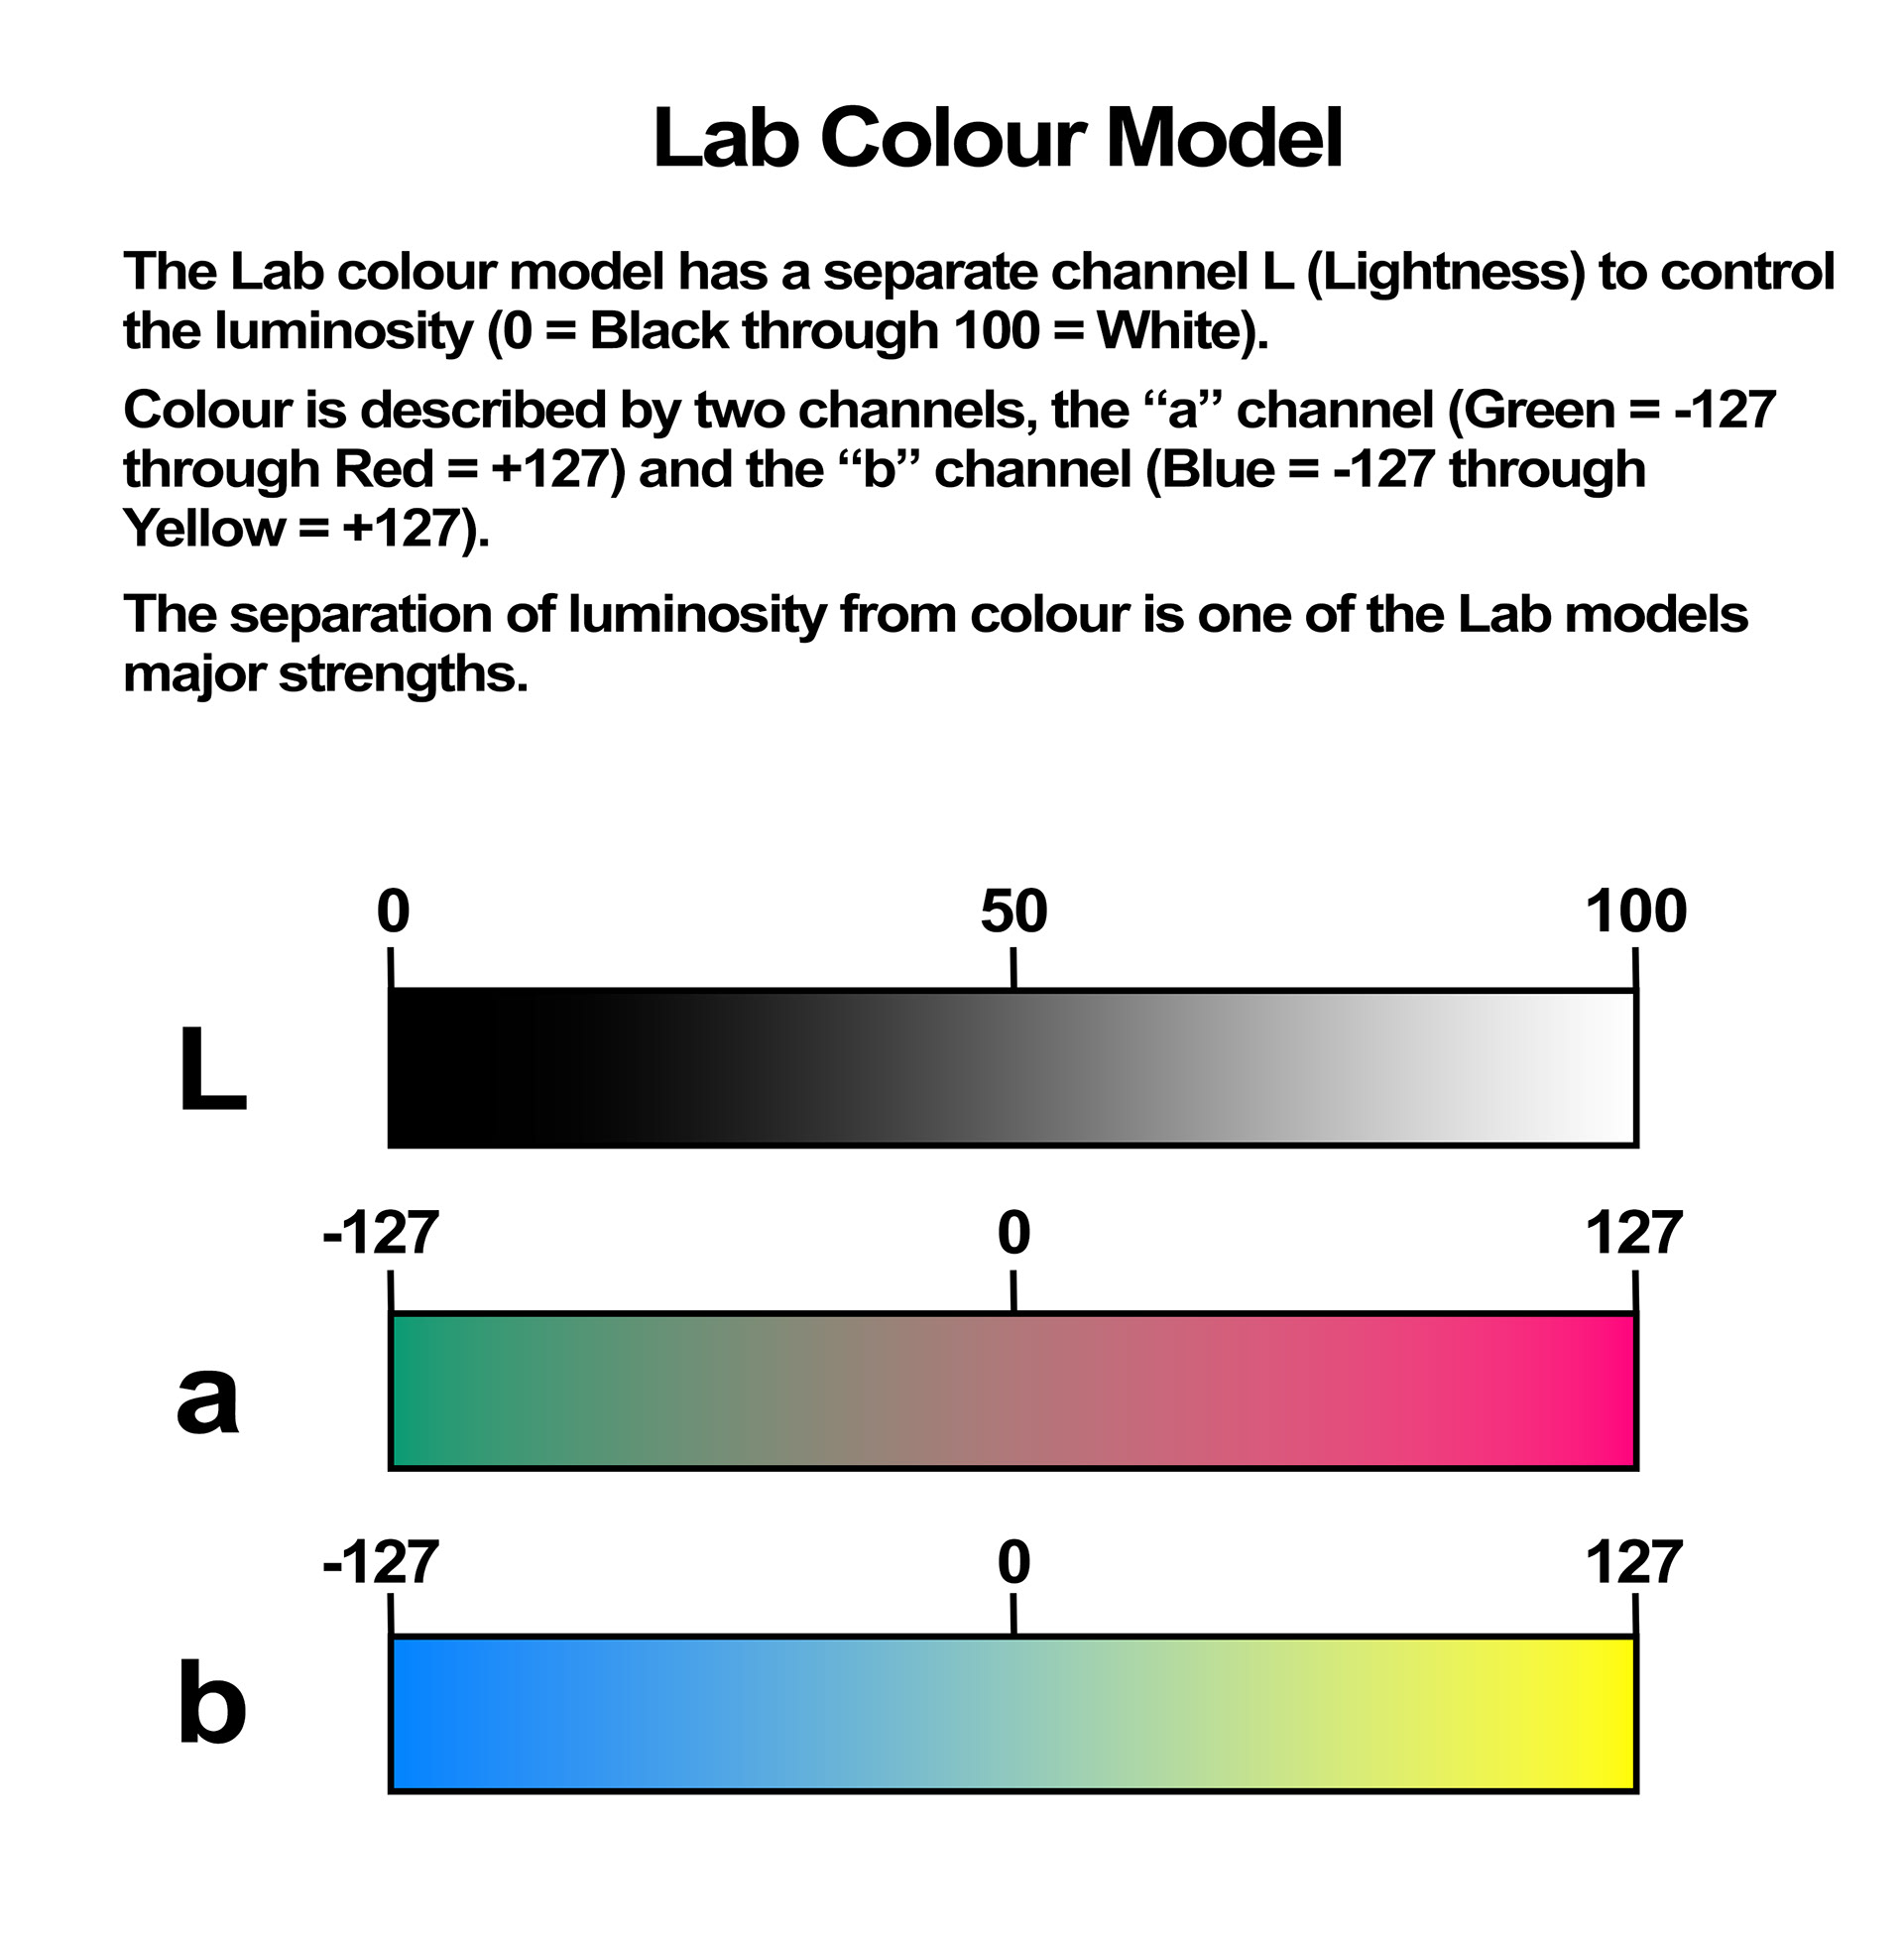
Fig 2 - Lab Colour Model
The Lab colour space is a larger colour space than either RGB or CMYK, and it is device-independent which is one reason it is often used in industry applications to specify colours.
In this article though, I’m just encouraging you to have a play with it the next time you want to manipulate colours in Photoshop, it is well worth it to do so – here’s how.
To convert your image to Lab colour mode you can use the Image / Mode / Lab command (see Figure 3). Alternatively, you can use the Edit / Convert to Profile command, choose Lab in the Profile drop-down and press Ok (see Figure 4).
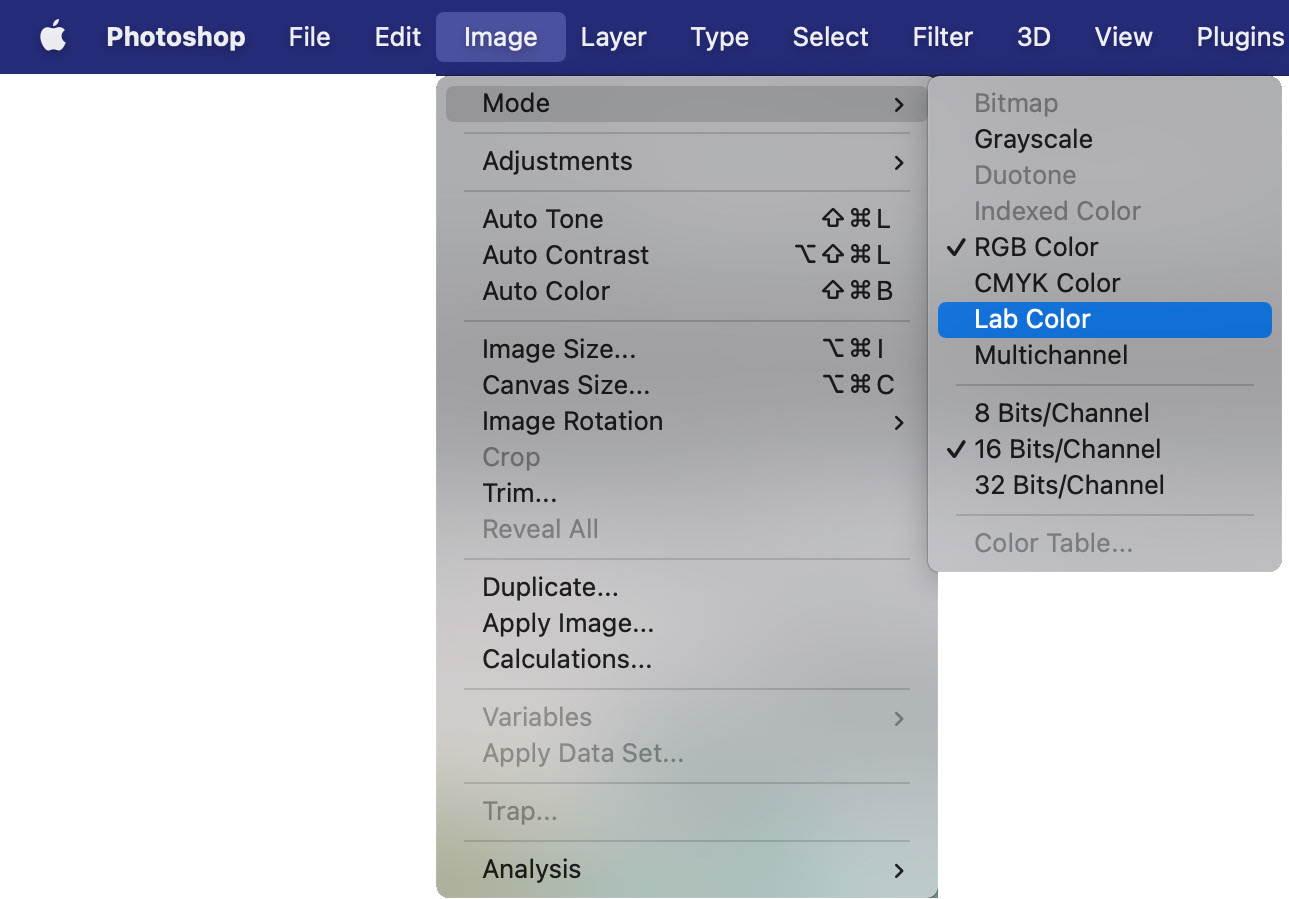
Fig 3 - Image Mode Lab
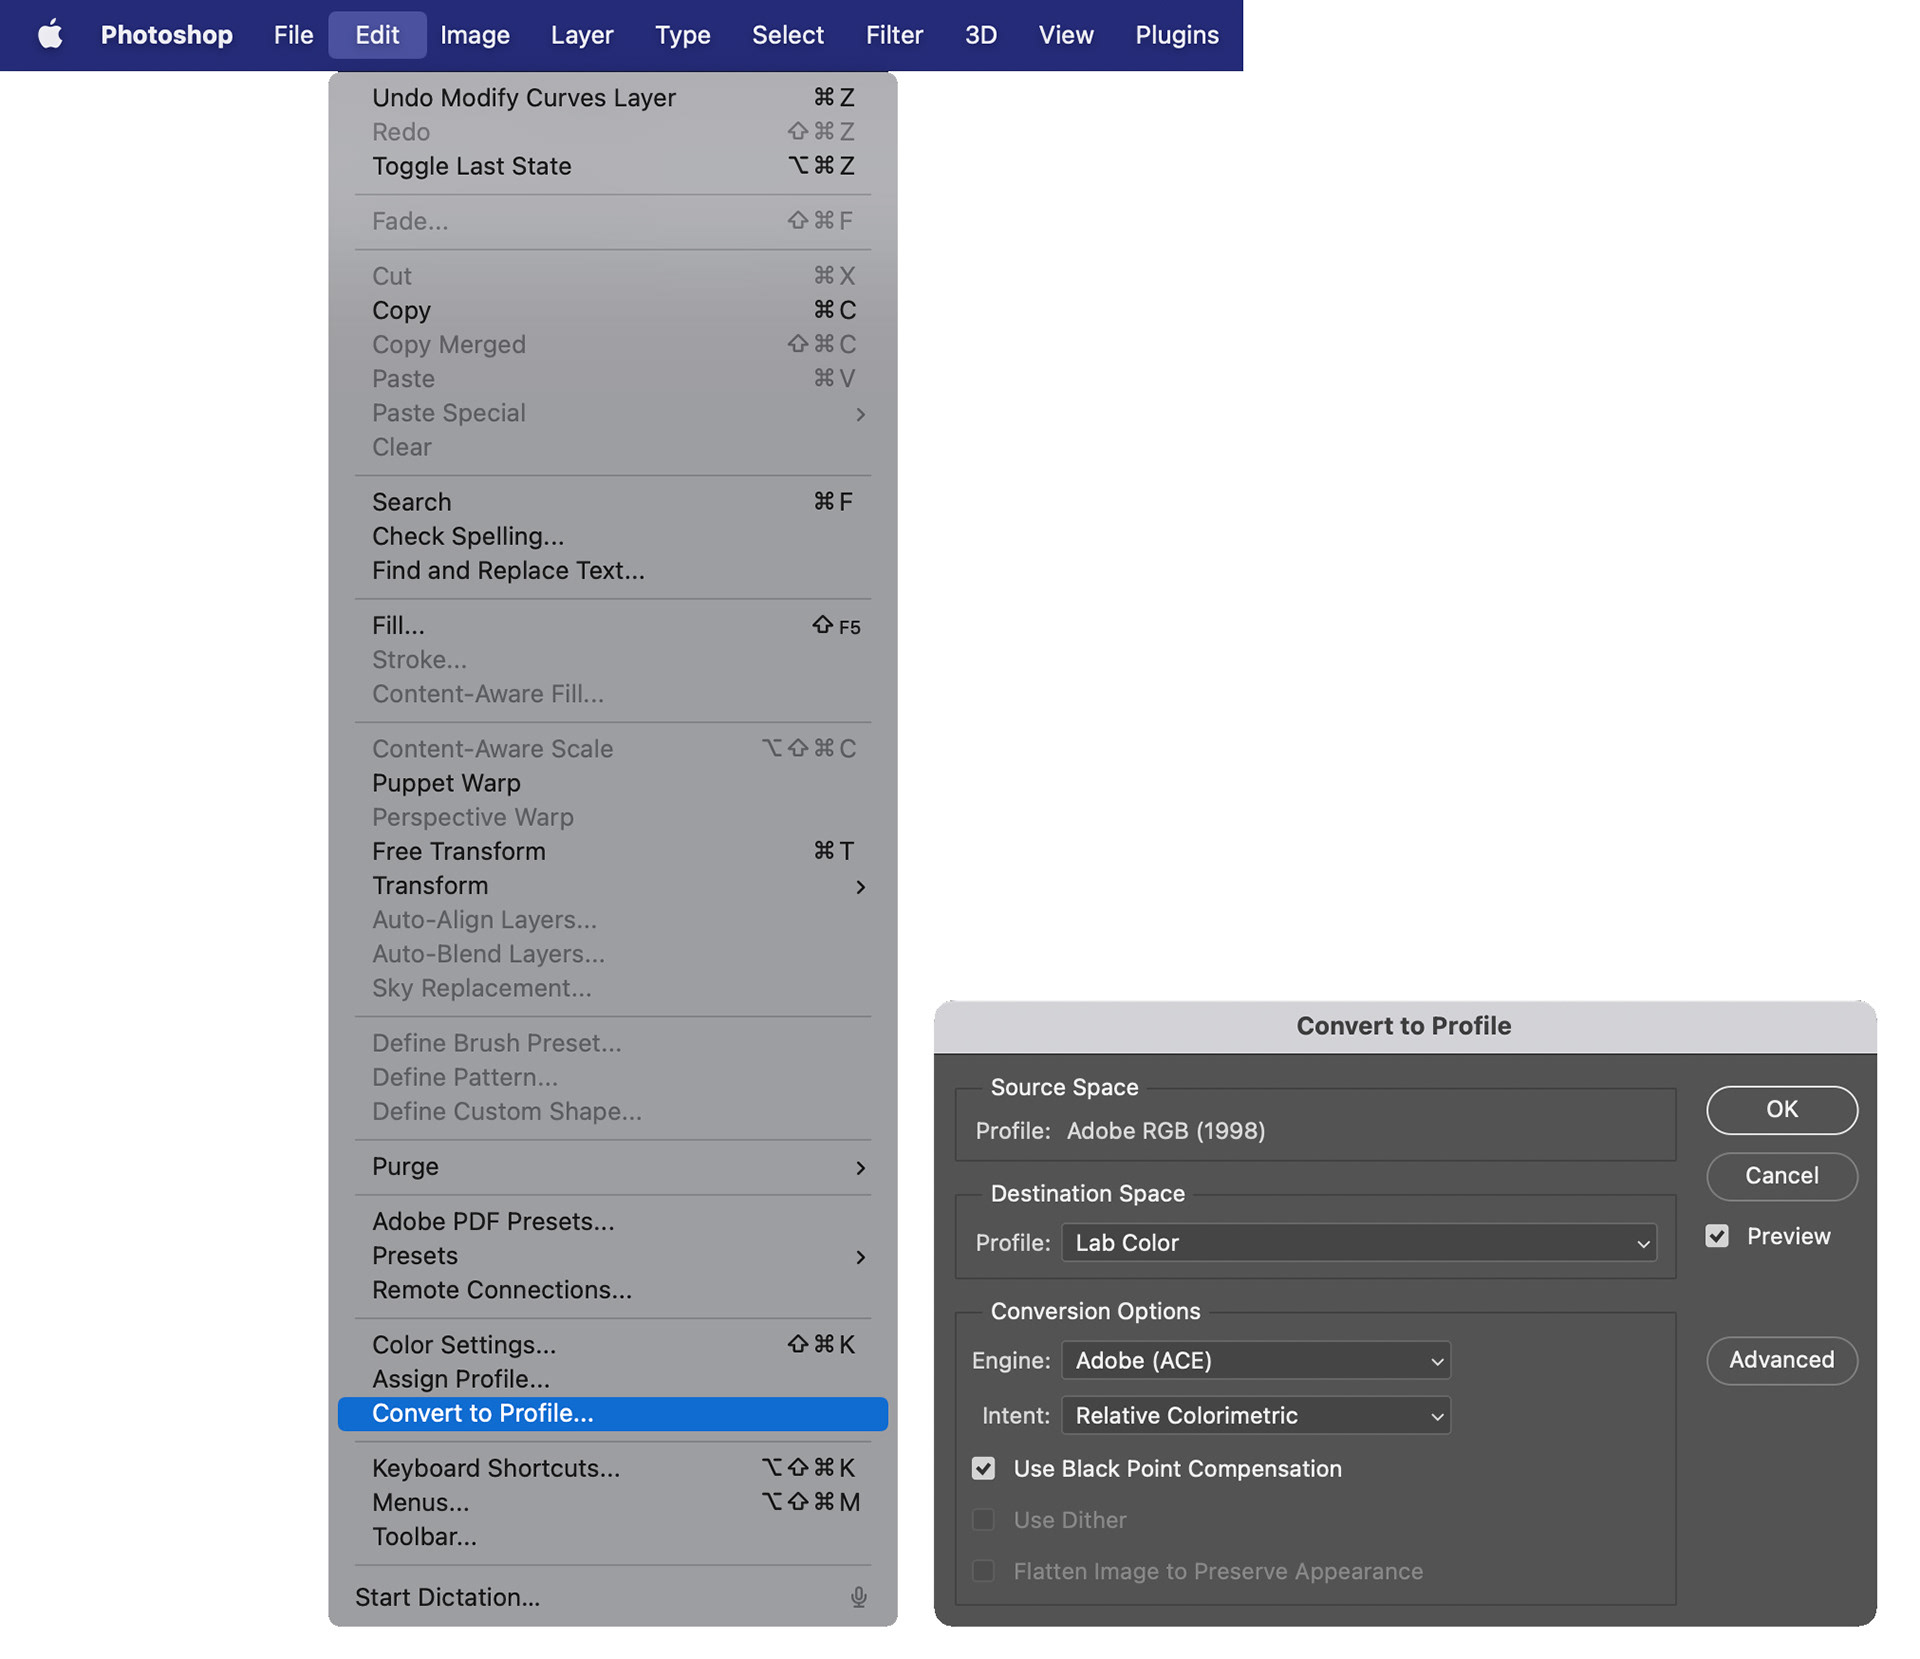
Fig 4 - Edit Convert to Profile
When changing image modes, if you have certain layers in your file (like Curves adjustment layers for example), you will receive warning messages that certain adjustment layers might be discarded, or that the appearance may change. You can choose to Flatten or Merge the document, cancel or proceed anyway. Use caution here so as to not lose any information from your file.
Similar warning messages will be shown when converting back to RGB or CMYK from Lab mode.
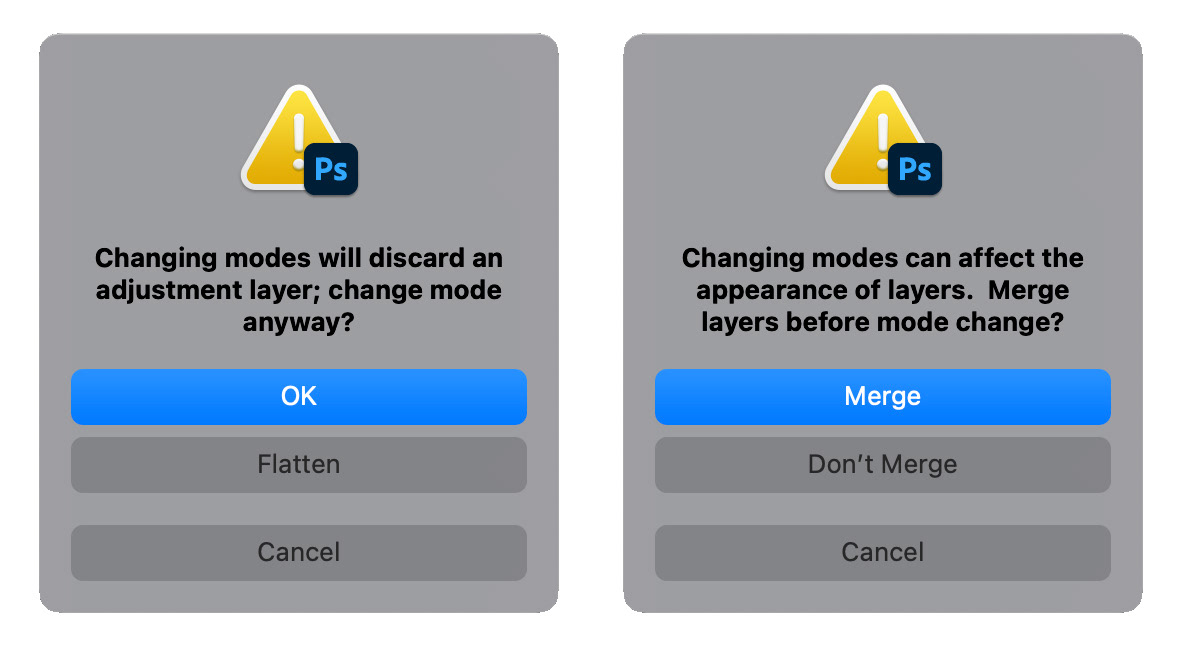
Fig 5 - Warning messages when changing image mode
Note that when in Lab colour mode certain blend modes, adjustment layers and many filters are not available to you (see Figure 6).
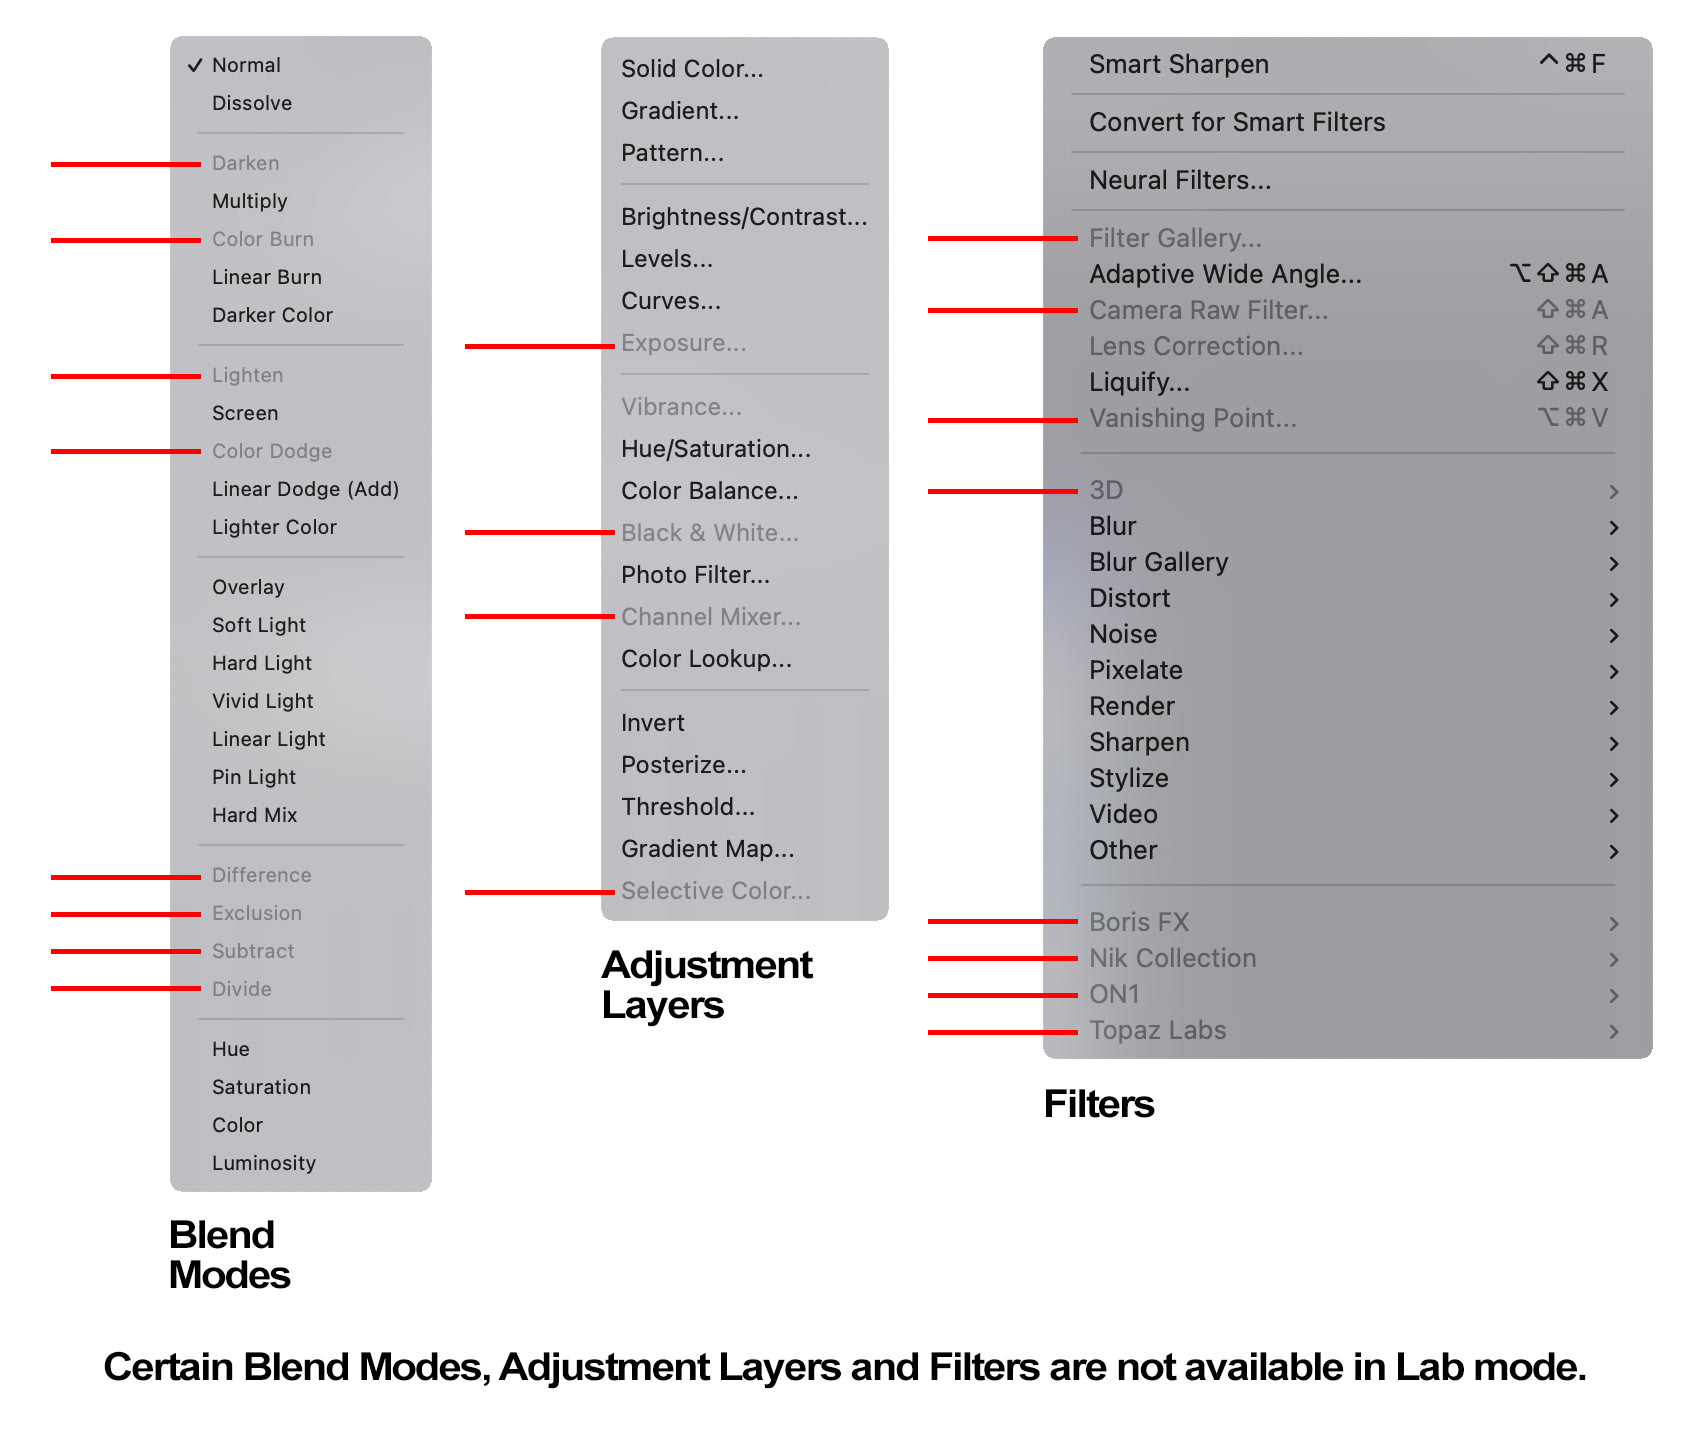
Fig 6 – Unavailable blend modes, adjustment layers and filters in Lab mode
Also, in Lab colour mode you cannot save to a JPEG file, you will need to convert back to RGB or CMYK to do that.
To avoid the danger of losing layers, or making unwanted changes to your file, I will usually use one of the following methods
Method 1
Create a duplicate copy of the Photoshop file, and flatten it, and convert the duplicate to Lab and make the changes there. This method is most suitable when the colour change / grading is being done as a final step.
Create a duplicate copy of the Photoshop file, and flatten it, and convert the duplicate to Lab and make the changes there. This method is most suitable when the colour change / grading is being done as a final step.
Method 2
Create a stamp visible layer and convert that layer to a smart object.
Double-click the smart object – it will open in a new window – change this smart object to Lab mode and make the required changes.
Save and close the smart object file.
The adjusted colour layer can now be masked if required, or the opacity changed to reduce the effect.
When in Lab mode you will notice obvious differences in the Channels panel and the adjustment layers or panels where the colour channels can be selected such as Curves (see Figure 7).
Figure 7 shows a simple example where I have used a single Curves adjustment layer in Lab colour mode and a simple mask to change the colour of my car.
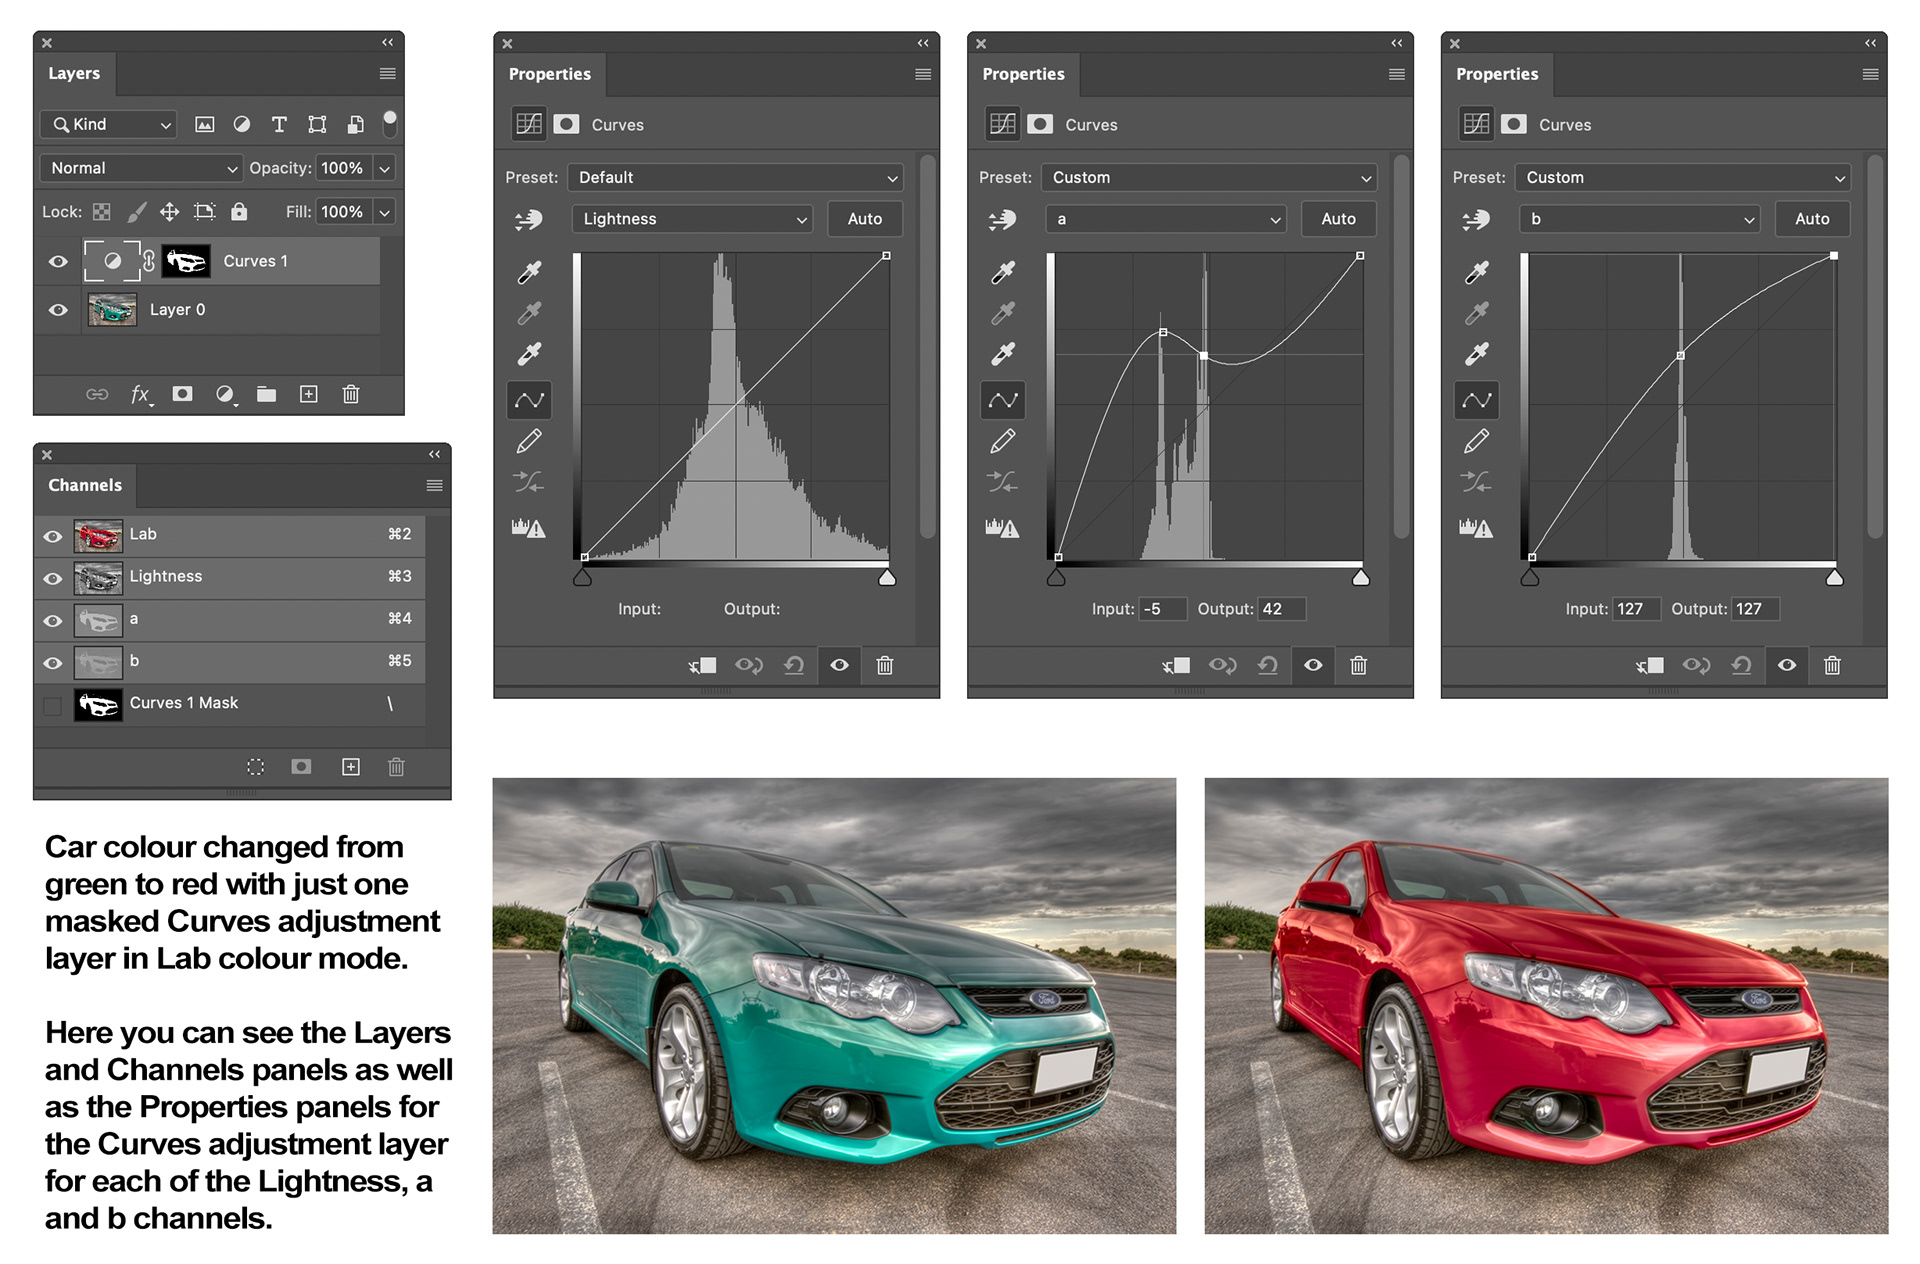
Fig 7 - Lab colour mode colour change example
It’s worth having a play with Lab colour mode next time you’re looking for some significant colour changes, playing with the curve in Lab can be much more effective. I think you have more chance of getting a good result, and less chance of mucking things up by flattening, muddying or over-saturating the colours.
This article was first published in the March 2023 issue of Artists Down Under magazine.