The Layer Lock icons can be found at the top of the Layers panel just underneath the Blend mode drop-down (see Figure 1).
They are possibly a “not often used” Photoshop feature, but one that can be very useful for protecting yourself against editing errors.
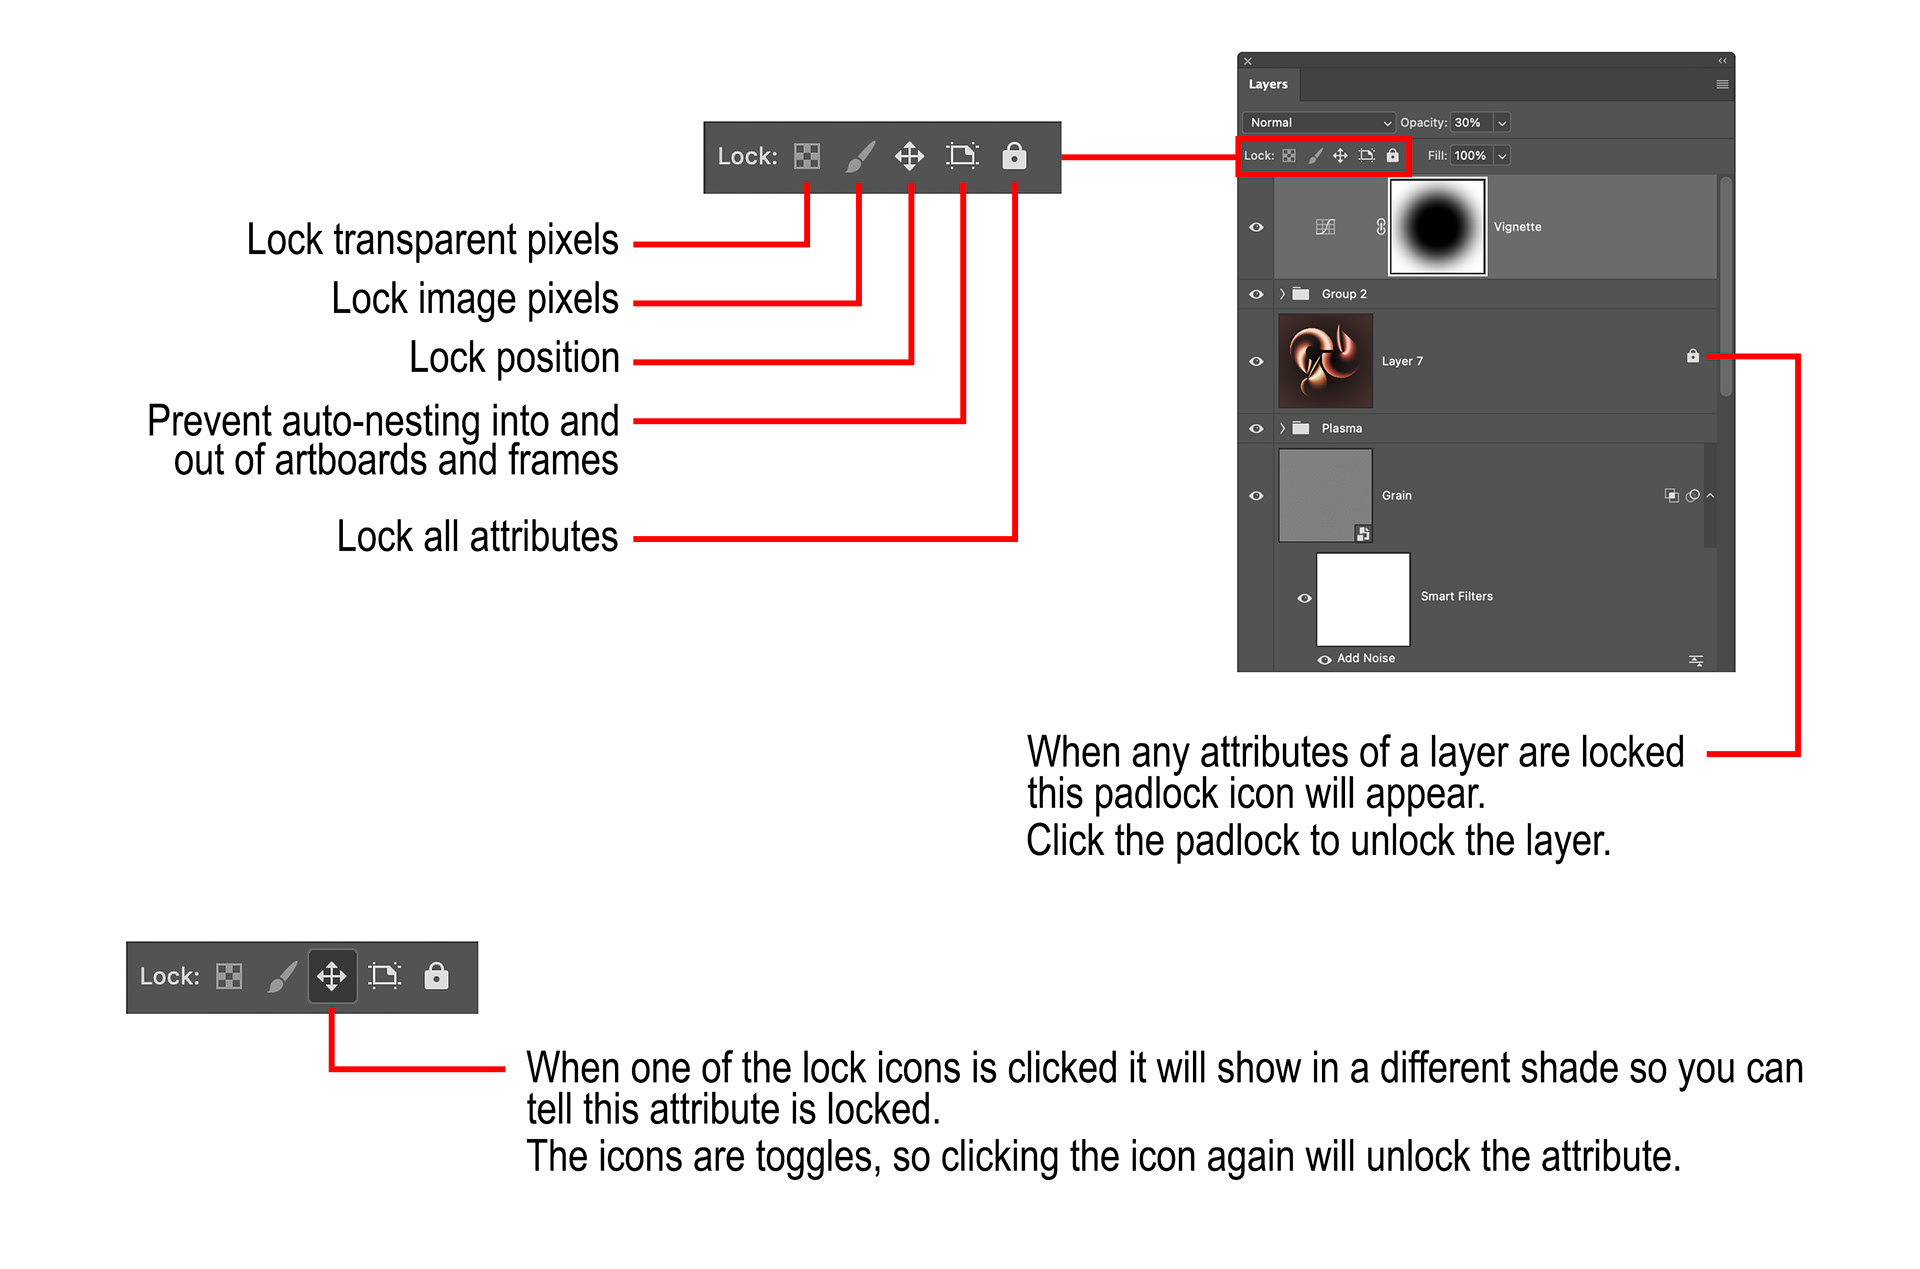
Fig 1 - Layer Locks
There are five Layer Lock icons that allow you to lock different attributes of a layer.
To lock a layer, first select the layer (or layers, you can lock multiple layers at once) then click one of the Layer Lock icons. The Layer Lock icons are toggles, so to unlock the layer you can just click the icon again.
When any of the layer attributes are locked, a padlock icon will appear on the right-hand side of the layer, you can also unlock the layer by clicking this icon.
The five Layer Lock icons have these functions (see figure 1);
Lock Transparent Pixels
When this attribute is locked you cannot alter transparent pixels on the layer, for example when using the Brush tool or Clone Stamp tool, only opaque pixels will be affected.
When an area of the image is partially transparent, the transparency (or opacity) of the area will be maintained.
Lock Image Pixels
When this attribute is locked you cannot update any of the pixels on the layer, for example with the Brush tool or Clone Stamp tool.
You can still move the layer; you just cannot change any of the pixels.
This might be useful for example when compositing elements into an image, where you don’t want to edit pixels accidentally, but do want to move the elements around.
Lock Position
When this attribute is locked you cannot move or transform the layer, but you can still edit the pixels.
Some examples of when this might be useful is if you have created blank layers for cloning or healing, or dodging and burning, or retouching. Accidentally moving one of these layers can have disastrous effects.
Another example is if you are blending layers together with masks and you don’t want to move them relative to each other.
Prevent Auto-Nesting of Artboards & Frames
This option is relevant only when using artboards and frames and is outside the scope of this article.
Lock All Attributes
This will lock all the above attributes. Using this Lock All Attributes option also prevents you from updating the Blend Mode or Transparency of the layer.
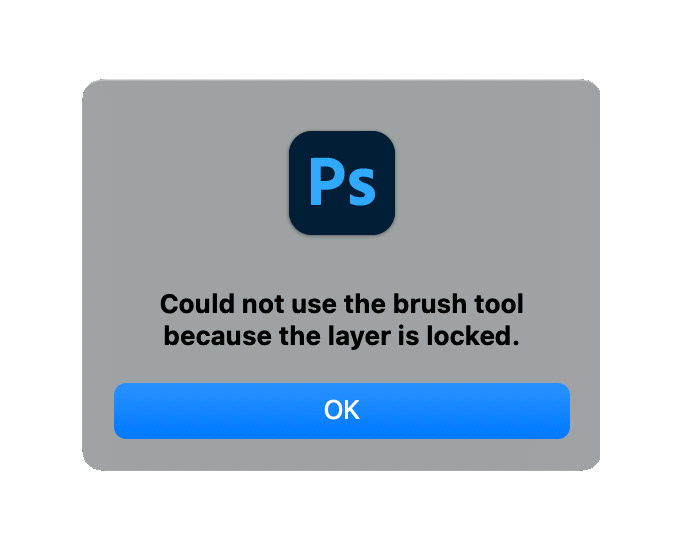
If you try an operation on a locked layer that is not allowed, you will notice the mouse cursor changes to a circle with a diagonal slash through it, and that if you click the mouse you’ll get an error dialog box similar to the one shown in Figure 2.
This option is relevant only when using artboards and frames and is outside the scope of this article.
Lock All Attributes
This will lock all the above attributes. Using this Lock All Attributes option also prevents you from updating the Blend Mode or Transparency of the layer.
If you try an operation on a locked layer that is not allowed, you will notice the mouse cursor changes to a circle with a diagonal slash through it, and that if you click the mouse you’ll get an error dialog box similar to the one shown in Figure 2.
Note that these lock options do not prevent you from selecting the layer in the Layer panel, or from moving the layer up and down in the layer stack.
The shortcut key Cmd+/ (Mac) or Ctrl+/ (Windows) can also be used to toggle on and off the Lock All Attributes for the active layer(s).
Judicious use of the lock icons is a good habit to develop and protects you from making accidental errors when editing.
The shortcut key Cmd+/ (Mac) or Ctrl+/ (Windows) can also be used to toggle on and off the Lock All Attributes for the active layer(s).
Judicious use of the lock icons is a good habit to develop and protects you from making accidental errors when editing.
This article was first published in the May 2025 issue of Artists Down Under magazine.