This article explains how to create a simple Action in Photoshop, and at the same time talks about one of my favourite way to clean-up selection fringes/halos around the edges of layer masks.
While there are lots of different ways to clean up the edges of a layer mask in Photoshop, like the sliders in Select and Mask, the Min and Max filters or the Layer Matting functions, I find that sometimes for a good result nothing beats a bit of manual clean-up with the Brush tool. Often there are different parts of your mask that will need different clean-up and the rather “global” nature of some of the other methods doesn’t work well.
To that end, I have a sequence of Photoshop instructions that I found I was often using to help me in this mask edge clean-up task that I have put into an Action, and it is now one I use all the time.
An Action in Photoshop is just a way to “record” a series of instructions or steps in Photoshop, and then you can play them back by running (or playing) the recorded Action.
The sequence of steps I found myself executing a lot for mask edge clean up was the following;
- Cmd (or Ctrl) clicking the mask to create a selection of it
- Contracting the selection (I do it by a single pixel, but amount is up to you) using Select / Modify / Contract
- Inverting the selection (so that effectively the black part of the mask is selected) using Select / Inverse
- Feathering the selection (this is optional, I feather it by 0.5 pixels) using Select / Modify / Feather
- Activating the default white/black colours and making black the foreground colour using the “D” and “X” keys
- Activating the brush tool using the “B” key
- Hiding the “marching ants”
Once these steps are complete then you are ready to start brushing away your mask edge halo/fringe.
During the edge clean-up process you may also want to “brush in” some of the white area inside the mask edge. If so, simply invert the selection by pressing the Shift+Cmd(Ctrl)+I keys, then selecting white as your foreground colour.
Recording a New Action
Open the Actions panel and you’ll see a number of icons along the bottom of the panel (see Figure 1).
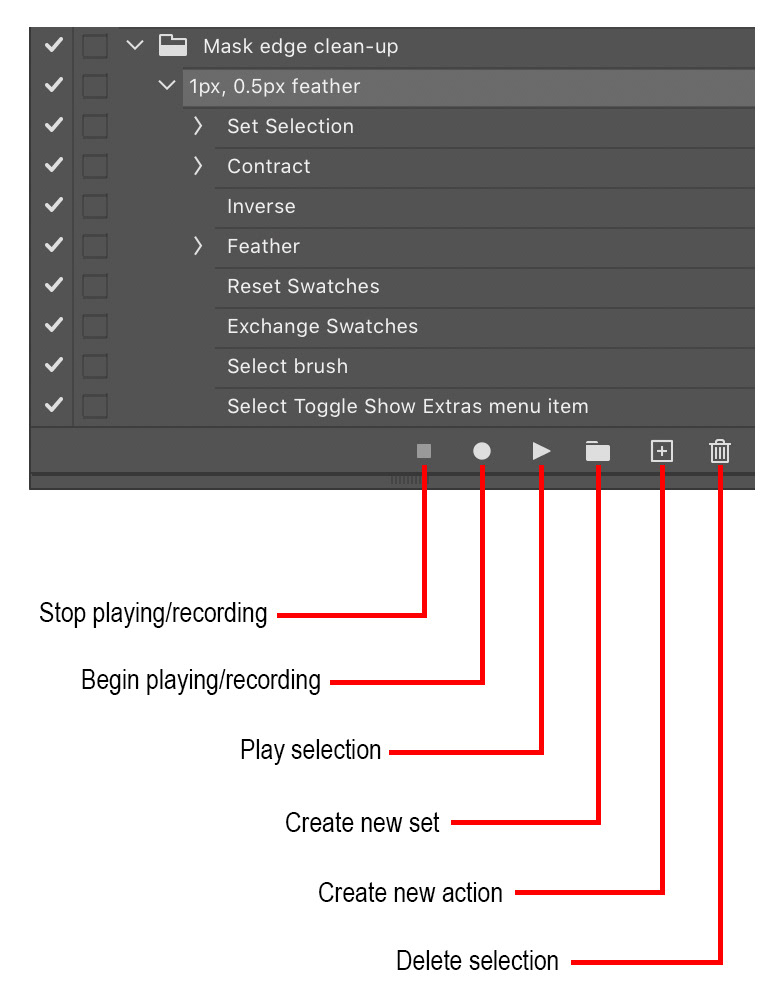
Fig 1 - Actions panel
Press the Create New Set icon and provide a name for the set (or folder) that will contain your new Action.
Press the Create New Action icon and the New Action dialog will display (see Figure 2).

Fig 2 - New Action dialog
Choose a name for your new action and then choose the set you created in the previous step. Optionally here you can also assign a Function Key that can be used to run the Action, as well as a Color that can be used to highlight the Action in the Actions panel.
When all of the above is done press the Record button, then simply execute the steps you want to record. Be sure to have prepared to execute them by having Photoshop “ready” to do so. For example to record the above steps I had to have made sure to have a file open that had a layer in it with a layer mask on it.
When you have finished the required sequence of steps, press the Stop Recording icon at the bottom of the Actions panel.
If you are recording my Mask Edge Clean-up Action you might have noticed something. You probably pressed Cmd(Ctrl)+H to hide the “marching ants” as the last step. You will notice that this step has not been recorded for you. There are a few Photoshop keystrokes that cannot be recorded, but there is a way to include them in your action.
Select the step in your Action after which you want the command inserted (in our case above that is the current last step “Select brush”. Open the Action Panel drop-down menu by clicking the “three lines” icon at the top-right of the panel (see Figure 3).
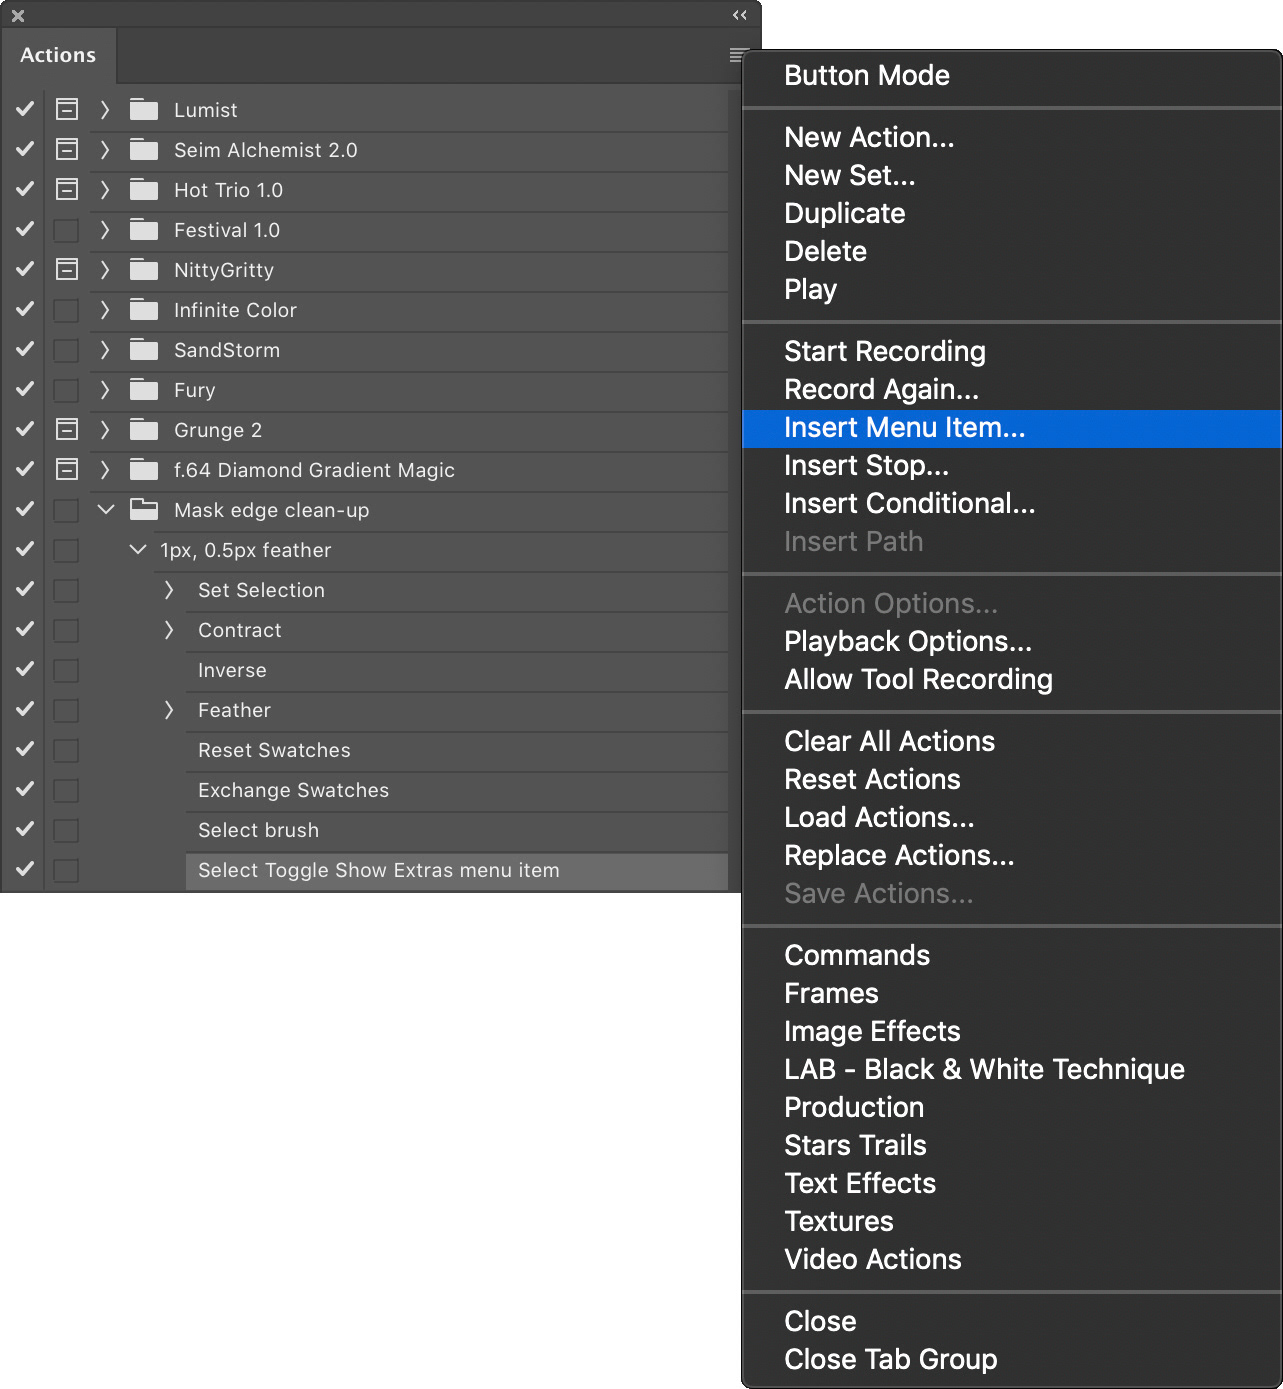
Fig 3 - Actions panel drop-down menu
Choose the Insert Menu Item command from the drop-down menu. The Insert Menu Item dialog is displayed (see Figure 4).
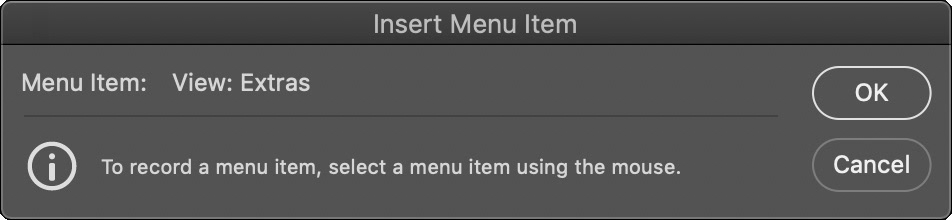
Fig 4 - Insert Menu Item dialog
Now, using your mouse, choose the menu item you wish to record. In our case it is the View / Extras command (the equivalent to pressing Cmd(Ctrl)+H).
Now press Ok on the Insert Menu Item dialog and the command will be inserted into your action.
You can reorder steps, delete steps or add steps into your recorded Actions, but for simple actions like this, I find that if I make a mistake it is easier to delete the action and start from scratch, but maybe that’s just me.
So, have a think about things that maybe you often do over and over and decide if recording an action may be worthwhile.
This article was first published in the August 2020 issue of Artists Down Under magazine.