To continue our look at vector based objects in Photoshop, let’s have a little bit of a further look at Paths, and investigate some of the features of the shape tools.
When you create a Path in Photoshop it “lives” independently of the layers in your Photoshop document, and therefore paths have their own panel.
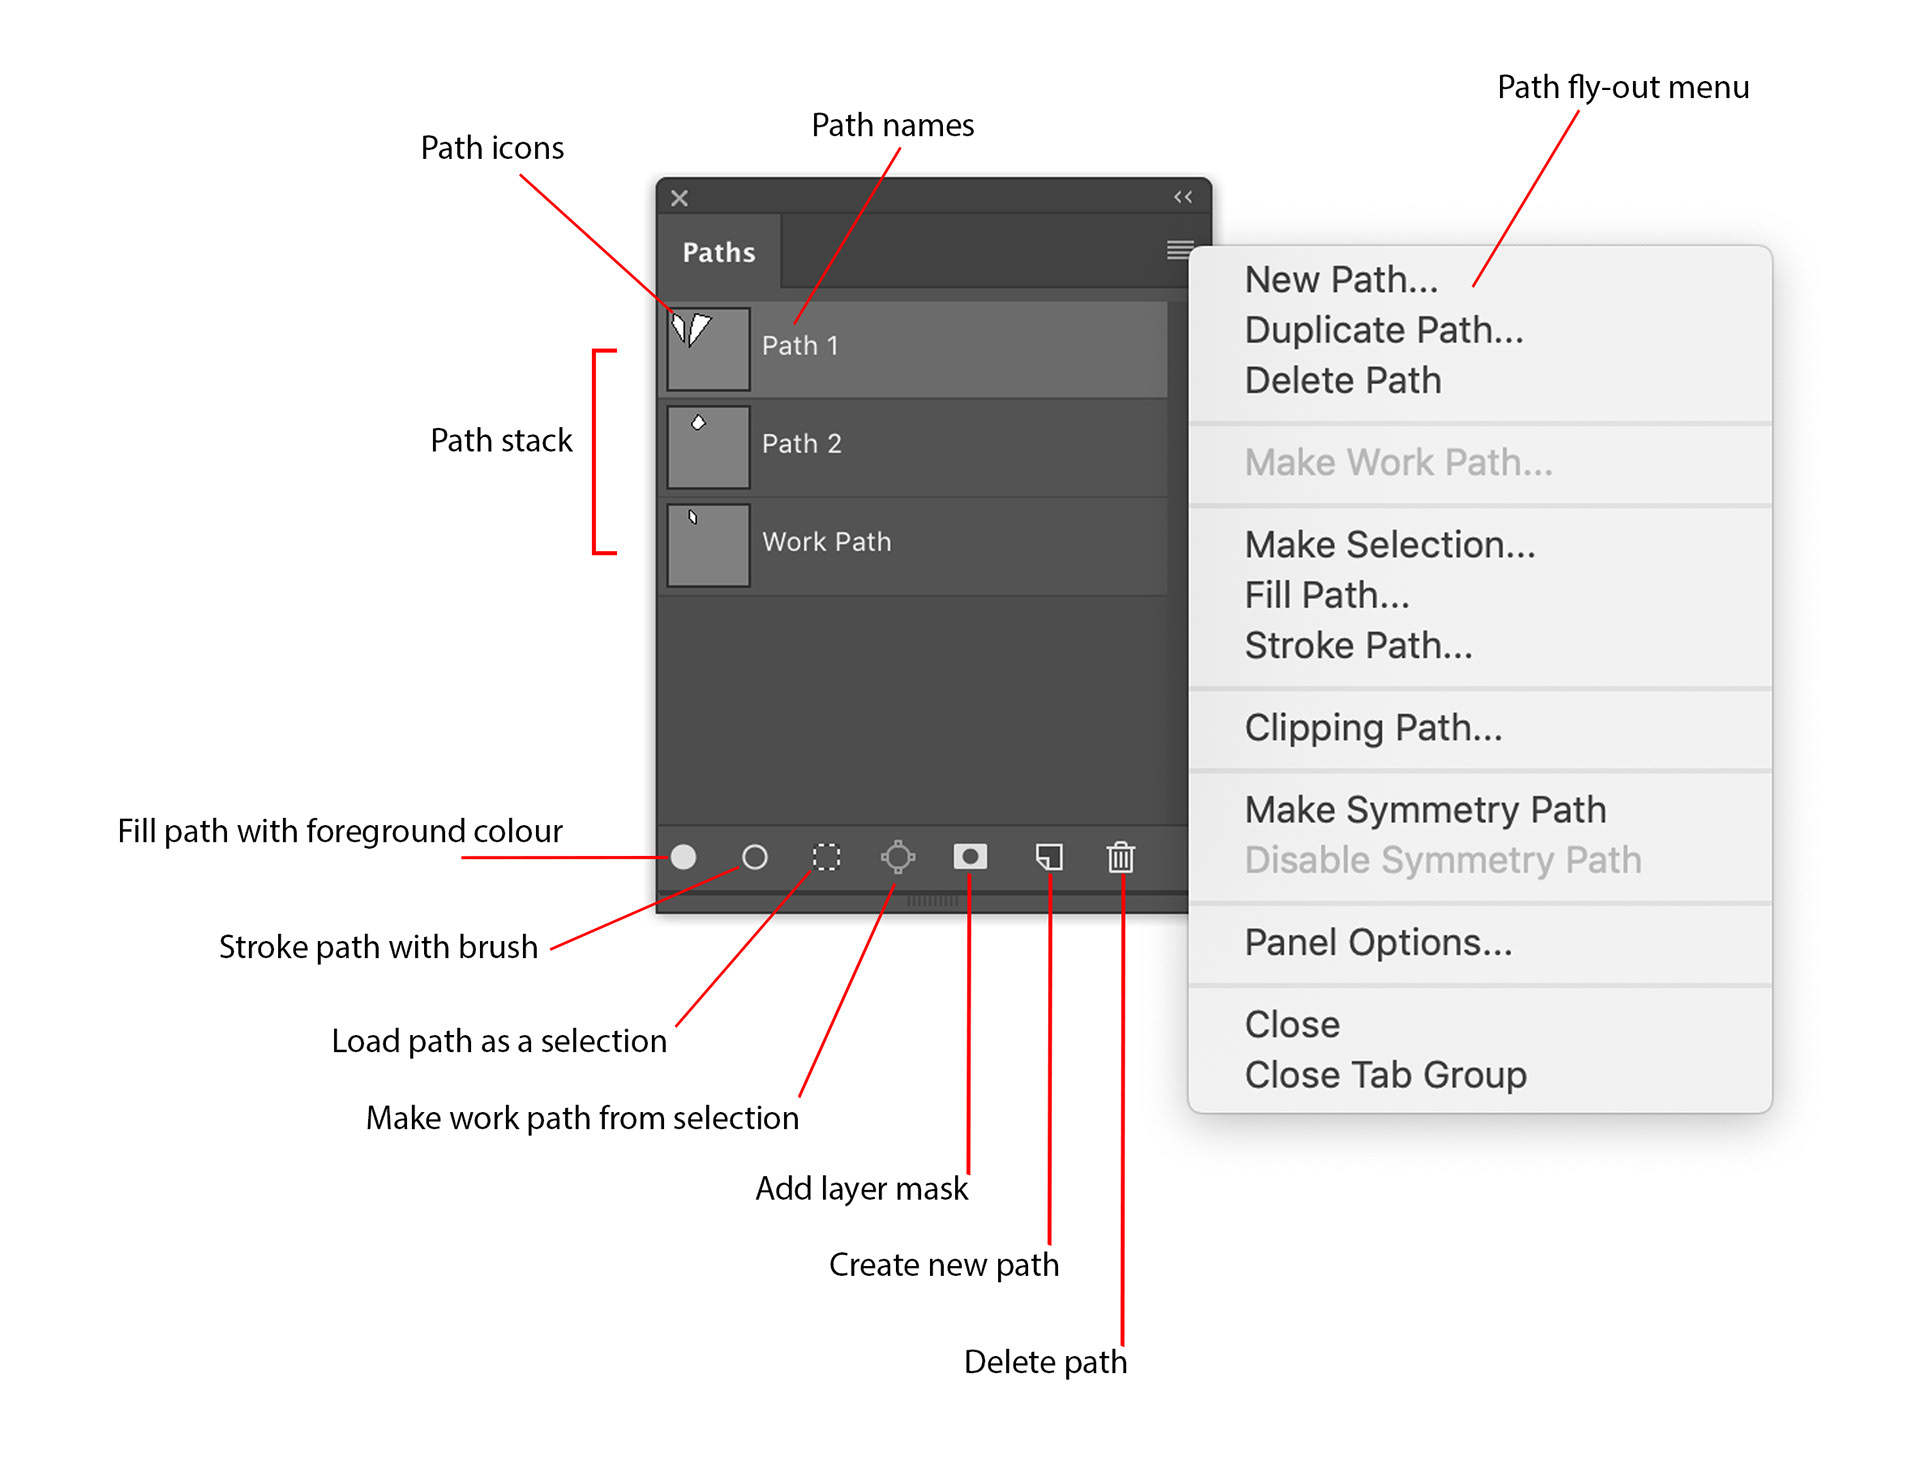
Fig 1 - The Paths panel
Figure 1 shows the various operations you can conduct from the Paths panel, many are available via the icons along the bottom of the panel, and the fly-out menu.
When you initially create a path it will be given the temporary name “Work Path”. To save the path with a different name, double-click the name in the Paths panel.
The Shape Tools
There are six different shape tools Rectangle, Rounded Rectangle, Ellipse, Polygon, Line and Custom Shape.
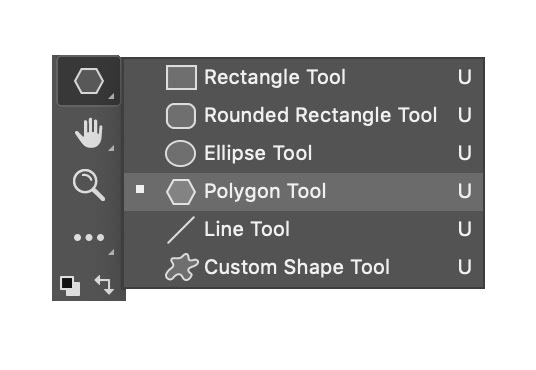
Fig 2 - The Shape tools
The second drop-down list in the Options Bar when any of the shape tools is active let’s you decide if you want to create a Shape, Path or Pixels when you draw with the tool. Shape and Path are preferred over Pixels because both are vector-based and are therefore resolution-independent and will be much easier to reshape and move around.
The primary differences between the Shape and Paths options are;
- With Shapes you can automatically apply fills and strokes and have them automatically update as you draw, change or move the drawn shapes
- Shapes are drawn on their own layers, whereas as stated above Paths do not “exist” on a layer, but are independent of layers.
- With Shapes you can automatically apply fills and strokes and have them automatically update as you draw, change or move the drawn shapes
- Shapes are drawn on their own layers, whereas as stated above Paths do not “exist” on a layer, but are independent of layers.
The Path Operations menu (see Figure 3) determines how Shapes or Paths that you draw interact with each other. The default for Shapes is New Layer which means that each shape you draw will be created on a new layer.
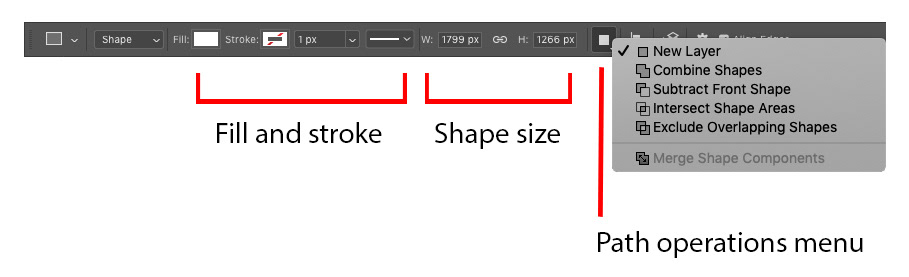
Fig 3 – The Paths operations menu
If you choose Combine Shapes a composite shape will be created from each of the shapes you draw.
If you choose Subtract Front Shape, the shape area drawn will be subtracted (or cut out) of the composite shape.
In the example shown in Figure 4, the two squares were first drawn with Combine Shapes, then the two circles were drawn with Subtract Front Shape.
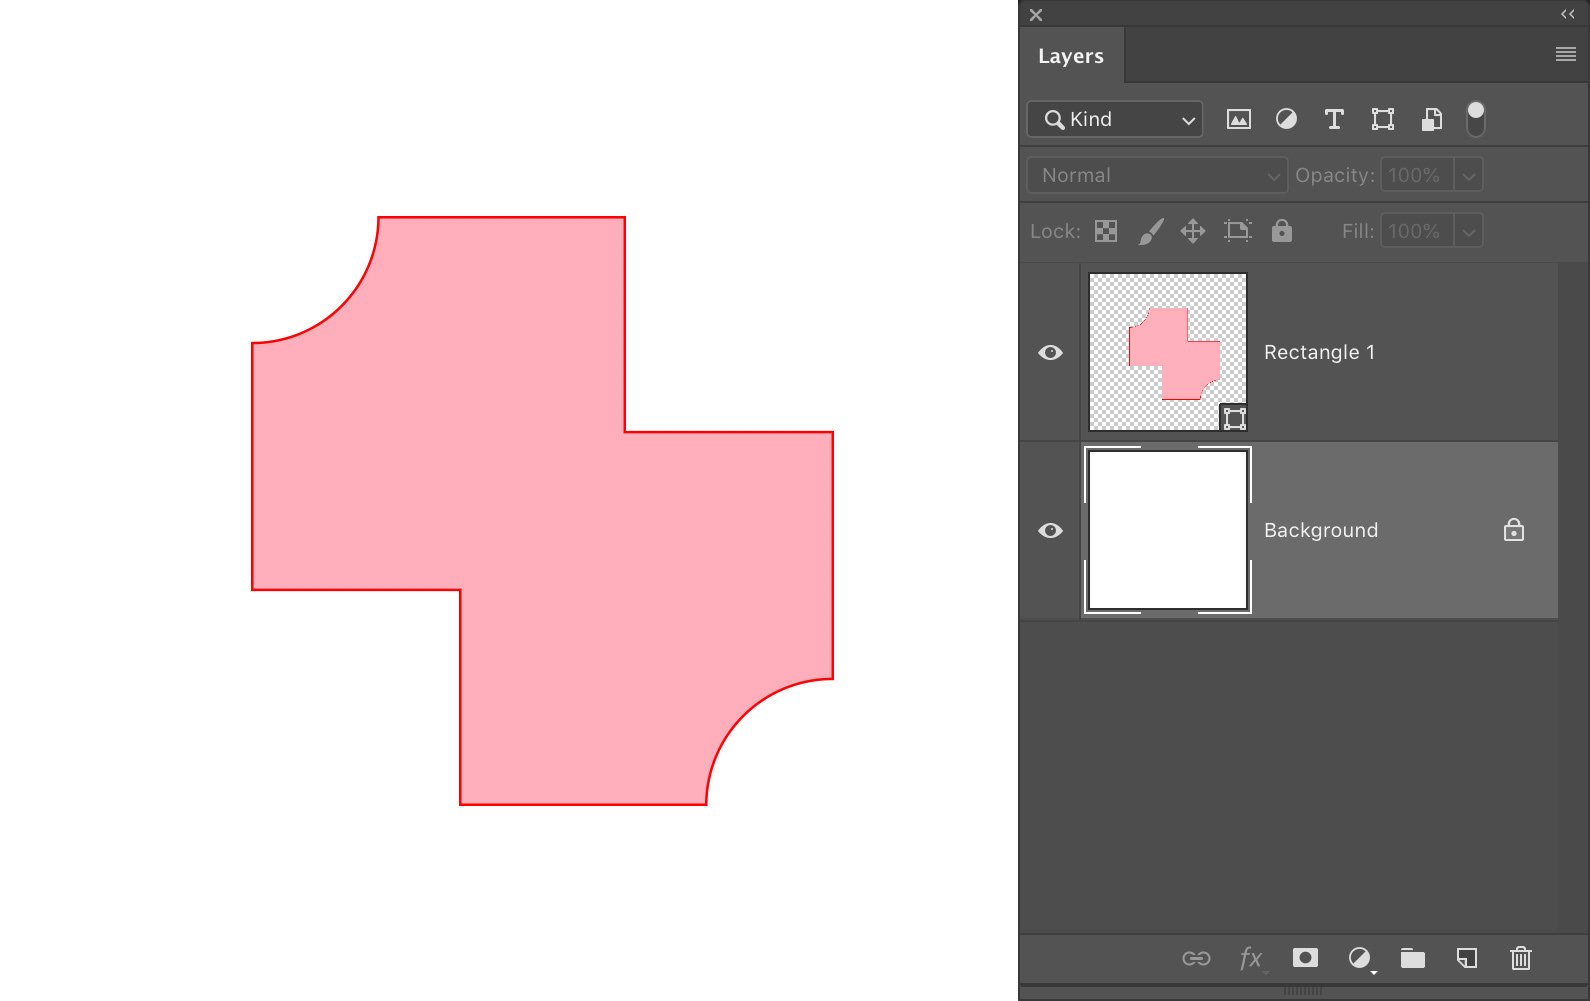
Fig 4 – Composite shape
Figure 5 shows the same shapes drawn as Paths, please note that you can see the resultant composite shape in the icon in the Paths panel as it is highlighted in white. This is the area that would be selected if you chose the Load Path as Selection command or filled if you chose Fill Path with Foreground Colour.
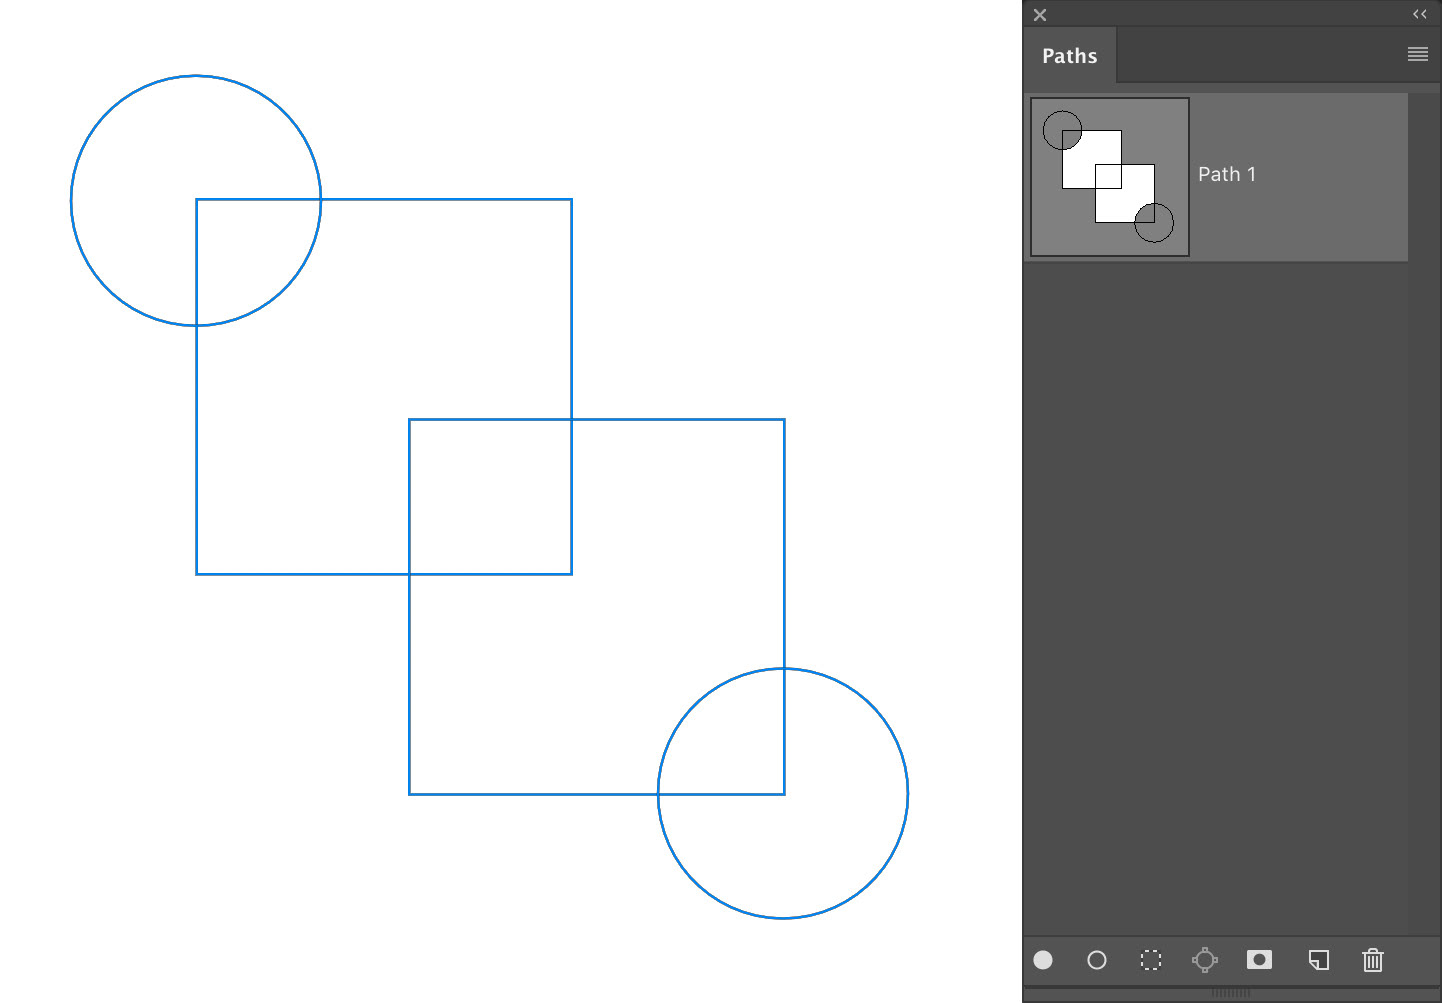
Fig 5 – Composite shape with paths
If you choose Intersect Shape Areas only the area that is intersected by the shapes will be the resultant composite shape. Exclude Overlapping Shapes gives you the inverse or opposite of Intersect Shape Areas.
Figure 6 shows the five different results when two simple squares are drawn;
- Diag A – New Layer
- Diag B – Combine Shapes
- Diag C – Subtract Front Shape
- Diag D – Intersect Shape Areas
- Diag E – Exclude Overlapping Shapes
- Diag A – New Layer
- Diag B – Combine Shapes
- Diag C – Subtract Front Shape
- Diag D – Intersect Shape Areas
- Diag E – Exclude Overlapping Shapes
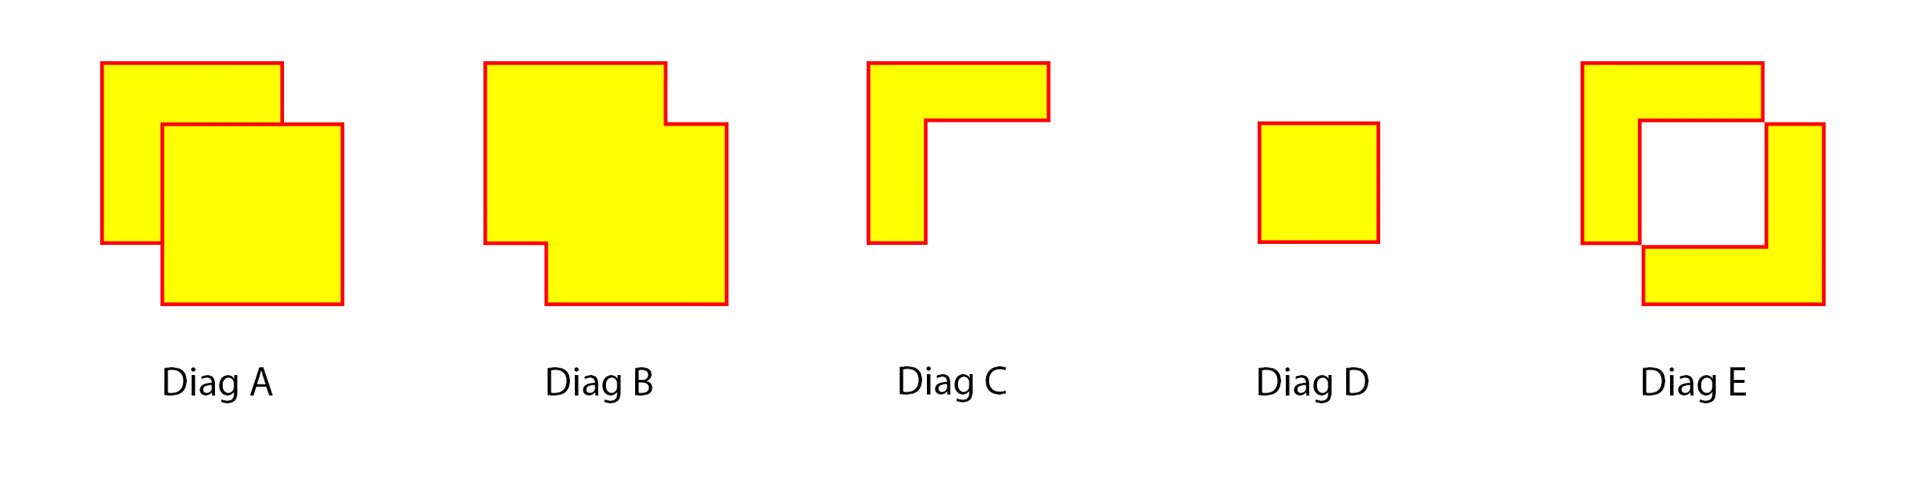
Fig 6 – Five different shape operations
When you have drawn different shapes (as shapes or paths) you can use the Path Selection Tool (black arrow) to select individual shapes and move them around, hold down the [Shift] key while selecting to select multiple shapes to move them in unison.
When drawing any shapes you can hold down the [Shift] key to temporarily select the Combine Shapes mode, or hold down the [Option/Alt] key to temporarily select the Subtract Front Shape mode.
You can also use the Direct Selection tool (white arrow) to select individual anchor points or direction handles to reshape the shapes as you desire.
The Path Alignment menu (see Figure 7) allows you to use align and distribute operations to align or evenly distribute selected shapes. Please note that the align icons will only be active if two or more shapes/paths are selected and the distribute icons will only be active if three or more shapes/paths are selected.
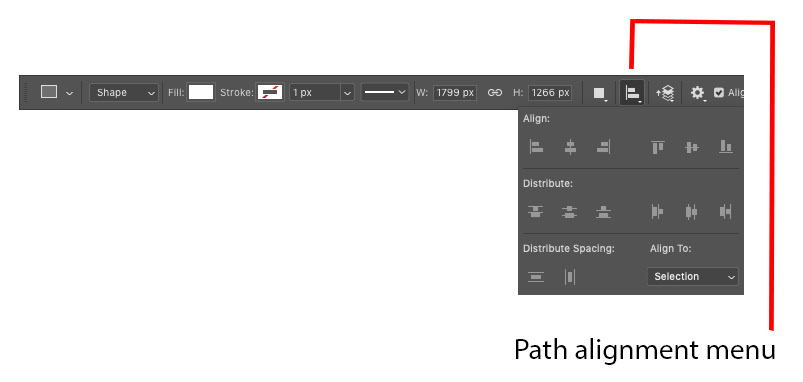
Fig 7 – Path alignment menu
Use the Path Arrangement menu (see Figure 8) to change the stack order of shapes or paths.
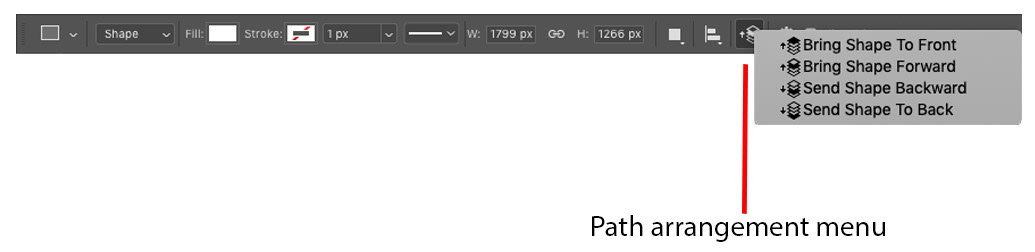
Fig 8 – Path Arrangement menu
The Shape and Path Options menu (see Figure 9) may be slightly different for different shape types. Here you can choose the aspect ratio of the shape to be drawn (unconstrained or a fixed ratio), or specify a fixed size (useful if you want to draw many shapes the same size). You can also change the way the shape is drawn (from the centre where the initial mouse click is made or edge to edge).
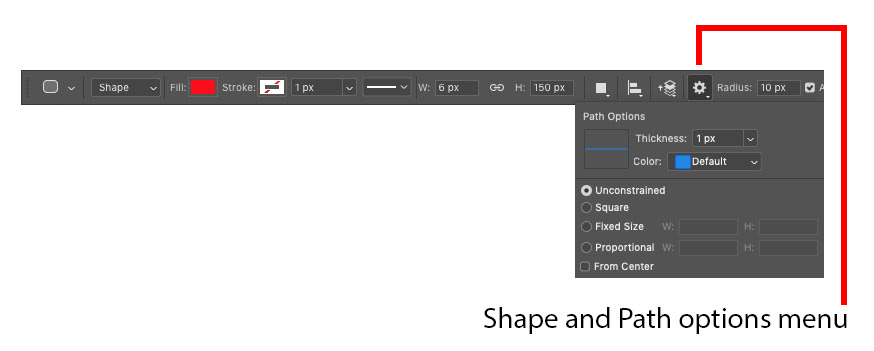
Fig 9 – Shape and Path Options menu
This article was first published in the April 2019 issue of Artists Down Under magazine.