The final article in this series on Multiple Exposures in Photoshop covers one of my favourite ways of creating them - using the Double Exposure filter in Analog Efex Pro which is a program found in the Nik Collection by DxO.
Analog Efex Pro provides many different options to change the look of your images, many of them aimed at providing a vintage look.
In the left navigator of Analog Efex Pro there are two ways to apply effects to your images. Under Camera Kit (see Figure 1) you will see listed the 14 different effects offered by Analog Efex Pro, Double Exposure is one of these. You can apply an effect on its own or combine them together.
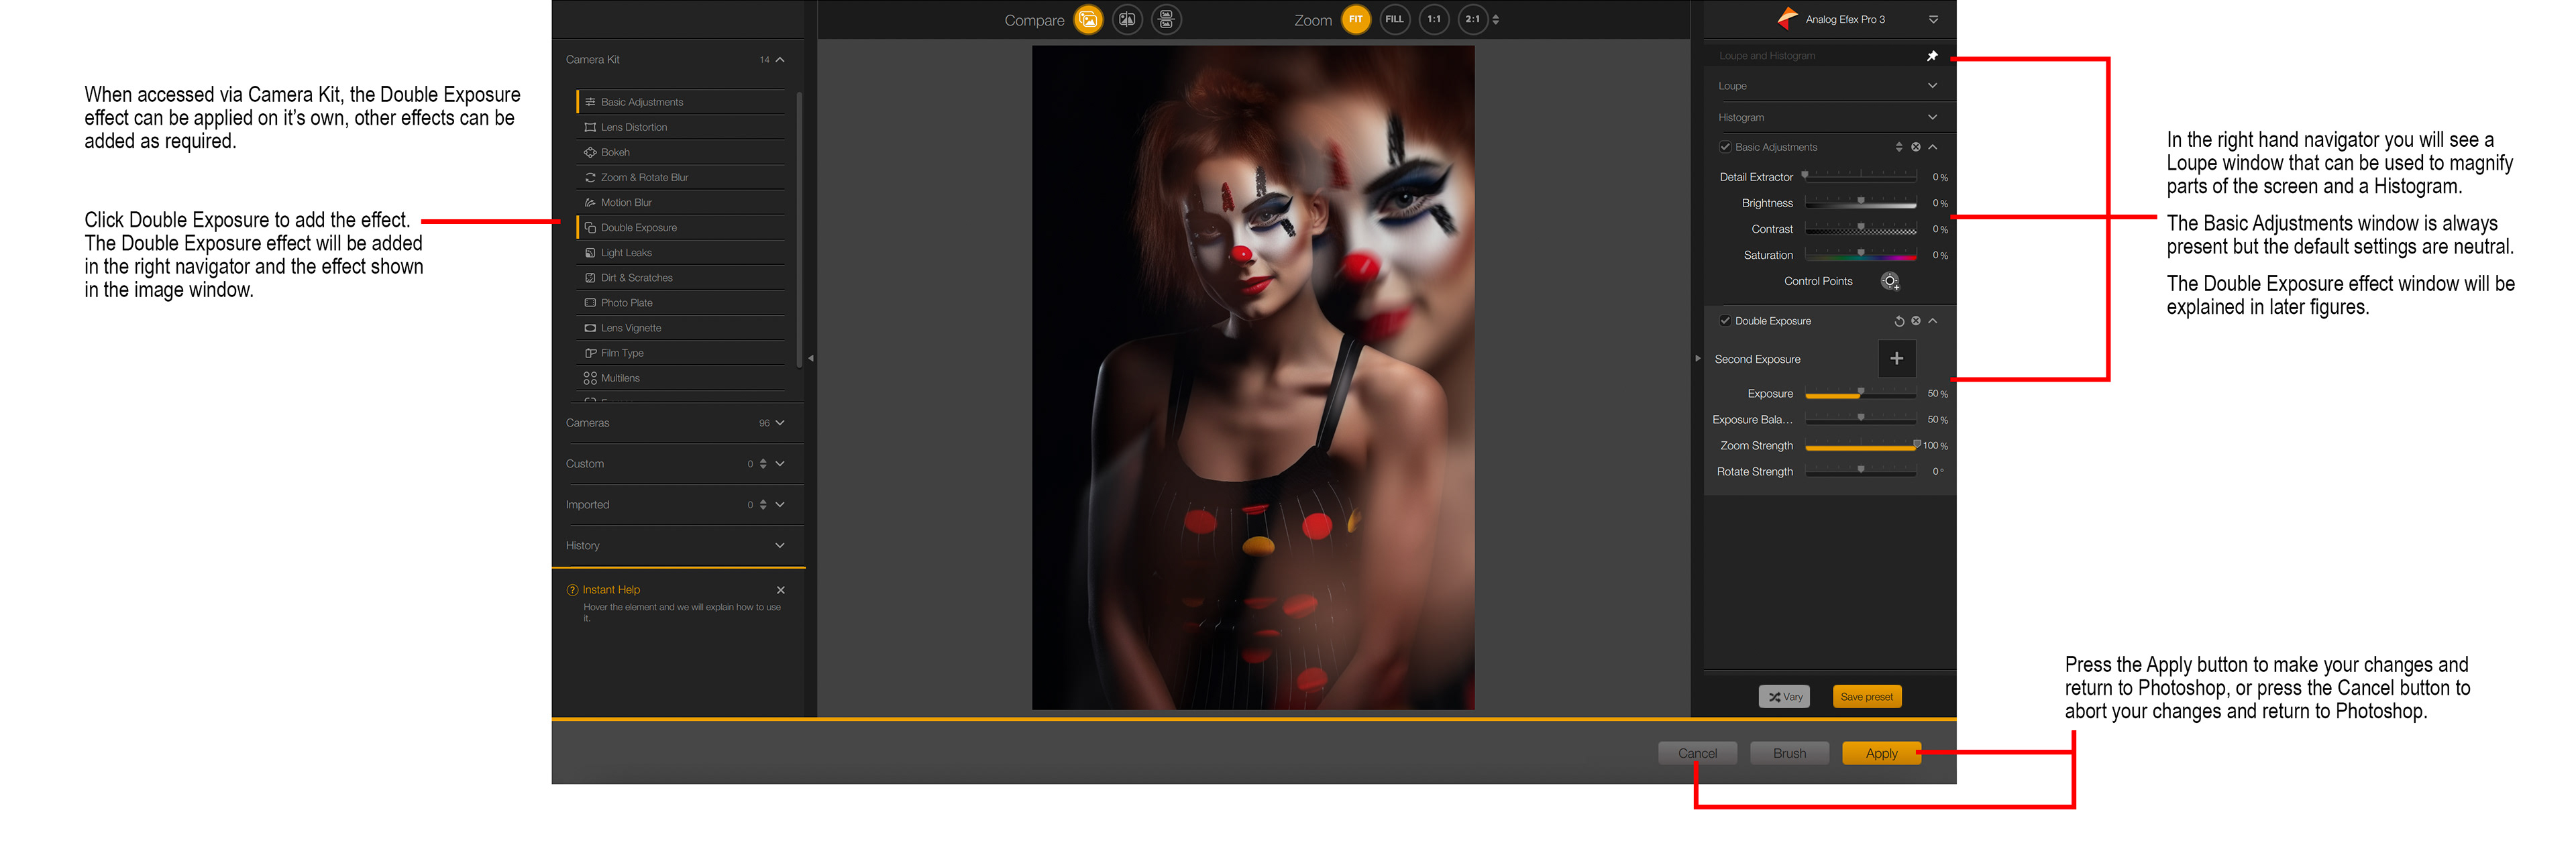
Figure 1 - Double Exposure via Camera Kit
Click on Double Exposure to add the effect, you will see the Double Exposure window in the right hand navigator and the Double Exposure effect will show in the image window.
Please note that the Basic Adjustments window is always shown but its default slider settings are neutral (no effect to the image).
In the left navigator you will also see Cameras (see Figure 2). Under Cameras there are 96 presets listed, these are split into 13 categories. One of these categories is Double Exposure which includes 9 presets. Each of these presets are combinations of the 14 different effects, created to give you some ideas of where to start. All of the Double Exposure presets include Basic Adjustments, Bokeh, Light Leaks, Lens Vignette and Film Type in addition to Double Exposure.
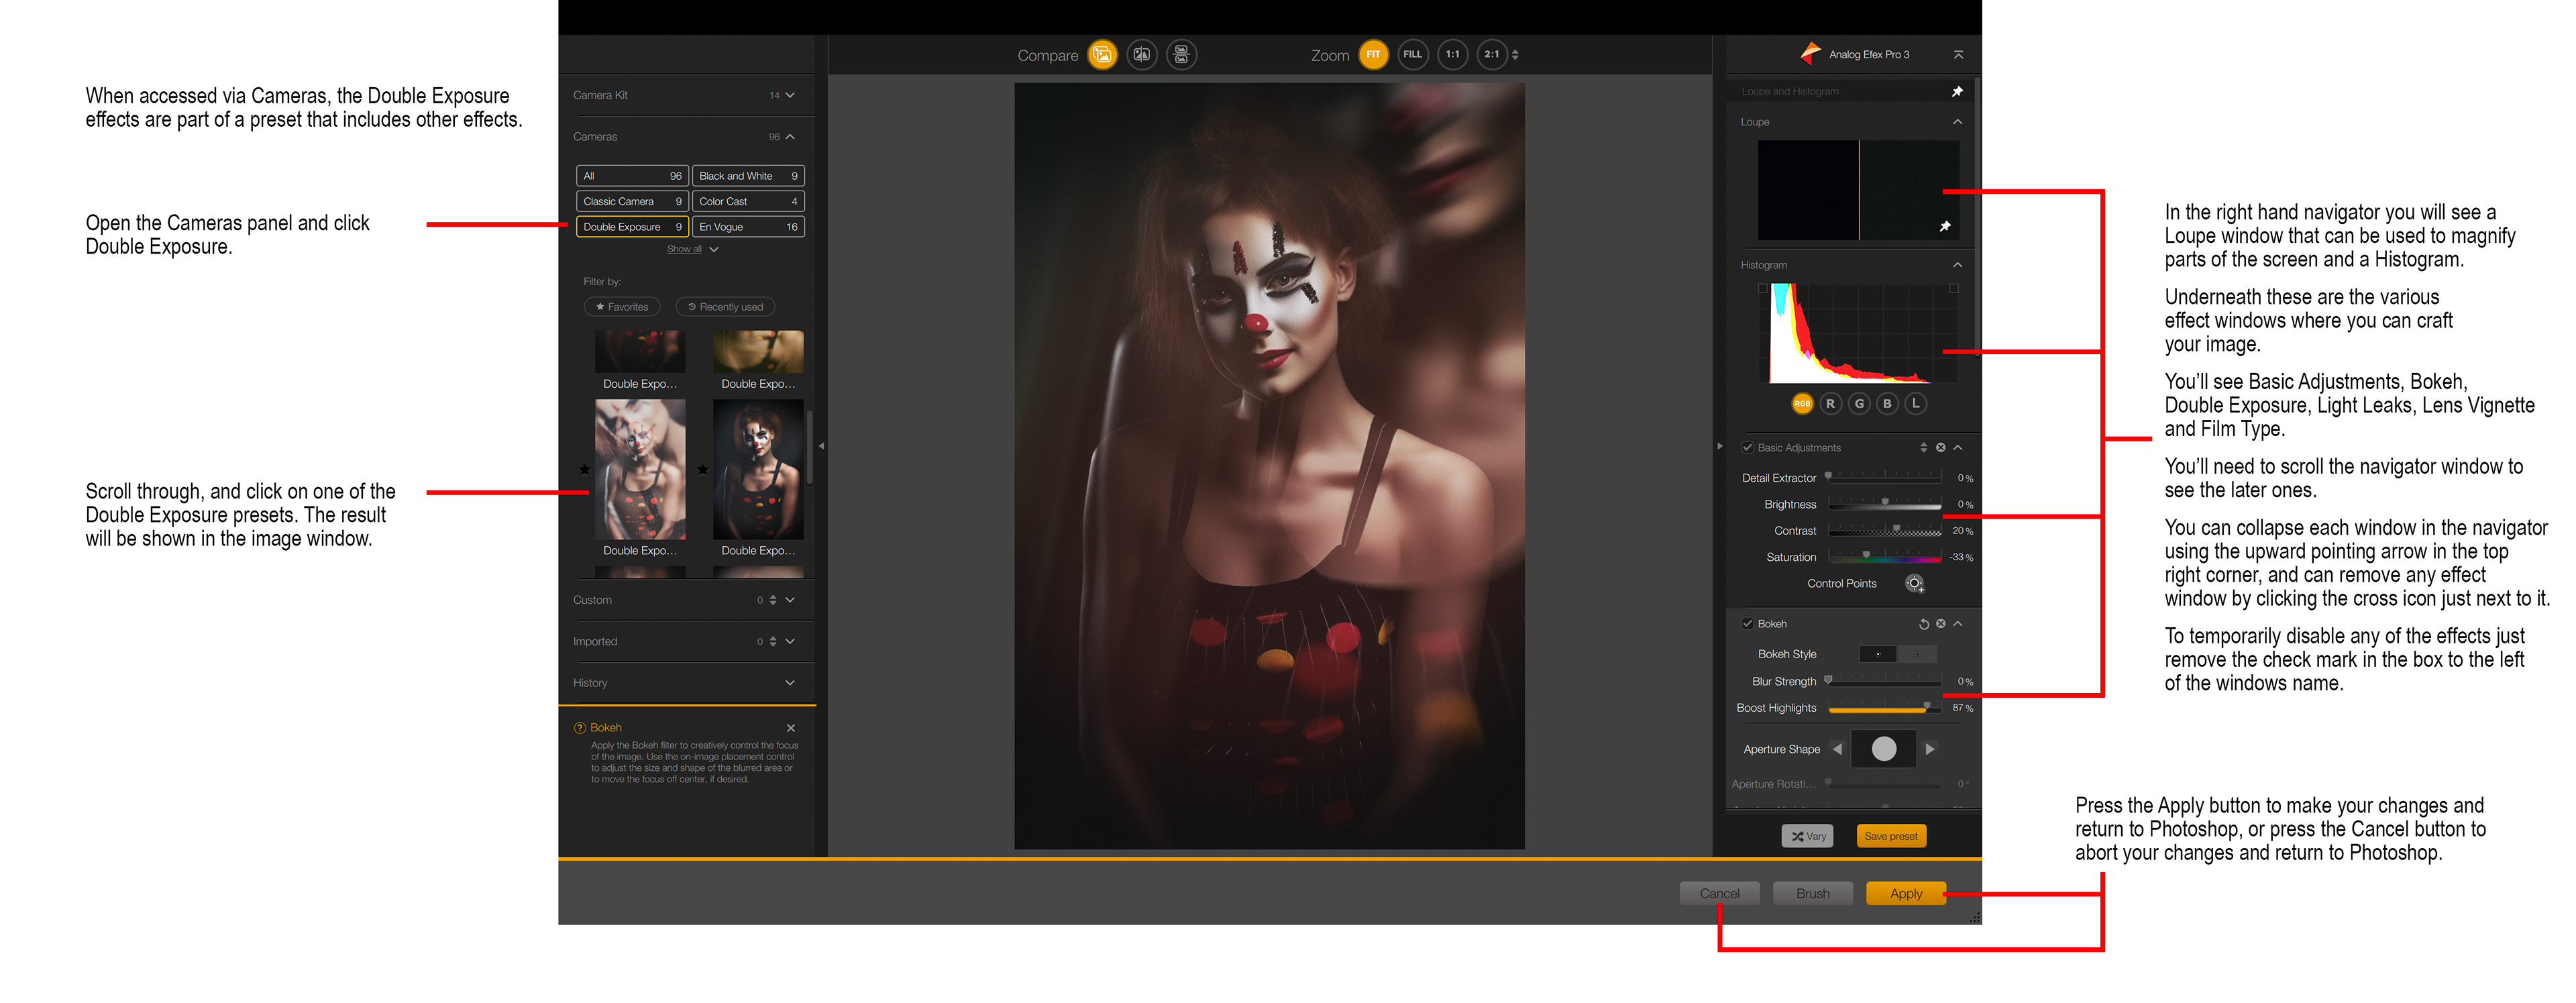
Figure 2 - Double Exposure via Cameras
To apply the Double Exposure effect via Cameras, open the Cameras panel and click Double Exposure. Scroll through and click on one of the Double Exposure presets. The result will be shown in the image window.
You will have to scroll the right navigator window to see the various effect windows (see Figure 3). You can collapse each window in the navigator using the upward pointing arrow in the top right corner and can remove any adjustment window by clicking the cross icon just next to it. To temporarily disable any of the effects remove the check mark in the box to the left of the windows name.
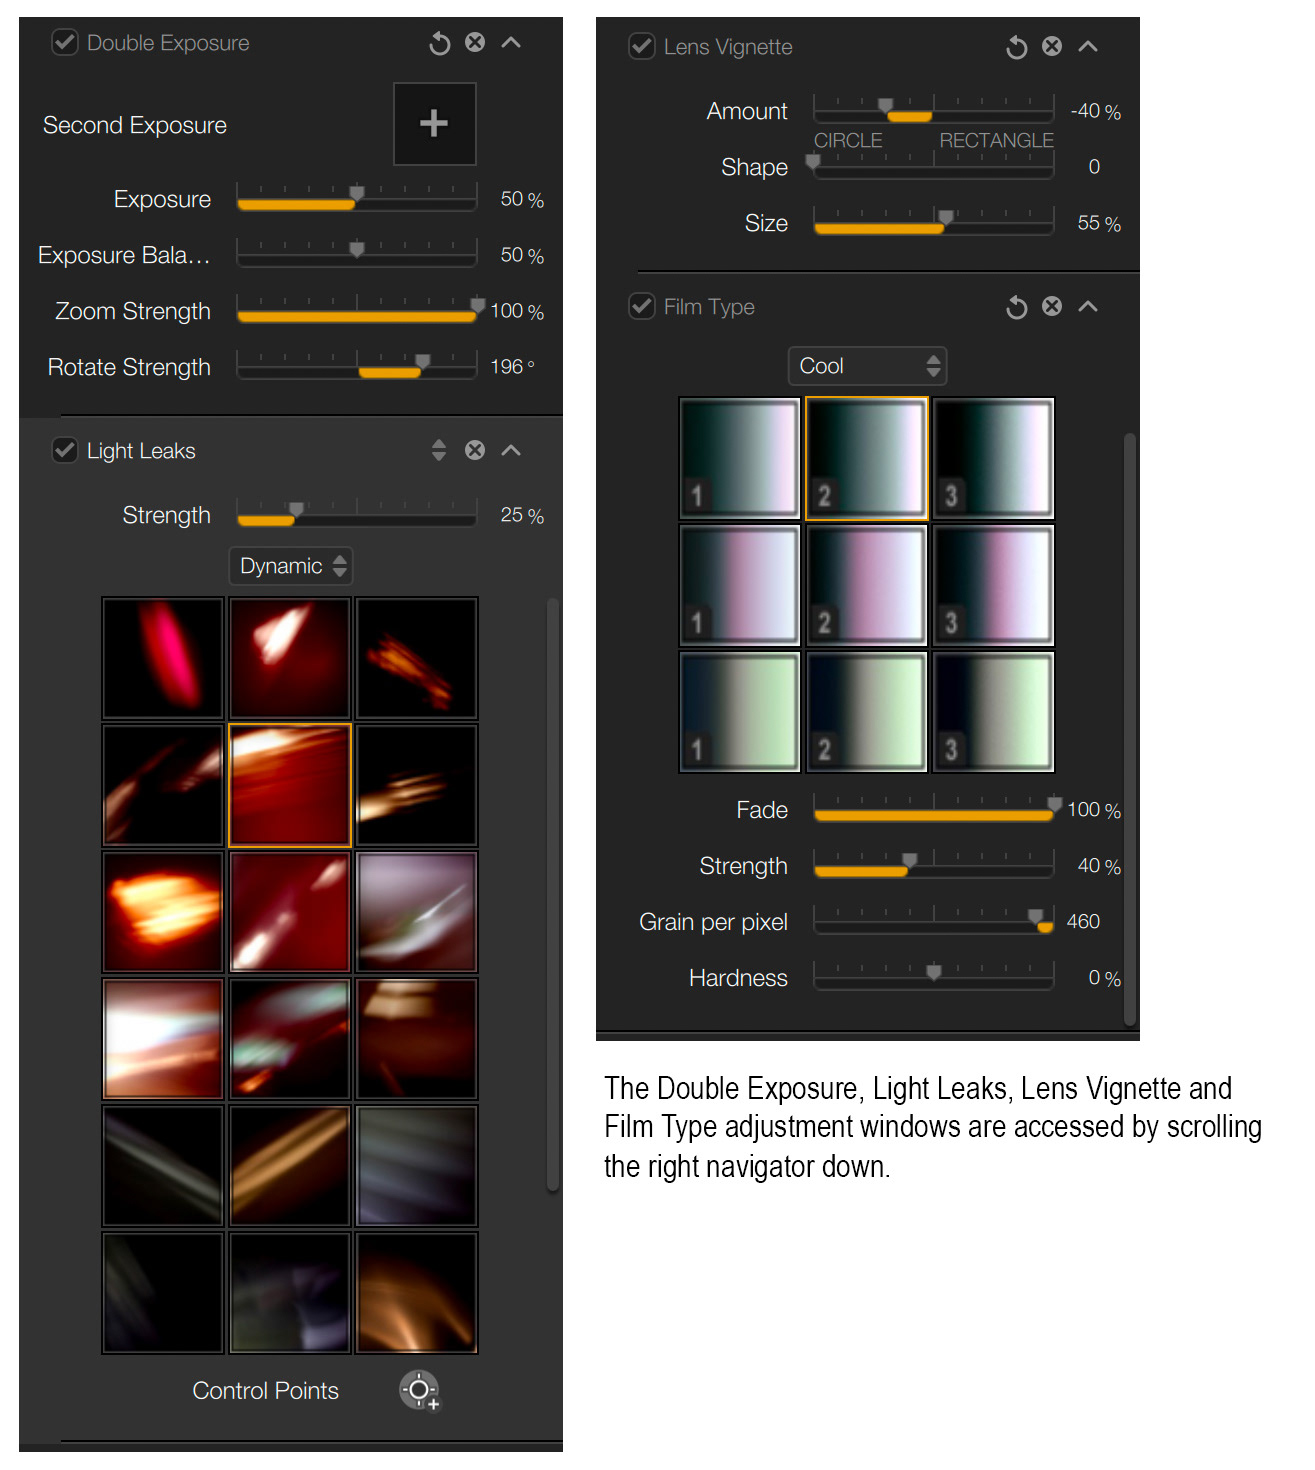
Figure 3 - Lower adjustment windows
Figure 4 shows the Double Exposure effect window.
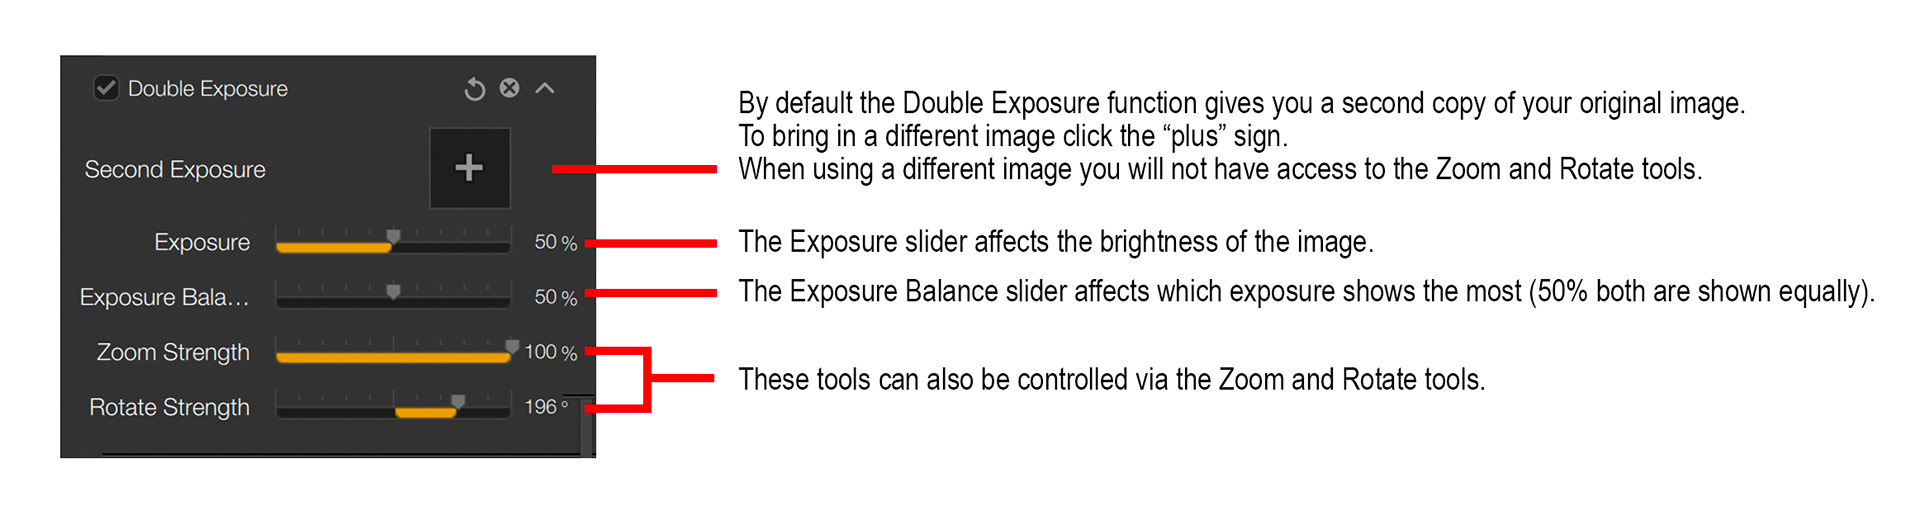
Figure 4 - Double Exposure adjustment window
By default the Double Exposure effect gives you a second exposure of your image. To bring in a different image for the second exposure click the + button and select another JPG or TIFF image. Please note that if you use a different image you won’t be able to use the Zoom/Rotate functions.
Use the Exposure slider to control the overall brightness and contrast of the image and use the Exposure Balance slider to control the opacity of the second exposure versus the original.
The Zoom Strength and Rotate Strength sliders are used to control the strength of any zoom or rotate effects on the second exposure. These effects are similar to if you zoomed the camera lens in/out while shooting or rotated the camera while shooting. You can get more control of these effects using the on-screen controls on the image window.
When the Double Exposure effect window is active, and you move your mouse over the image window you will see two small circular icons that represent the Move and Zoom/Rotate tool. Click either icon to select that tool. The Move tool has the double-headed arrow in the centre and is shown active in Figure 5.
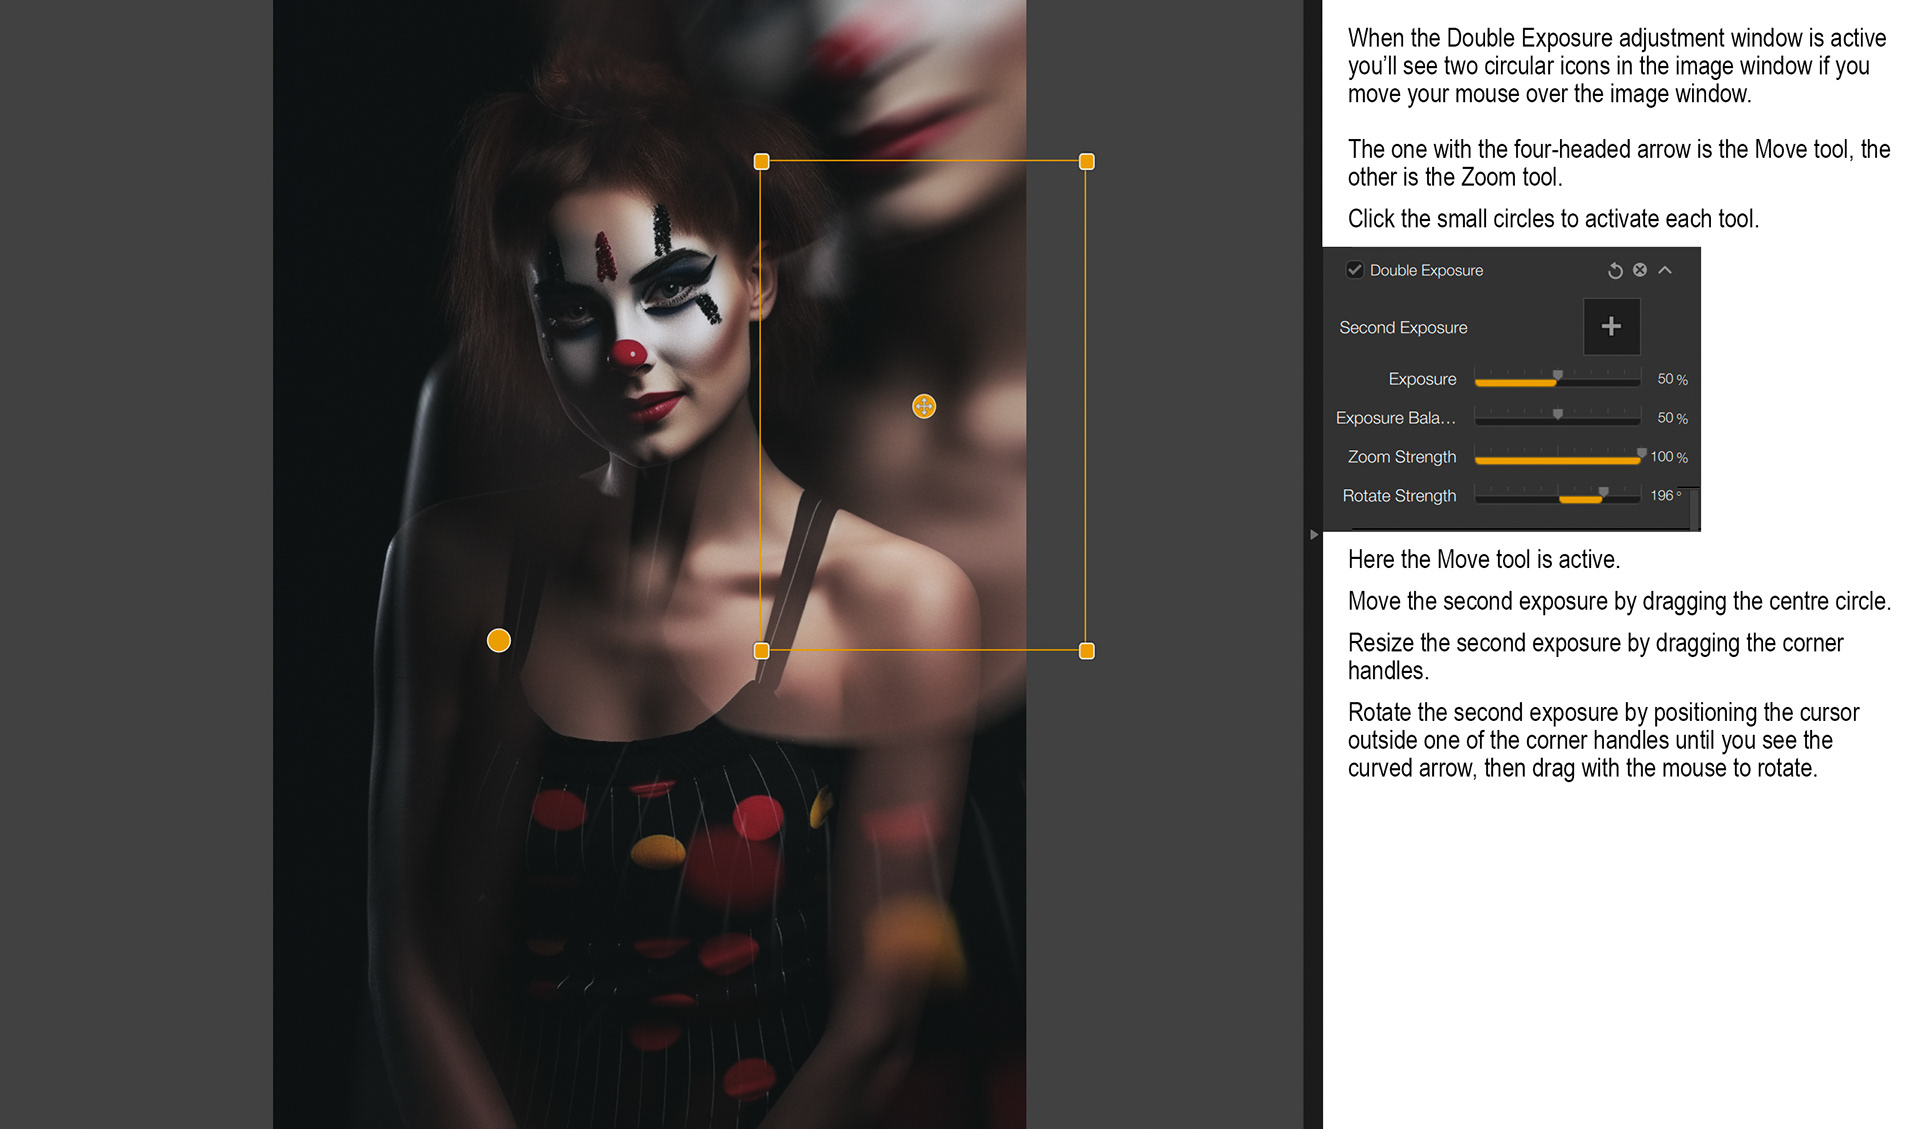
Figure 5 - Double Exposure Move Tool
Move the second exposure by dragging the circle with the double-headed arrow. Resize the second exposure by dragging the corner handles. Rotate the second exposure by positioning the mouse pointer just outside one of the corners until you see the curved arrow and then dragging the mouse.
The Zoom/Rotate tool is the solid circular icon, clicking on it will activate the tool, shown in Figure 6.
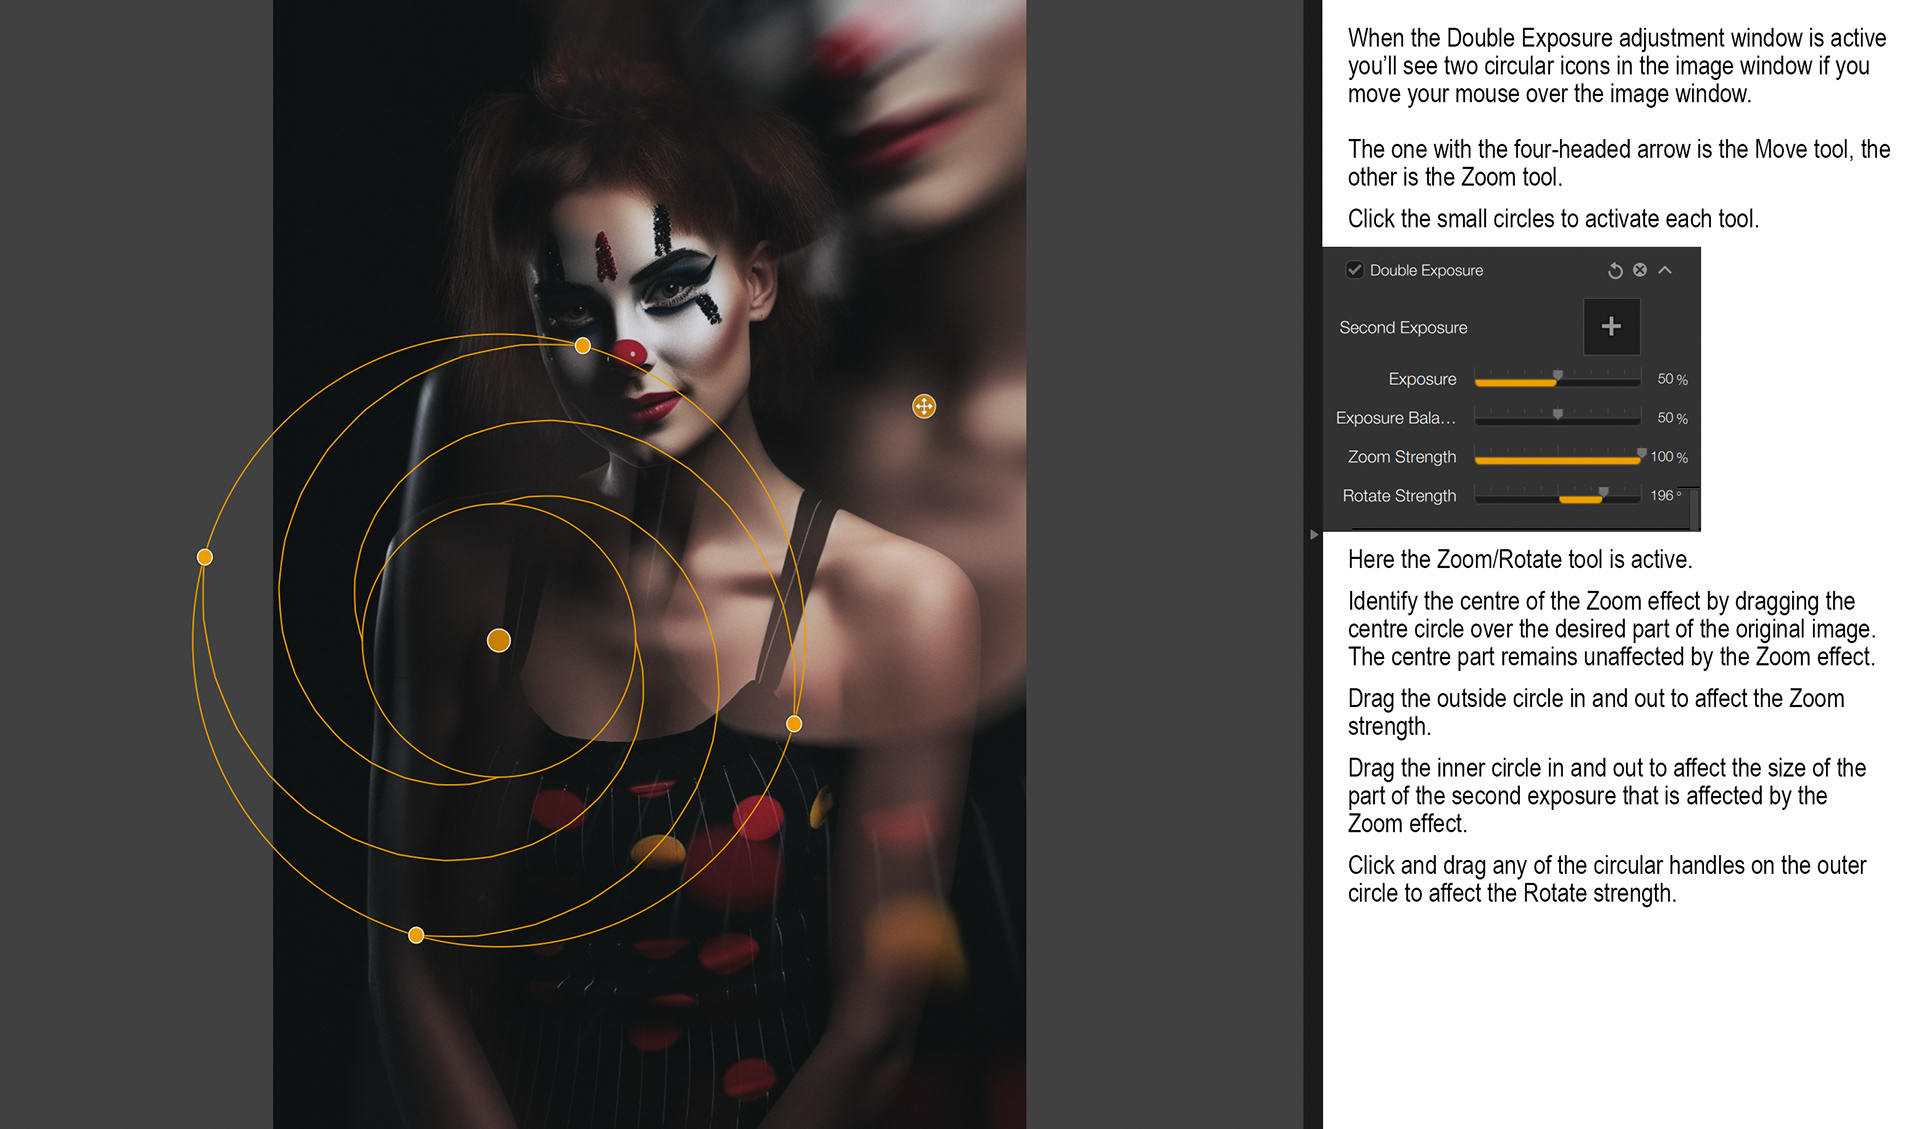
Figure 6 - Double Exposure Rotate Tool
Identify the centre of the Zoom/Rotate effect by dragging the centre circular icon over the desired part of the original image. This is the part of the image that will be unaffected, or affected least, by the Zoom/Rotate effect. Drag the outside circle in and out towards the centre to affect the Zoom strength (the Zoom Strength slider moves in unison). Drag the inner circle in and out to affect the size of the “protected” part of the second exposure from the Zoom/Rotate effect. Click and drag any of the circles on the outer circle around the circle to affect the Rotate strength (the Rotate Strength slider moves in unison).
With filters like Analog Efex Pro I would always highly recommend applying them to a separate layer in Photoshop, that way you can use layer masks and layer opacity to adjust which parts of your image are affected by the Double Exposure effect.
There is a setting in the Analog Efex Pro preferences that allows you to ensure that Analog Efex Pro will automatically create a stamp visible layer and apply its effects to that layer. I recommend changing this setting as shown in Figure 7.
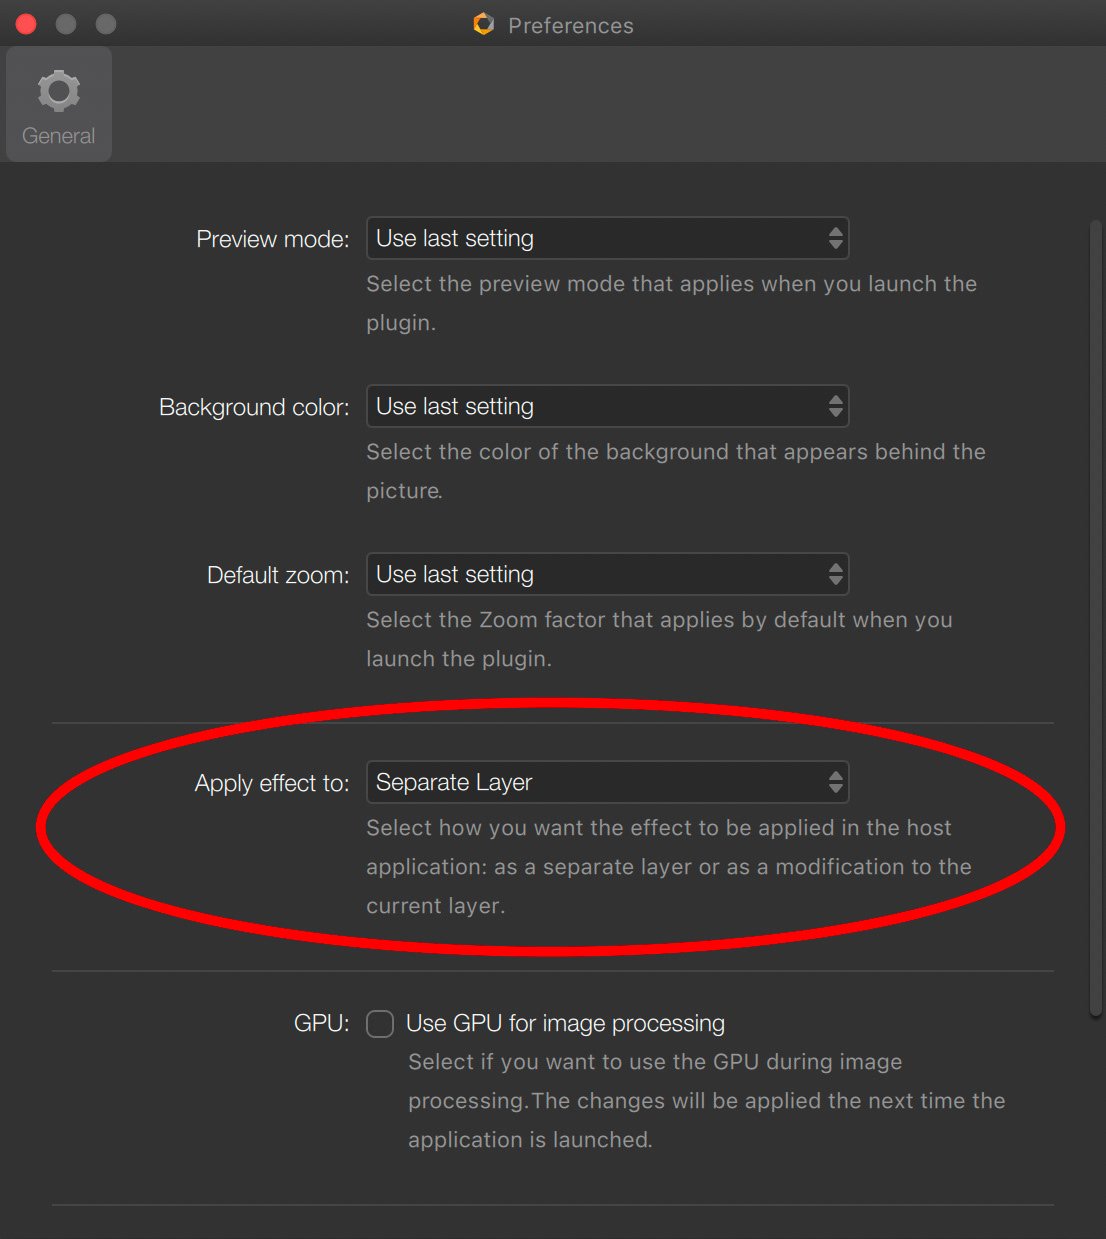
Figure 7 - Analog Efex Pro preferences
Analog Efex Pro does not allow you to apply more than one Double Exposure effect, but there is an obvious workaround. Use the Double Exposure and then run the resultant image (layer) thru Analog Efex Pro again – this can obviously be repeated as many times as necessary.
I enjoy this method of creating double (or multiple) exposures and think you will too. Give it a try, you won’t regret it.
I will leave you with the resultant image I made while creating the screenshots for this article. “Clown” included four iterations of the Double Exposure effect (with some masking) and various other textures and colour grading adjustments.
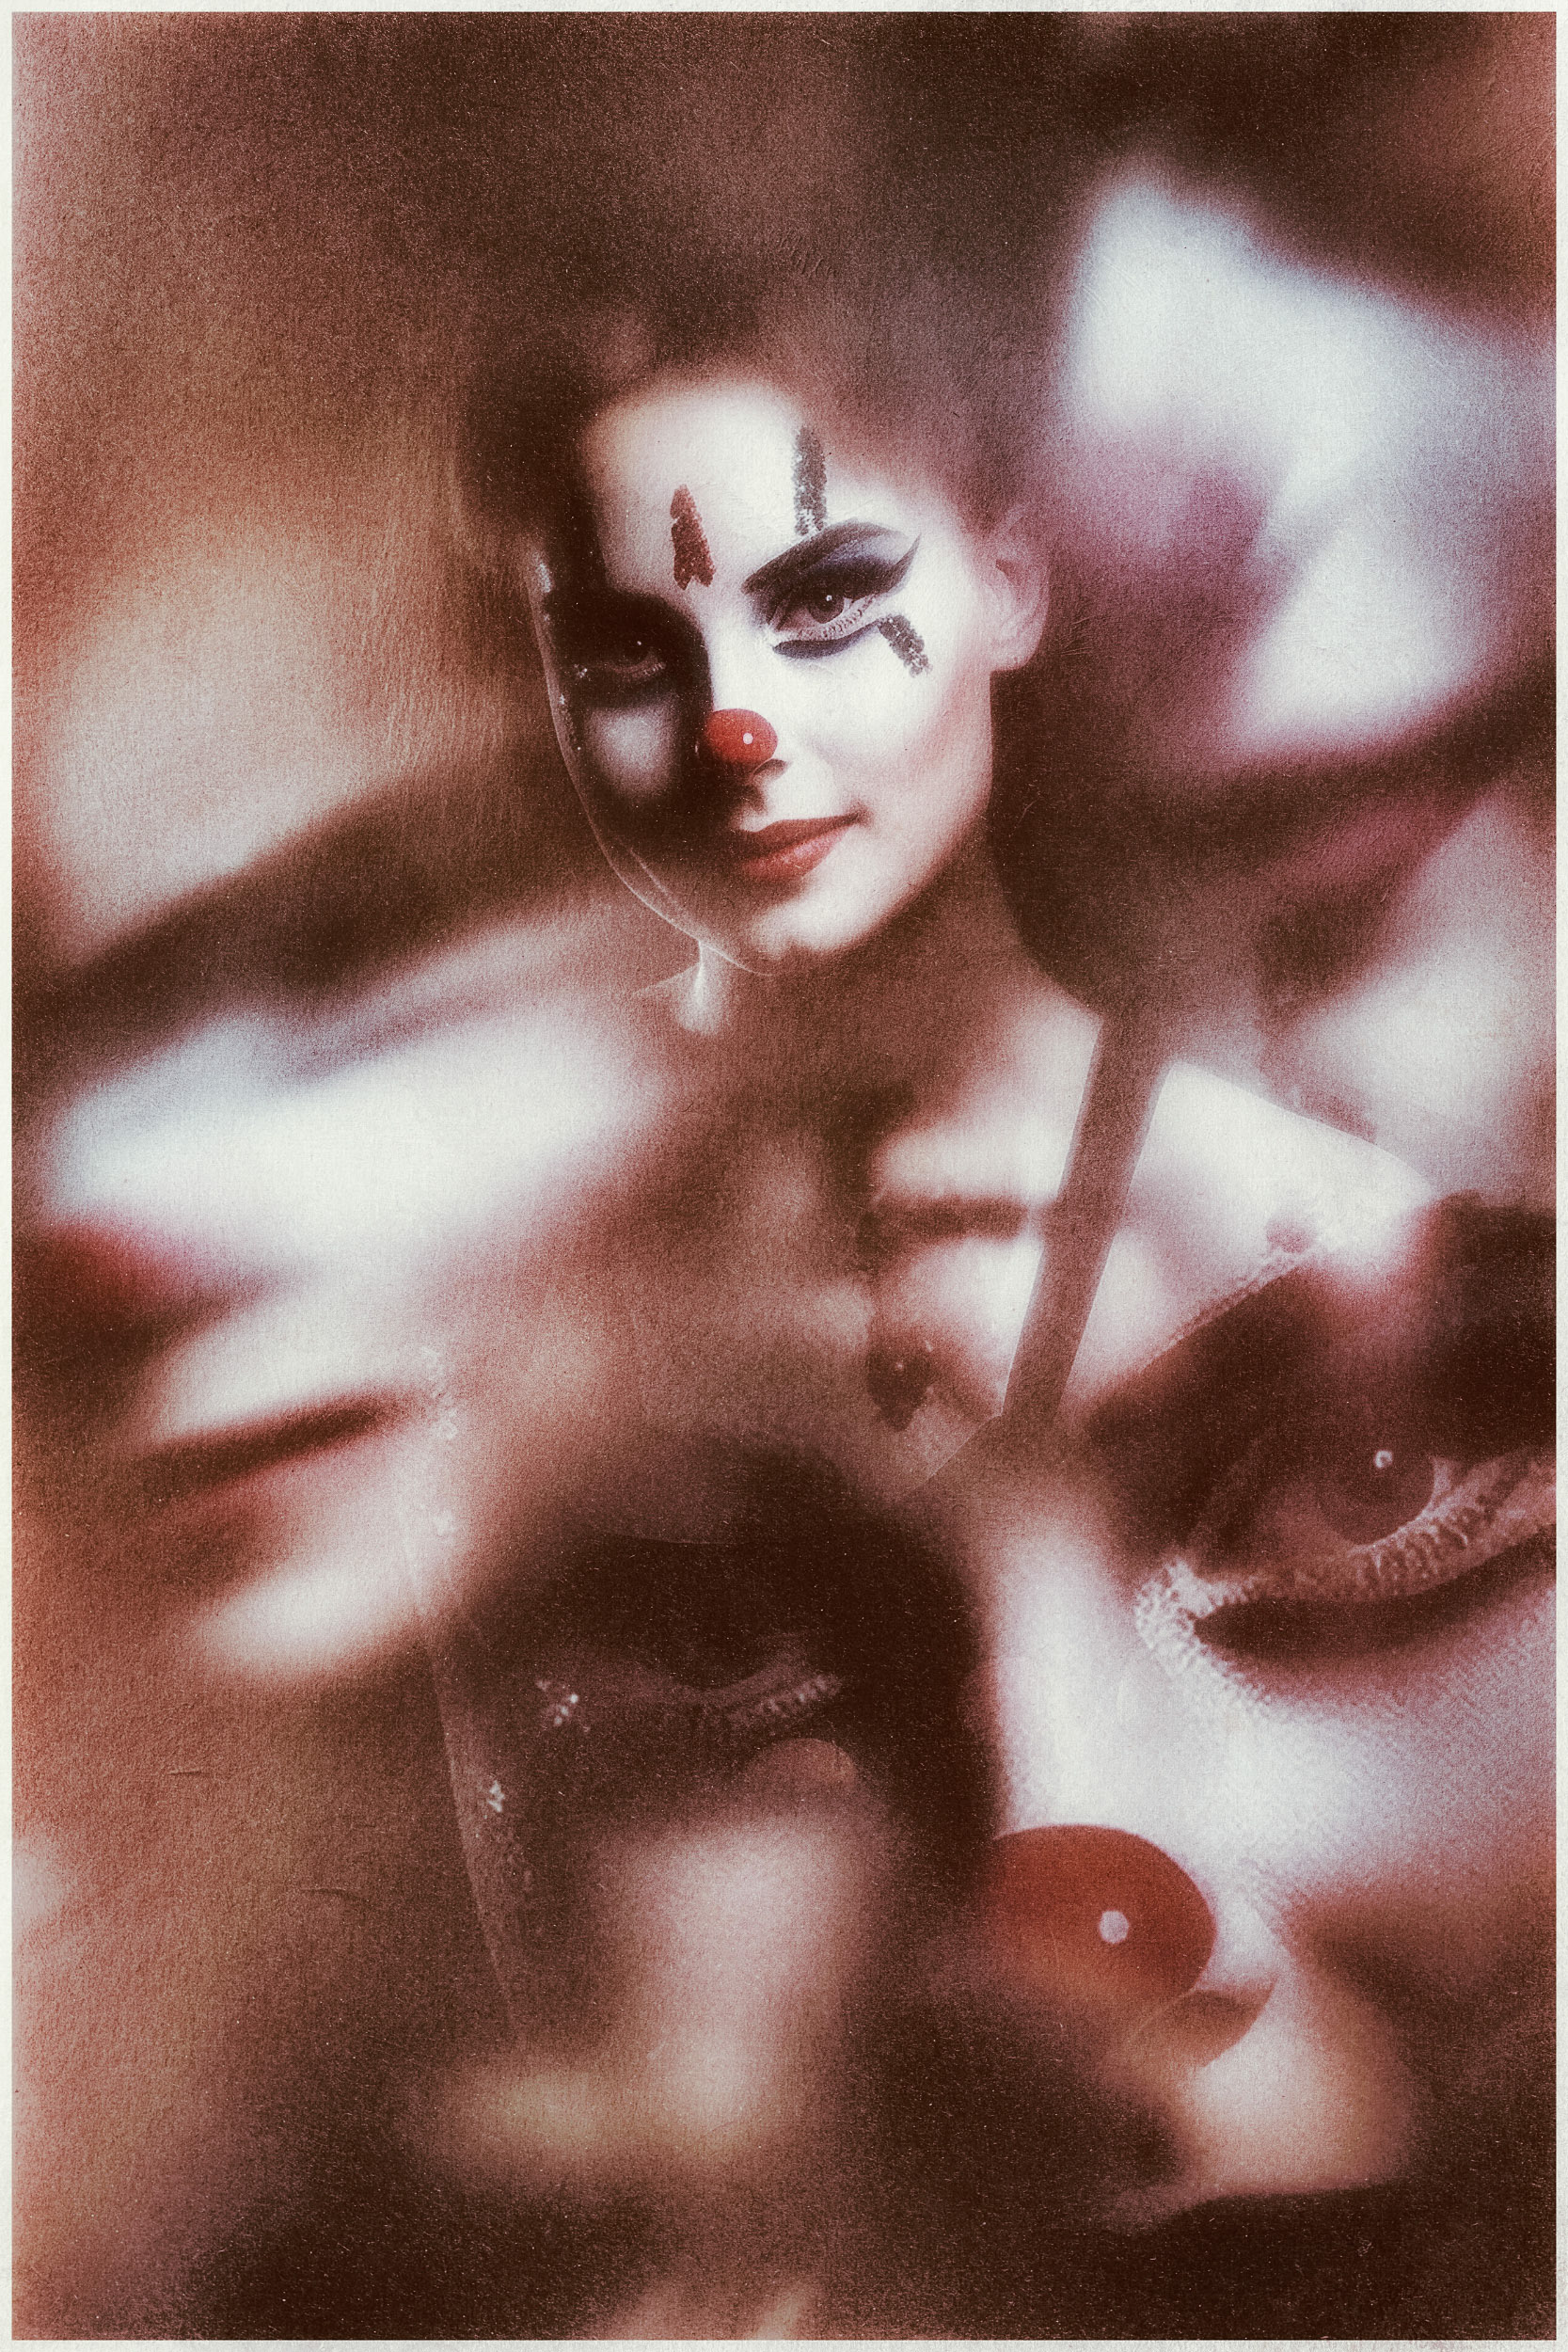
Figure 8 - "Clown"
This article was first published in the July 2023 issue of Artists Down Under magazine.