Following on from last months article on the Pep Ventosa “In the Round” technique, this article discusses another multiple exposure technique called the Adamski Effect. Unlike last month’s technique, which could be accomplished “in camera” or in post-processing, this technique is purely done in Photoshop, or a similar package.
The Adamski Effect is named after Josh Adamski, an Israeli photographer who uses the technique in a lot of his work.
I was introduced to the technique by a dear friend of mine, Charlotte Hedman. Charlotte has created a number of images using this technique, all of which I loved.
The Adamski effect involves keeping the main subject of your image in focus, while using creative motion blur techniques to blur the background of the image. You can use vertical motion blur, or horizontal motion blur, or using other techniques like Path Blur, you can create multi-directional and even curved blurs. Any of these can be used on their own, or in combination.
My first example is “Pedagogy Promenade” a beautiful image from my friend Charlotte, based on a photograph she took at Simon Fraser University in British Columbia, Canada.
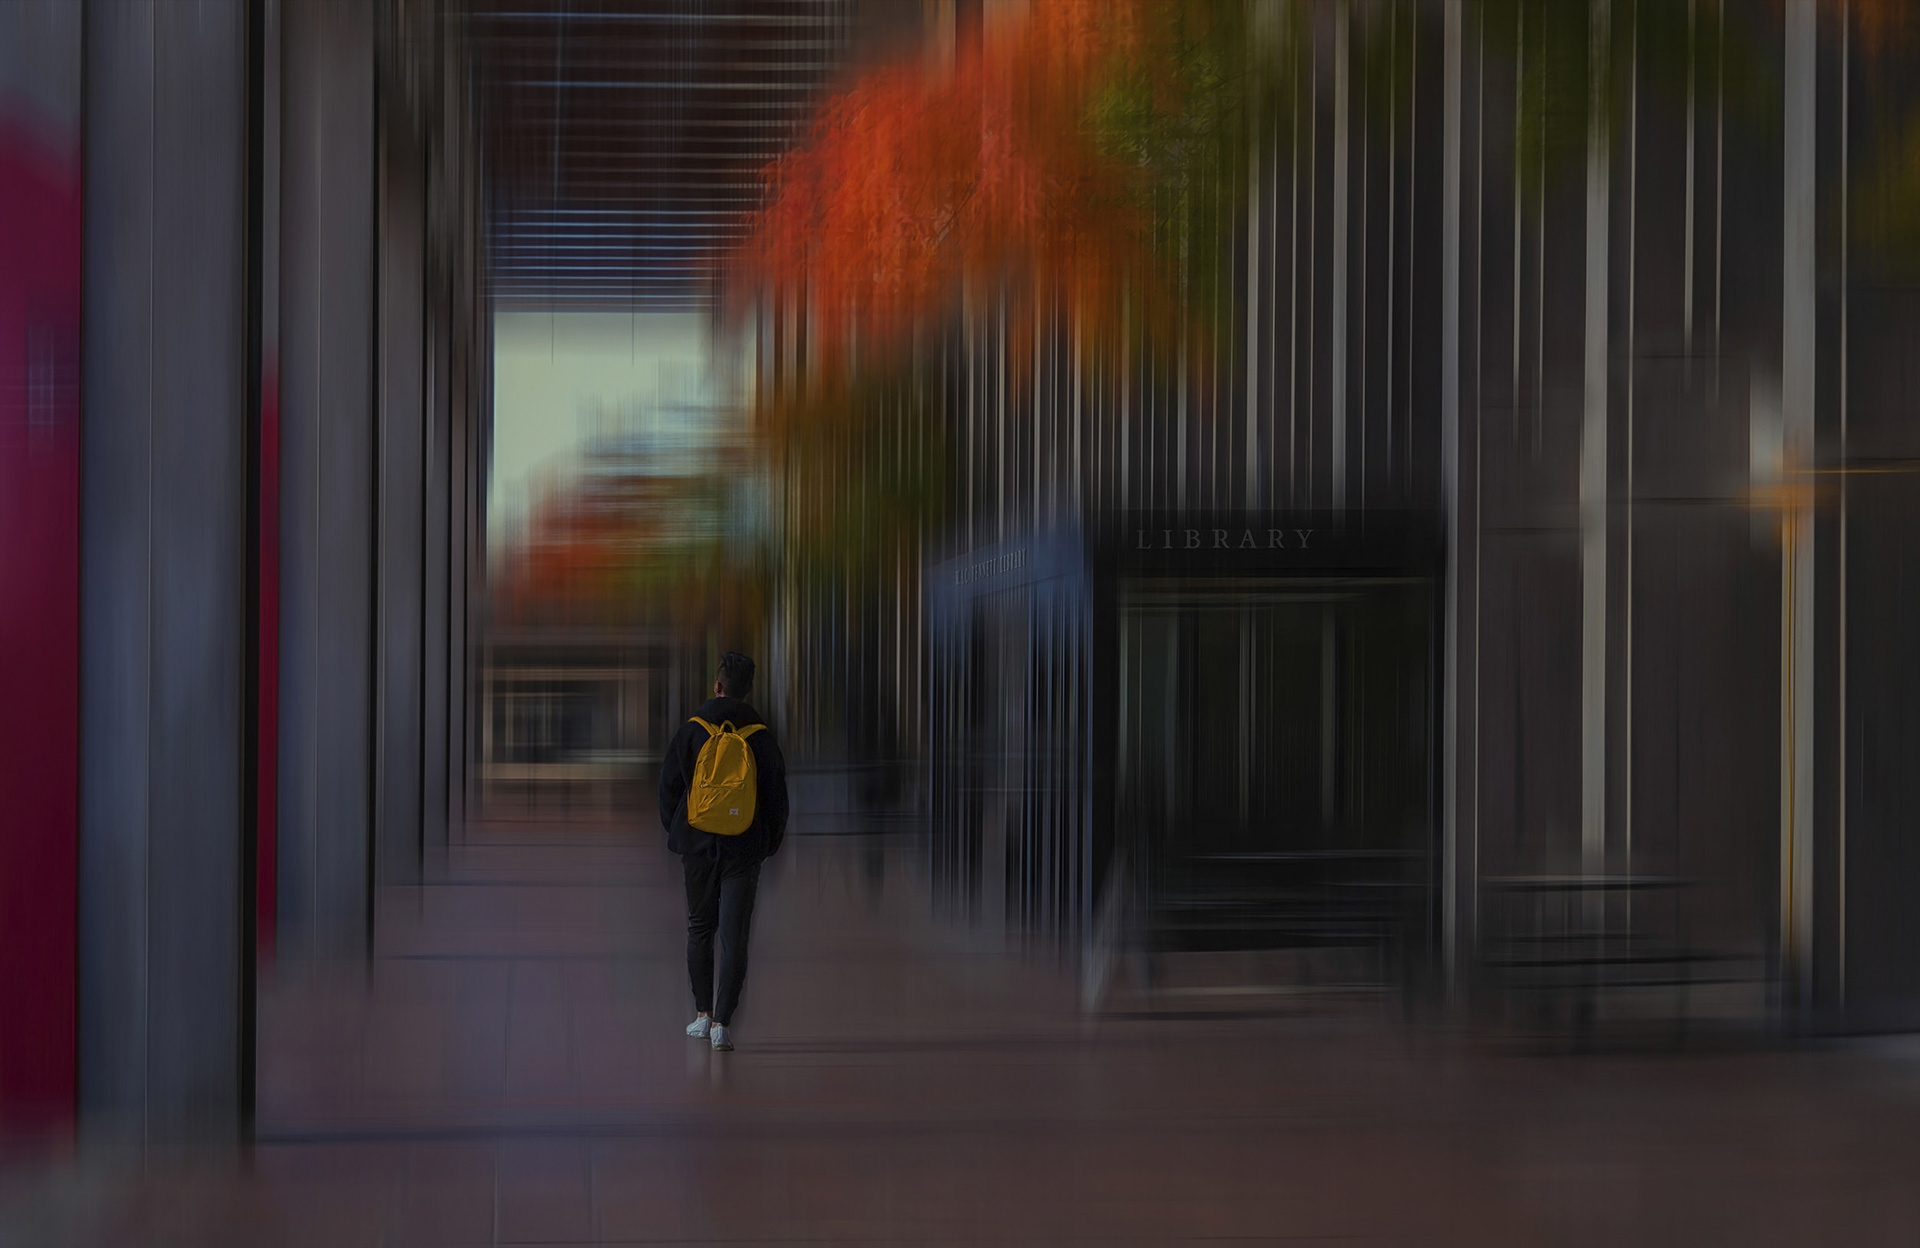
Figure 1 - "Pedagogy Promenade" by Charlotte Hedman
In this image, Charlotte would have had at least three copies of her photograph stacked in layers of her Photoshop document. The top layer has the central subject, the man with the yellow backpack, masked so that it is the only thing showing, and he is left in focus. The layers underneath have had horizontal motion blur and vertical motion blur applied, and again layer masks have been skillfully used to apply these to varying degrees in different parts of the image to achieve the beautiful result you see.
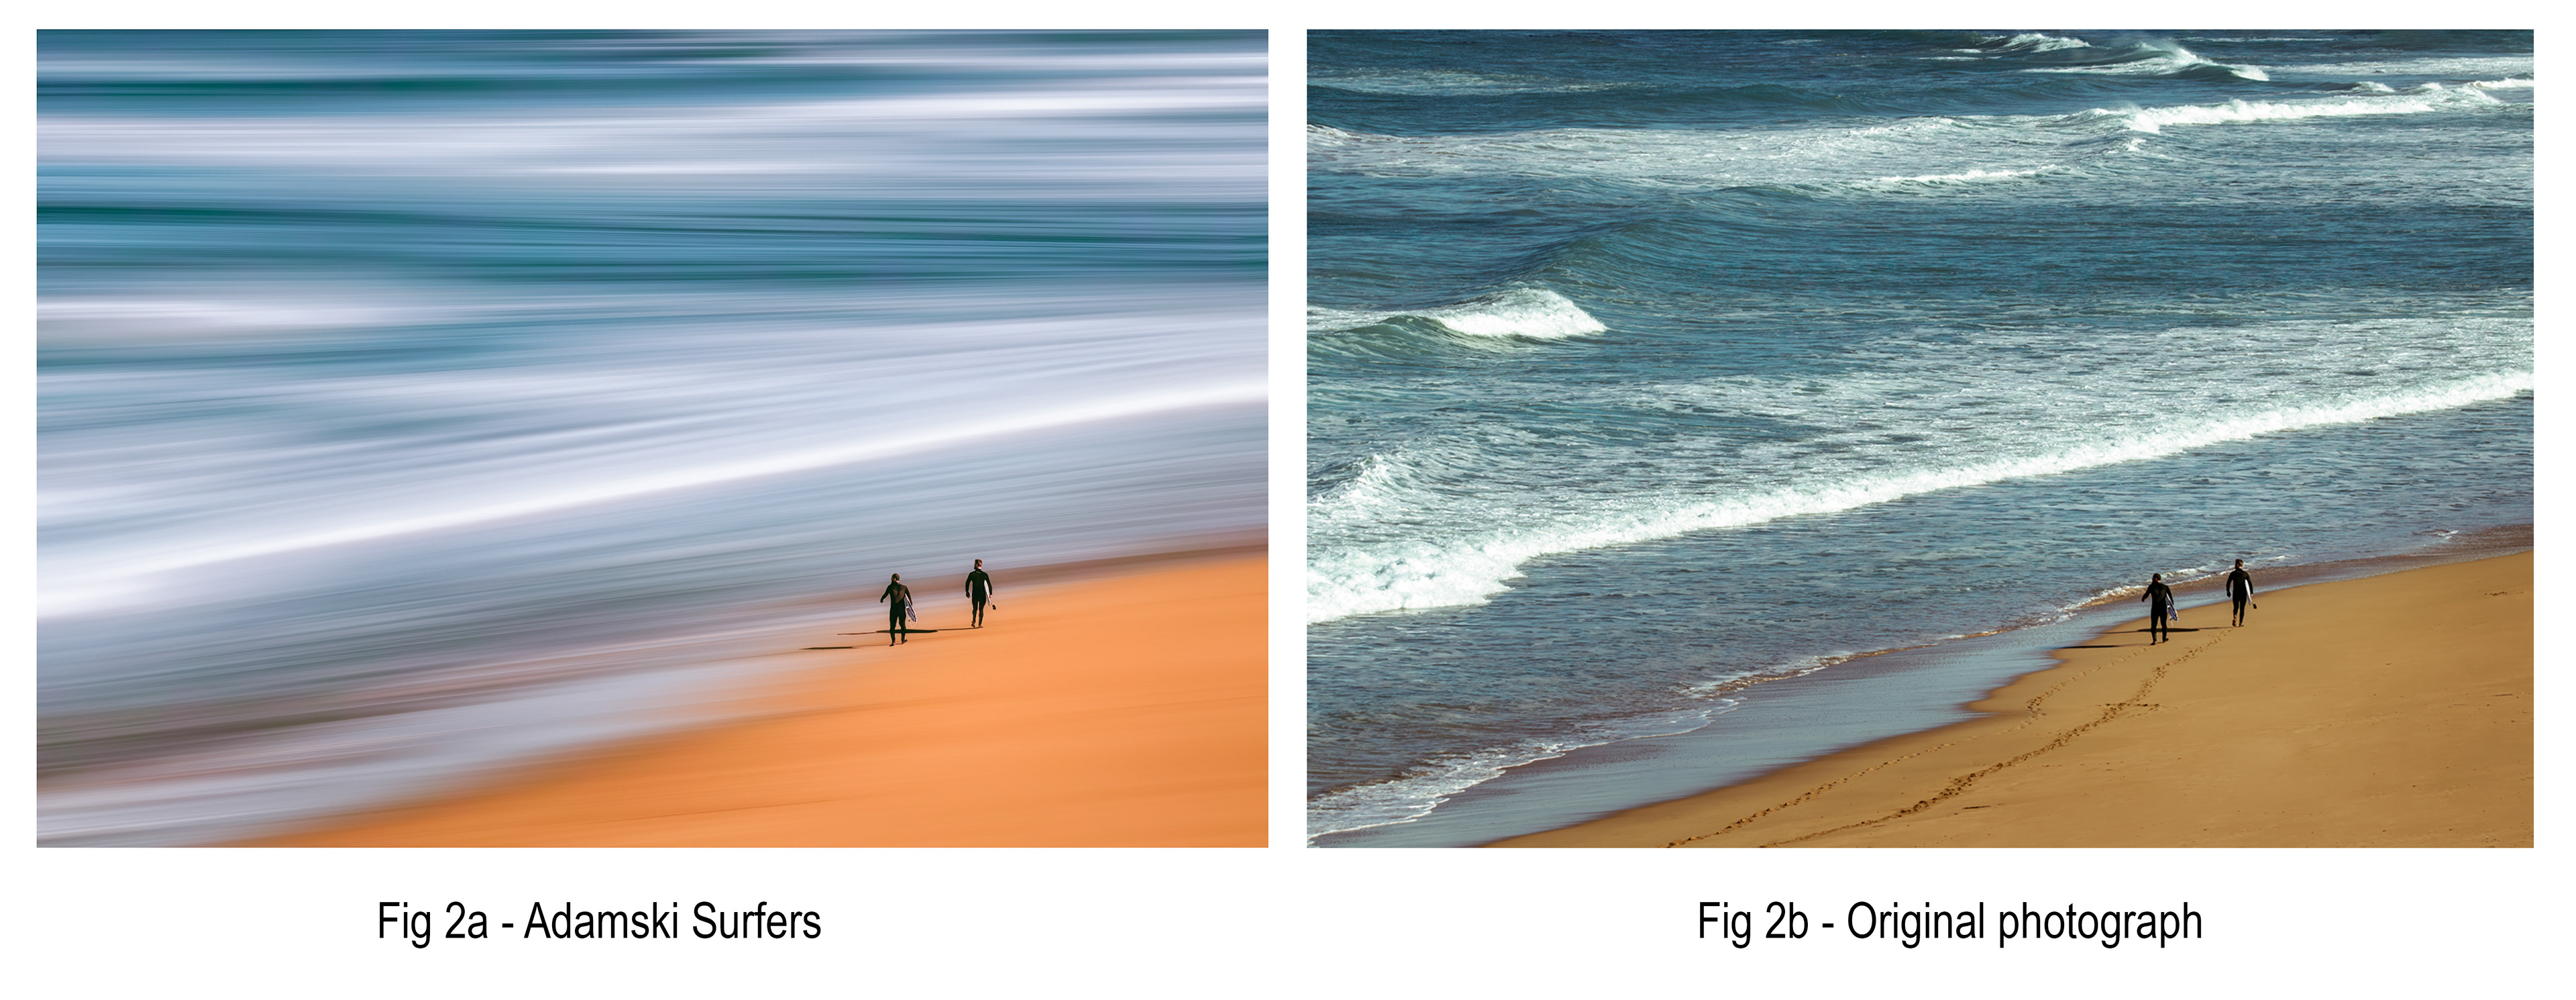
The second example, “Adamski Surfers”, shown in Figure 2, is my first attempt at this technique, based on a photograph I took at Logan’s Beach in Warrnambool. Figure 2 also shows the original photograph.
The basic layer stack for the image is shown in Figure 3.

Figure 3 - Layer stack for the base layers
Here is the process I used to create this image.
1. I duplicated the Background layer twice.
2. I used the Pen Tool to create a selection of the surfers and their shadows, then used that selection to create a layer mask on the top layer.
3. I activated the selection created in step 2 by [Cmd/Ctrl]+clicking on the layer mask, then expanded the selection by 10 pixels and used Content-Aware Fill to remove the surfers from the bottom copy of the image.
4. I then converted this layer to a Smart Object, this allows you to easily reconfigure the blur to be applied in the next step if required.
5. I then used the Path Blur option, found in Filter / Blur Gallery to apply three separate blurs following the lines of the waves, the Path Blur dialog is shown in Figure 4.
6. The Path Blur was applied a second time to create even more blur.
7. Various adjustment layers were then used to adjust the tones and colours in the image to taste (these are not shown in Figure 3).
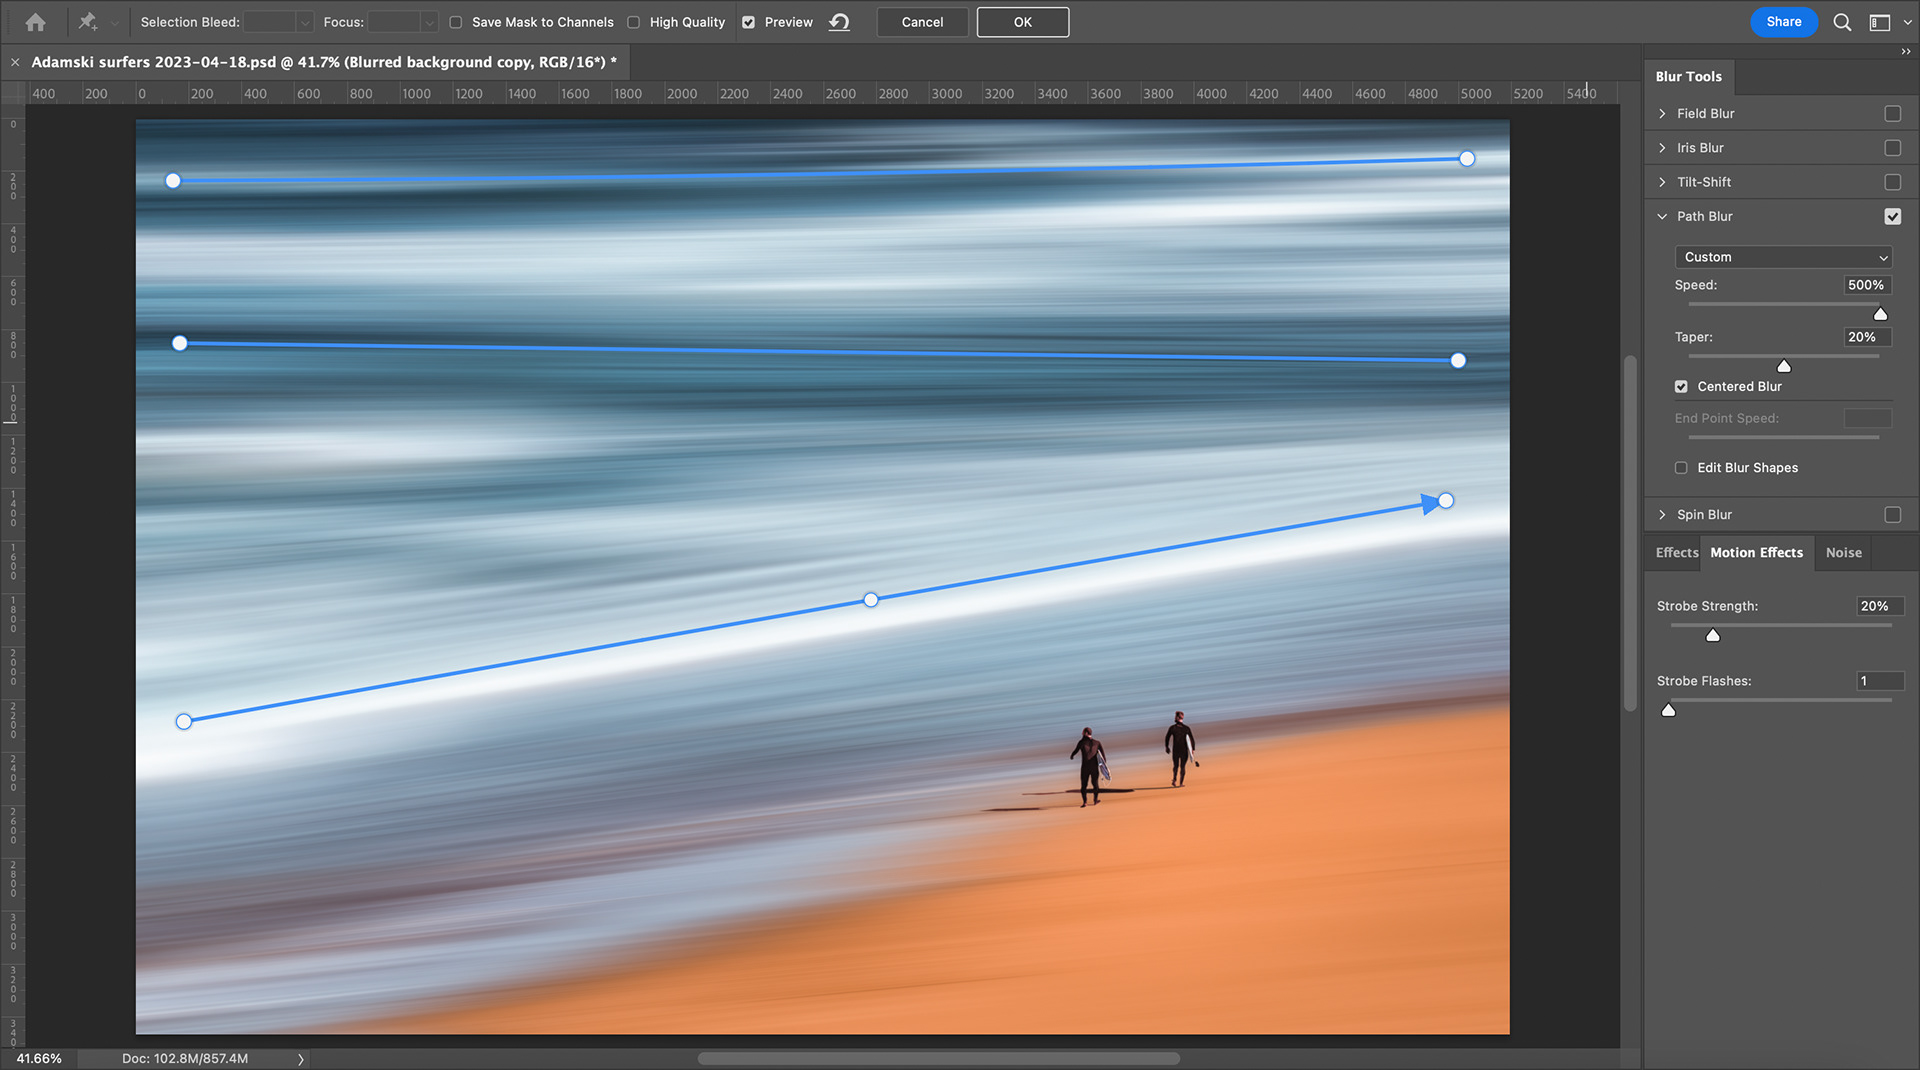
Figure 4 - The Path Blur dialog
The Adamski Effect process can create some really beautiful results, I encourage you to take a look at Charlotte’s other Adamski images on Flickr, you will find them at the link below.
You will notice that a few of Charlotte’s images have beautiful swirly, curved blur in the skies. I assumed these were created using Path Blur but when I asked Charlotte about it she described her technique, she said;
“When I do the skies with the curved blurs - I add a layer from another image - say a sky. Or sometimes just take a portion of the sky if it's very interesting and make a new layer out of it. I then use the Transform tool, and first make it narrower, and then use the Warp tool in Transform, to shape the sky into those curves. In some of my beach scenes, I used three to five different layers of different skies. On each of those layers, I used a low opacity brush to mask the edges to blur them so they aren't too sharp.”
So, just goes to consolidate my view that there are many equally effective ways to do things in Photoshop.
"Shall we stay or shall we go" shown in Figure 5 is one of the beautiful swirly, curved blur sky images by Charlotte. It is based on a photo she took in California.
"Shall we stay or shall we go" shown in Figure 5 is one of the beautiful swirly, curved blur sky images by Charlotte. It is based on a photo she took in California.
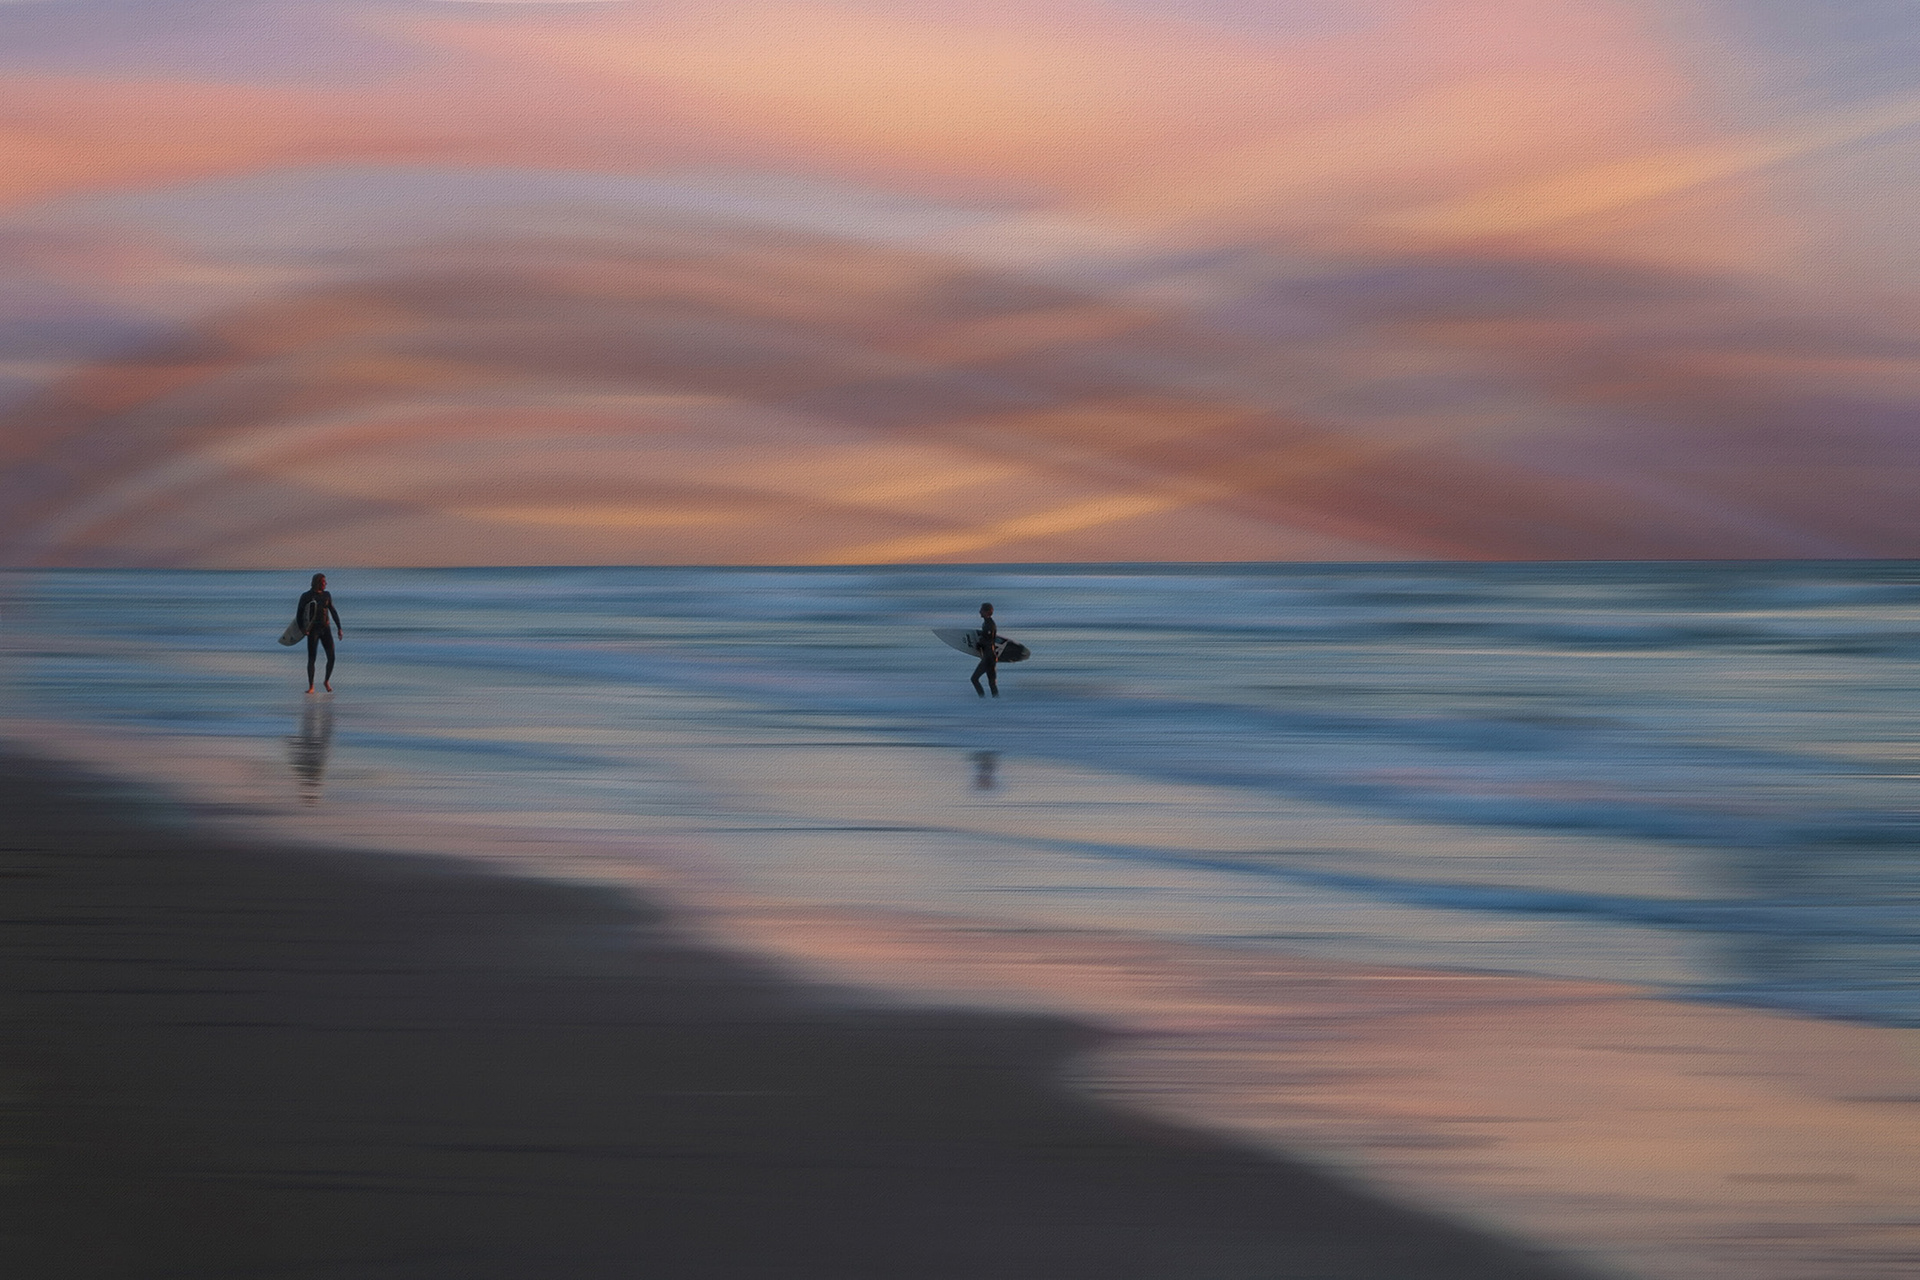
Figure 5 - "Shall we stay or shall we go" by Charlotte Hedman
I hope you like the Adamski Effect and will give it a try to create your own images.
You can view some of Josh Adamski’s work on his Instagram @josh_adamski.
This article was first published in the June 2023 issue of Artists Down Under magazine.