DxO Labs have just released version 5 of the NIK Collection, my favourite set of filters for Lightroom and Photoshop (and other image manipulation programs).
In this version update, Color Efex Pro and Analog Efex Pro receive the same user interface upgrade that was introduced to Silver Efex Pro and Viveza in Version 4 (see Figure 1).
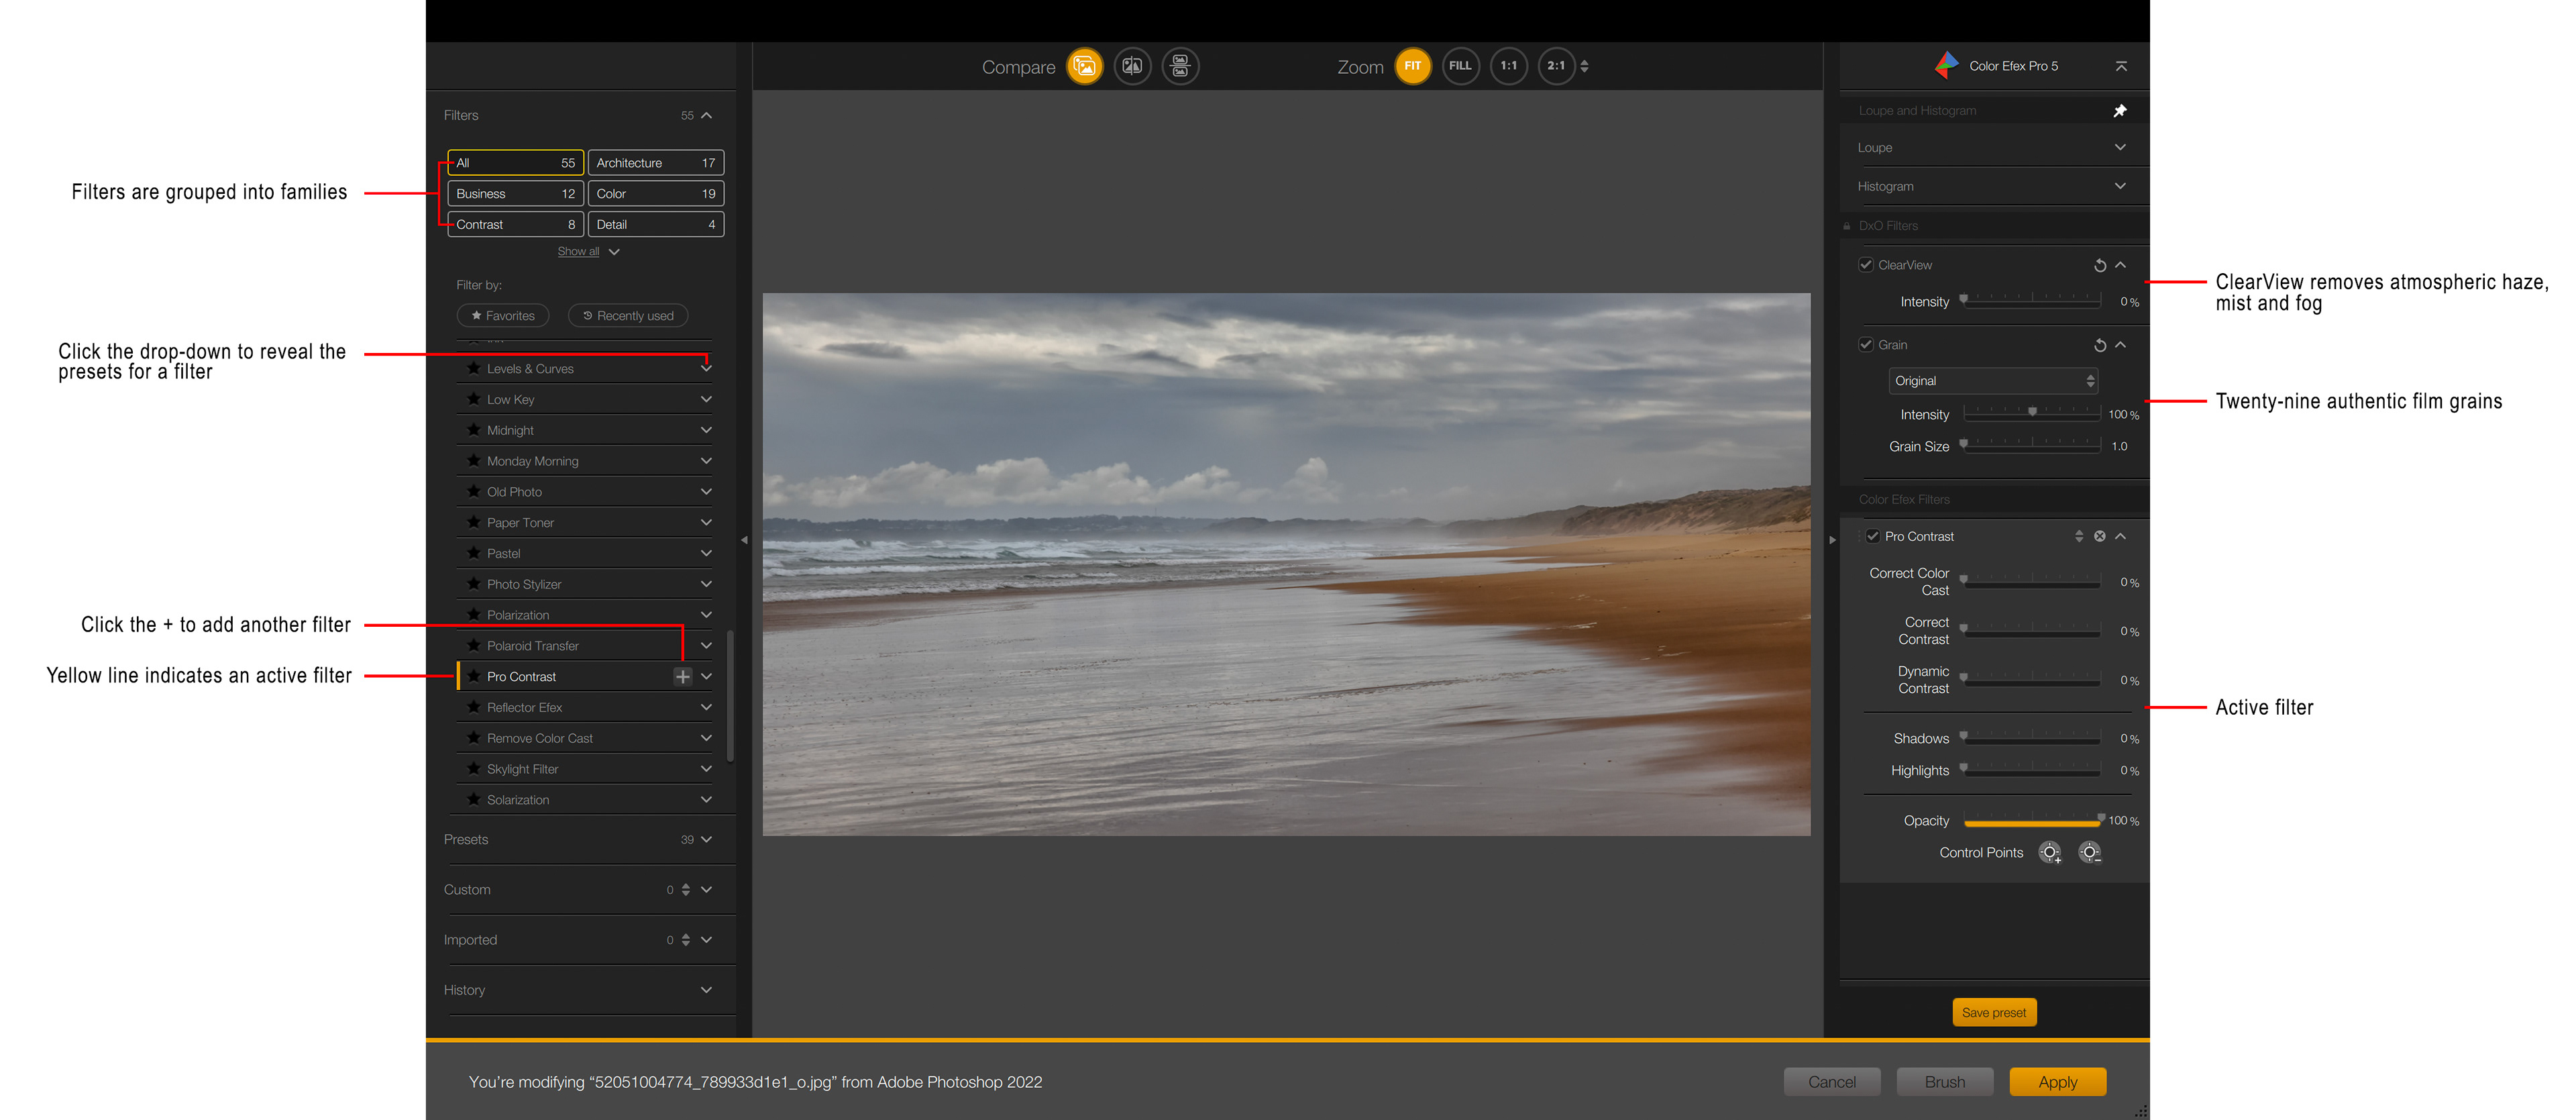
Fig 1 - Nik Color Efex Pro updated user interface
DxO have added their ClearView technology to both Silver Efex Pro and Color Efex Pro. ClearView is similar to the Dehaze slider in Lightroom and Photoshop, in that it is used to remove atmospheric haze, fog and mist from images by improving local contrast, but I think it does a better job than Dehaze when used judiciously.
They have also added the Film Grain technology from their FilmPack product (an add-in available for their PhotoLab product) to Color Efex Pro and Silver Efex Pro. This allows the addition of many authentic film grains to your images.
The control point technology in all products has also received some significant updates.
Control points in all products essentially allow you to add masks so that you can selectively apply the filter effects to your images rather than applying them globally. When you drag a control point onto your image, it looks at the luminance (brightness) and chrominance (colour hue) directly under the centre of the control point and creates a mask matching these within a circular area around the control point. You can increase or decrease the size of the circle using the slider attached to the central point of the control point. The enclosing circle acts like a radial gradient, the further from the centre the mask strength reduces (see Figure 2).
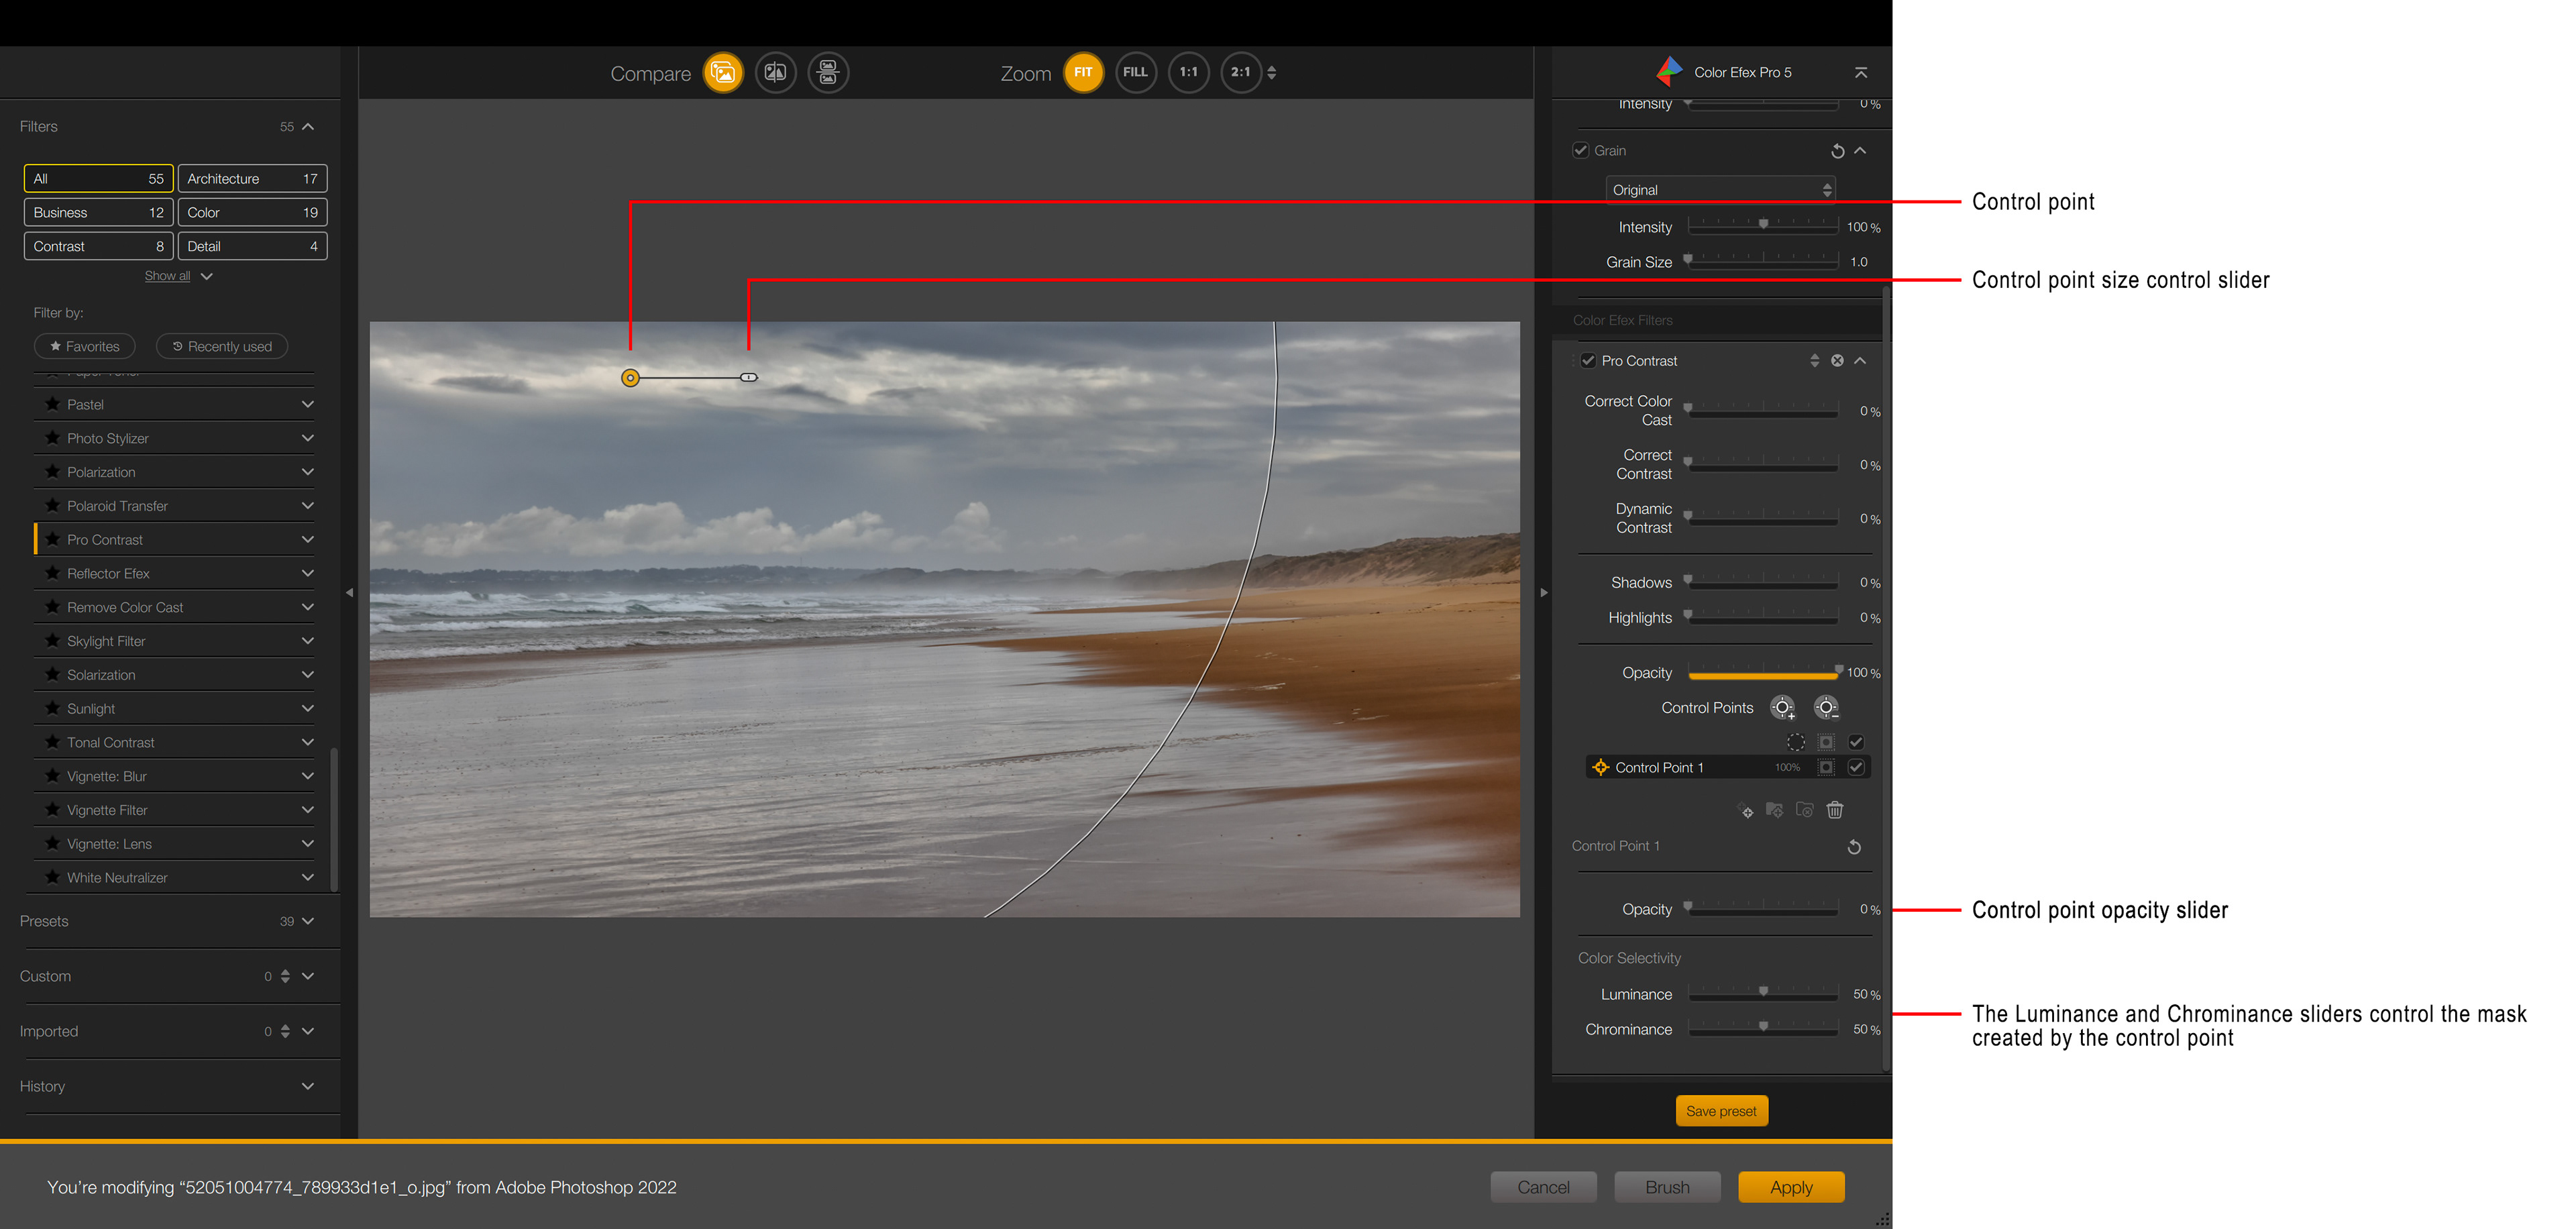
Fig 2 - Control point in Color Efex Pro
A control point can be a positive control point (only applies the filter effect in the masked area) or a negative control point (applies the filter effect everywhere else except the area defined by the control point). Each filter has an opacity slider as does each control point, when you add your first positive control point the overall filter opacity slider is set to zero, and the opacity slider for the control point is set to 100%. Similarly, when you add your first negative control point the overall filter opacity slider is set to 100% and the opacity slider for the control point is set to zero. These opacity sliders on the filter and the control points can be adjusted to control the impact of the filter effects.
By clicking the mask icon next to any control point you can enter mask view to see the mask created by your control point (see Figure 3).

Fig 3 - Control Point mask view
One of the biggest updates in this version (and in NIK Collection version 4 for Silver Efex Pro and Viveza) is the addition of the Luminance and Chrominance sliders for each control point. By moving these sliders to the right you can increase the mask sensitivity so that only areas that more closely match the brightness and colour directly under the control point (see Figure 4) are selected. Moving the sliders to the left will expand the mask loosening the sensitivity to the brightness and colour under the control point.
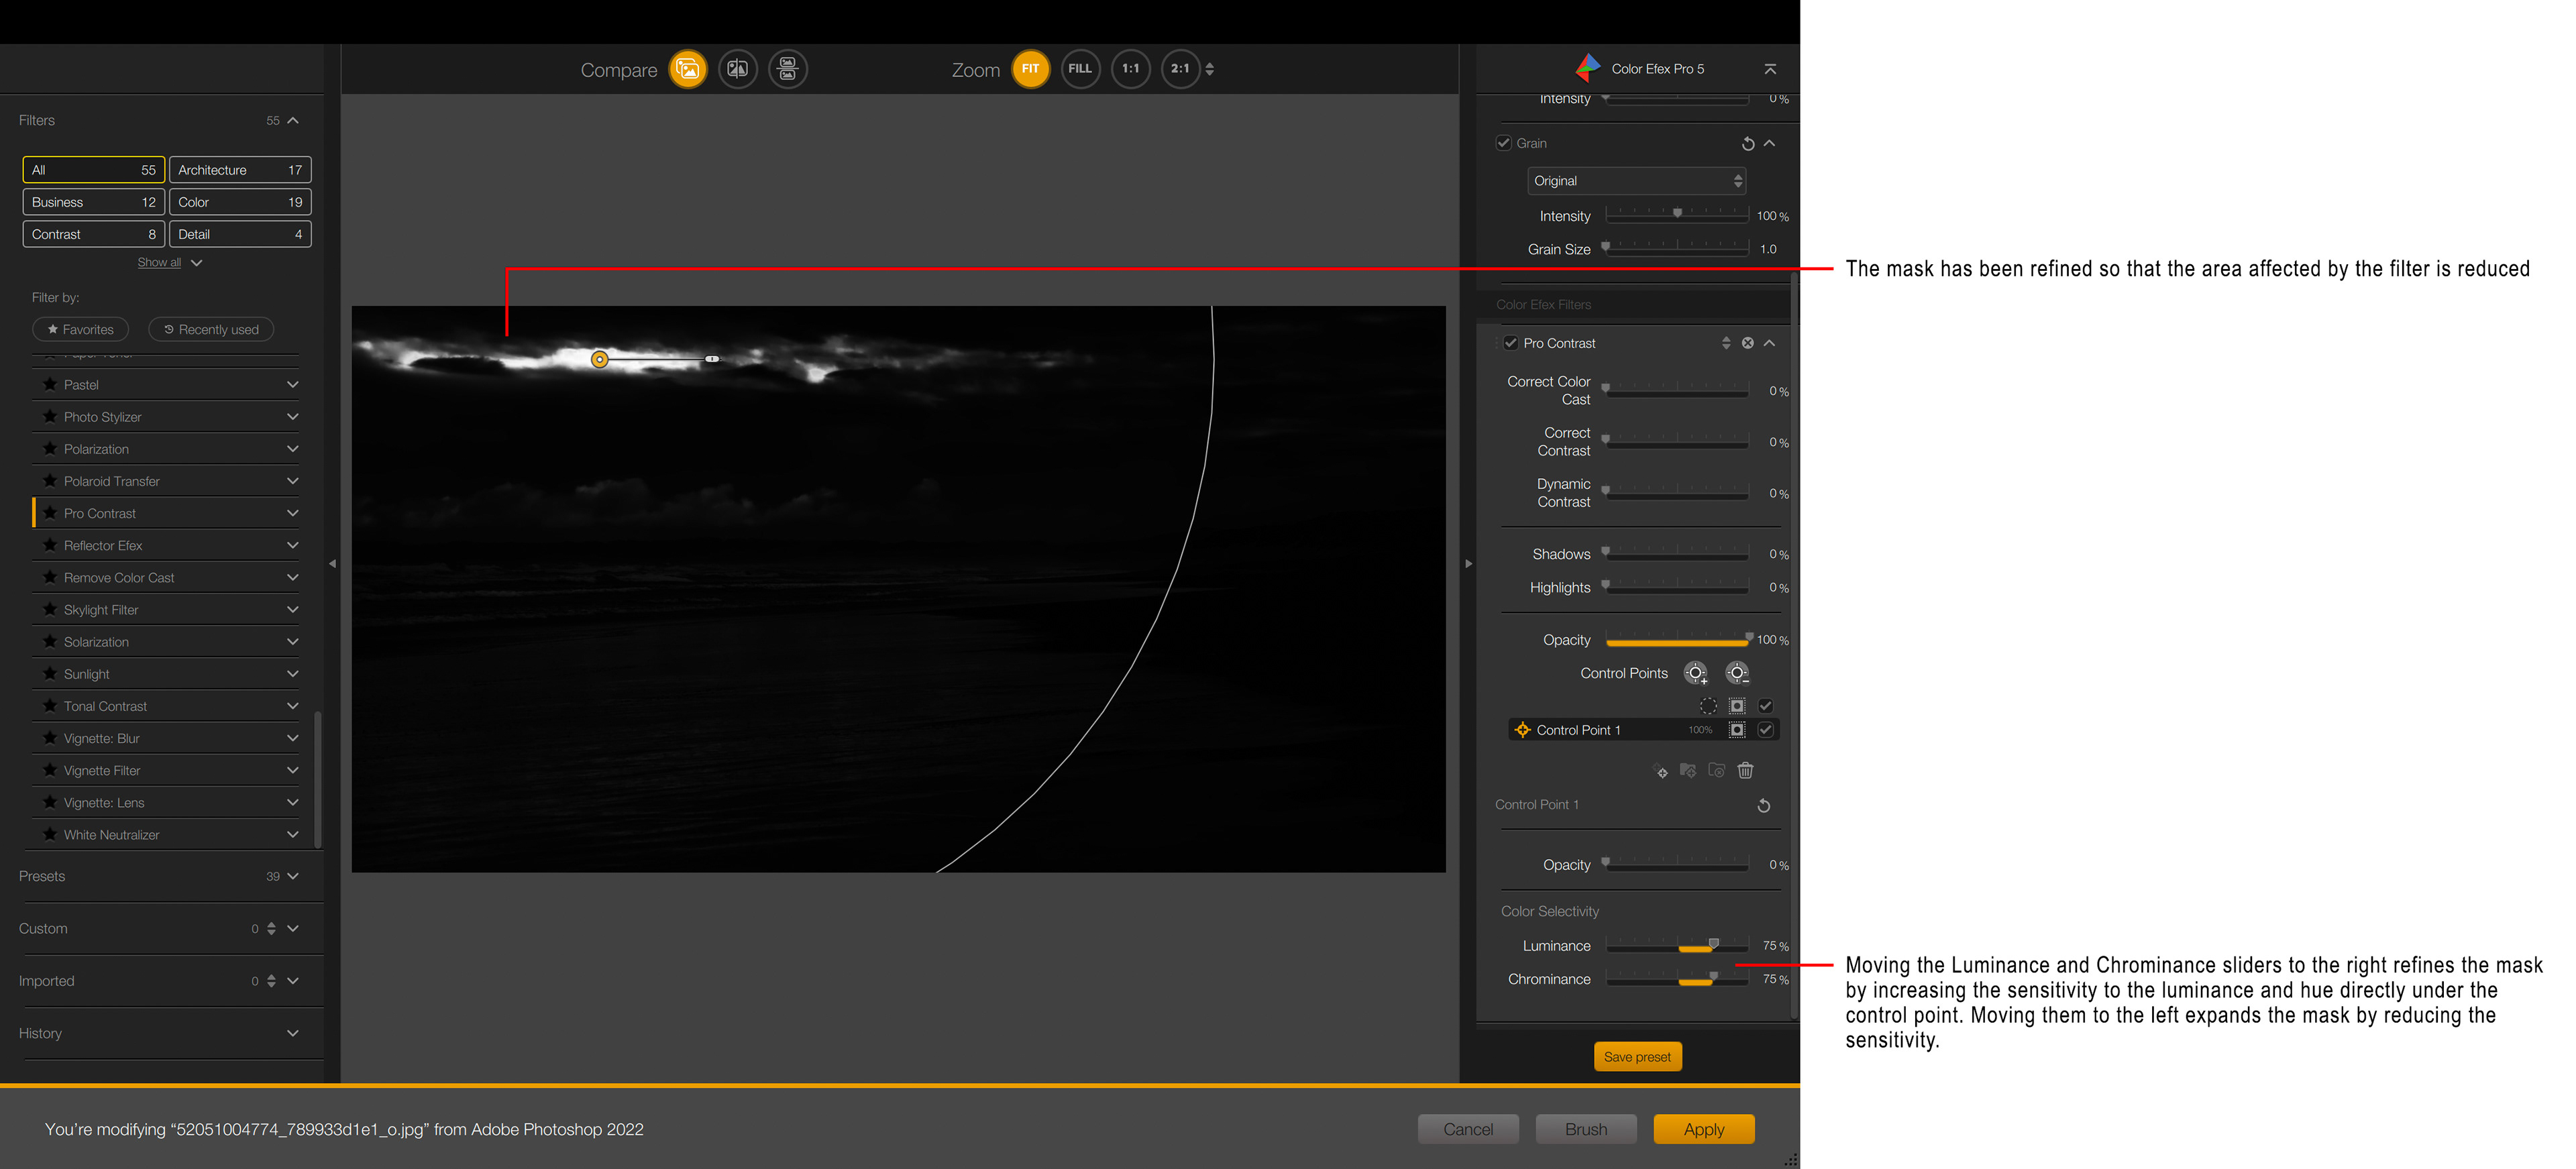
Fig 4 - Refining the mask with the Luminance and Chrominance sliders
These sliders make the use of the control points much more accurate and powerful.
One interesting use of these Luminance and Chrominance sliders is to drag them all the way to the left, effectively removing any relationship between the mask and the brightness or colour under the control point. This effectively turns the mask into a pure radial gradient (dependent on the size of the control point circle).
Another useful update is the ability to rename control points and control point groups.
There have also been a number of changes to presets, making it possible to optionally save control points you have created along with the preset, as well as offering the possibility to import and export presets.
Also please note that in Color Efex Pro you can save/use presets that use multiple filters.
I think this upgrade is a worthwhile one as it adds significant power to the control point technology, as well as standardising the new user interface across the four filters that I use the most. There’s not much out there that touches the Nik Collection for power and flexibility in my opinion, so if you’re not a Nik user already, it’s definitely worth downloading and taking advantage of their 30-day free trial.
This article was first published in the August 2022 issue of Artists Down Under magazine.