Adobe have just released Adobe Camera Raw version 16 as well as Lightroom version 13. These include a new feature called Point Color that allows very accurate adjustments to colour in your image.
Before talking about that it is worth noting that there has also been some re-arrangement of the basic panels with the sliders that were previously contained in the Basic panel now in three panels called Light, Color and Effects (see Figure 1).
Before talking about that it is worth noting that there has also been some re-arrangement of the basic panels with the sliders that were previously contained in the Basic panel now in three panels called Light, Color and Effects (see Figure 1).
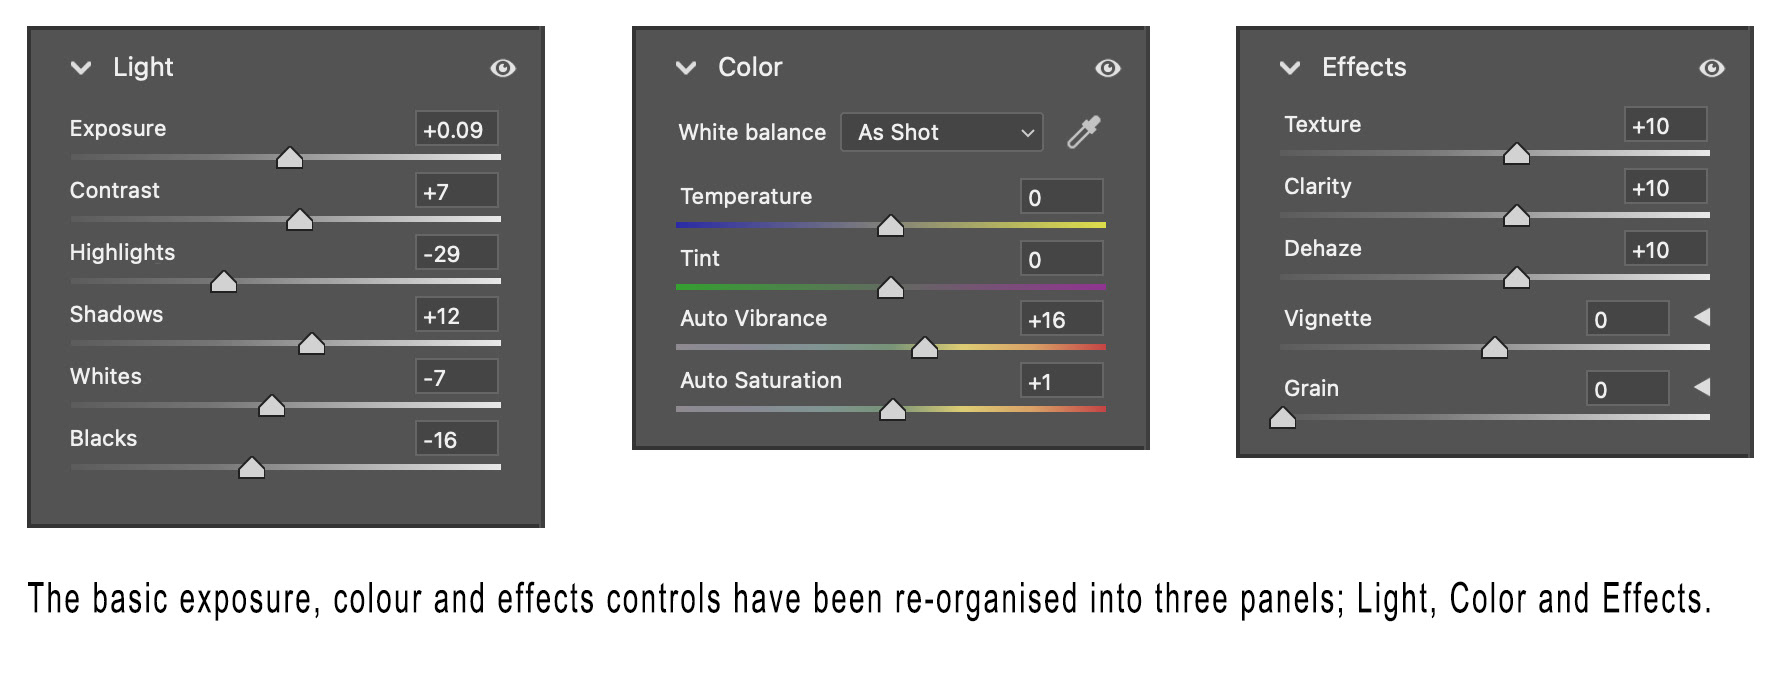
Figure 1 - ACR Basic panel re-organization
The new Point Color features are found in a second tab in the Color Mixer panel and are shown in Figure 2.
This new feature allows much more accurate colour adjustment than the Color Mixer because it allows selection of the colours to be adjusted based on hue, saturation and luminance, and allows you to select with great accuracy the range of each of these to select. The Color Mixer only allows selection by pre-determined hue ranges.
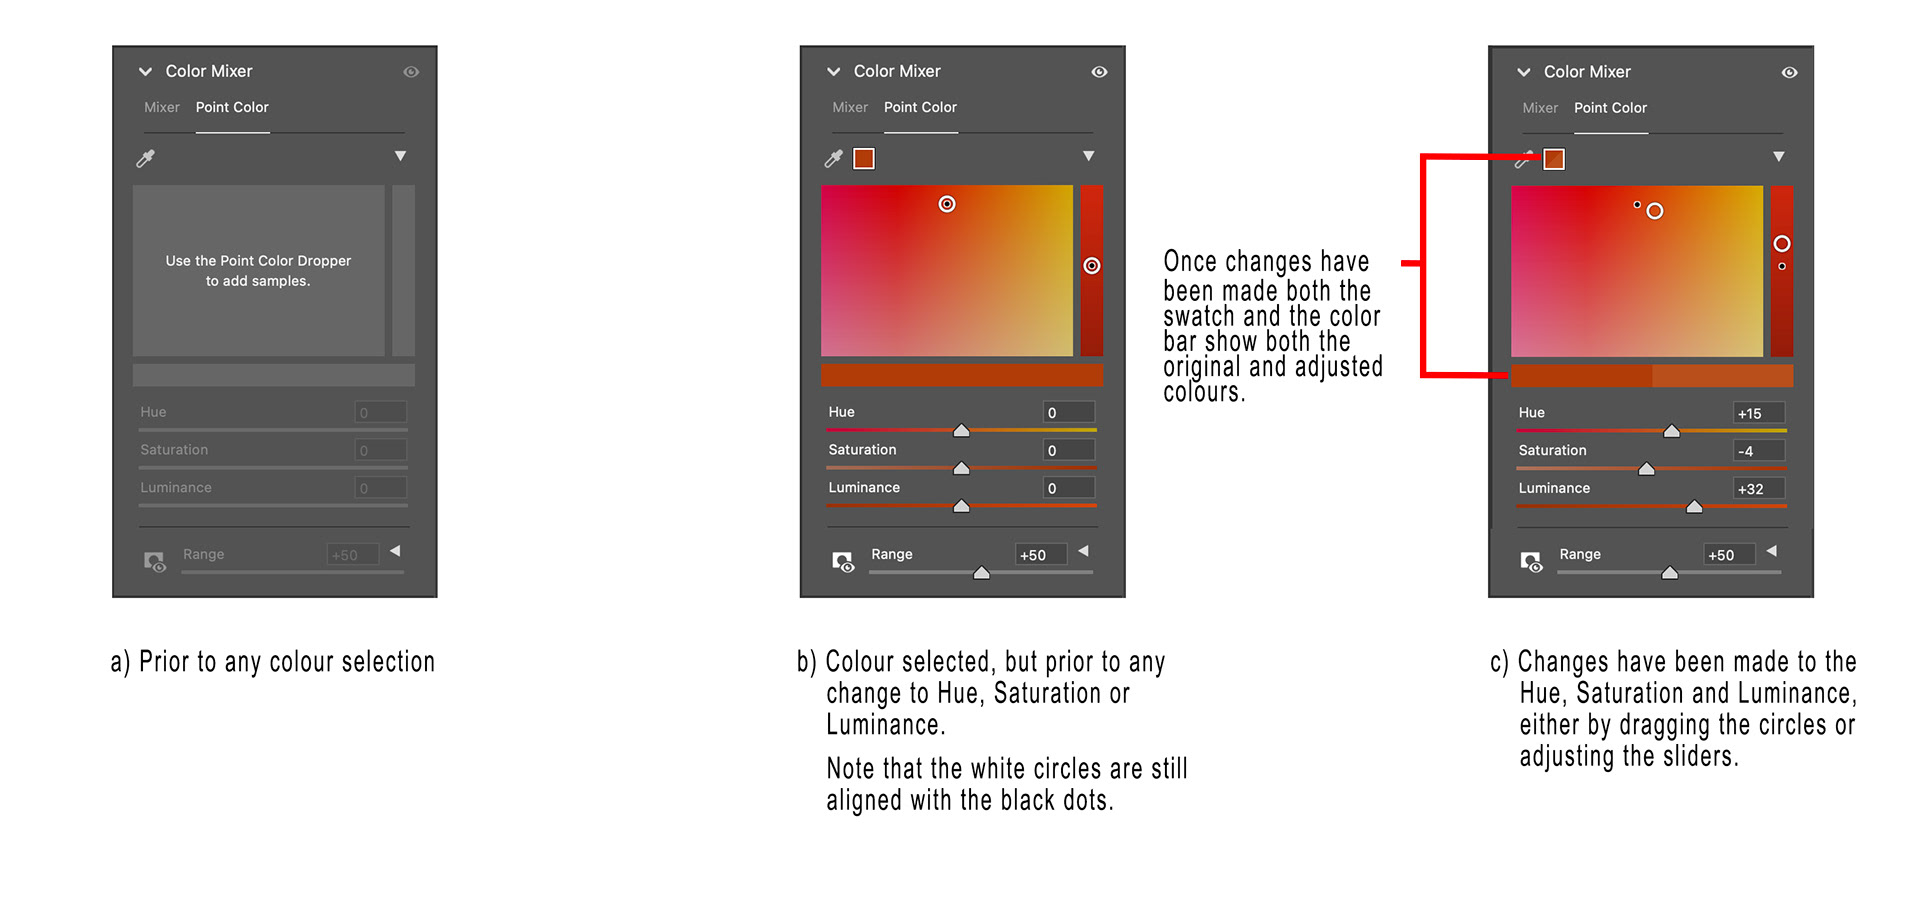
Figure 2 - Point Color dialog
Use the dropper to click on your image to select the colour you want to adjust, a new swatch is added next to the dropper and the Point Color dialog will change like Figure 2b).
The large square of colour represents the Hue and Saturation, the vertical column of colour represents the Luminance. Within each of these you’ll see a black dot surrounded by a white circle. The black dots represent the position of your original selected colour and will remain in place. You can adjust your selected colour by dragging the white circles. Within the large square of colour, drag the white circle left and right to adjust the hue, and up and down to affect the saturation. Within the vertical column drag the white circle up and down to affect the luminance.
The colour spectrum in the large square and vertical column shows the range of possible colour adjustments that can be made.
As you adjust the colour by dragging the white circles, you’ll note that the Hue, Saturation and Luminance sliders also move as you drag the circles, you can also use the sliders directly if you prefer.
Once a colour adjustment has been made, both the swatch and the horizontal bar show the original and adjusted colour for comparison (see Figure 2c).
The Range slider (see Figure 3) allows you to adjust the range of colours that are selected, moving the range slider right (to a higher number) causes more colours close to your selected colour to be selected for adjustment, moving it left (to a lower number) causes less colours to be selected. As you move the Range slider you will see a preview of the range of colours selected (see Figure 3).
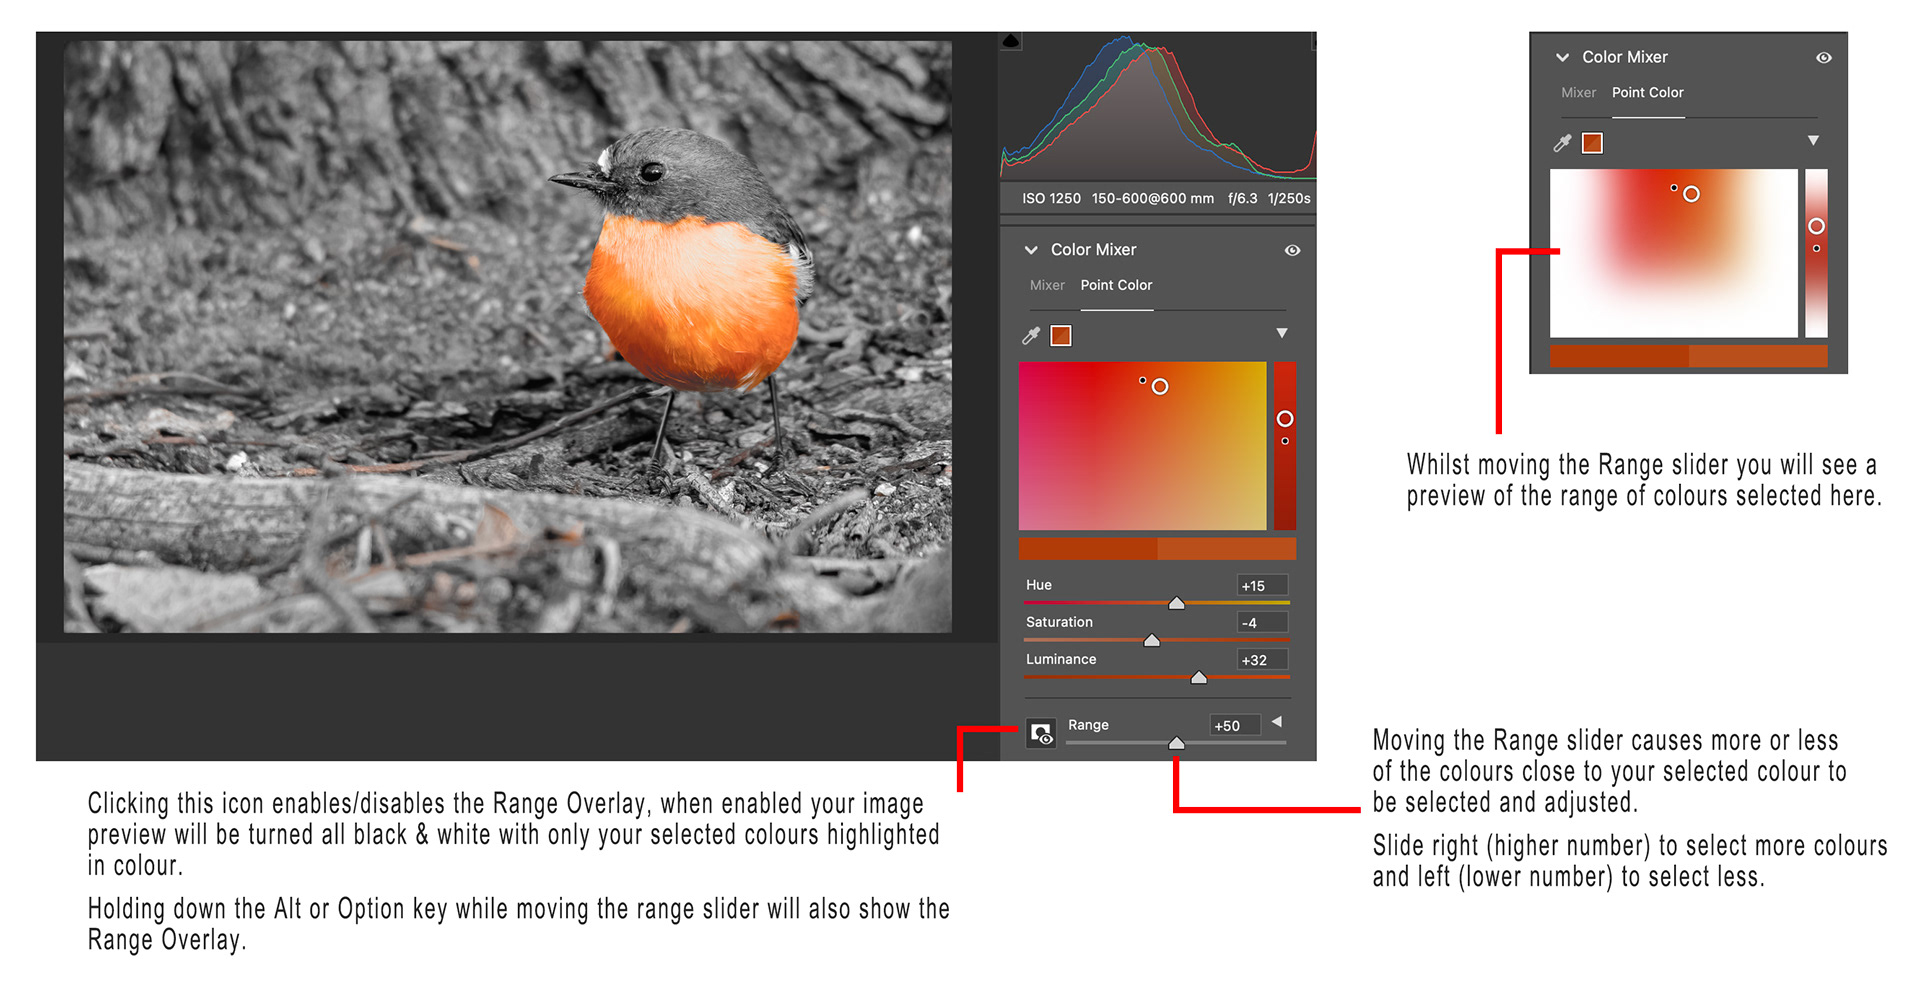
Figure 3 - Range Overlay and Range Slider
Clicking the Range Overlay icon causes your image preview to change to show you visually on your image which colours are selected. All the parts of your image that are in the colours selected will remain in colour, the remainder of the image will be greyscale (black and white). Holding down the [Alt] or [Option] key while moving the Range slider will also have the same effect.
If you want even more control over the selected colours, click the arrow next to the Range slider value to reveal the Hue Range, Saturation Range and Luminance Range sliders (see Figure 4).
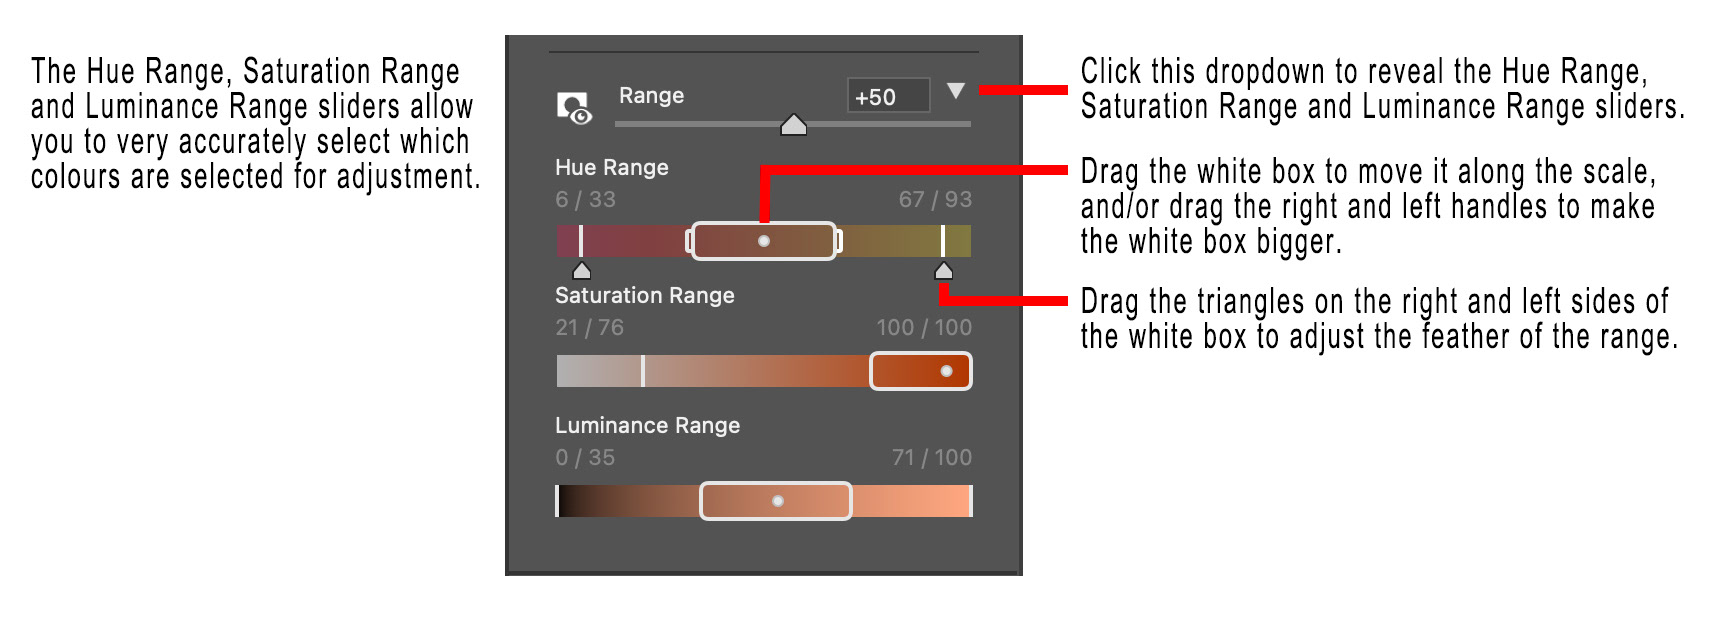
Figure 4 - Hue Range, Saturation Range and Luminance Range sliders
Each of these sliders has a white rectangle that starts centred around the dot representing the original colour selected with the dropper. All the colours inside the white rectangle will be “fully adjusted”. You can move the rectangle by dragging it left and right, you can make it bigger or smaller by dragging the left and right handles of the rectangle (these appear when the mouse is pointed at the slider).
To the left and right of the white rectangle are the feather lines, which have a small triangle at the bottom when the mouse is pointed at the slider. These lines determine the colours that are partially adjusted, the adjustments “fades” to zero adjustment between the edge of the rectangle and the feather line on each side. Any colours outside of the lines are not adjusted.
These sliders give you complete control over which colours/tones are adjusted.
If you wish to return one of these sliders to its original state, double-click the slider.
You can use the Point Color feature to modify up to eight different colours in your image (see Figure 5). Each time you use the dropper a new swatch will be created. Click a swatch to access the adjustments for that colour.
Right-click a swatch to delete it or to delete all swatches.
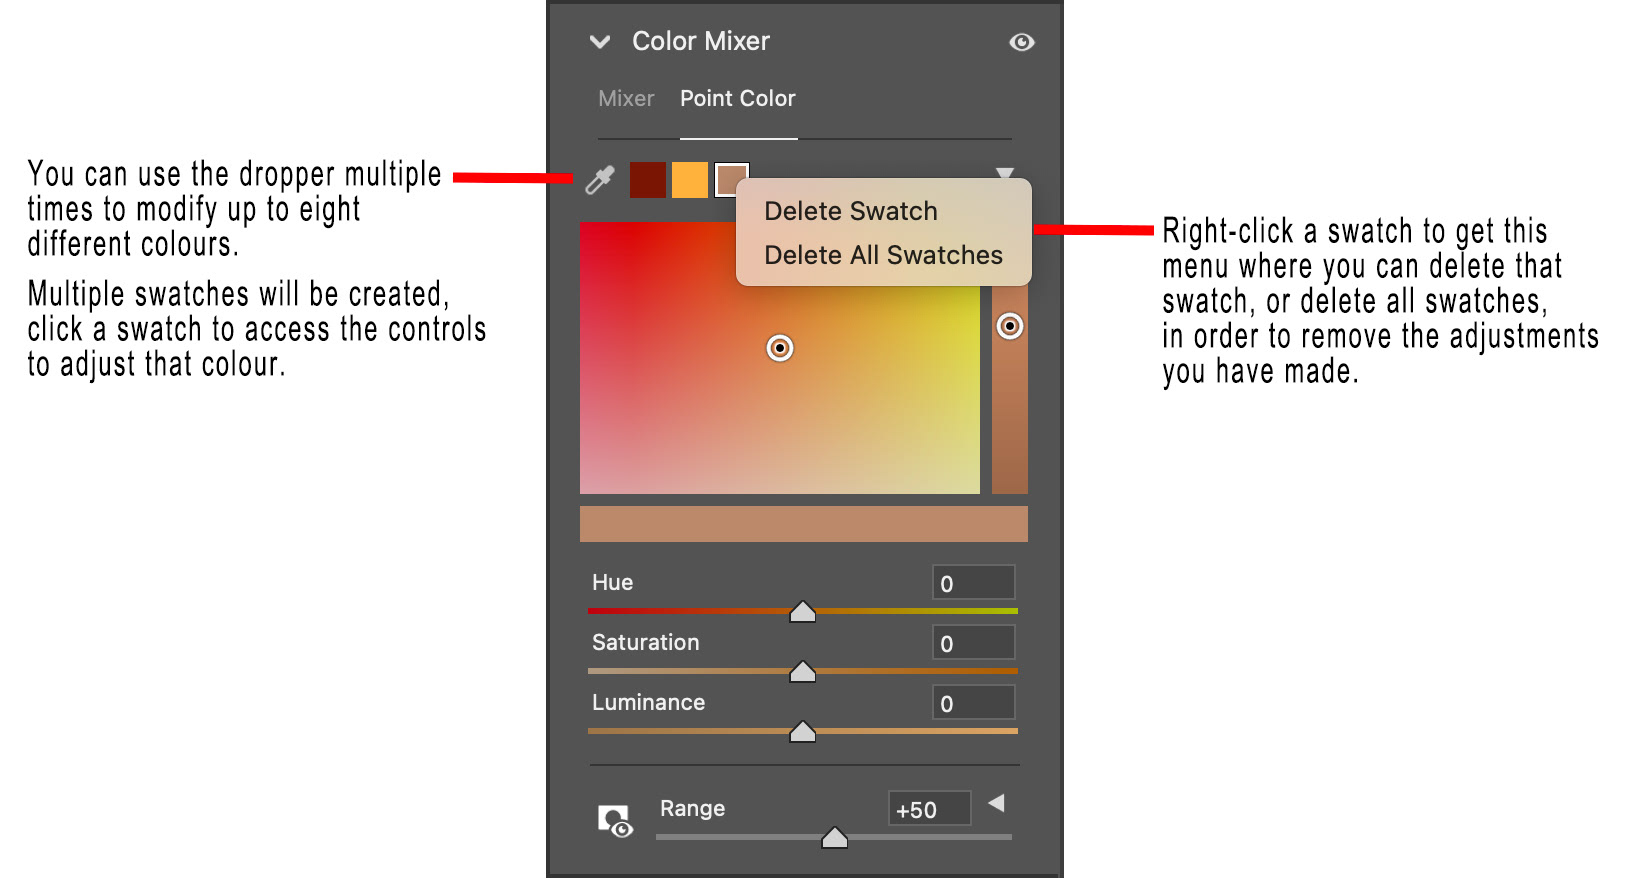
Figure 5 - Modifying multiple colours
For even more targeted adjustment you can also access the Point Color feature from within a mask (see Figure 6).
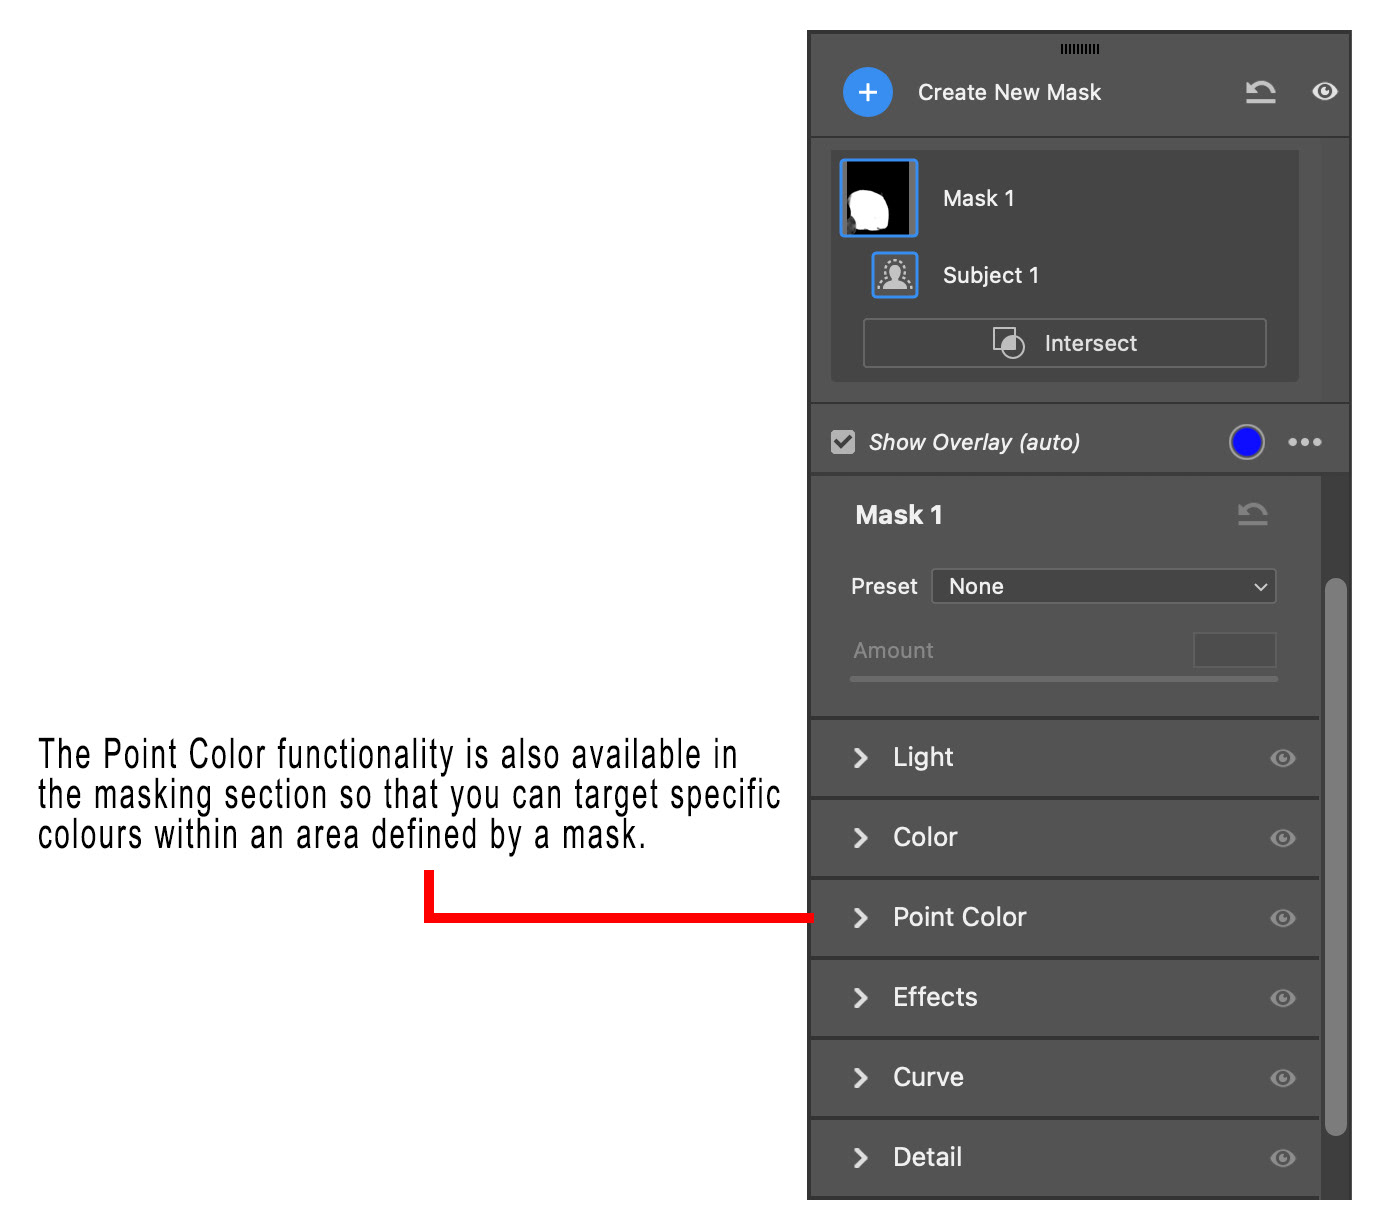
Figure 6 - Point Color in masks
Also, don’t forget that you have access to Camera Raw functionality from within Photoshop via the Camera Raw filter.
This extended control over adjustment of colours is a very welcome addition to both Adobe Camera Raw and Lightroom.
This article was first published in the November 2023 issue of Artists Down Under magazine.