In the June 2023 release of Adobe Camera RAW (version 15.4) and Lightroom CC (version 6.4) Adobe introduced the Refine Saturation Slider.
It is a small, and fairly hidden slider, and may have slipped under many people’s radar, but it is incredibly useful.
It is found in the Curves Panel, but only appears for the RGB Point Curve, if you select the Parametric Curve or any of the colour channel (red, green or blue) Point Curves the Refine Saturation slider will not appear (refer Figure 1).
Note also that the slider will not become active until after you have made an adjustment to the curve.
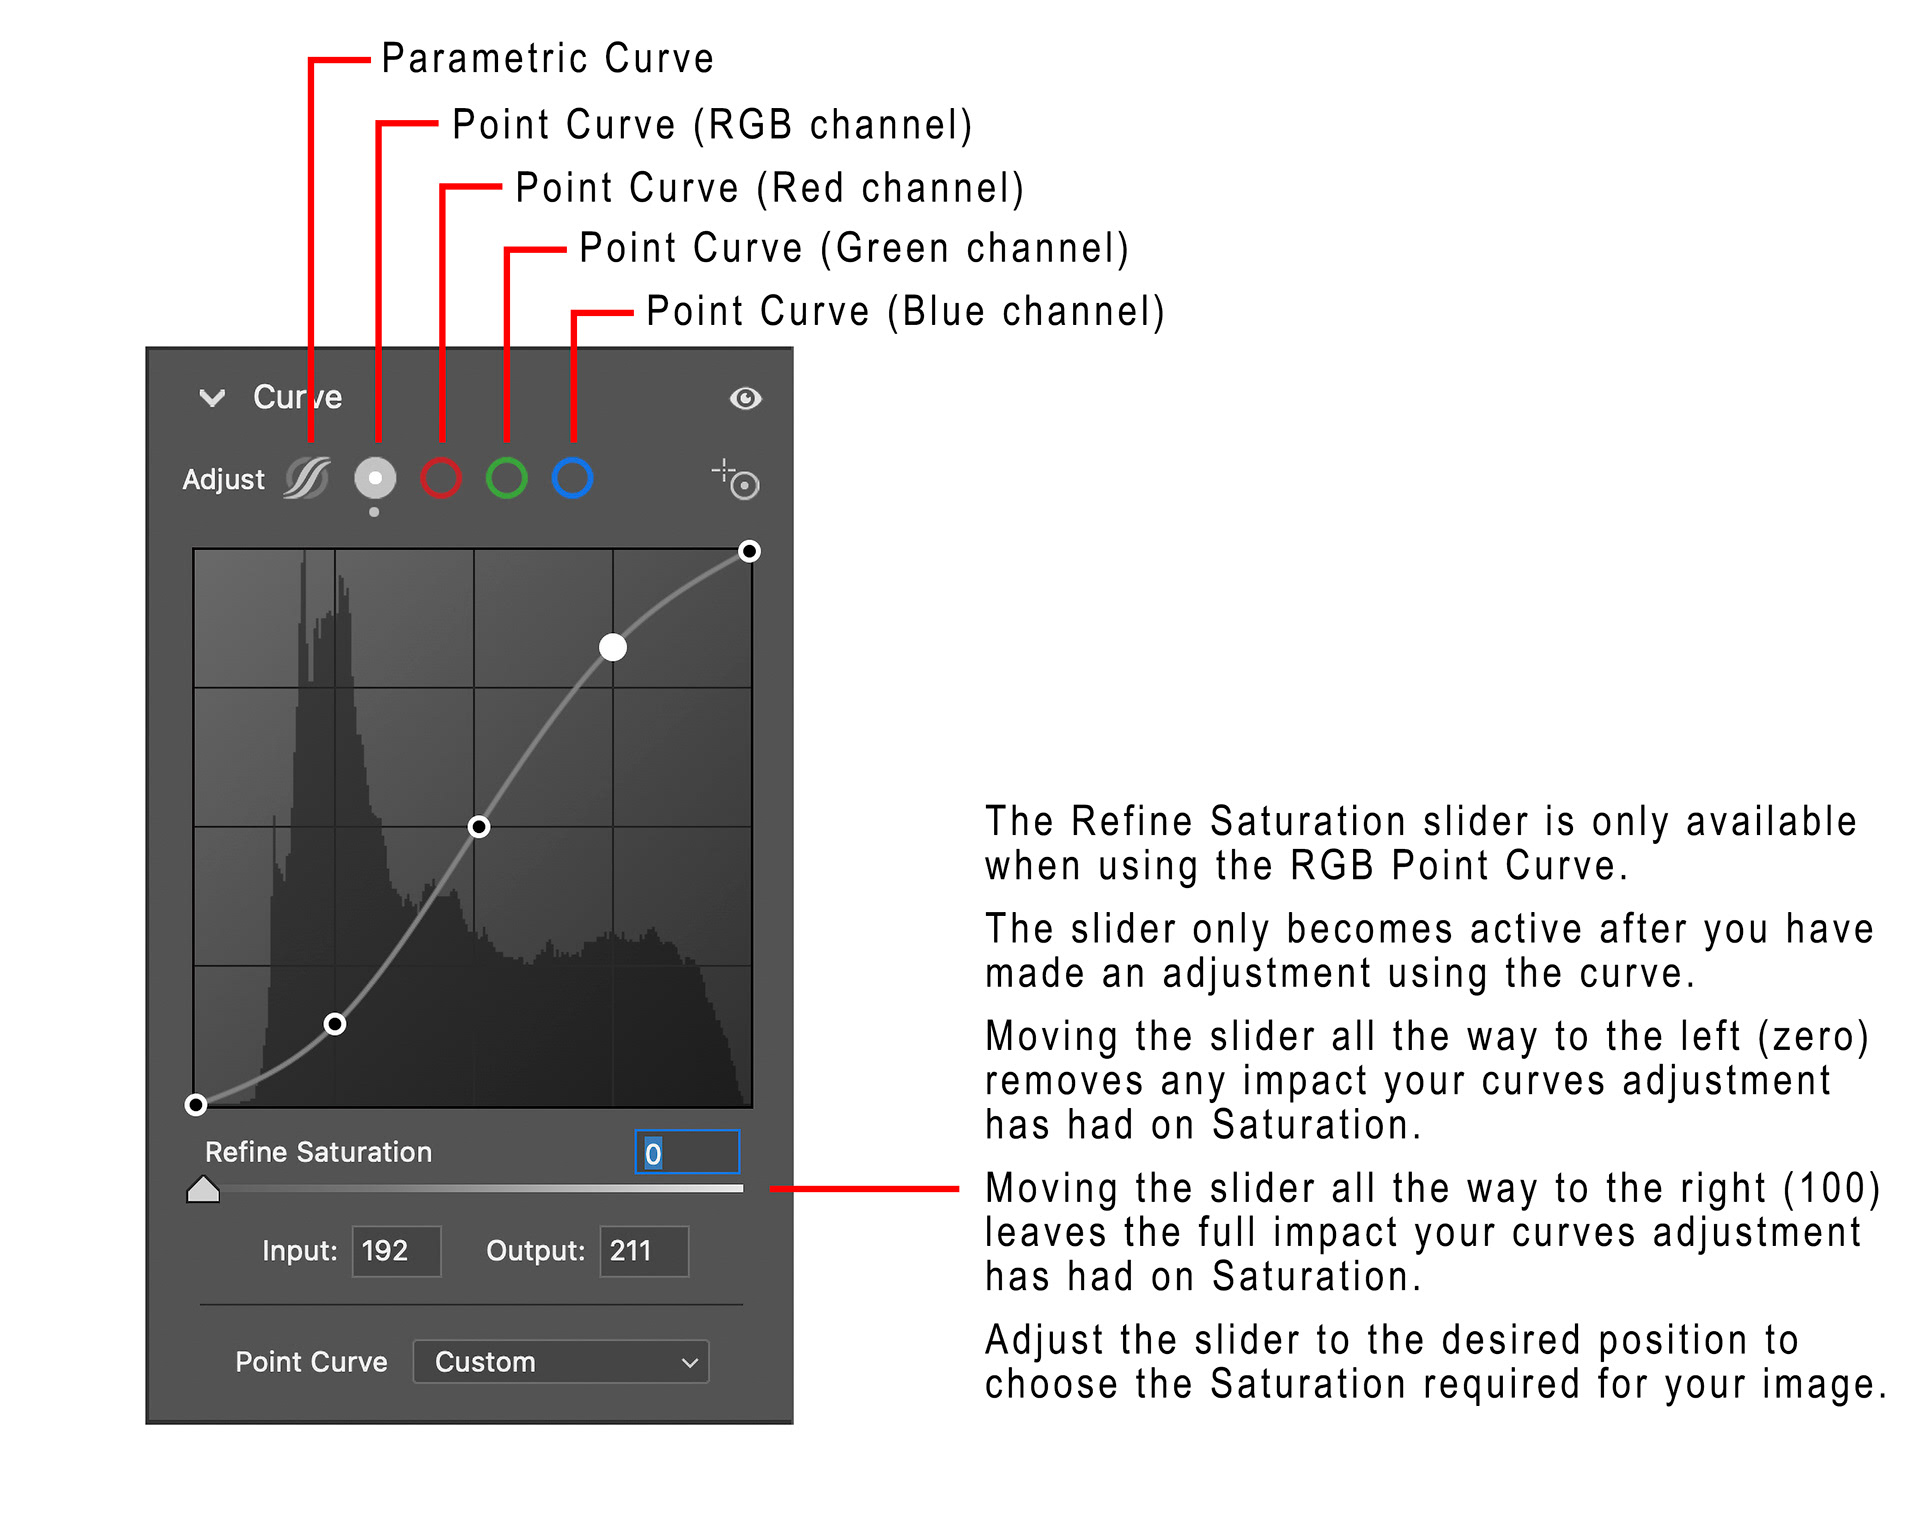
Figure 1 - Curves panel with RGB Point Curve selected
One of the issues that arises when you make contrast adjustments to your image is that it can cause unwanted changes to the saturation of your colours, and it can even sometimes introduce hue changes if the adjustments are big enough.
If you increase contrast (darken the darks, lighten the lights) there will nearly always be a consequent increase in the saturation, if you decrease contrast (lighten the darks, darken the lights) there will be a decrease in saturation.
The job of the refine saturation slider is to reduce the impact to saturation for changes made using the RGB Point Curve. Moving the slider to zero removes completely any impact to saturation caused by your curves adjustment. Moving the slider to 100 leaves the full impact of your curves adjustment on the saturation, obviously you can adjust the slider anywhere in between to dial in the required saturation.
So for a curve that increases contrast moving the Refine Saturation slider down towards zero will decrease saturation, while for a curve that decreases contrast moving the Refine Saturation slider down towards zero will increase saturation.
Please note that the Refine Saturation slider only affects saturation changes made in the RGB Point Curve, it doesn’t affect any saturation changes made in other ways (eg the Contrast slider or the Blacks and Whites sliders).
I have found good success recently by making any required contrast adjustments with the RGB Point Curve rather than using the other methods.
The Curves panel is also available to you when creating masks in Lightroom or Adobe Camera Raw which allows even more precise and targeted adjustments.
My favourite Photoshop trainer, Greg Benz, recently posted a tutorial on this subject, it is well worth a watch. It is called “How to avoid color shifts with Lightroom curves” and can be found at this link
This article was first published in the April 2024 issue of Artists Down Under magazine.