Did you know you can easily create a layer mask in Photoshop based on the saturation of pixels in your image?
This allows you to create adjustments to your image based on the saturation levels in your image. So, you could increase the saturation of less saturated areas, decrease the saturation of over saturated areas, or use the saturation levels for any other type of adjustment.
To create a Saturation Mask, follow these steps;
- Create a Selective Colour adjustment layer.
- Make sure Relative / Absolute is set to Absolute.
- For each of the six colors (Reds, Yellows, Greens, Cyans, Blues and Magentas) move the Blacks slider all the way to the left (-100).
- For each of the three neutrals (Whites, Neutrals and Blacks) move the Blacks sliders all the way to the right (+100).
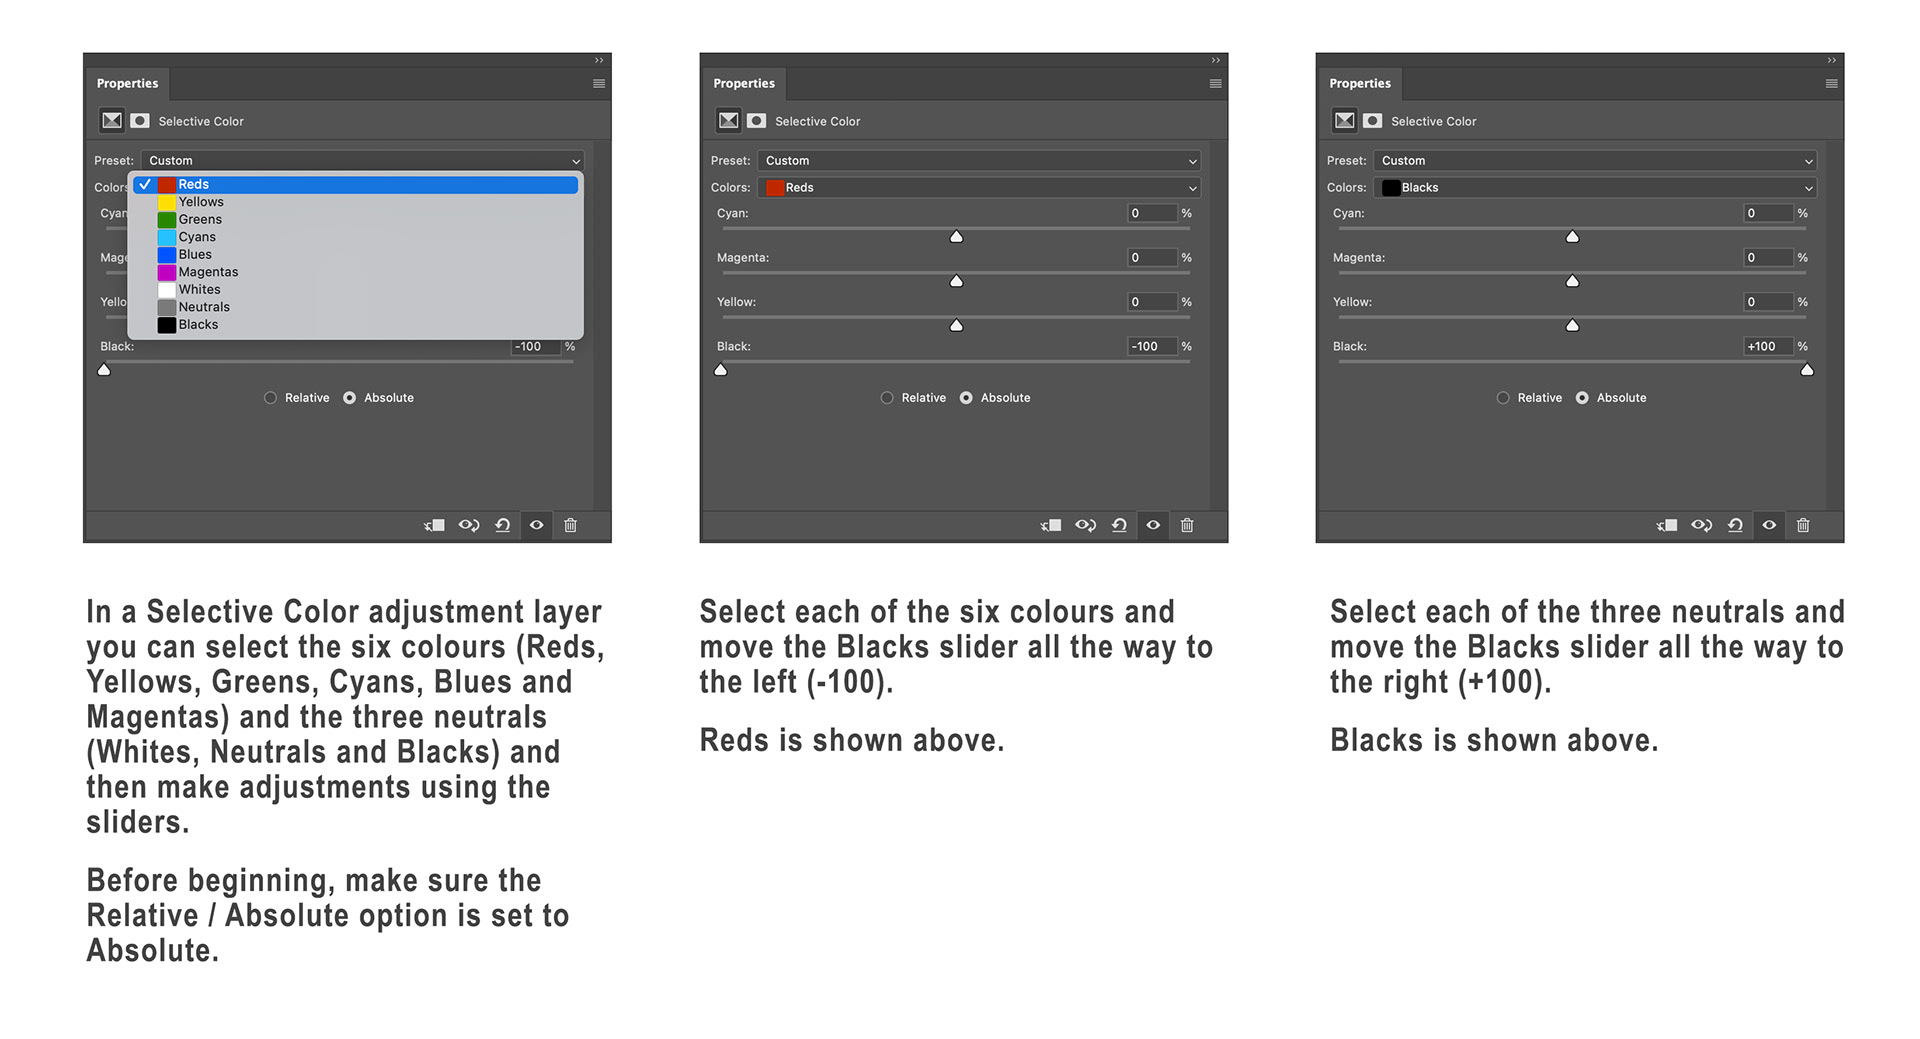
Fig 1 - The Selective Color adjustment layer
These adjustments result in a greyscale image that is effectively a saturation mask, white in the completely saturated areas, black in the completely desaturated areas and varying shades of grey depending on the saturation levels in between.
To convert this into a Saturation mask, follow these steps;
- Press Opt+Cmd+2 (Mac) or Alt+Ctrl+2 (Windows) – this will create a selection based on the greyscale image created by the Selective Color adjustment layer.
- Now that you have the selection active you can turn off the visibility of, or discard, the Selective Color adjustment layer.
- Create whatever adjustment layer you want to use (in the example a Hue Saturation adjustment layer) and it will be created with a layer mask based on the active selection.
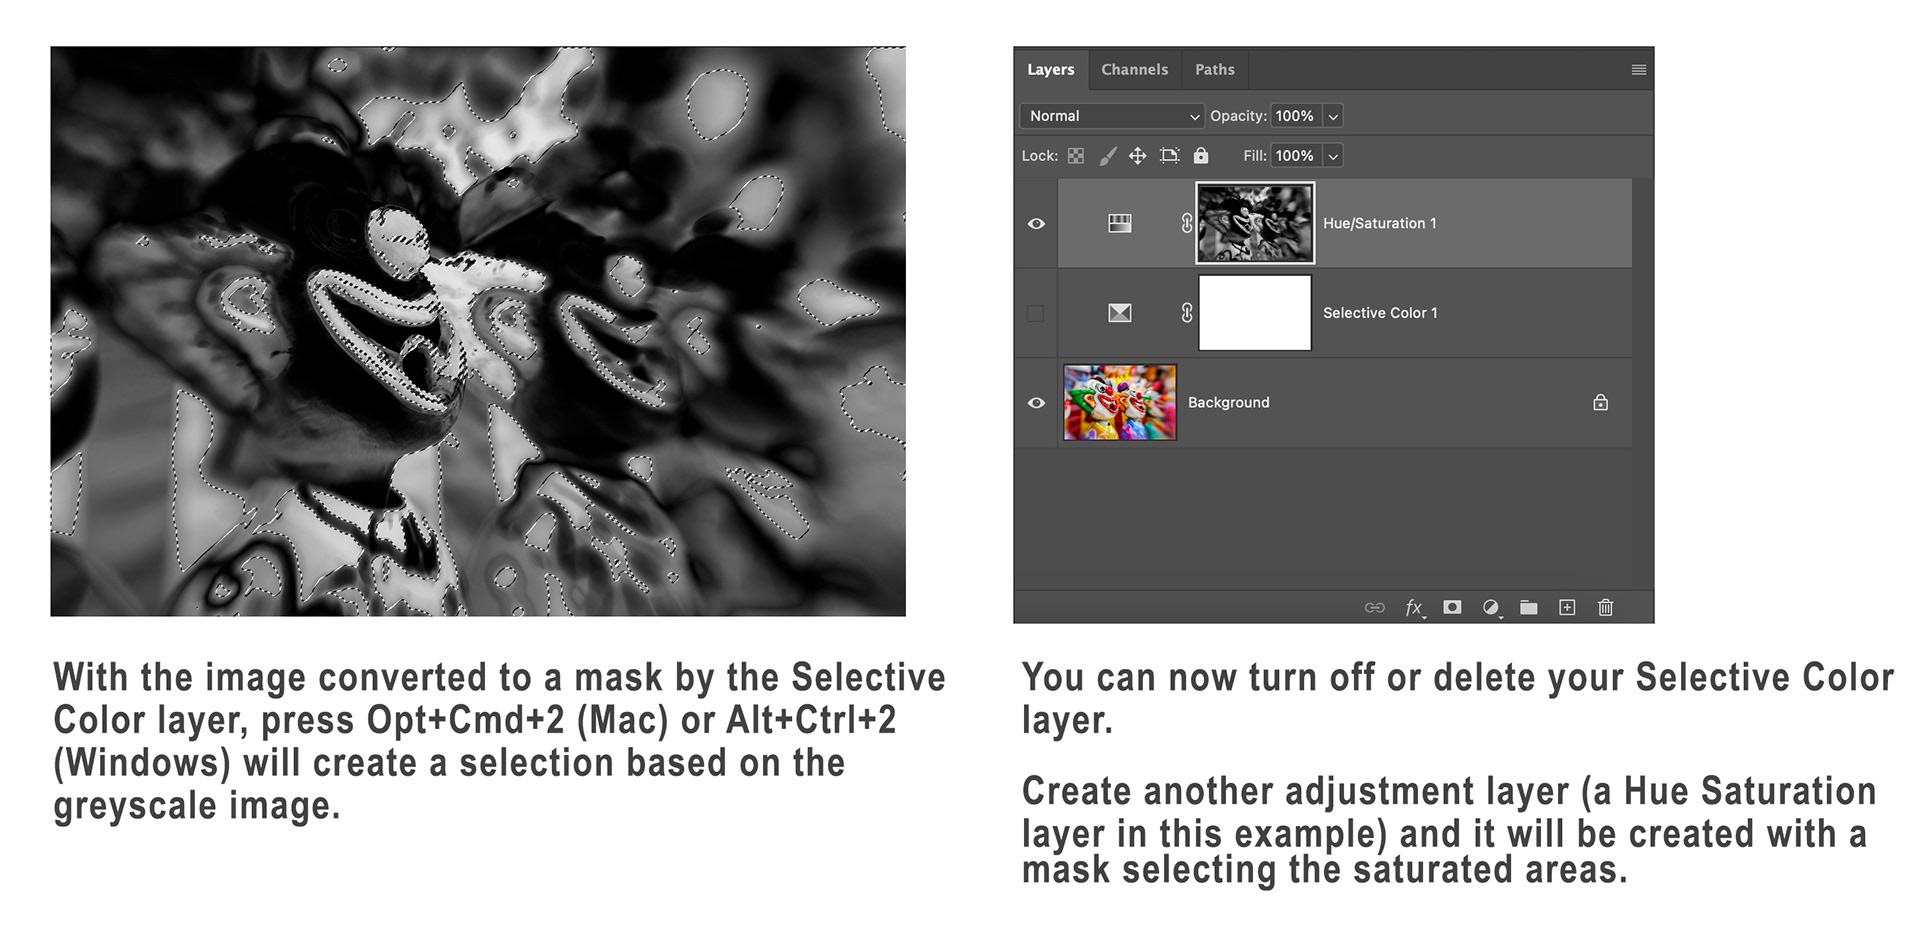
Fig 2 - Creating the selection and layer mask
If you want a mask that protects the saturated areas and selects the desaturated areas, you can simply invert the mask. Clicking on the layer mask and pressing Cmd+I (Mac) or Ctrl+I (Windows) will invert the mask.
Figure 3 shows the example photo used, the saturation mask and the inverted saturation mask.
Figure 3 shows the example photo used, the saturation mask and the inverted saturation mask.
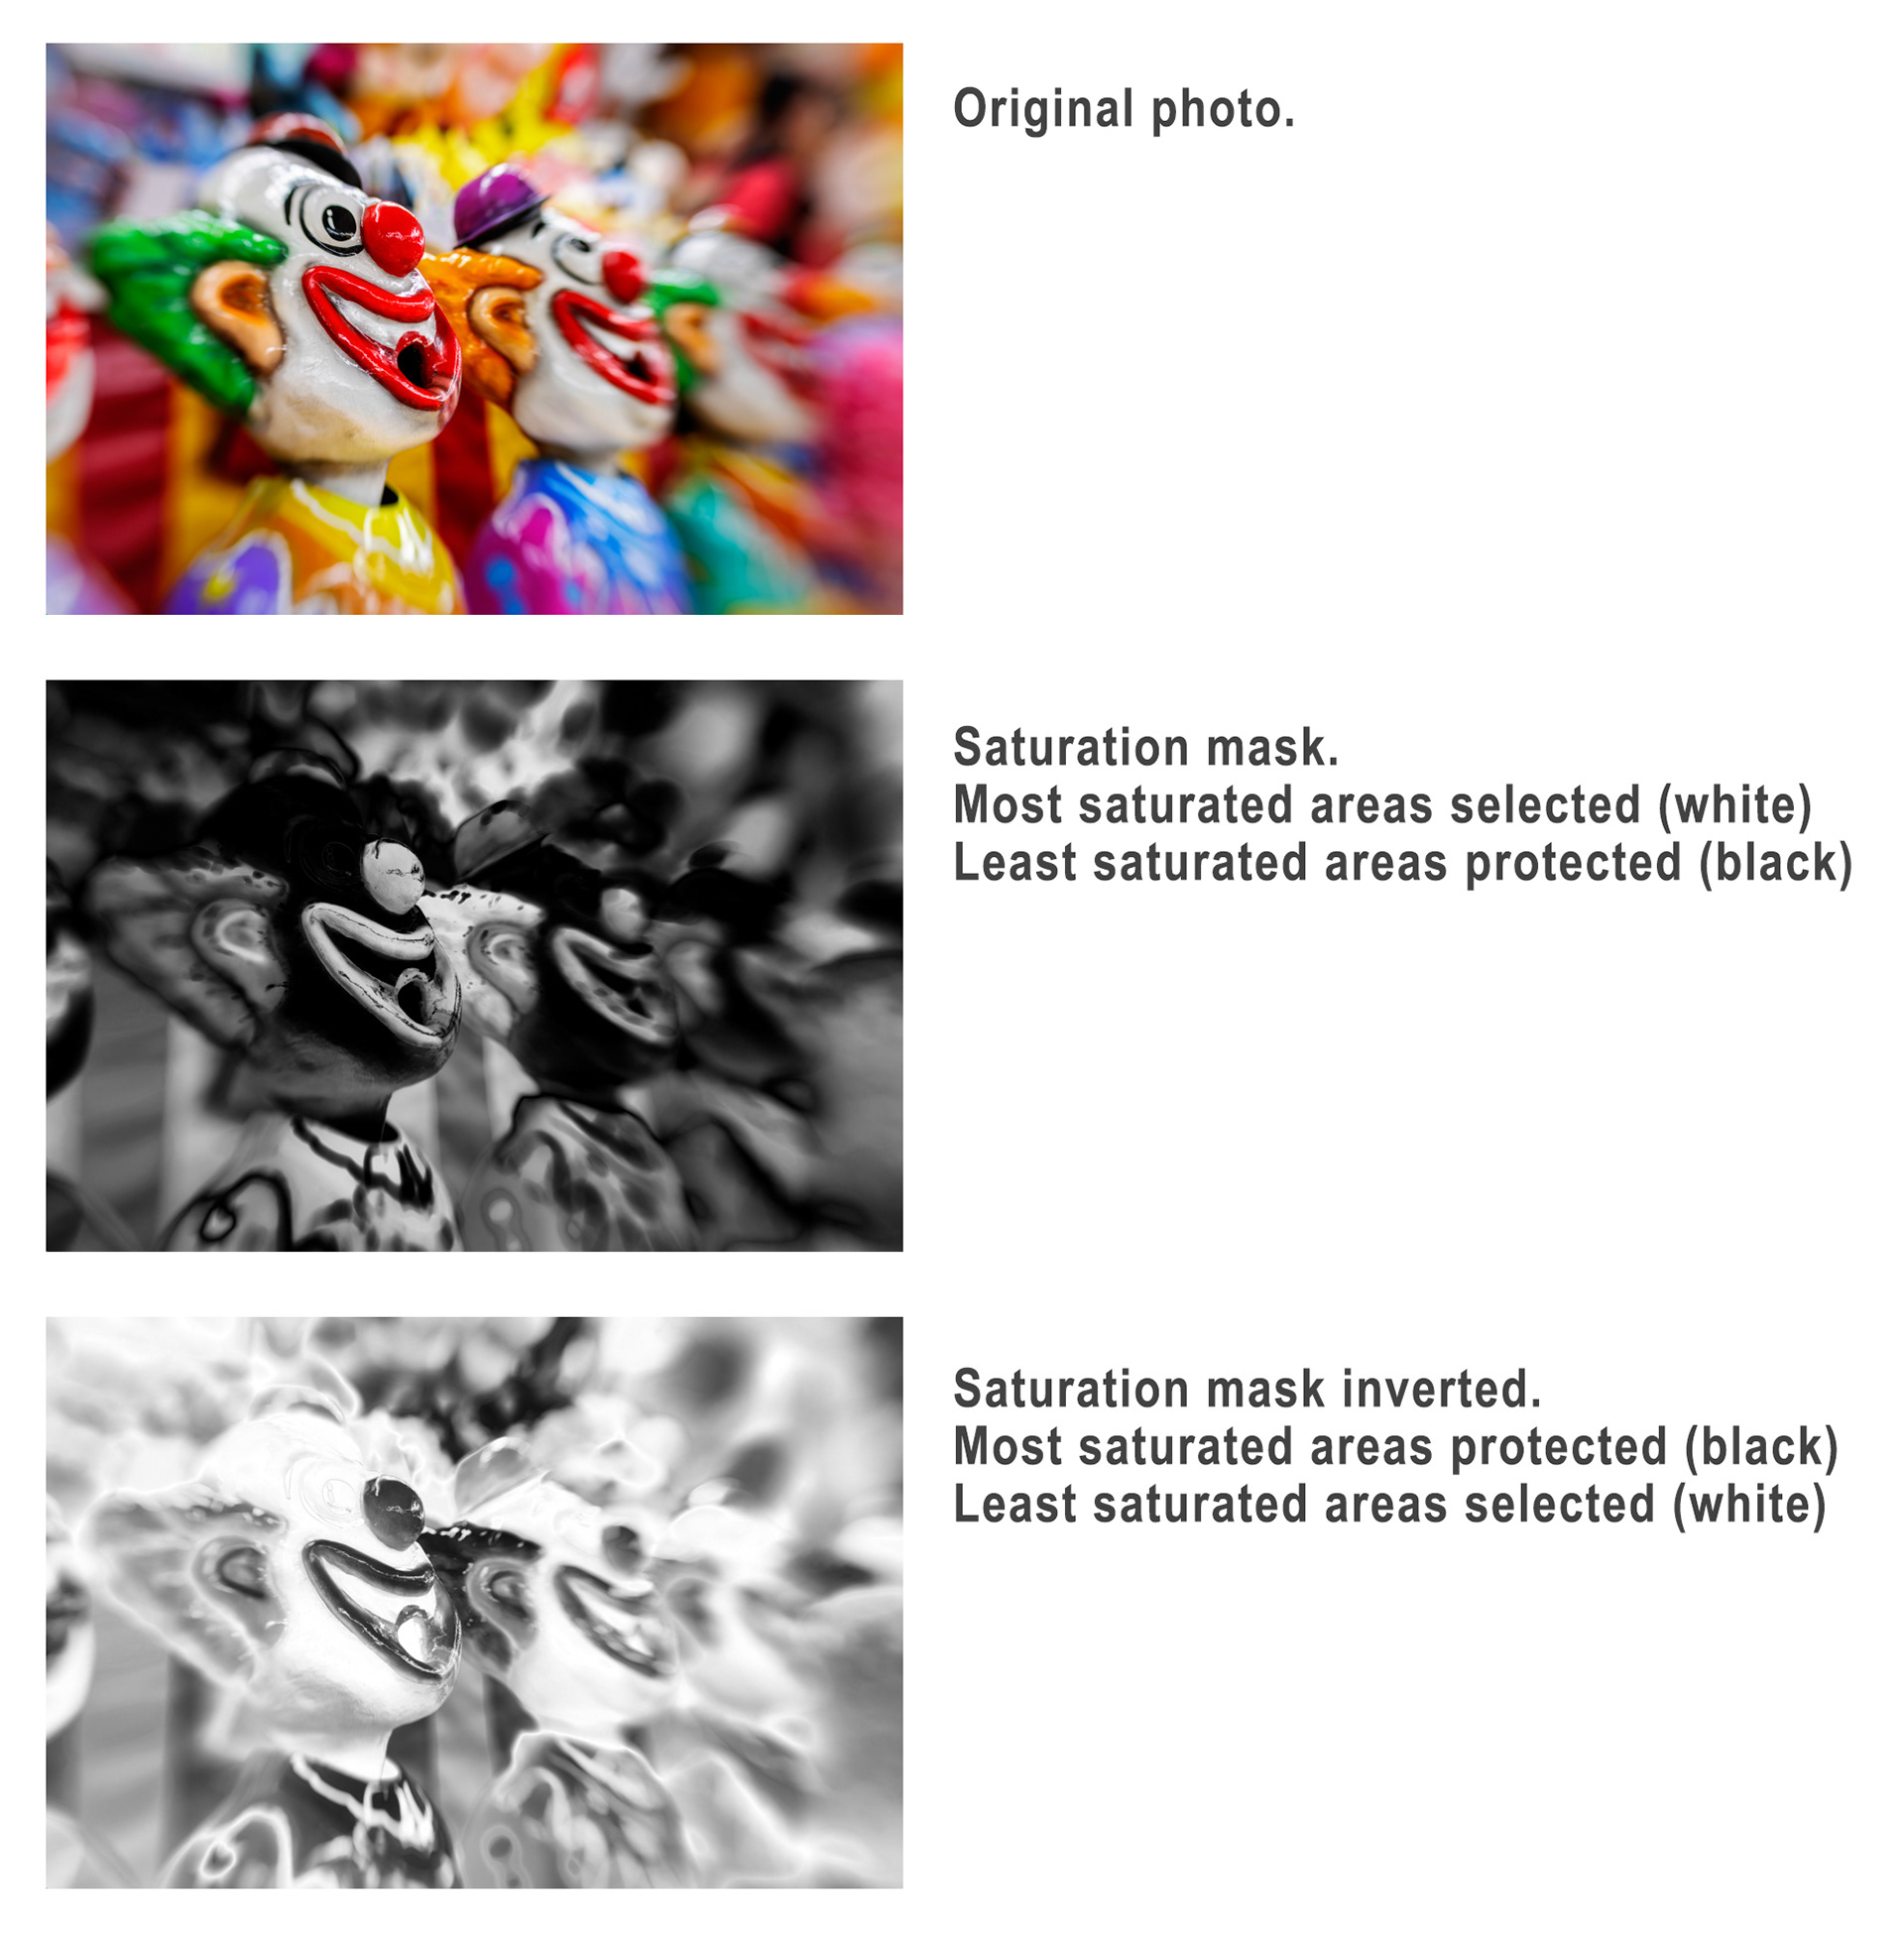
Fig 3 - Original photo and Saturation Masks
As with any layer mask you can adjust the intensity of the blacks and whites to increase or decrease the selection or protection of the mask. The easiest way to do this is to Opt-Click (Mac) or Alt-Click (Windows) the layer mask which will display it in the image window. Then Press Cmd+L (Mac) or Ctrl+L (Windows) to bring up a Levels adjustment and move the levels sliders to create the desired mask.
If you think that this is something you might use frequently, I’d suggest creating a Selective Color adjustment layer preset that you can use in the future rather than having to move all the colours and neutrals sliders each time.
Before discarding the Selective Color adjustment layer, select the layer and click the menu icon at the top-right of the Properties panel, then choose Save Selective Color Preset. The saved preset will appear in the Presets drop-down for future use.
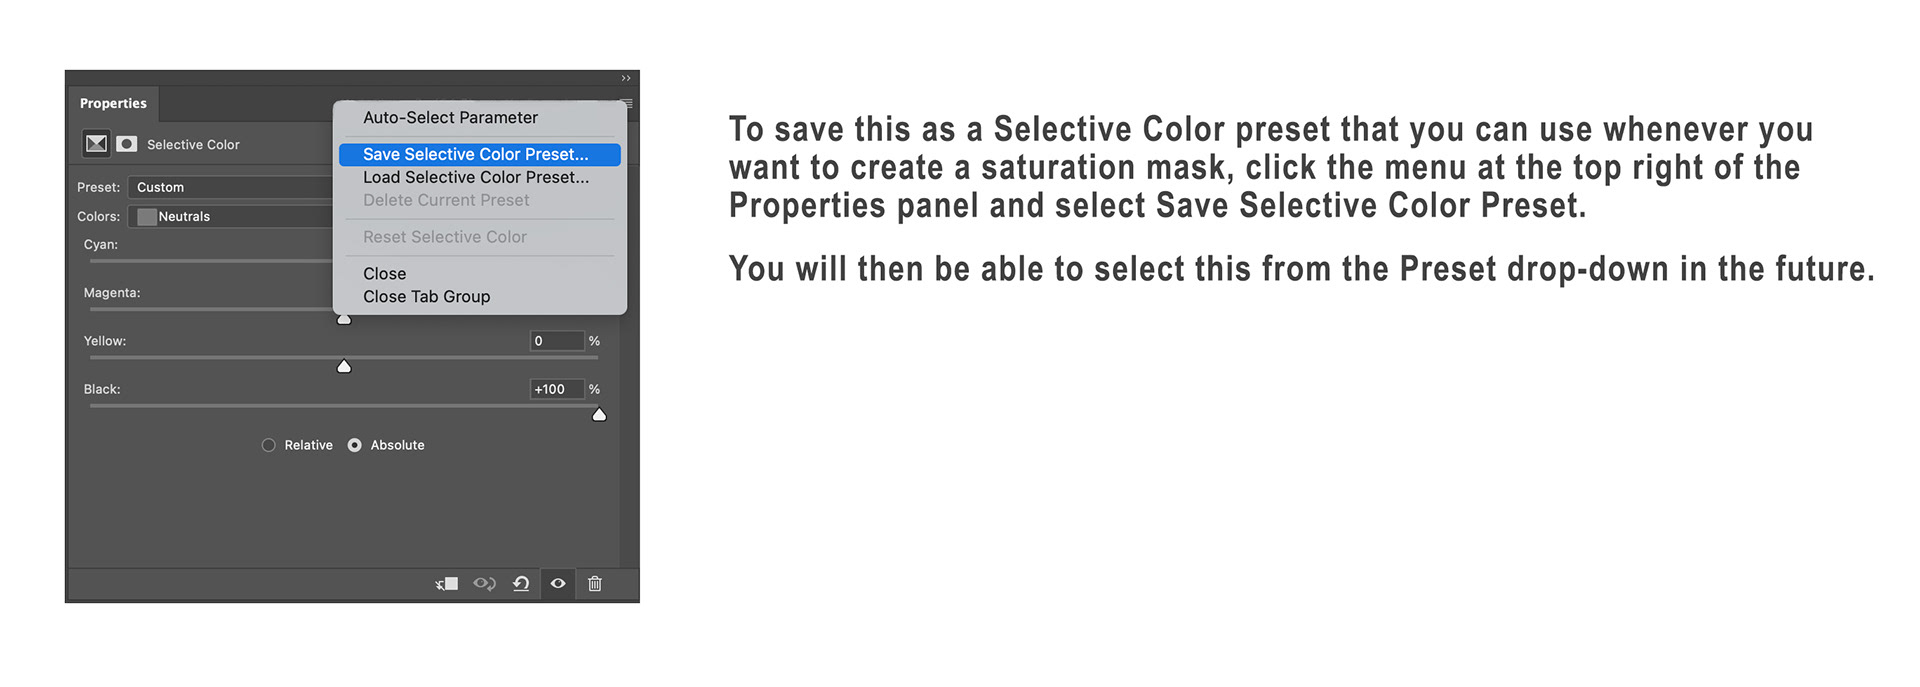
Fig 4 - Creating a Selective Color preset
Using masks to target and control adjustments is very powerful, and being able to create a mask based on saturation is another weapon in your Photoshop arsenal.
This article was first published in the February 2025 issue of Artists Down Under magazine.