In the latest release of Photoshop (October 2020, Version 2021), Adobe have added an “automatic” sky replacement feature, playing catchup a little with products like Luminar that have had this for a little while.
To access the feature, choose Sky Replacement from the Edit menu, you will be presented with the Sky Replacement dialog as shown in Figure 1. You must have a pixel layer active at the time of choosing the command.
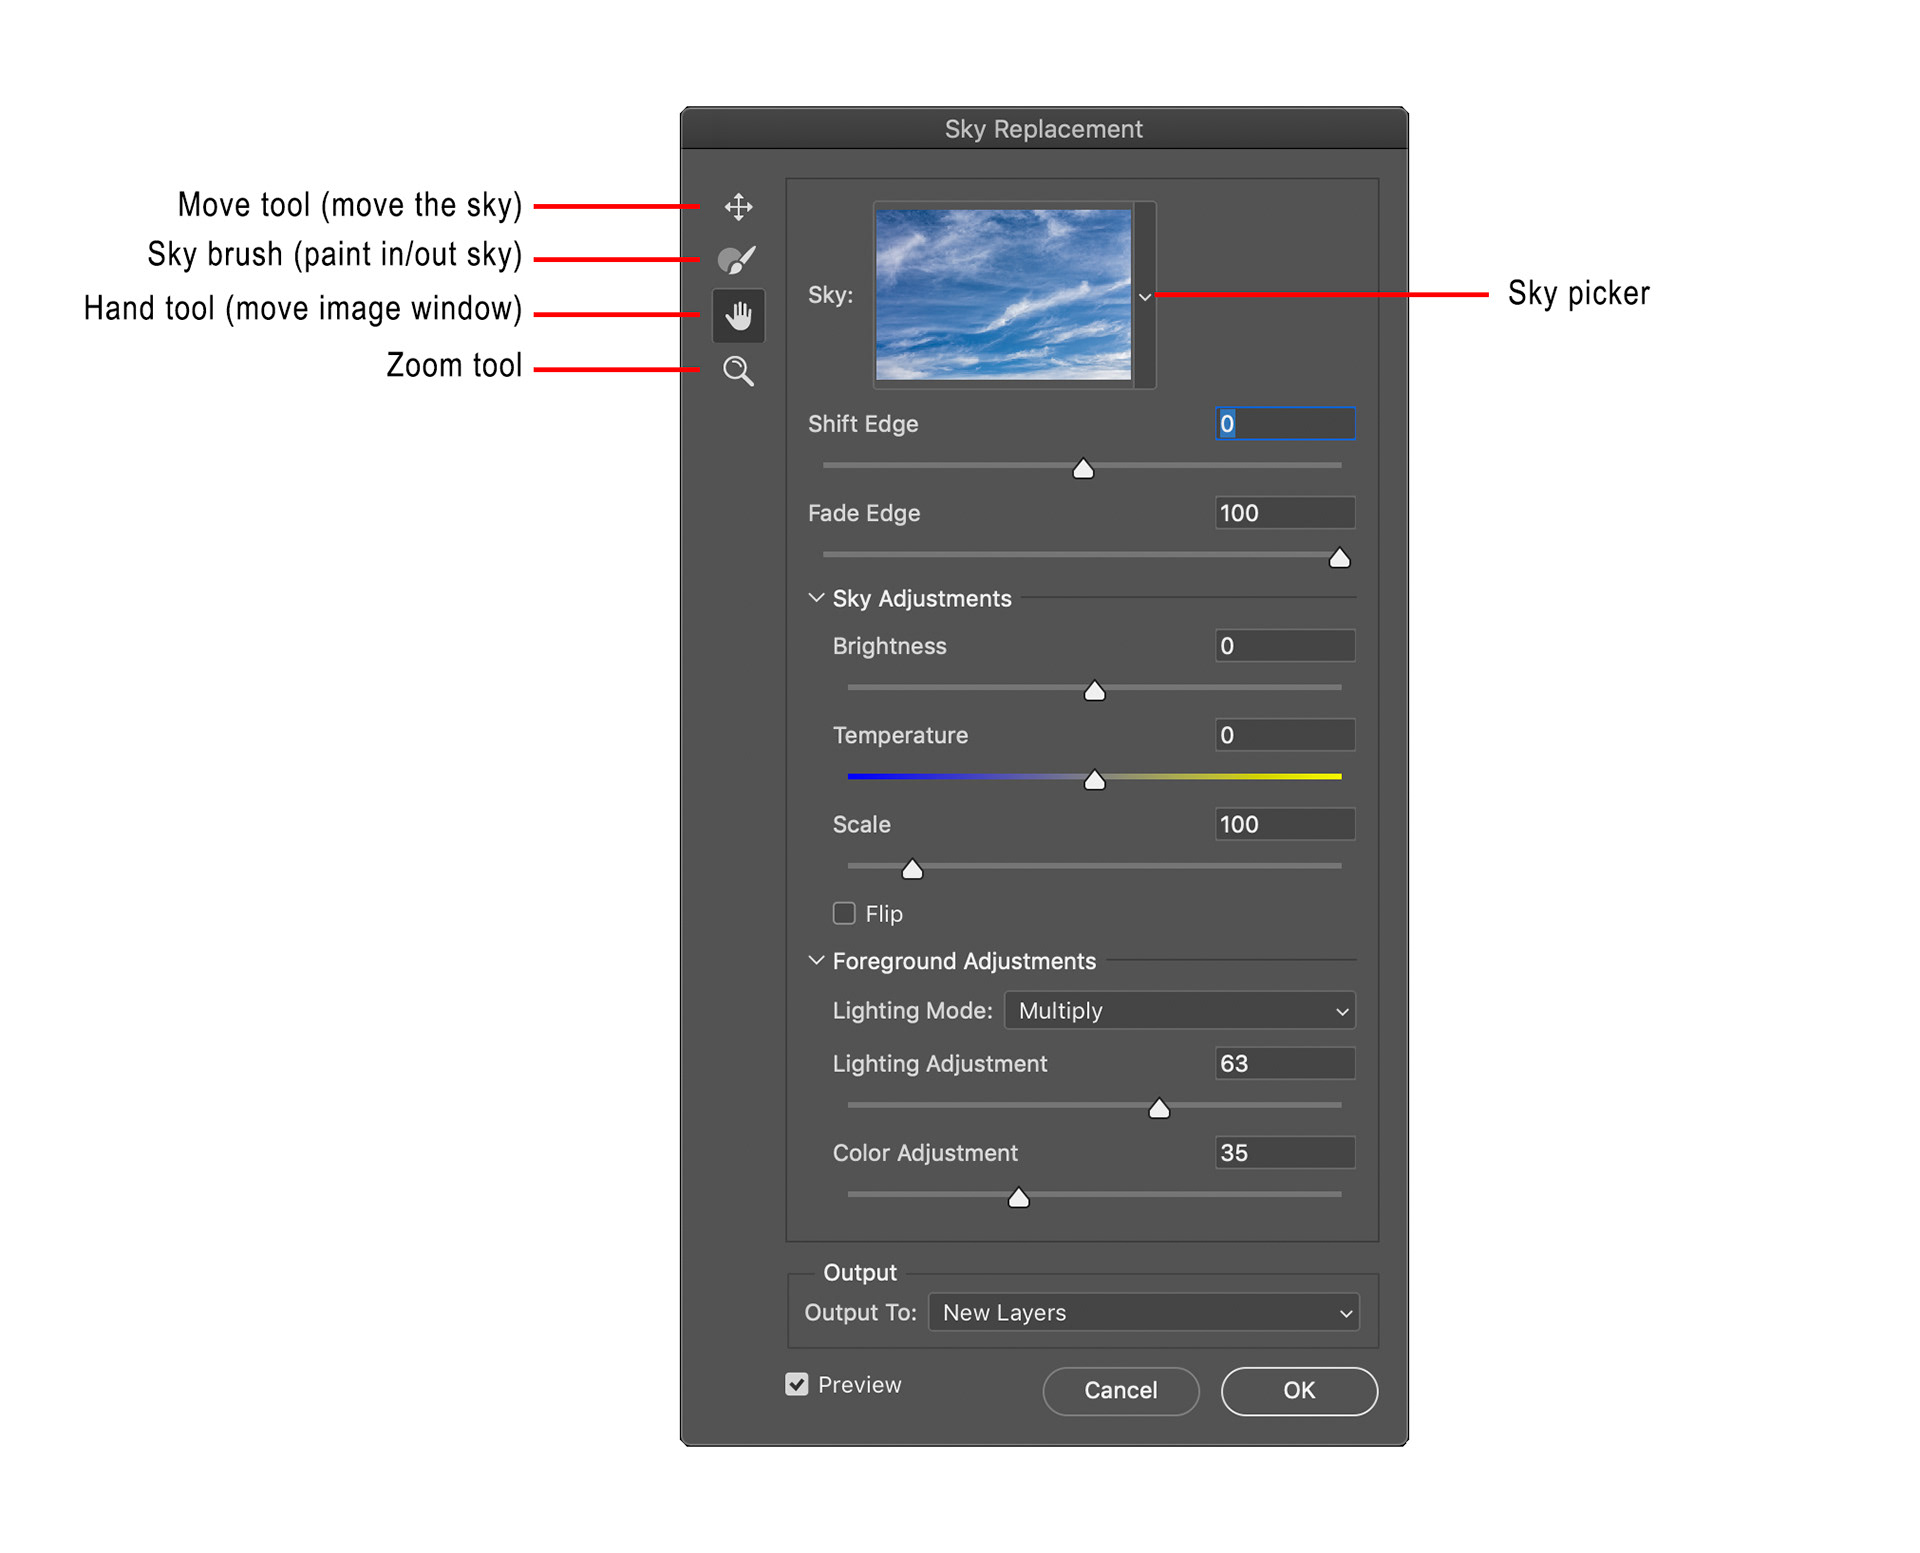
Fig 1 - Sky Replacement dialog
I’ll talk about the last option in this dialog first, for Output always choose New Layers as this will output a layer group that makes up the sky replacement which you can easily adjust later. The other option Duplicate Layer outputs a flattened version to a duplicate layer which is much harder to edit.
Photoshop will churn for a few seconds while it generates the required masks and such, and then the current sky will be replaced into your image (as long as the Preview check box is ticked).
Click the drop-down arrow next to the current sky thumbnail to activate the Sky Picker (see Figure 2).
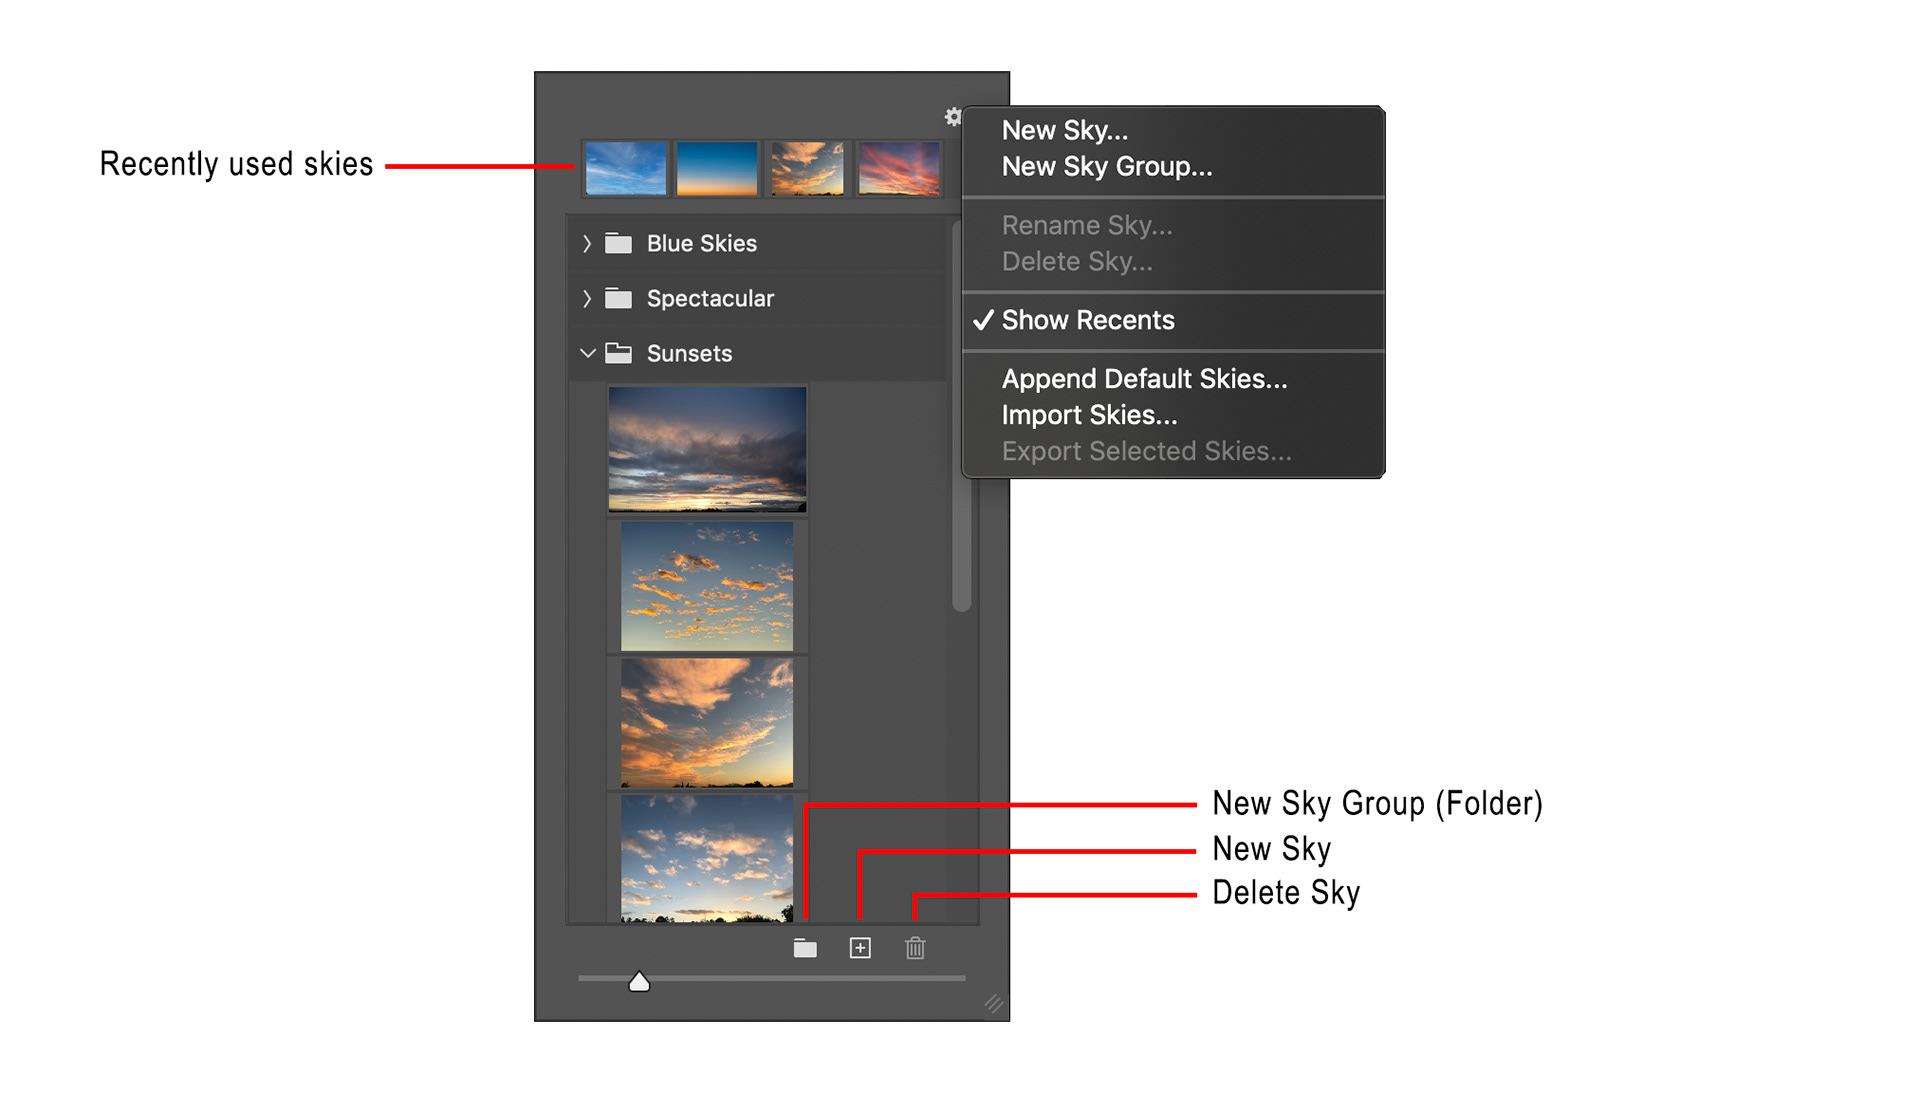
Fig 2 - Sky Picker
Here you can choose a different sky simply by clicking on it (again it will be shown in your image). You can add your own skies here using the New Sky icon at the bottom of the panel. You can also add a new Sky Group (folder) using the New Sky Group icon. You can move skies between folders simply by dragging and dropping them. Delete any unwanted skies using the Delete Sky icon.
If you do not see any skies here initially, activate the panel menu and choose Append Default Skies.
Click off the Sky Picker (ie click on the Sky Replacement dialog) to close the Sky Picker.
The Shift Edge slider moves the sky up (negative) and down (positive) relative to the edge (or horizon) Photoshop has determined. Generally the default of zero (no movement) will work best.
The Fade Edge slider will attempt to fade or feather the sky near the edge (or horizon) resulting in a feathered grey mask, rather than a sharp edge. In my experience, the masks created by this tool can be a bit feathered (or muddy) anyway. If you look at Figure 3 you can see an example of a mask (using an image with a building against the sky) showing the different masks created using the extreme values for Fade Edge. You’ll notice on this example that some areas of the edge are muddy even with the Fade Edge slider at zero.
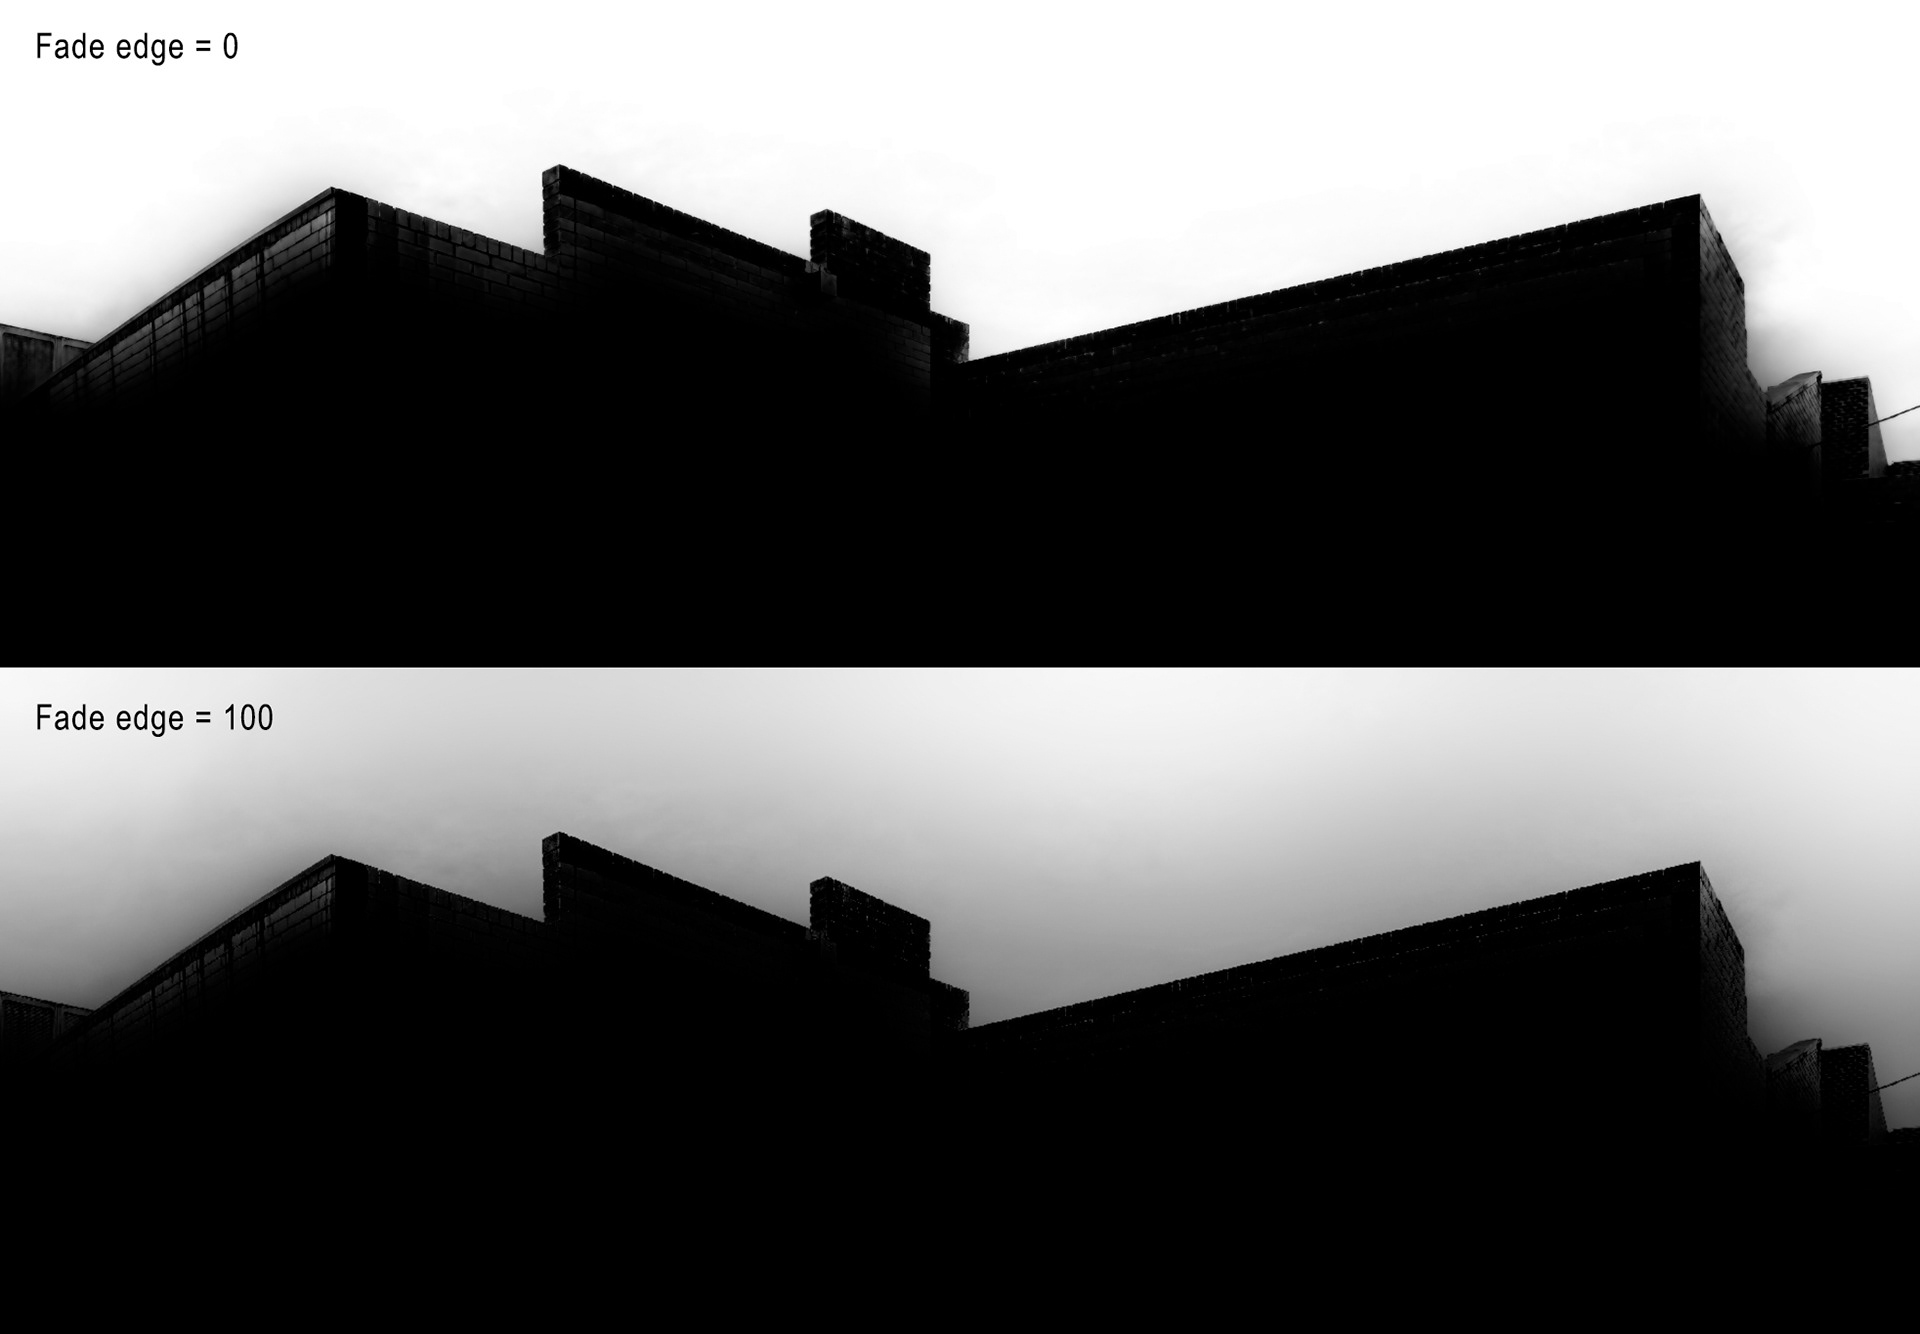
Fig 3 - Example masks with different Fade Edge values
The Brightness and Temperature sliders allow you to modify the brightness and colour temperature of the sky. If you change either of these sliders from their defaults of zero (no change), an addition layer will be created in the layer group, these will be clipped to the Sky layer. For the Brightness, a Brightness/Contrast adjustment layer is created, for the Temperature, a Color Balance adjustment layer is created. Obviously these can be adjusted later if required.
Move the scale slider to change the scale or size of the sky.
Checking the Flip check-box with cause the sky to be flipped horizontally. You’ll always want to be conscious of where the light is coming from in the sky and make sure it matches the image.
The foreground adjustments allow you to adjust the light / colour of the foreground in your image somewhat. These sliders simply set the opacities of the Foreground Lighting and Foreground Color layers in the layer group created. The adjustments only really change the parts of the foreground closer to the sky edge (horizon).
The Sky Replacement dialog offers four tools, the use of three of these is fairly self-explanatory, the Move Tool allows you to move the sky around (you may have to scale it up first to avoid the edges showing as you move it), the Hand Tool allows you to move your image window around and the Zoom Tool to zoom in an out.
The scale, orientation and position of the sky can all be modified later using the Move / Transform tool on the Sky layer. Note that the mask on the Sky layer is already unlinked from the image so you don’t need to worry about it moving.
The final tool, the Sky Brush allows you to paint in and out the sky. Here you are essentially painting with a black or white brush on the mask of the Sky layer, with a brush that has been put into Overlay mode for you. Overlay mode means that when painting “in” the sky (same as painting mask with white) you will only affect areas that are lighter than 50% grey, and when painting out the sky you will only affect areas that are darker than 50% grey). Obviously, this can also be done later, and is probably easier to do later once you have visually examined the mask.
Figure 4 shows the Sky Replacement layer group that is created with the tool. Obviously you can also change it’s opacity to “tone down” the replaced sky if required.
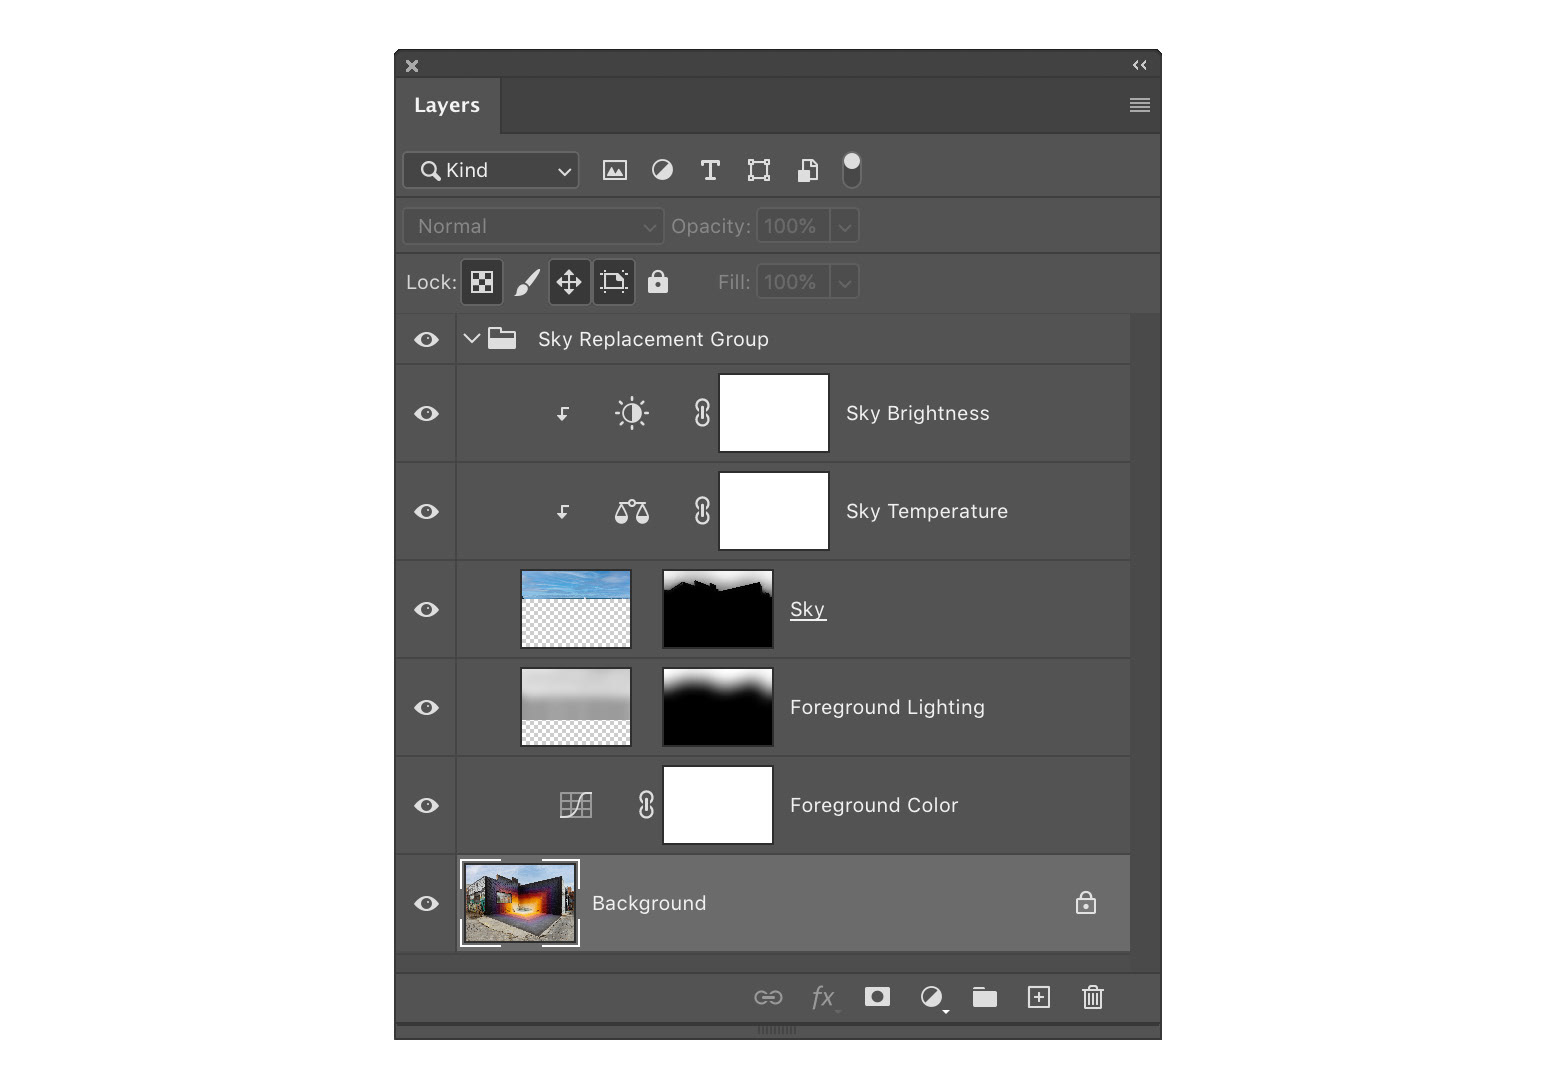
Fig 4 - Sky Replacement layer group
Overall I think this tool does a good job, but not as good a job as doing the job totally manually with Luminosity Masks, but it is much quicker, and with some careful tweaking of the layers afterwards a very good result can be had.
This article was first published in the January 2021 issue of Artists Down Under magazine.