In the latest Adobe Camera RAW (ACR) update - version 13.2 – Adobe have introduced a new feature called Super Resolution. This uses the Adobe artificial intelligence engine to quadruple the resolution of an image, that is the height and width of the image are both doubled giving four times as many megapixels.
With the images I have tested this feature on it has done a remarkable job.
Usually when Adobe updates the ACR program, Lightroom Classic gets the same new features, but that is not the case at the moment, but this may follow at some time in the future.
Therefore, if you are a Lightroom user you will have to open your images directly in Photoshop/ACR to take advantage of this feature (as opposed to using the Edit In Photoshop command from Lightroom).
Also, the Super Resolution feature is not available when using Camera Raw as a filter from within Photoshop, only when the image file opens initially in ACR prior to passing the image to Photoshop.
The Super Resolution feature will work on Raw, JPEG, HEIC or TIFF files.
If you want a JPEG, HEIC or TIFF file to open in ACR, rather than opening straight into Photoshop you can change your Camera Raw Preferences to make this happen. In ACR, click the gear icon in the top right corner, then choose File Handling, then make sure that both the JPEG/HEIC and TIFF settings are set to “Automatically open all supported …”JPEG/HEIC (see Figure 1).
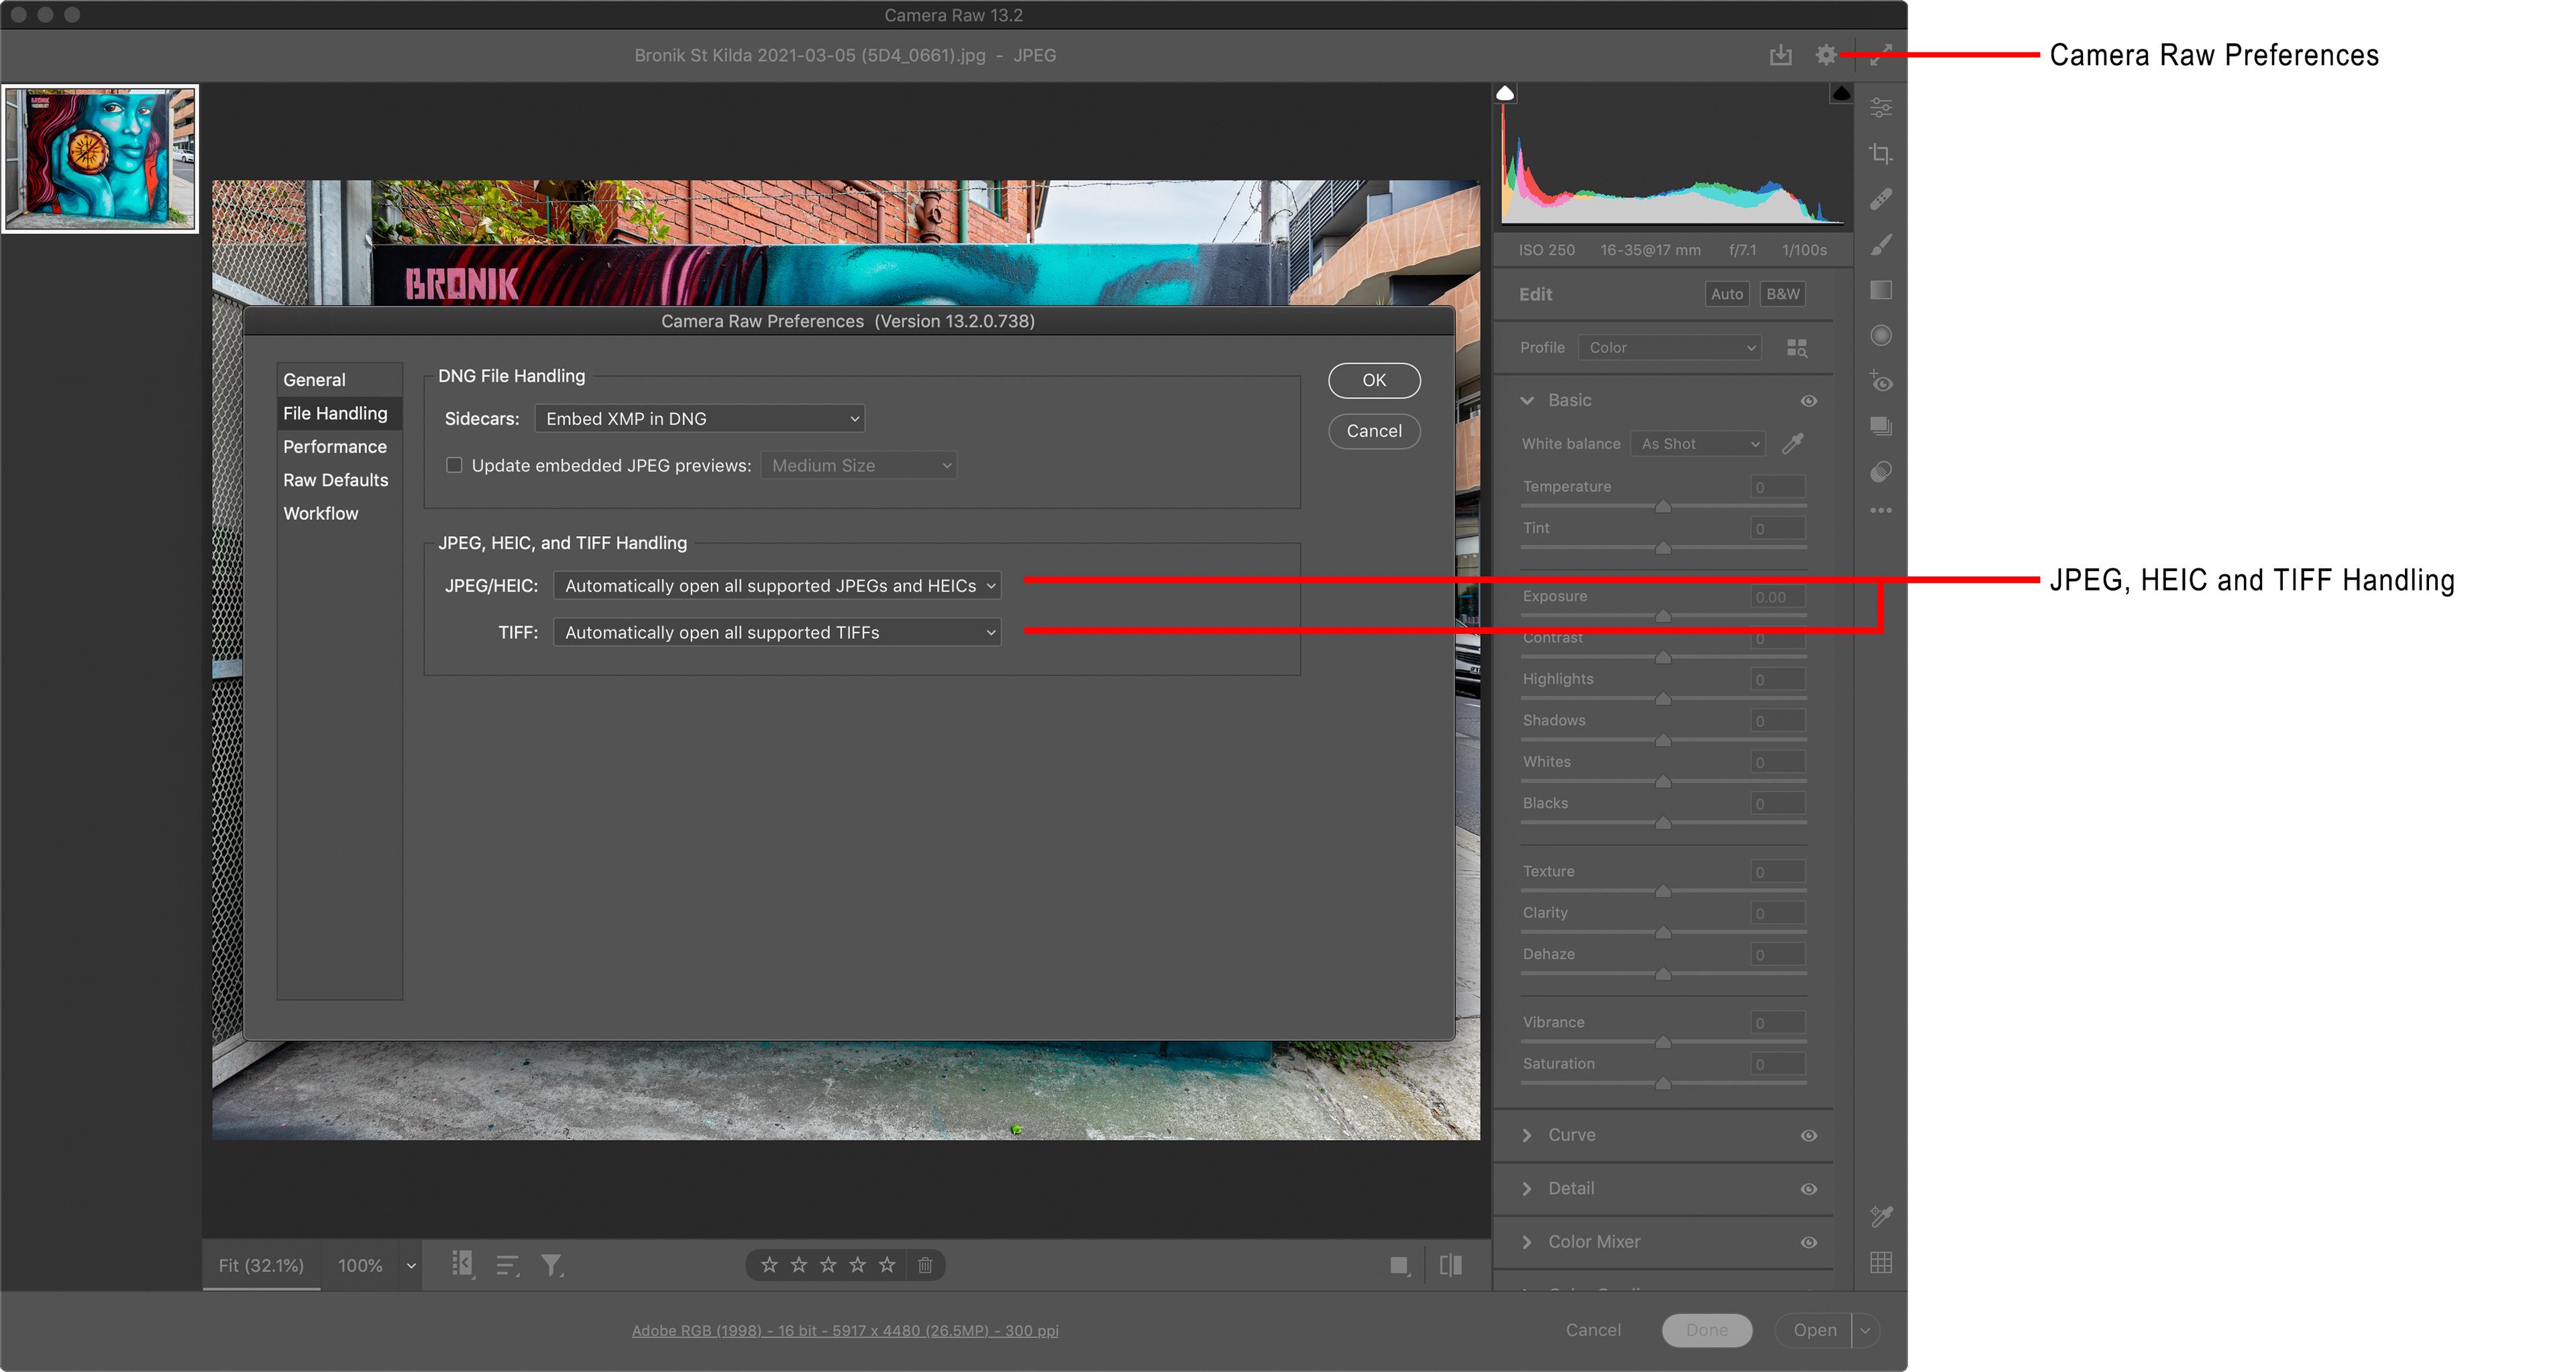
Fig 1 - Camera Raw Preferences File Handling
Alternatively, you can open Adobe Bridge, find the file, right-click on it and choose “Open in Camera RAW”.
Once in ACR, either click the menu icon on the image in the film strip (this looks like three dots), or right-click the image, to bring up the menu, then choose Enhance (see Figure 2).
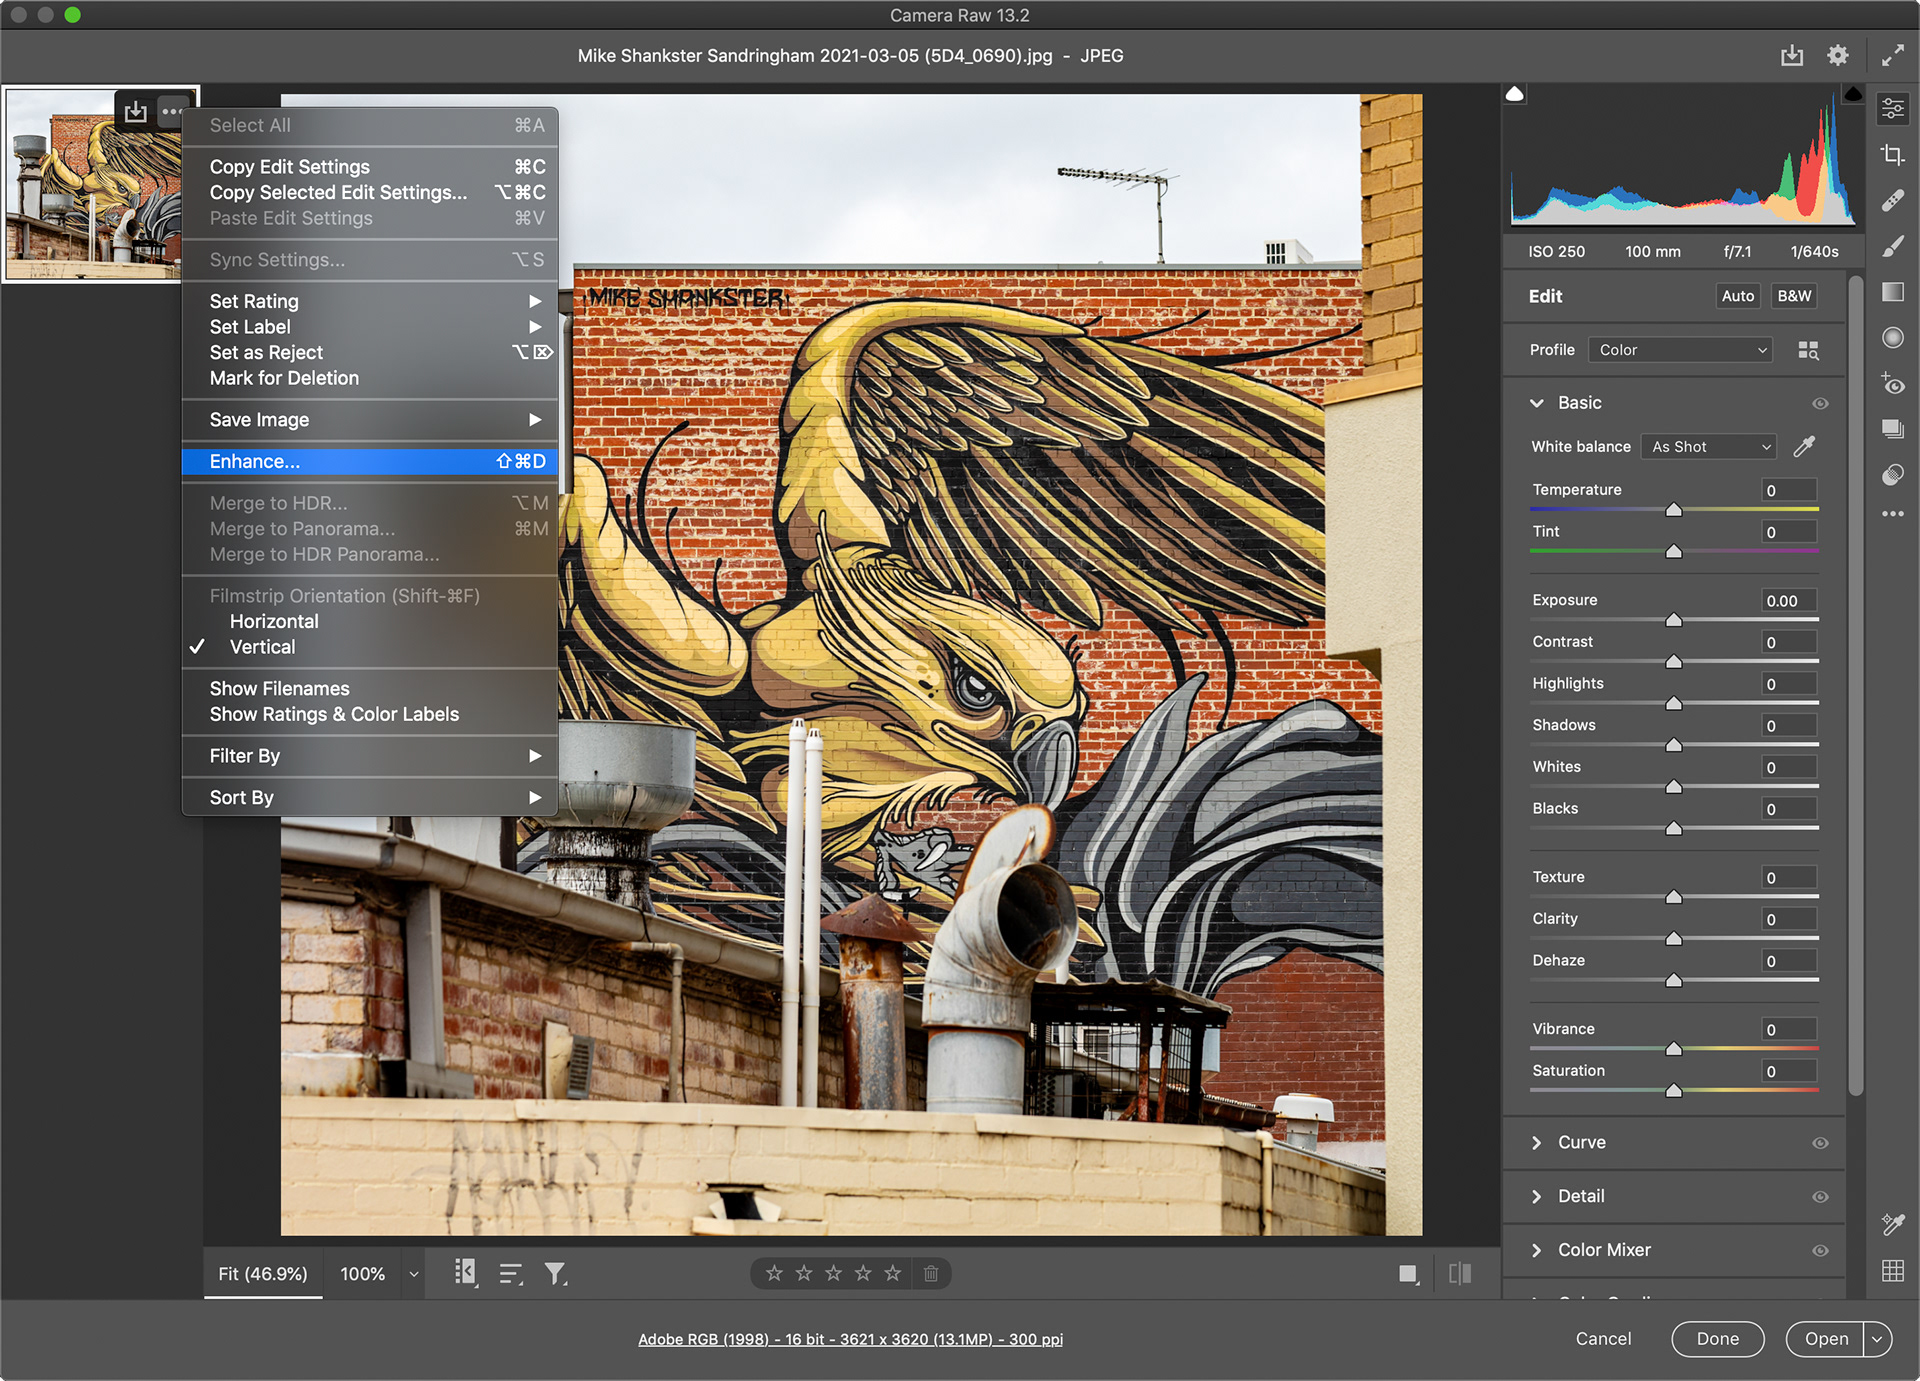
Fig 2 - Camera Raw Right-click menu
The Enhance Preview dialog is opened (see Figure 3).
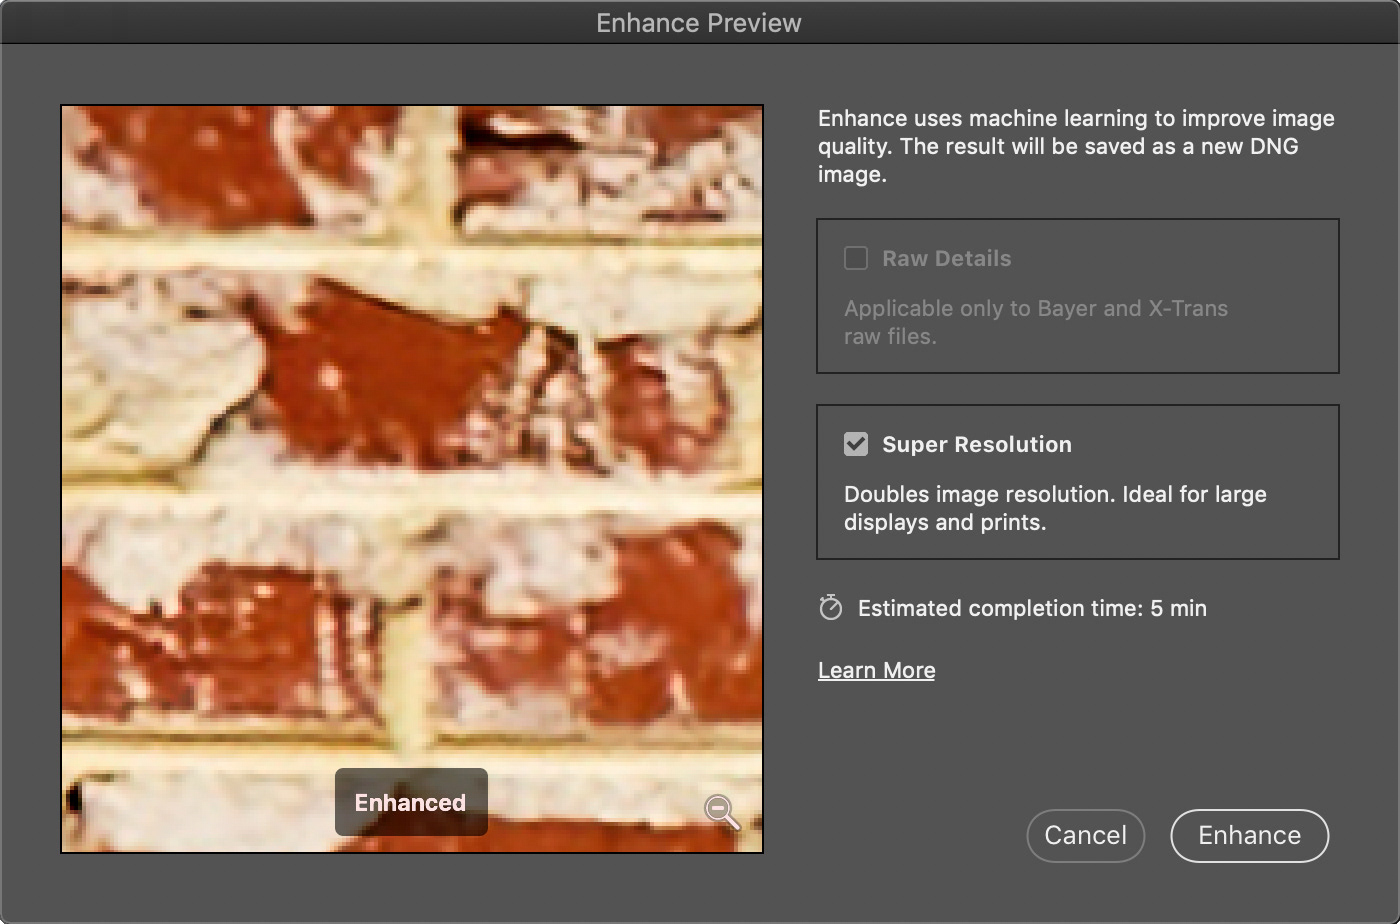
Fig 3 - Enhance Preview dialog
Make sure that the Super Resolution check box is ticked and press the Enhance button. The process may take a little while, and will be longer the larger the file you are upsizing, but it doesn’t seem to take as long as the estimate shown on the screen on my Macbook Pro, but this may be dependent on your computer speed too.
Once the process is complete you will be returned to the Camera Raw screen, and you will notice that you now have another image file in the film strip (see Figure 4).
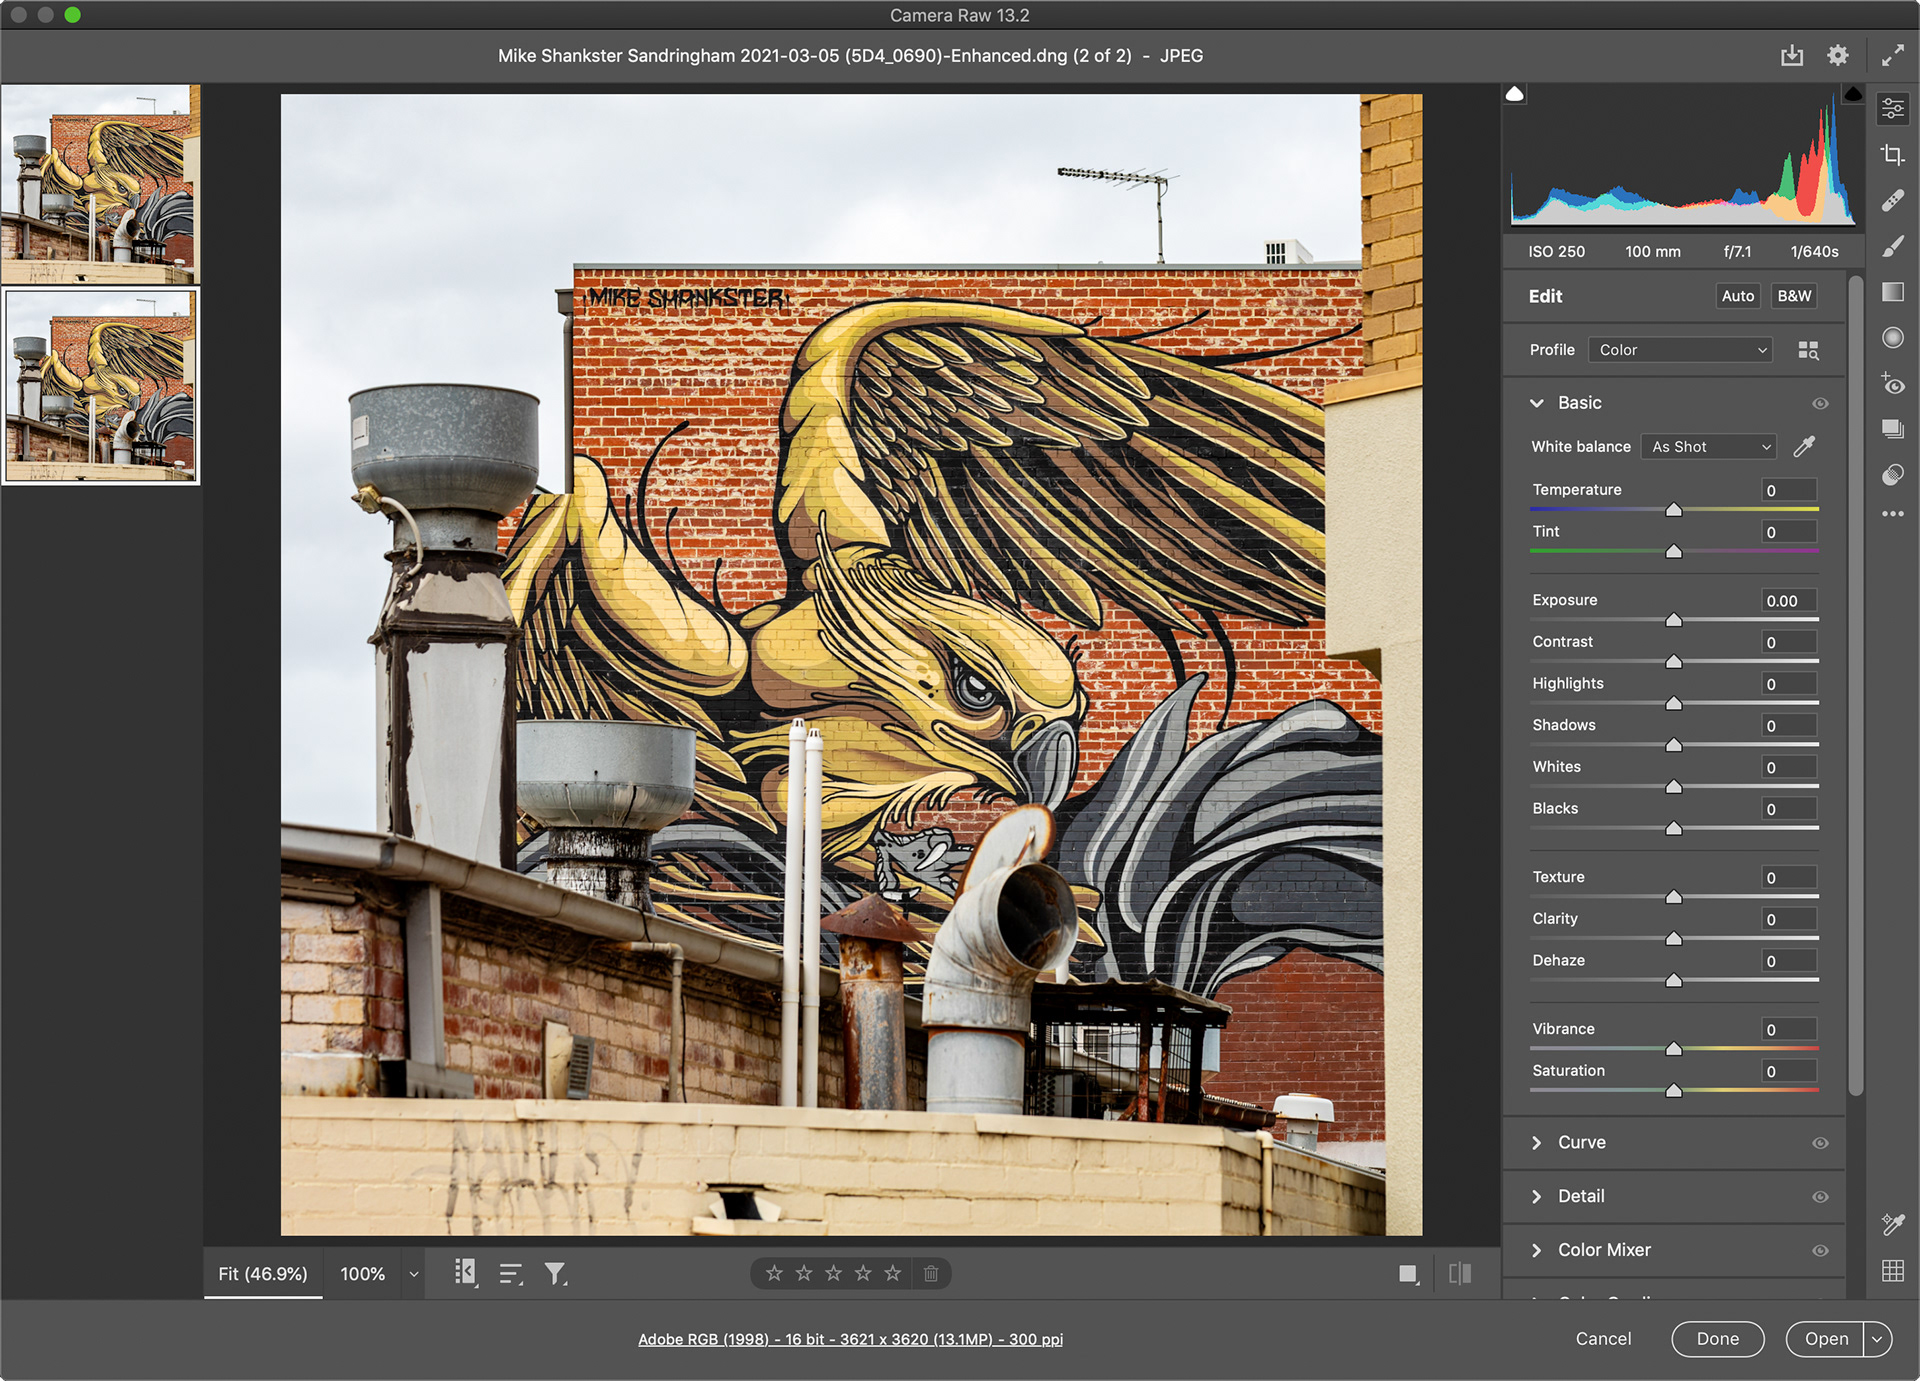
This new file will be a RAW file with file type DNG and it will have been created in the same folder as the original file. The filename will be the same as the original file with “–Enhanced” appended to it. Select this new file in the film strip and press Open to open it into Photoshop.
This new functionality will allow you to create larger versions of your files should you need them for sale or for printing. As I said earlier it seems to me to do a really good job, and is a welcome new feature.
This article was first published in the April 2021 issue of Artists Down Under magazine.