A few months ago I purchased the TK9 Photoshop plug-ins created by Tony Kuyper. I am finding them very useful and they are saving me a lot of time when using Photoshop.
The TK9 set of modules includes four different sub-systems.
Multi-Mask – This is a fully-functioned luminosity mask plugin but also allows the creation of masks and selections based on colour channels, hue, colour, saturation, vibrance, and BlendIf values. It also includes edge, half-edge, and focus masks and depth maps. All masks can be infinitely modified, and, with a mask calculator, combined through addition, subtraction, or intersection. Multiple mask output options include adjustment layers, layer masks, selections, burning, dodging, mask painting, and pixel layers.
Combo and Cx – The Combo and Cx plug-ins provide 60 buttons that provide quick access to many Photoshop functions, allowing you to perform functions that would otherwise require multiple steps or reaching into the Photoshop menu system. The Combo and Cx plug-ins are essentially the same panels but with different form factors, choose the one that best suits where you want to place it in your Photoshop workspace.
Export – Allows for easy resizing, sharpening and export of your images and allows you to create presets based on your various needs.
My Actions – Create up to five nestable panels that run your favourite Photoshop actions with a single click.
This is a lot of functionality for the price which is US$33 at the time of writing this article.
There is a lot of functionality overlap with Lumenzia, another Photoshop plug-in I have had for many years, have previously reviewed, and still use. I find room for both these tools in my Photoshop work. Both are brilliant, cost-effective tools.
Let’s take a deeper look at the four different sub-systems in TK9.
Multi-Mask
Figure 1 shows the main Multi-Mask panel. Each of the top twelve buttons will invoke a sub-panel to perform a particular function (see Figure 2).
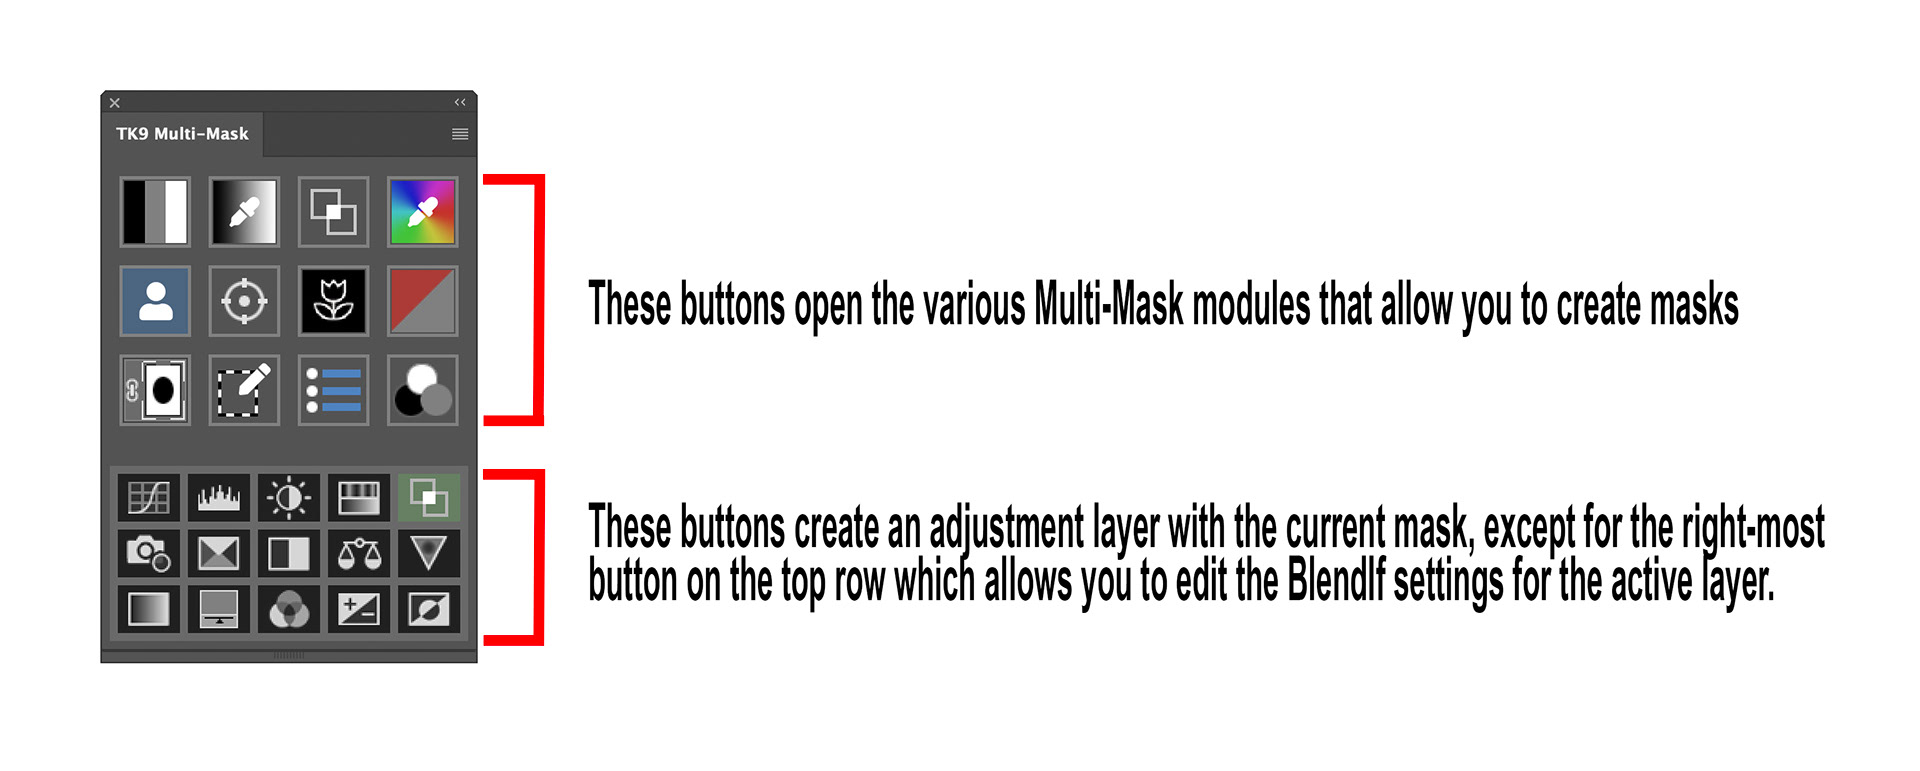
Fig 1 - Multi-Mask panel
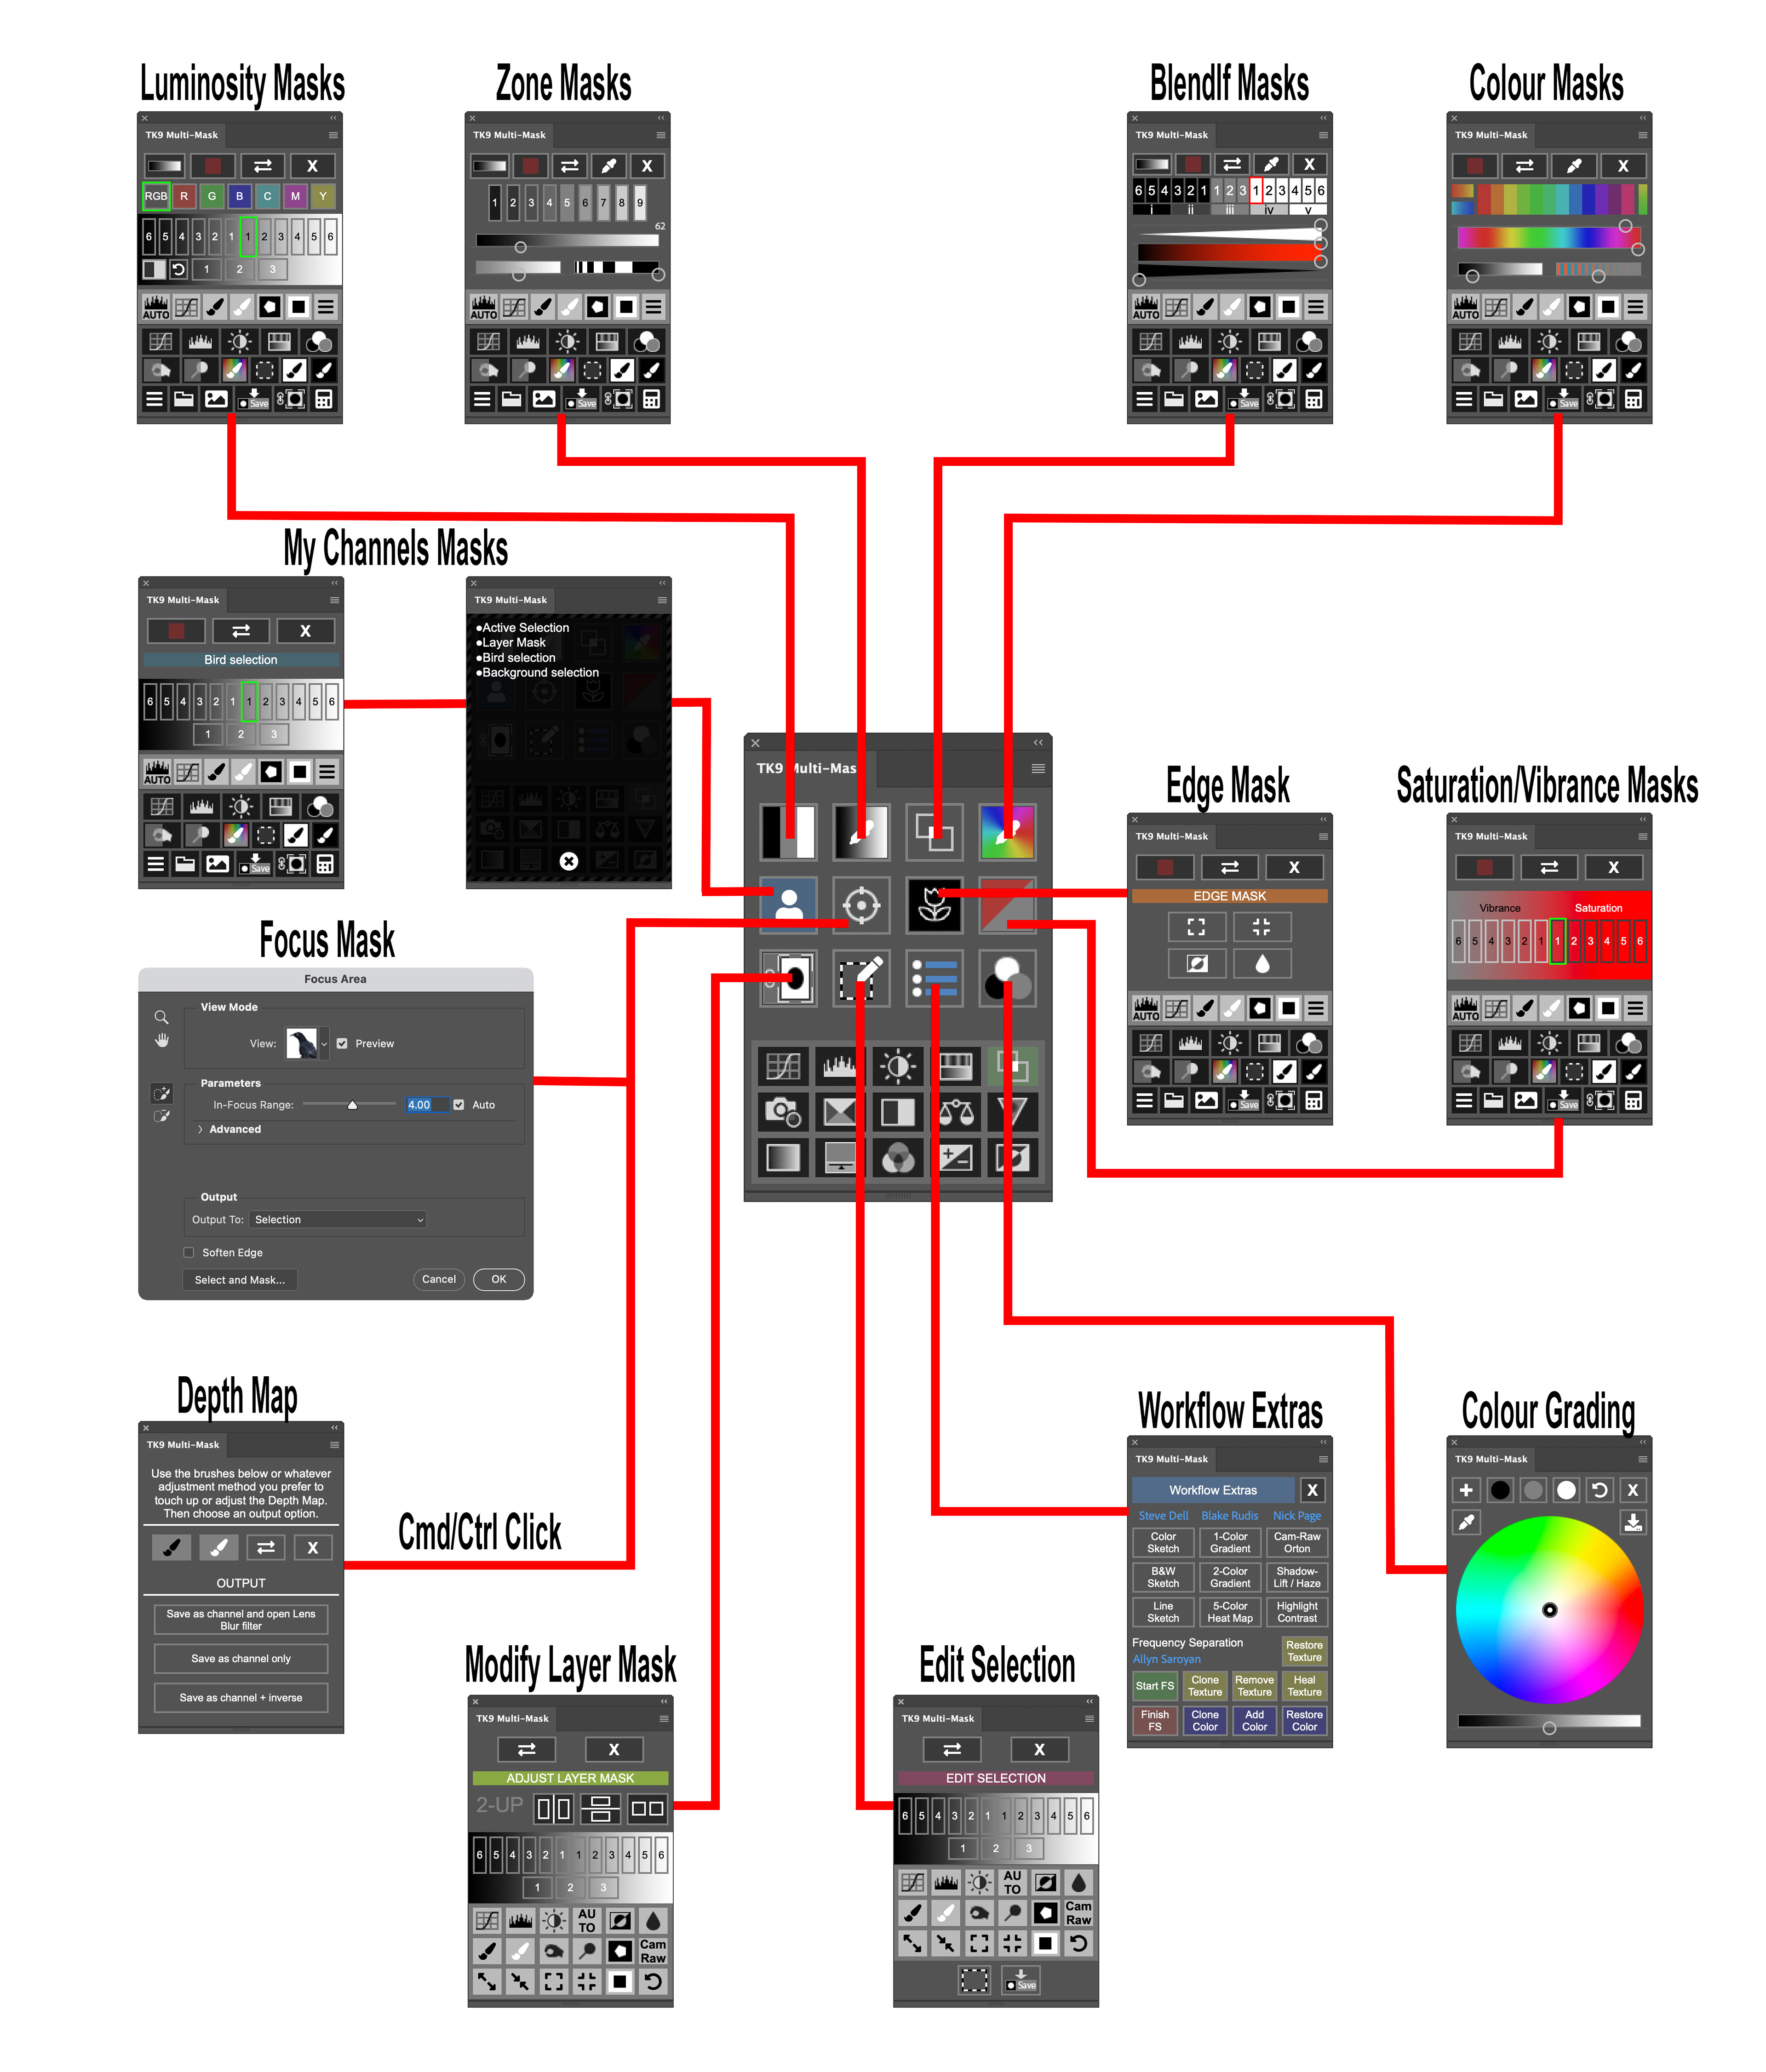
Fig 2 - Multi-Mask Sub-panels
Each of these sub-panels have a similar structure with buttons to choose the mask source, the particular mask you want, buttons to modify the mask (via Curves, Levels, painting with a black or white brush amongst other things) and buttons to decide what action to take with the mask (such as creating an adjustment layer with the mask on it, adding a layer mask to the active layer, creating a selection, saving the mask as an alpha channel and even saving it as a pixel layer). Figure 3 shows the sub-panel for creating luminosity masks.

Fig 3 - Multi-Mask Luminosity Masking panel
Combo and Cx
The Combo and Cx plug-ins (see Figure 4) are exactly the same except for the form factor. The Combo panel is six buttons wide and ten buttons high, the Cx panel is three buttons wide and twenty buttons high. You should choose whichever one of these fits in best with how you want your Photoshop workspace laid out.
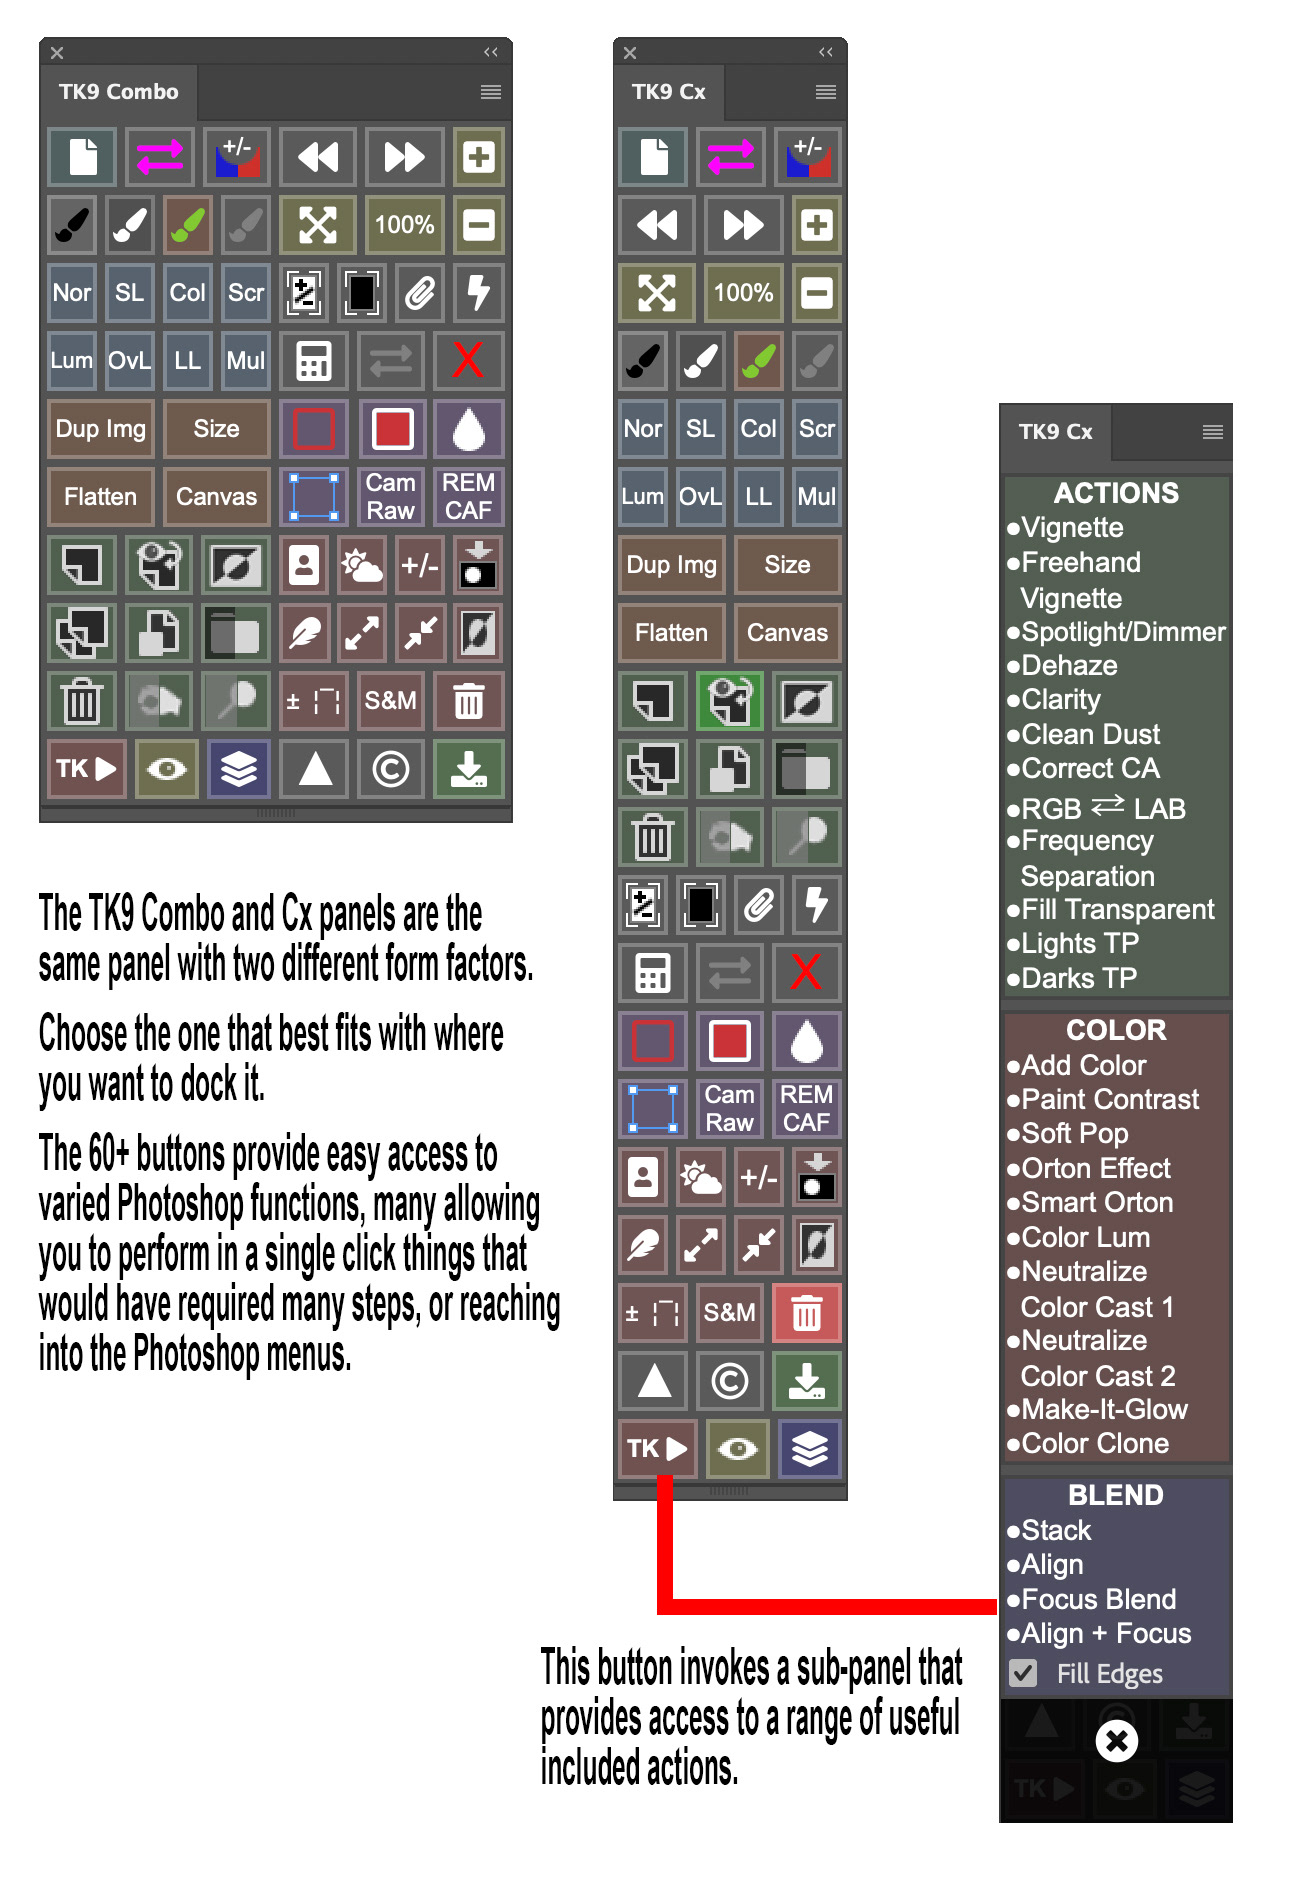
Fig 4 - Combo and Cx panels
Figure 5 shows how I have included the Mulit-Mask and Cx panels in my workspace.
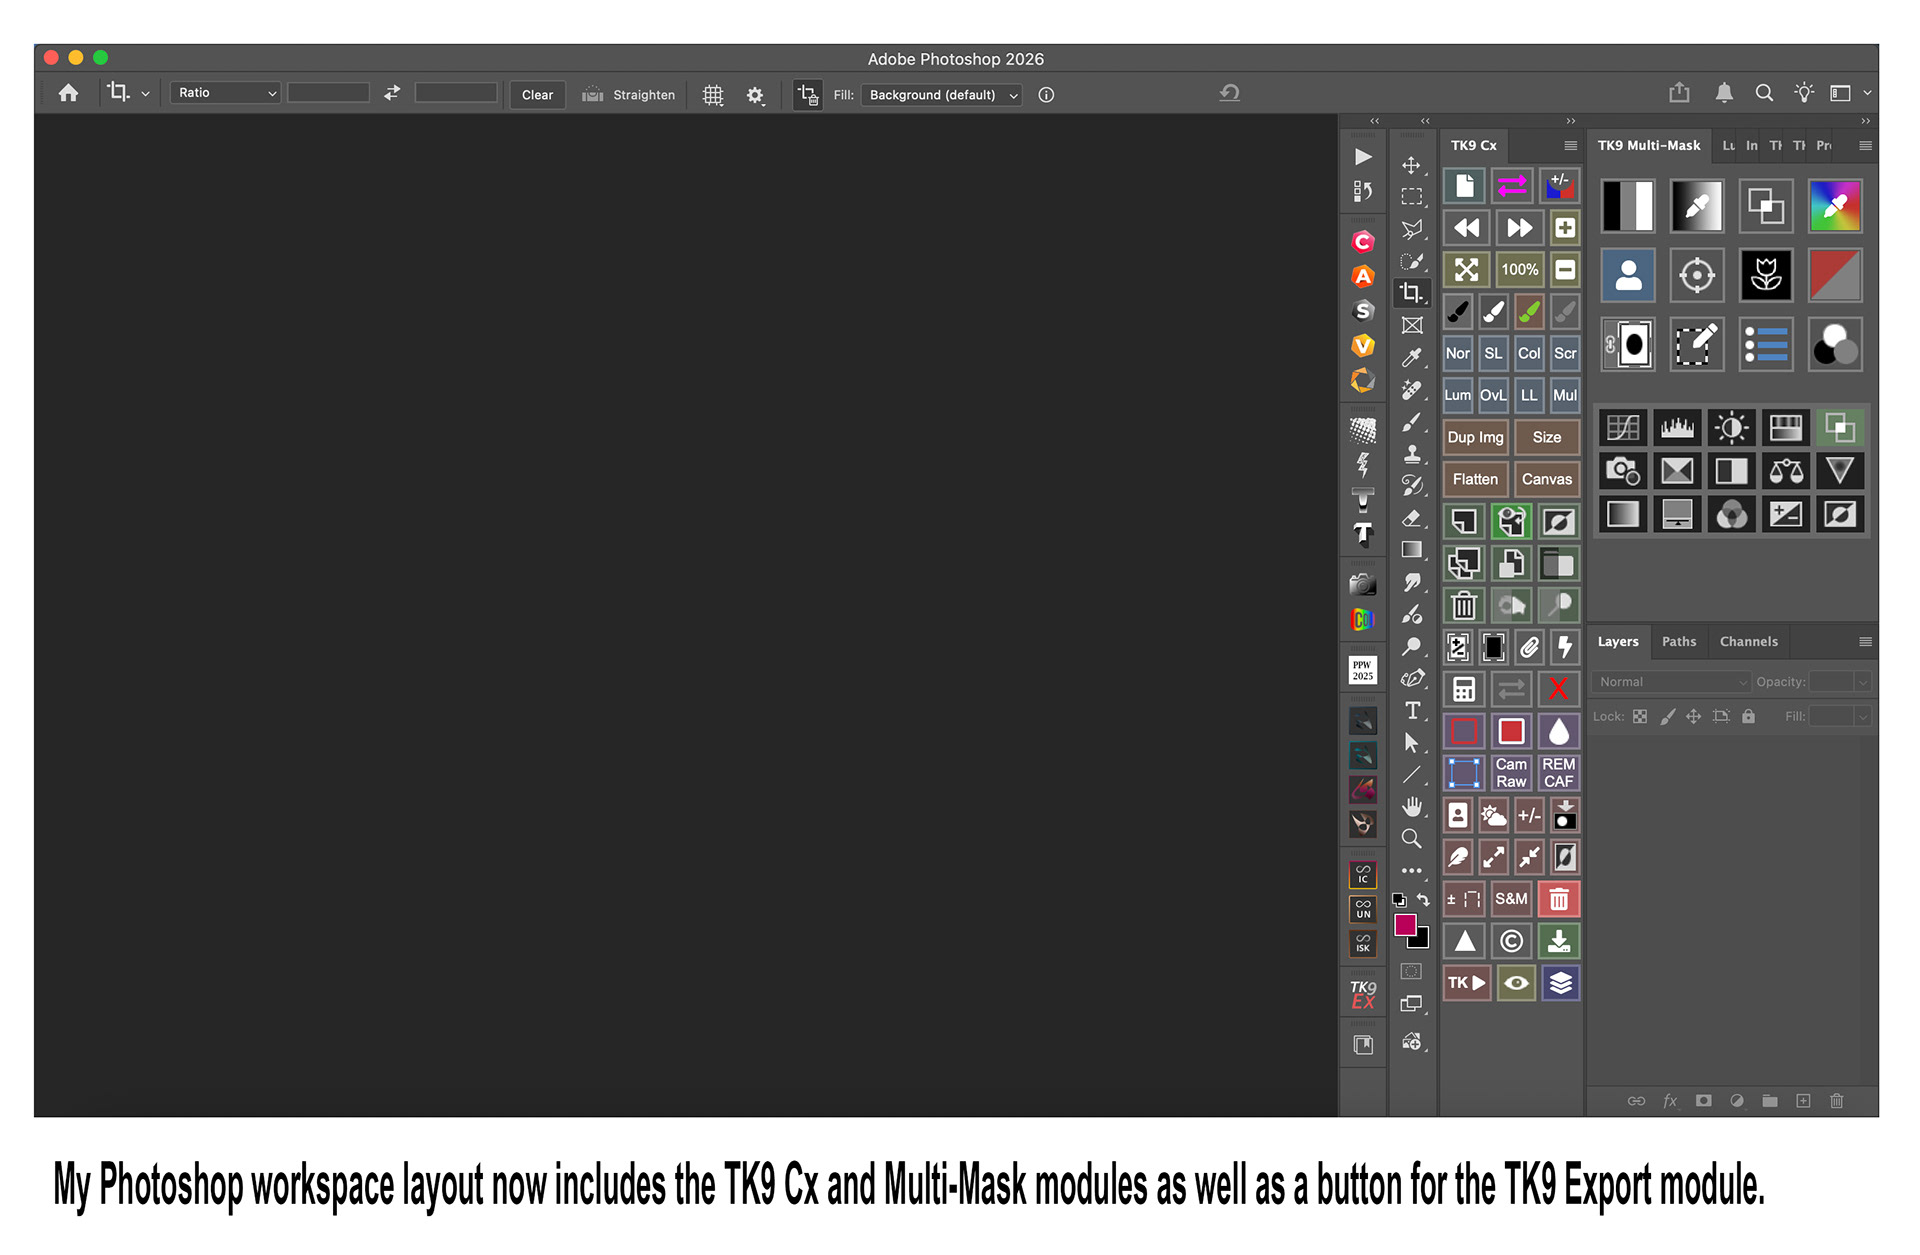
Fig 5 - My Photoshop workspace
Most of the buttons have multiple actions or options via modifier keys such as Cmd/Ctrl and Shift.
Here’s a few examples of just a few of the time-saving buttons that perform common tasks that would otherwise take multiple steps.
- The Camera Raw button will create a new stamp-visible layer, convert it to a Smart Object and then invoke the Camera Raw filter.
- The Black Brush button will change the foreground colour to black and the background colour to white, it will then select the brush tool. When the Cmd/Ctrl key is used it will change the brush blend mode to Overlay. The White Brush is the same except the foreground colour is set to white and the background colour to black.
- The Burn button will create a new layer, fill it with 50% grey and change it’s blend mode to Soft Light, and then name the layer. It will then select the Brush tool and change the foreground colour to black and the background colour to white. The Dodge button will do the same except the brush foreground/background colours are set to white/black.
- The +/- Layer Mask button toggles between removing and adding a layer mask to the active layer. If a layer mask is present it is removed. If no layer mask is present, a white mask is created. If there is an active selection a layer mask based on the selection is created.
- There is a button that will delete all non-visible (hidden) layers.
These are examples of some of the buttons that provide one-click access to dialogs that would otherwise require multiple clicks through the menu system.
- Feather selection, Expand selection and Contract Selection
- Duplicate Image, Image Size, Flatten Image, Canvas Size.
- Feather selection, Expand selection and Contract Selection
- Duplicate Image, Image Size, Flatten Image, Canvas Size.
These are examples of quick buttons that would usually require accessing a drop-down or special mouse movements/key combinations.
- Normal, Soft Light, Colour, Screen, Luminosity, Overlay, Linear Light and Multiply blend modes.
- Toggle Clipping Mask
- Normal, Soft Light, Colour, Screen, Luminosity, Overlay, Linear Light and Multiply blend modes.
- Toggle Clipping Mask
The TK Actions button provides access to over 20 special actions for different image effects (see figure 4).
Export
The Export panel allows you to easily resize, sharpen and export your images in an almost unlimited number of ways. You can create presets for the things you regularly use, for example I have presets for general social media posts, Instagram square posts, Instagram 4:5 aspect ratio posts, camera club competition sizes, magazine submissions etc.
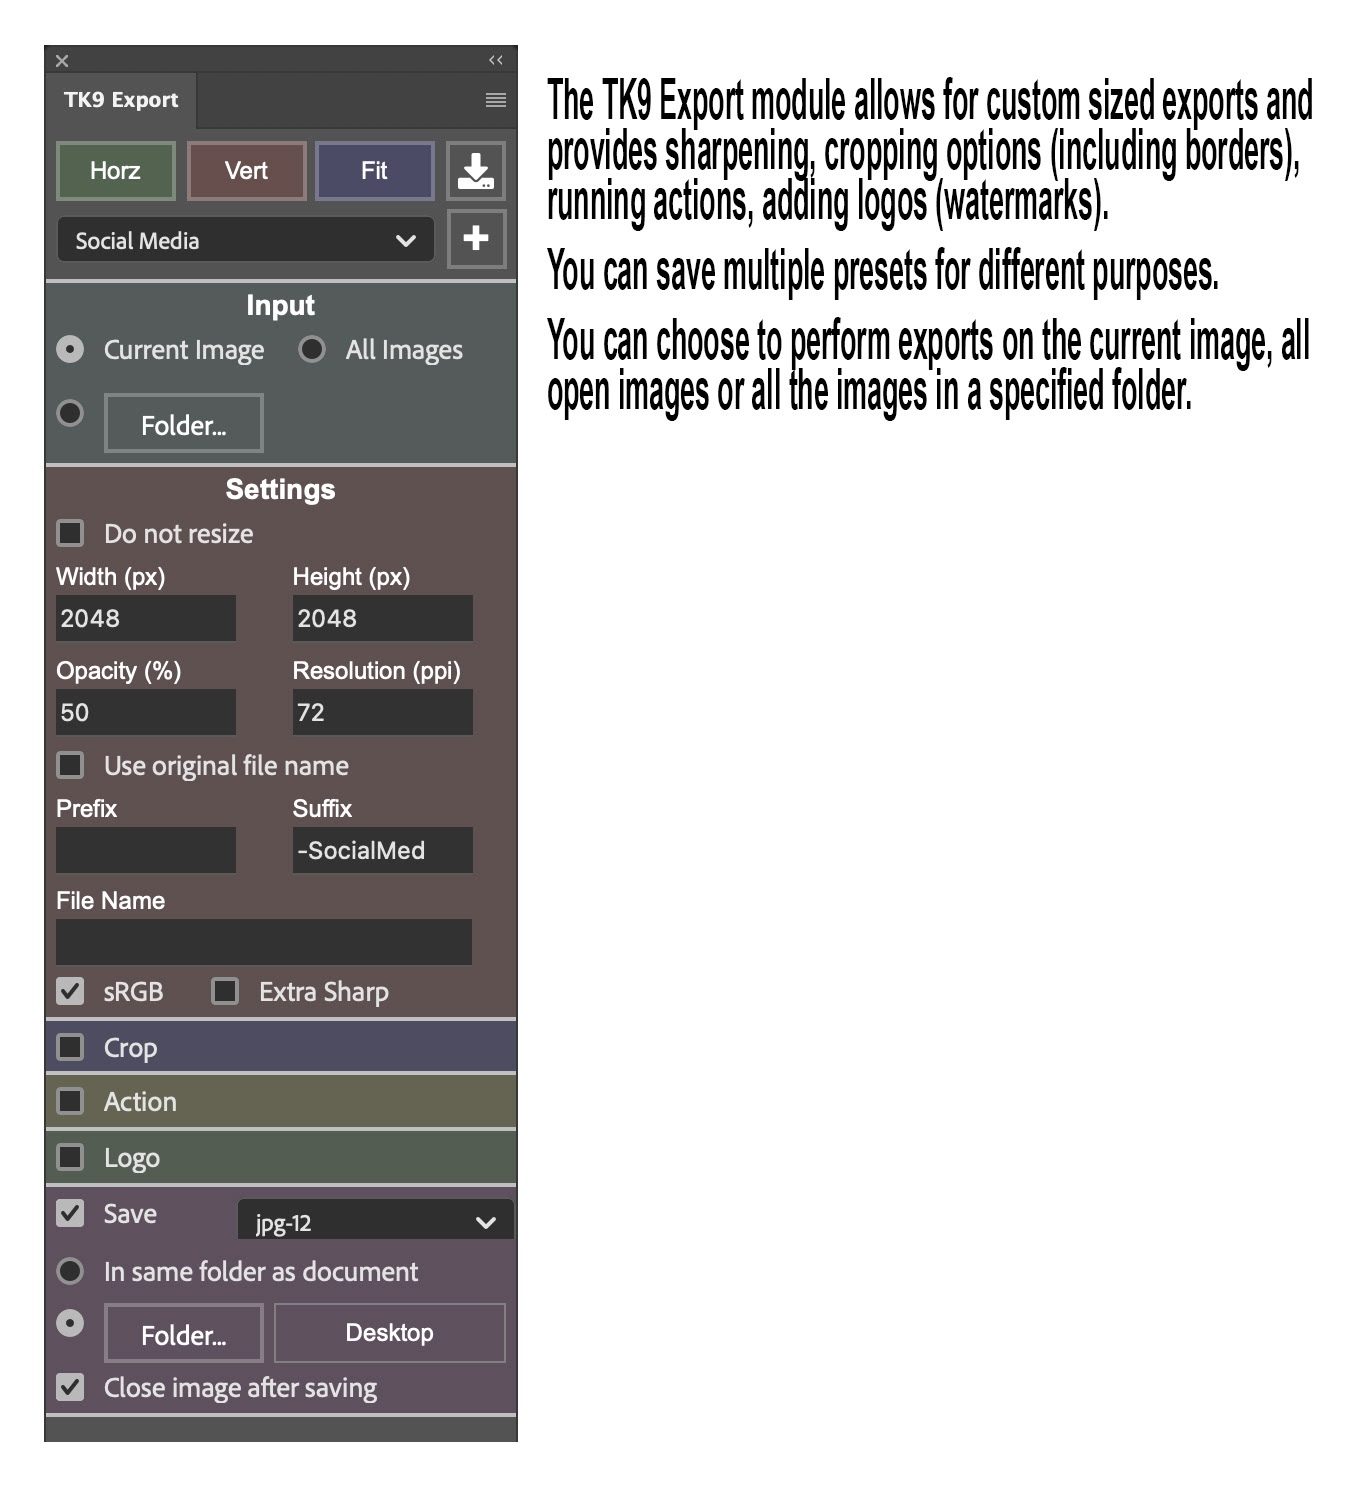
Fig 6 - Export panel
You can run the Export function on a single file, on all open files or all the files in a specified folder, and you can choose to put the output files in the same location as the original or in a specified folder.
For specific aspect ratios you can choose to crop in various ways or add bars to the tops or sides to fill out the image. You can also add watermarks/logos as well as running Actions at export time.
My Actions
I am not using this panel actively yet but I can see it’s potential. It lets you create up to five mini-panels from where you can launch Photoshop Actions you’ve got installed. This could be really useful to help you create single-click menus of your favourite / most-used actions.
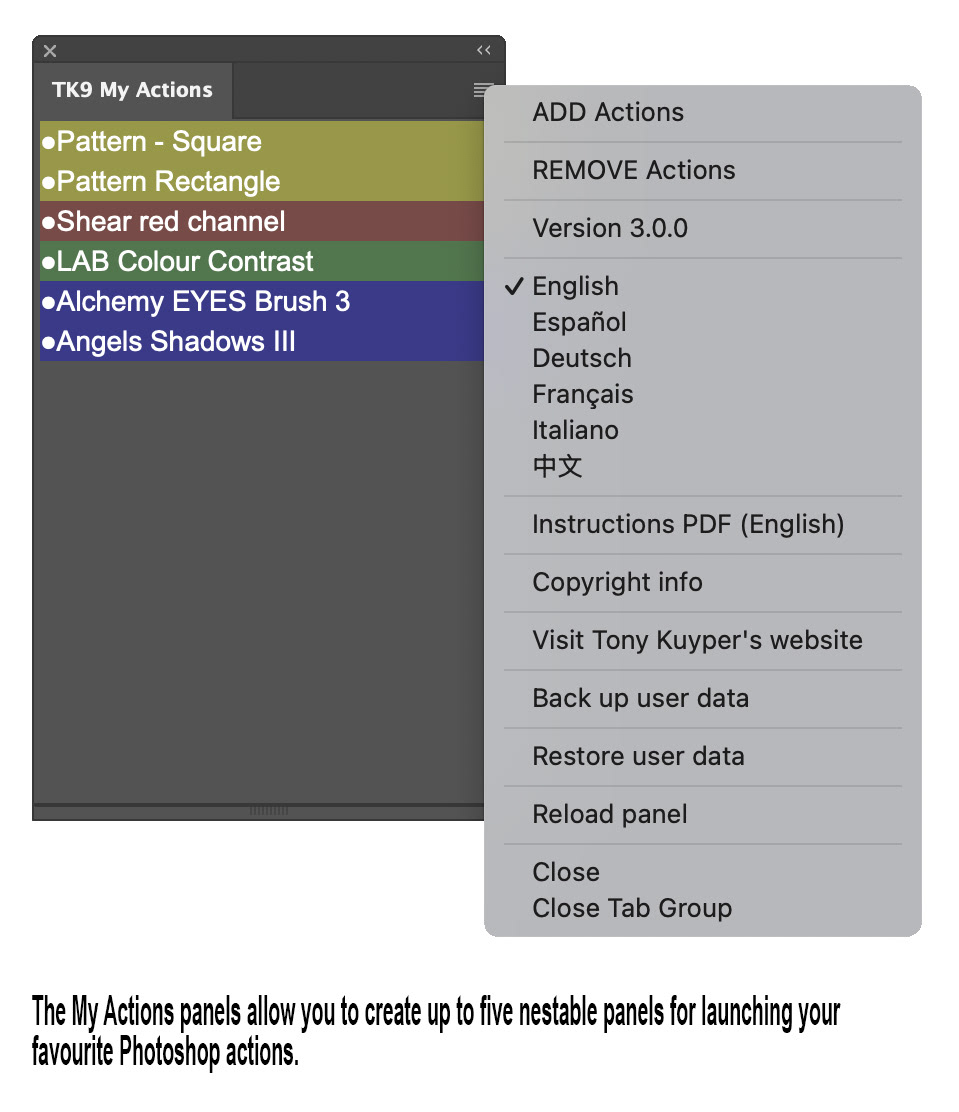
Fig 7 - My Actions panel
I think you’ll agree there is a lot of functionality here in these tools, especially for such a low-price. The Multi-Mask panel itself is worth much more than the purchase price in my opinion.
If you’re interested in getting into some more advanced masking techniques then TK9 is well worth a look. You’ll find it on Tony Kuyper’s website here,
Tony also has a lot of other tools on his website, many of them are free. There’s also heaps of interesting articles and videos there (many of them on luminosity masking).
This article was published in the May 2026 issue of Artists Down Under magazine.