The Transform Again keystroke in Photoshop can be very useful for creating repeating patterns.
For Mac users the Transform Again keystroke is Command+Option+Shift+T, for PC users it is Control+Alt+Shift+T.
Let’s look at an example to see what it does, in this example I will use it to create a circular pattern from single brushstrokes, using some fractal brushes.
Step 1.
Create a new document with a solid colour background (I chose white), then create a new blank layer.
Create a new document with a solid colour background (I chose white), then create a new blank layer.
Step 2.
Activate some guides to mark the centre of the document. The easiest way I find to do this is with the View / New Guide Layout command, choosing 2 rows and 2 columns.
Activate some guides to mark the centre of the document. The easiest way I find to do this is with the View / New Guide Layout command, choosing 2 rows and 2 columns.
Step 3.
On the blank layer I placed a single brushstroke with my first fractal brush.
On the blank layer I placed a single brushstroke with my first fractal brush.
Step 4.
Activate the Move tool and press Command+T (Mac) or Control+T (PC) to get into transform mode.
Activate the Move tool and press Command+T (Mac) or Control+T (PC) to get into transform mode.
Step 5.
In transform mode you will see the resize handles around the brushstroke as well as a small cross-hair in the middle of the object. This cross-hair indicates the axis of rotation, because I want to rotate my brushstroke around the centre of the document, I dragged the cross-hair to align it with the centre of the document using the guides.
In transform mode you will see the resize handles around the brushstroke as well as a small cross-hair in the middle of the object. This cross-hair indicates the axis of rotation, because I want to rotate my brushstroke around the centre of the document, I dragged the cross-hair to align it with the centre of the document using the guides.
Step 6.
Now I am going to type 30 (degrees) into the angle of rotation field in the options bar. I am choosing 30 because it divides evenly into 360 (a full rotation), so I will end up with 12 of my brush strokes centred around the middle of the document (see figure 1).
Now I am going to type 30 (degrees) into the angle of rotation field in the options bar. I am choosing 30 because it divides evenly into 360 (a full rotation), so I will end up with 12 of my brush strokes centred around the middle of the document (see figure 1).
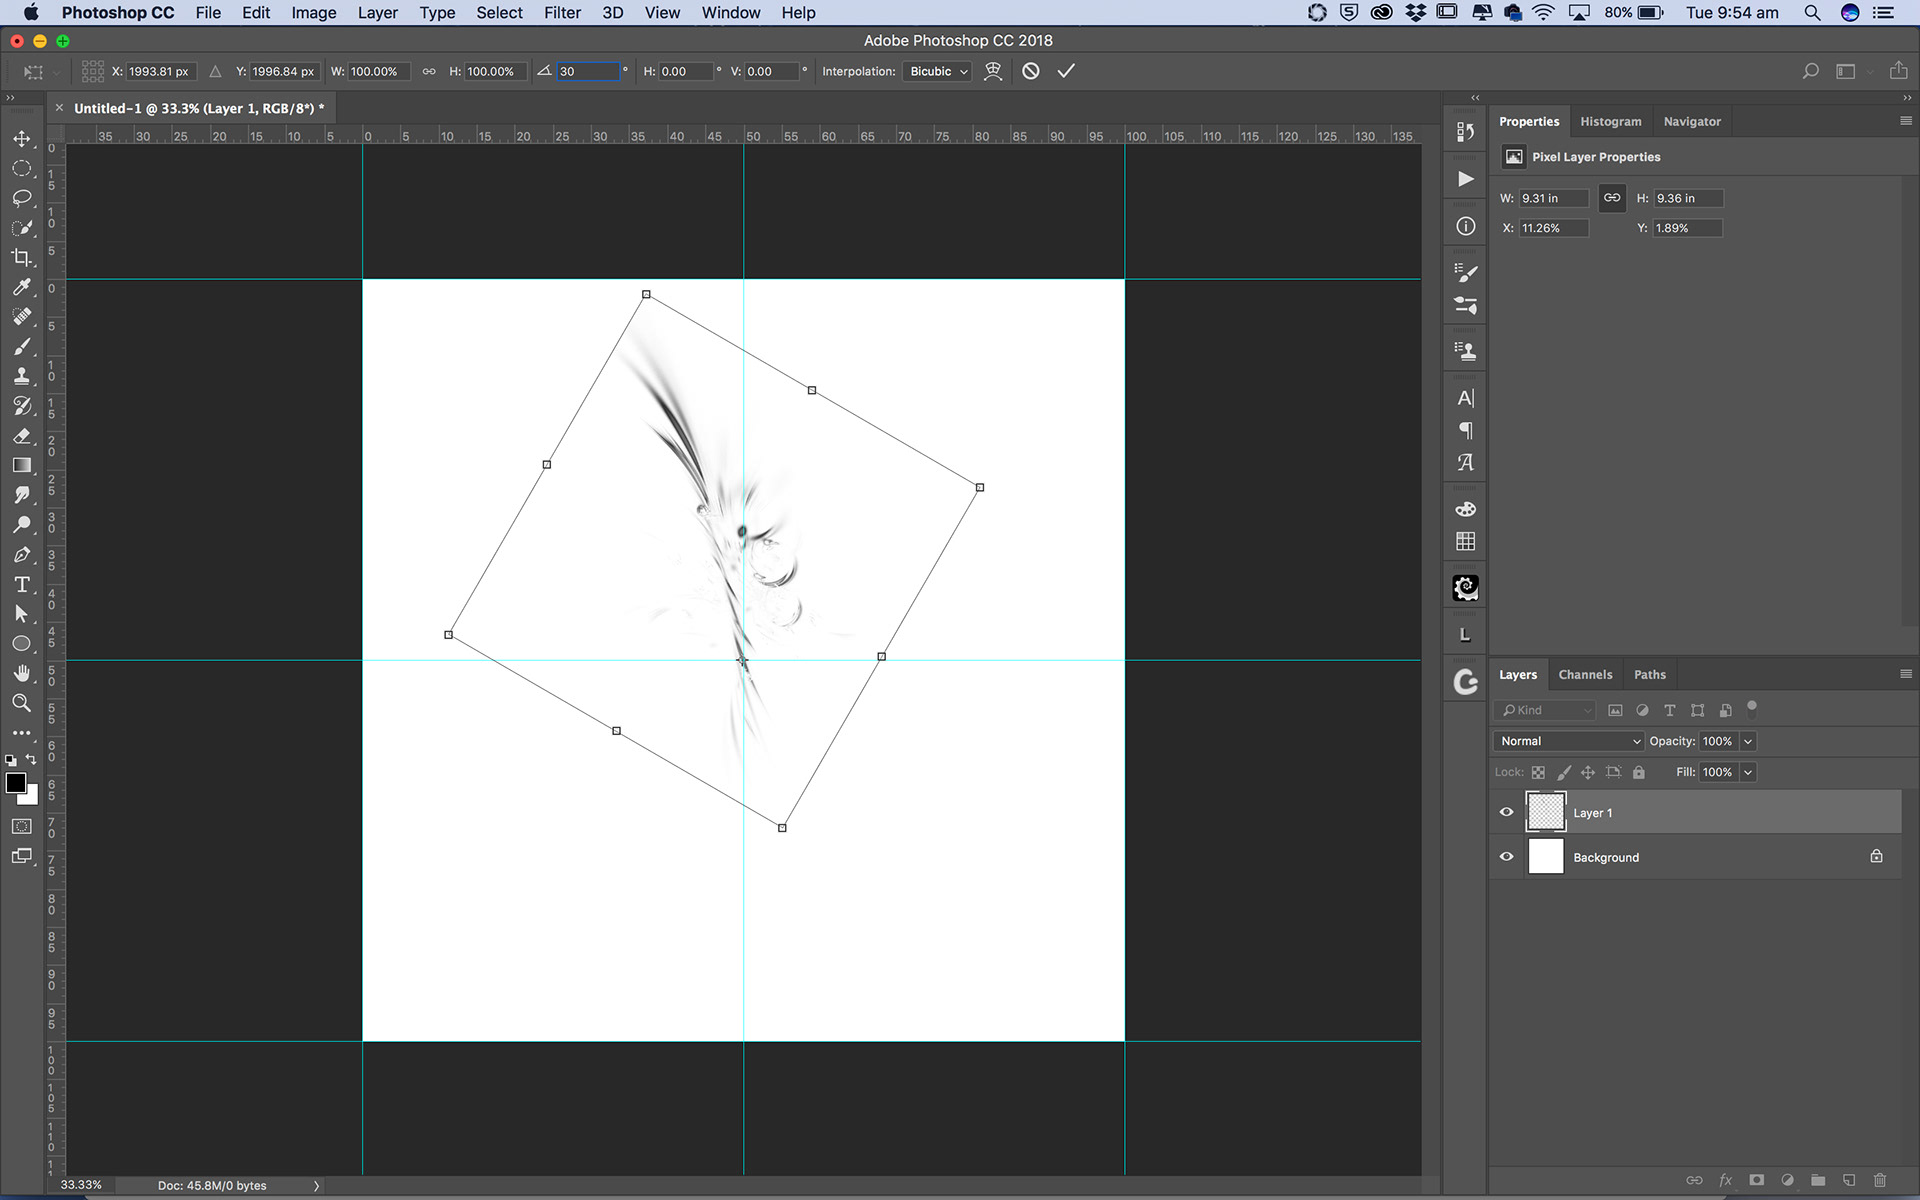
Figure 1
Step 7.
When you click the tick in the option bar, or press the Enter key, the brush stroke will rotate 30 degrees.
When you click the tick in the option bar, or press the Enter key, the brush stroke will rotate 30 degrees.
Step 8.
Now the magic begins. Press the Transform Again keystroke 11 times. Photoshop will create 11 more copies of your brush stroke, evenly spaced, rotated around the centre (see figure 2).
Now the magic begins. Press the Transform Again keystroke 11 times. Photoshop will create 11 more copies of your brush stroke, evenly spaced, rotated around the centre (see figure 2).
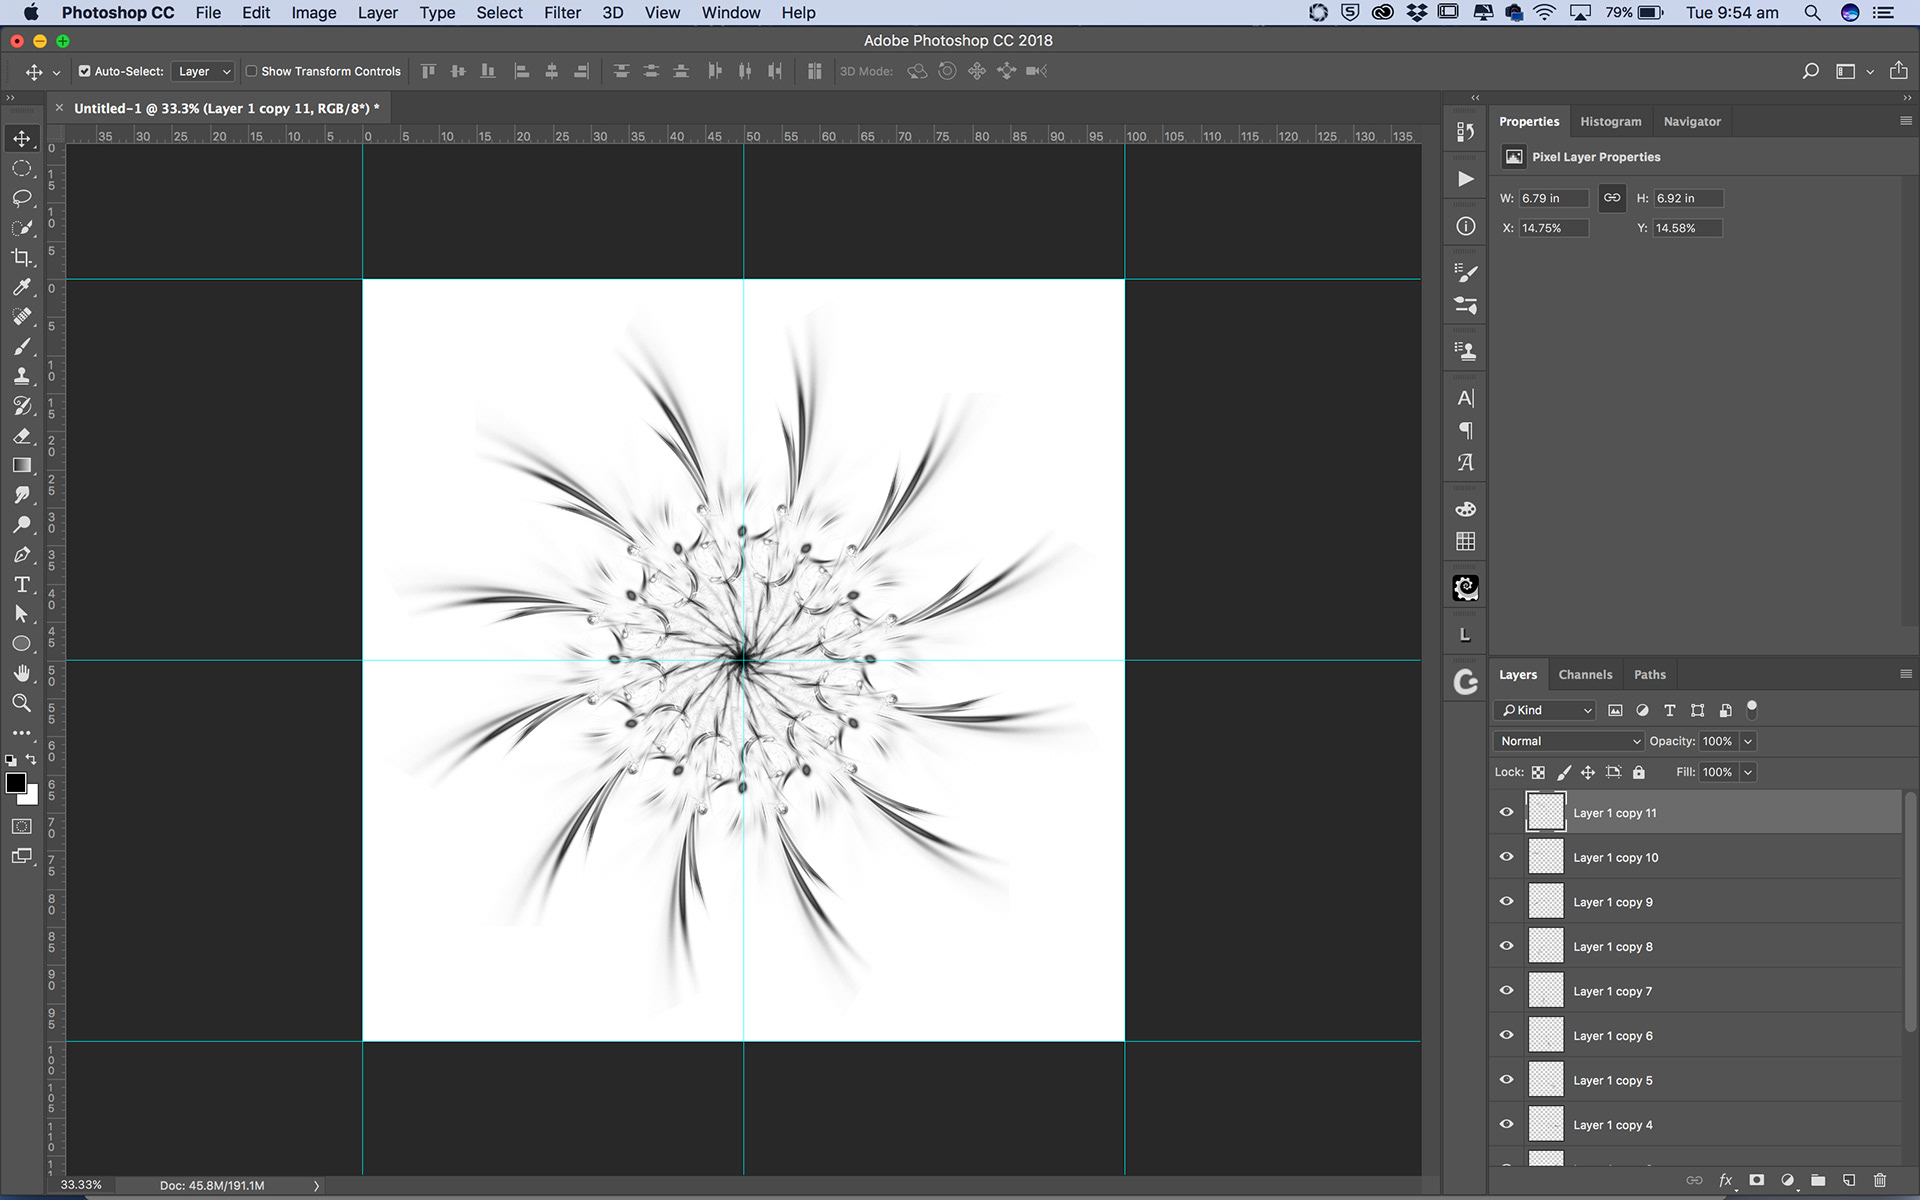
Figure 2
Step 9.
Now I created another blank layer, placed another single stroke of a different fractal brush in red, and then used the Transform Again keystroke a further 11 times to duplicate this new layer (see figure 3).
Now I created another blank layer, placed another single stroke of a different fractal brush in red, and then used the Transform Again keystroke a further 11 times to duplicate this new layer (see figure 3).
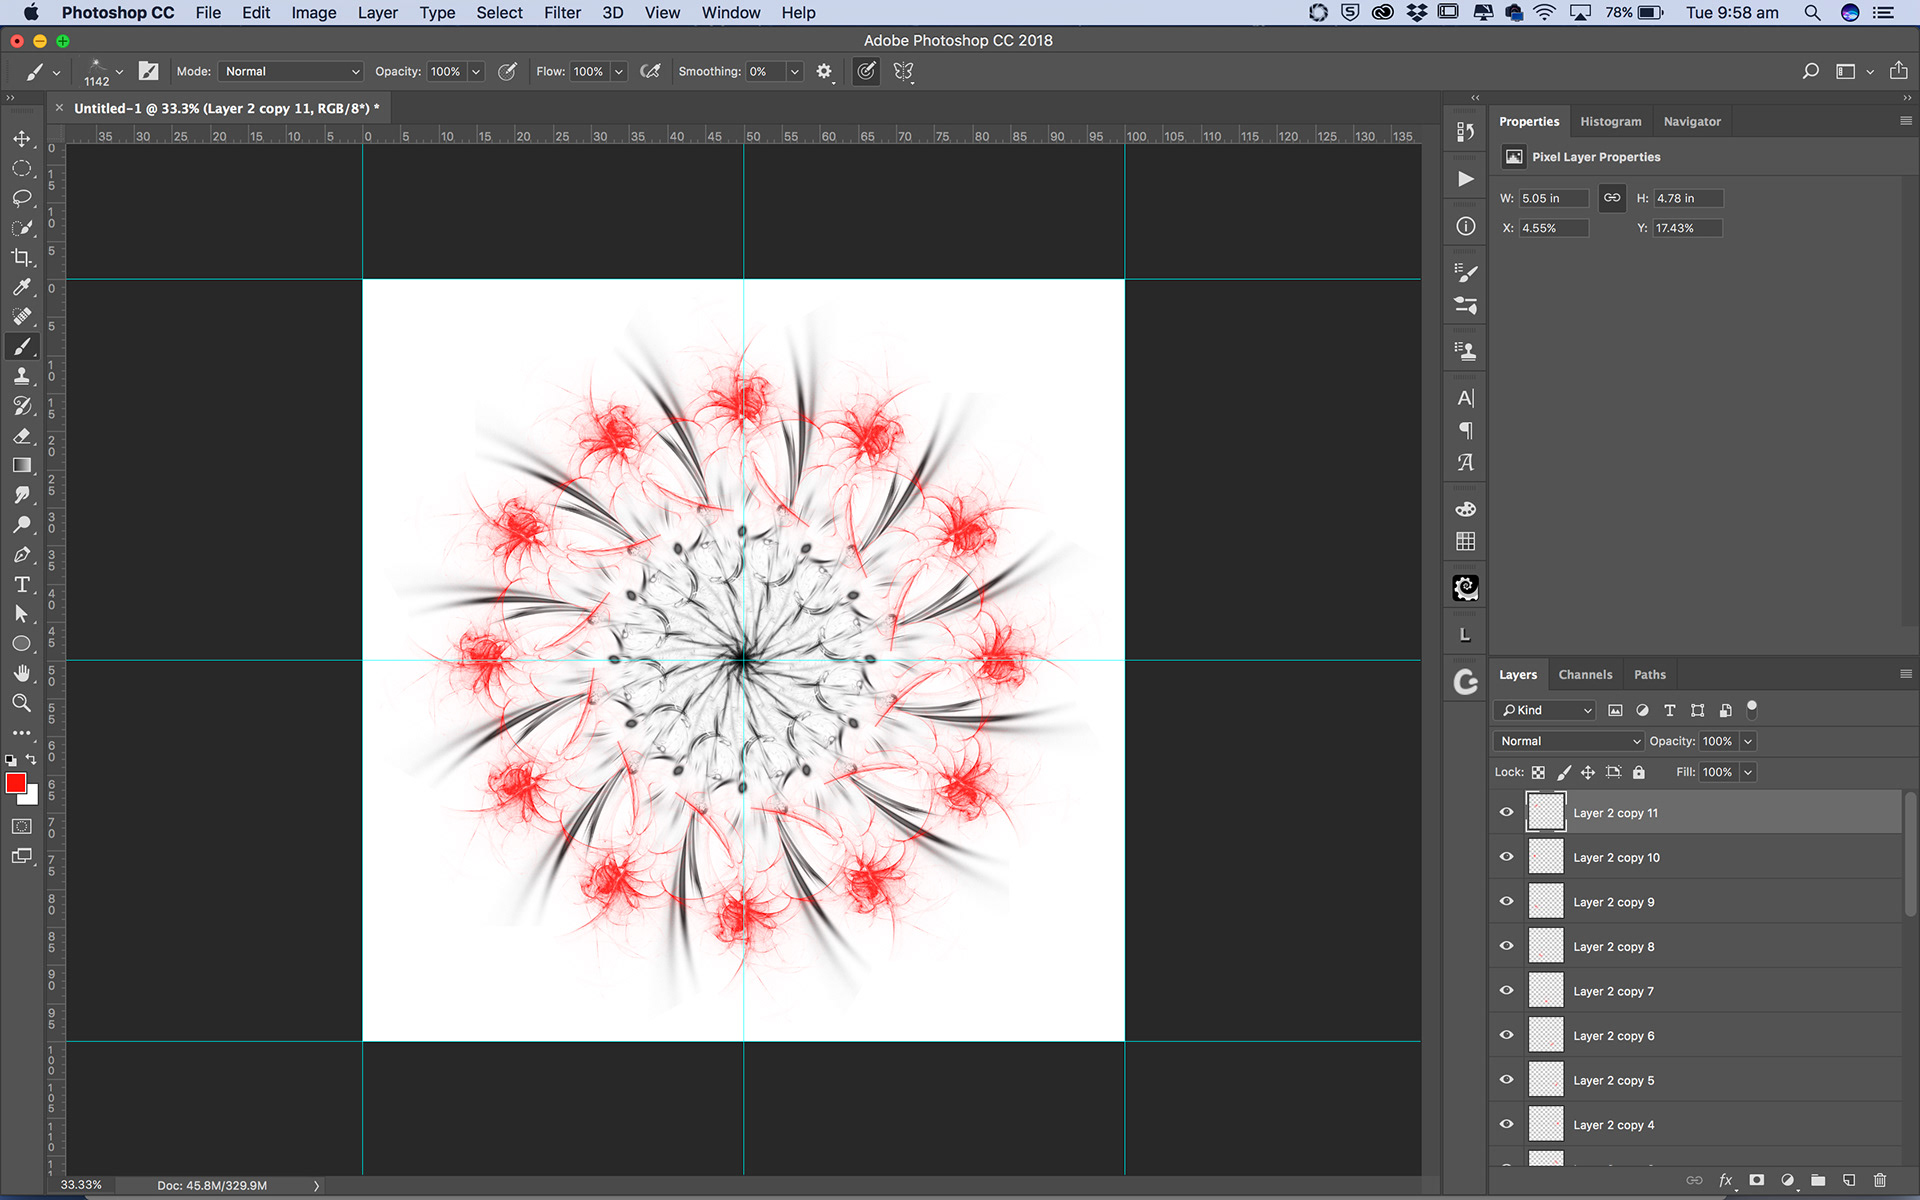
Figure 3
Step 10.
Note that when I created the red layers in step 9 I didn’t have to move the rotation point, or specify the 30 degree rotation, I didn’t have to even activate the Move tool, the Transform Again keystroke will just repeat using the same values as the previous time. Obviously if you want to change them, activate the Move tool, enter transform mode and do so.
Note that when I created the red layers in step 9 I didn’t have to move the rotation point, or specify the 30 degree rotation, I didn’t have to even activate the Move tool, the Transform Again keystroke will just repeat using the same values as the previous time. Obviously if you want to change them, activate the Move tool, enter transform mode and do so.
This useful keystroke is not limited to rotating brush strokes, it can be used on any layer based object, and can be used on any other type of move or transformation – so have an experiment with and see if you can think of any other uses for it. If nothing else it is great for creating patterns that can be used as elements in your work or possibly as backgrounds.
Usually I will merge the layers of each set of rotations into one layer to make them easier to handle, and the colours can easily be changed using Color Overlay in Layer Styles. Also, turning of the background layer and then saving as a transparent PNG file can make them easily imported into other pieces of your work.
Figure 4, called “Whizzer” is an example of a more complex pattern/background created using the above technique.

Figure 4 - "Whizzer"
This article was first published in the February 2018 issue of Artists Down Under magazine.