Adobe have recently introduced two great new ways to remove unwanted elements from your images.
Introduced in Photoshop CC version 24.5, after a brief appearance in the Beta version, the Remove Tool is the new “star” of the healing tools.
The Remove Tool is nested with the other healing tools (see Figure 1) and its icon is similar to the Healing Brush and Spot Healing Brush but with a couple of little stars on the left-hand side. Perhaps these are indicative of the absolute magic this tool can perform.

Figure 1 - The Remove Tool
There are only a few options appearing in the Options Bar for the Remove Tool (see Figure 2).
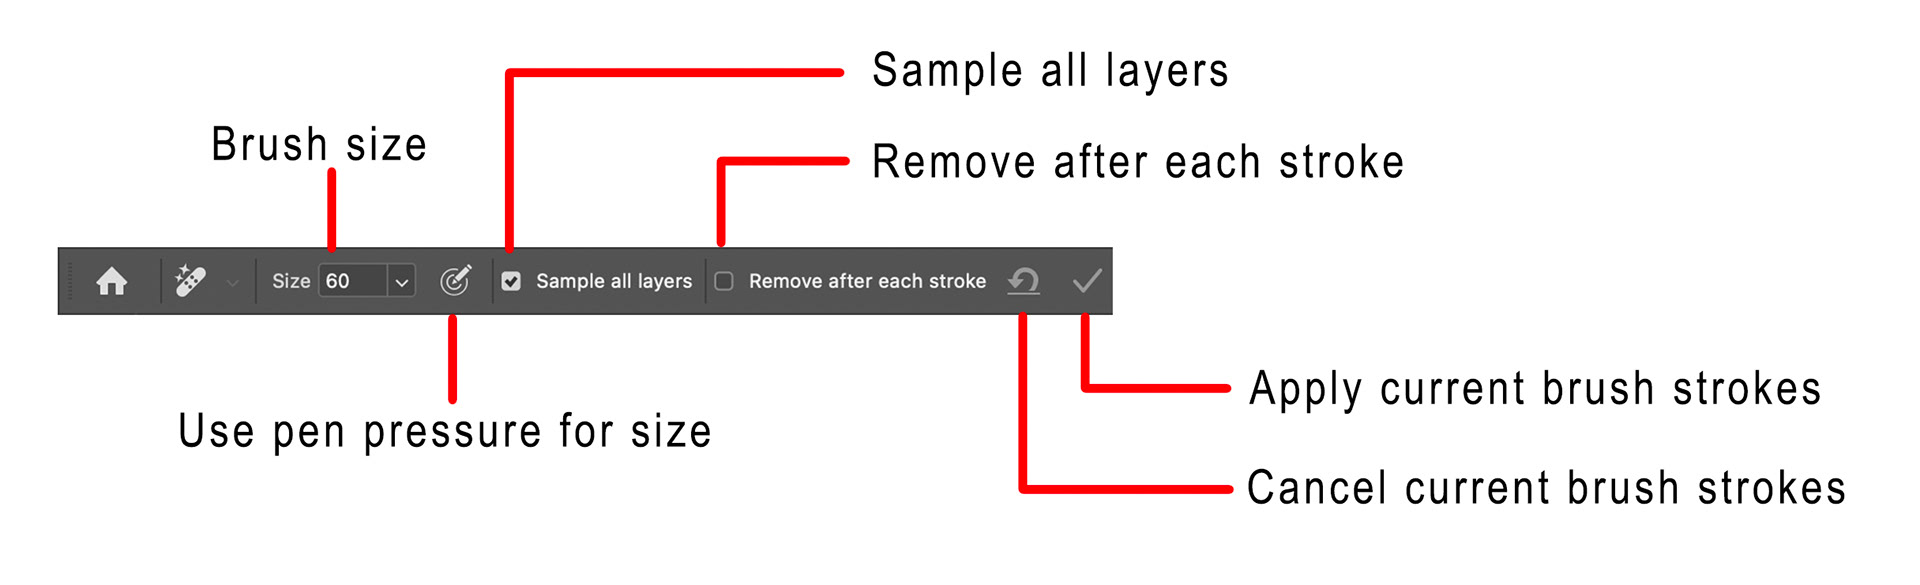
Figure 2 - The Remove Tool Options Bar
The first option is the brush size, which like other brush tools can also be changed using the left and right square-bracket keys, “[“ and “]”.
The second option, when clicked on, allows users of pressure-sensitive tablets to use pressure to control the size of the brush.
The third option “Sample all layers” determines whether only the current layer, or the “composite image” from all layers is sampled from when using the tool. It is good practice to do your healing or removal of unwanted objects on a blank layer to enable a non-destructive workflow, so this option will usually be checked.
The fourth option determines whether the Remove Tool activates and does it job each time you release the mouse button or lift your tablet pen, or if it enables you to make multiple separate brush strokes before choosing to either cancel or apply those strokes using the last two icons in the options bar.
To use the Remove Tool simply “paint” over the entire object you wish to remove. Make sure to paint the entire object, if you miss any bits then it is likely that artifacts will be left behind.
If removing straight-line type objects, like telephone or electricity wires, you can use the click once at one end of the straight line, hold down the [Shift] key and then click at the other end of the straight line. You can only use this method though if you have unchecked the “Remove after each stroke” option in the options bar. Ensure to size your brush correctly to make it just a little bigger than the object to be removed (see Figure 3). Make sure to also select any lighter or darker pixels along the objects edge that are often created by sharpening.
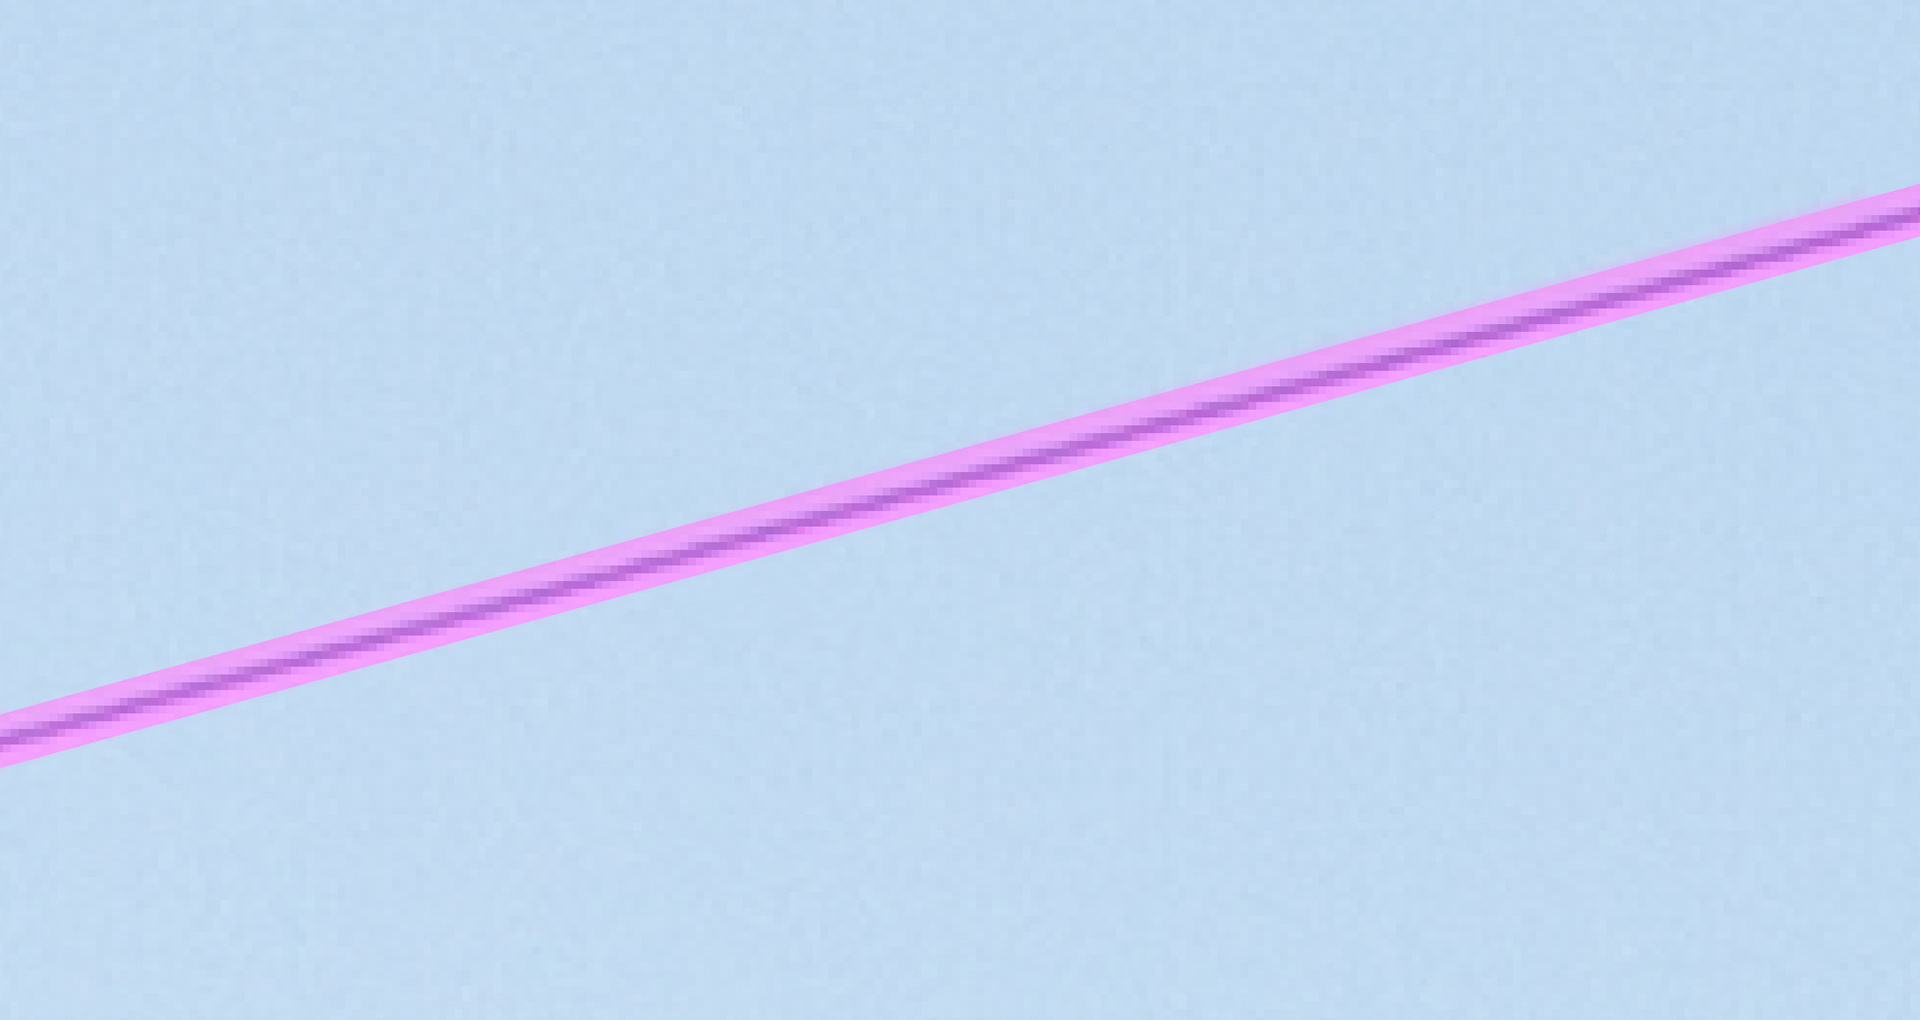
Figure 3 - Straight-line selection with the Remove Tool
If there are multiple objects or areas you wish to remove I would generally recommend selecting them and removing them one at a time rather than selecting them all and then doing the “remove”.
Another excellent new tool that can be used to remove objects very effectively is the Generative Fill feature that can currently only be found in the Photoshop Beta version.
The Generative Fill feature has many different uses, but in this article I am only really considering its use to remove unwanted objects. Figure 4 shows the process to use Generative Fill to remove an object.
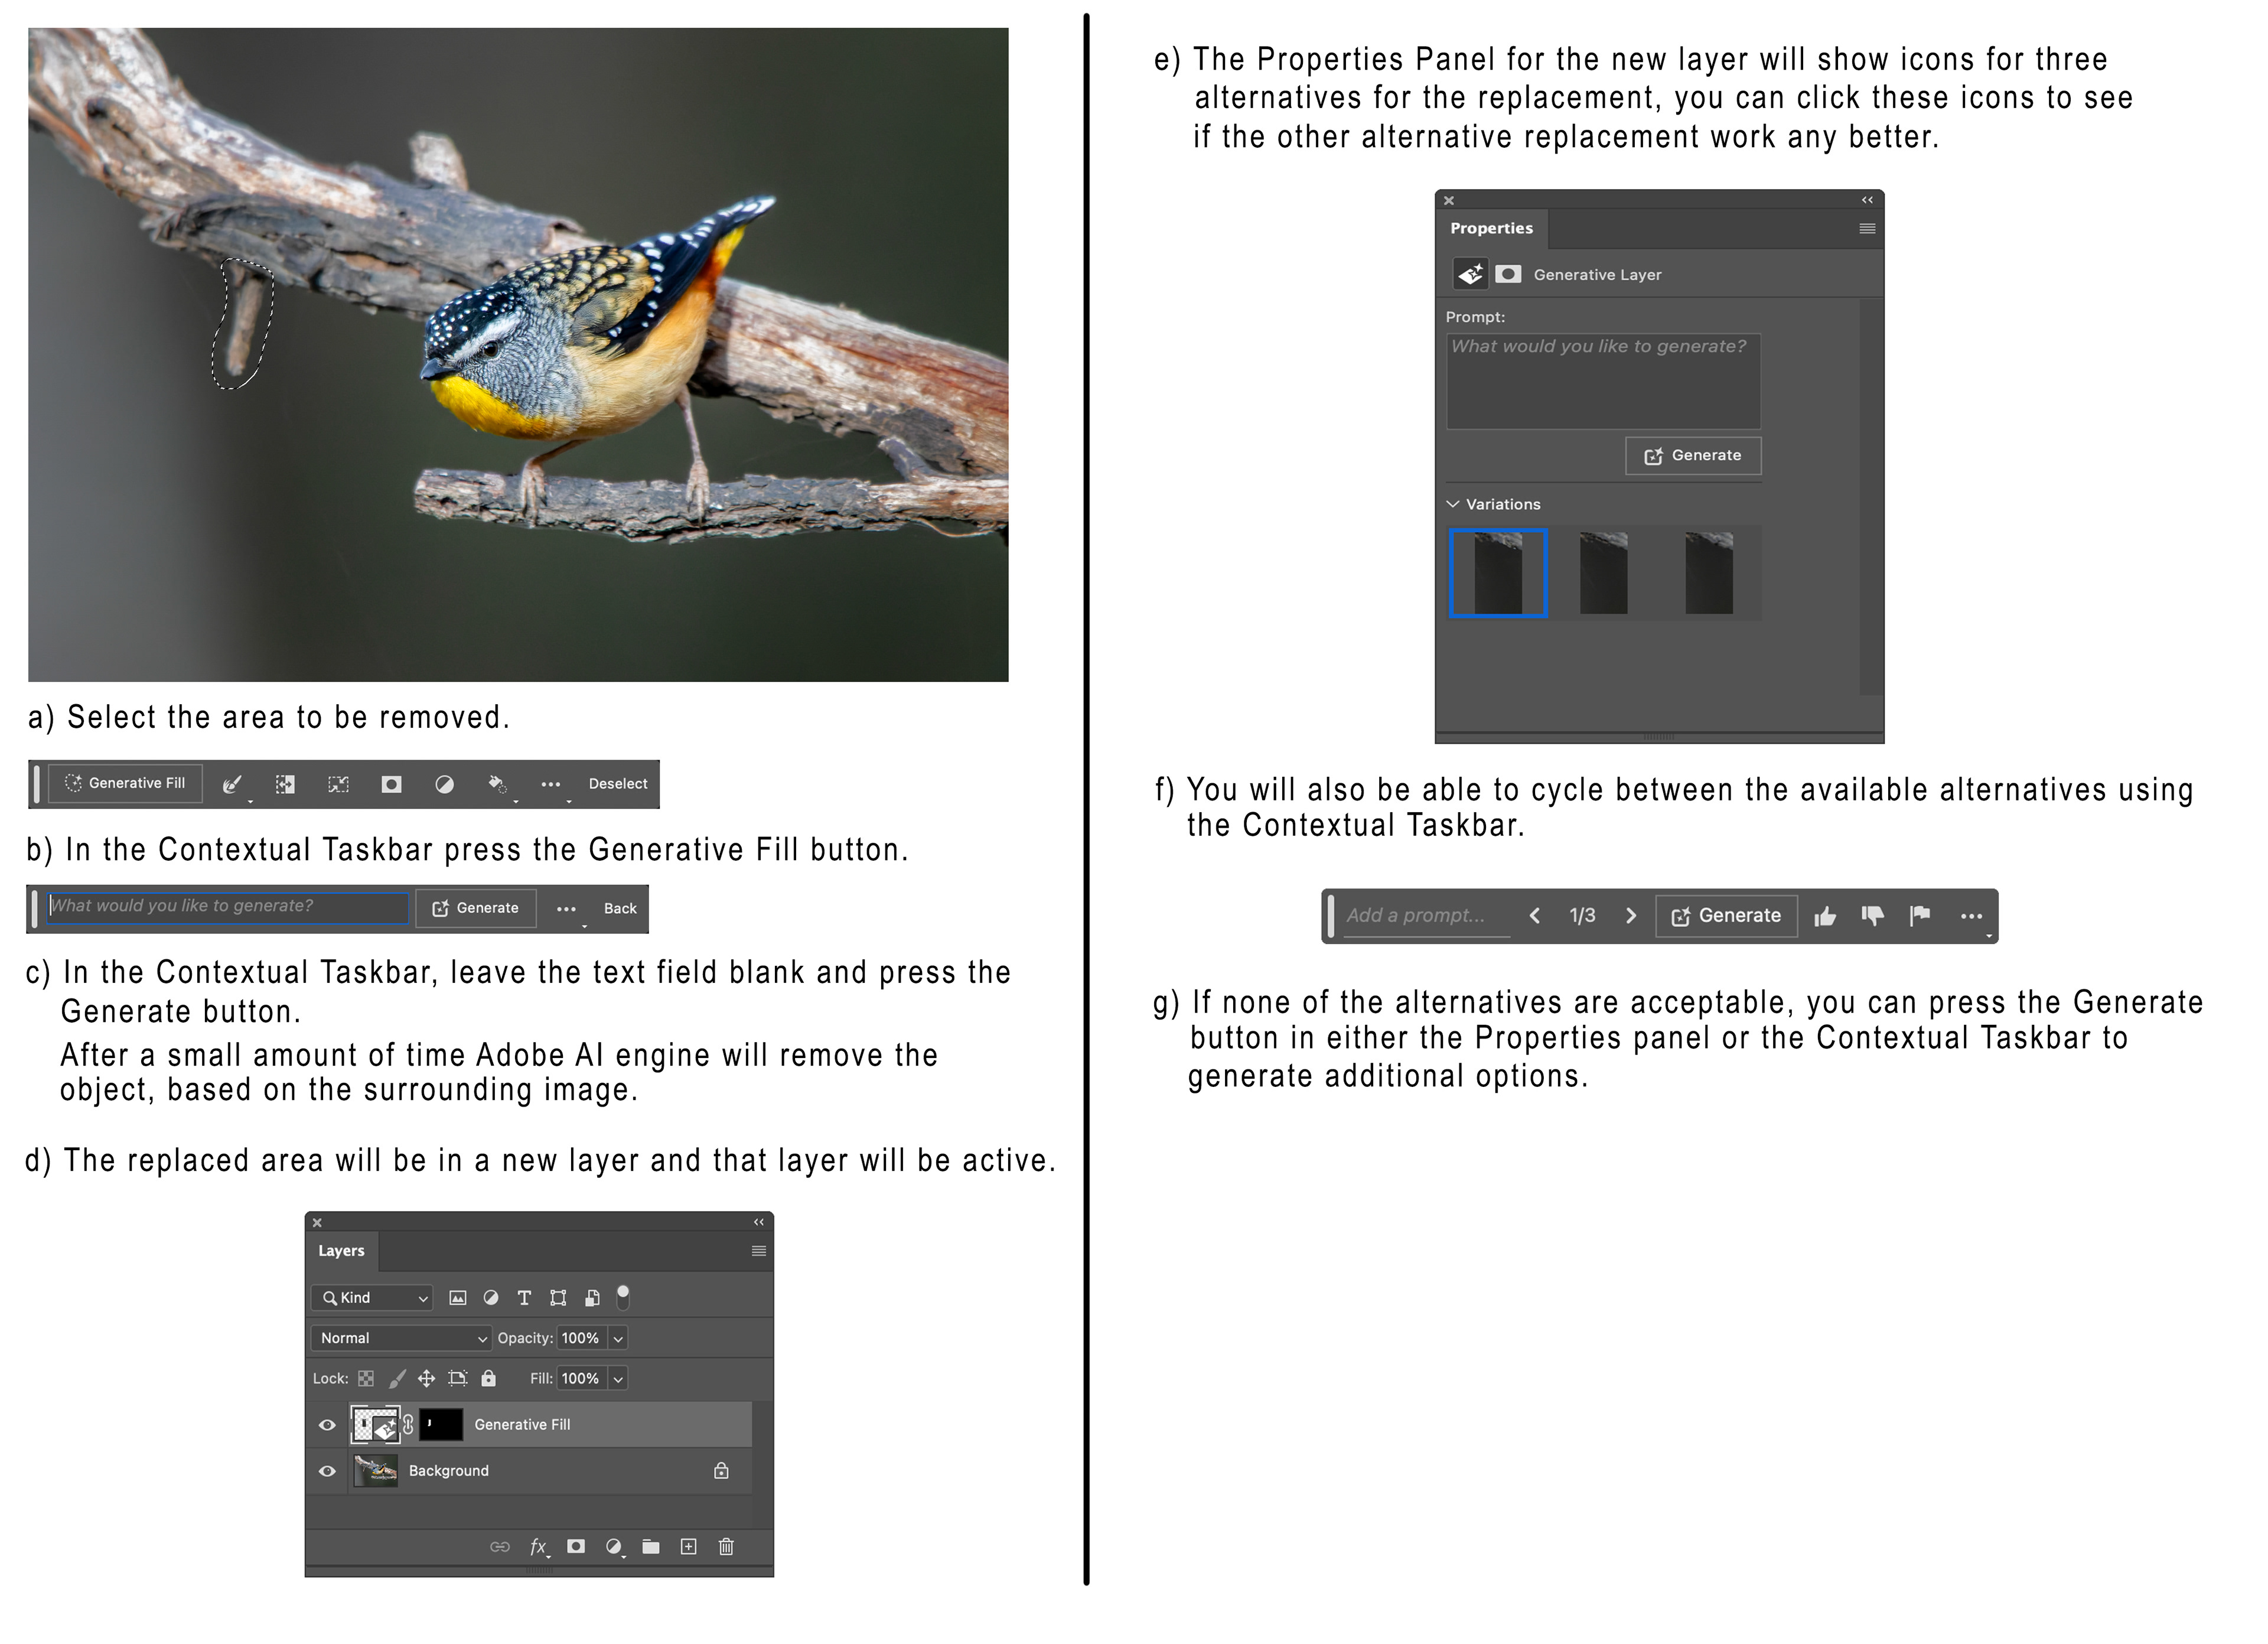
Figure 4 - Using Generative Fill to remove objects
One of the limitations of the Generative Fill function at the moment (like other AI image tools) is that the resolution of returned imagery is limited to 1024x1024 pixels. If you select an area bigger than this to remove you need to be aware that the resolution of the replaced imagery may not be high enough if the area around that being removed is sharp and detailed.
Both of these new tools do a terrific job and I have to say that since I have started using them I have hardly touched the Spot Healing Brush or Healing Brush tools. I still use the Clone Stamp and Patch Tool for clean-up, but only rarely.
If at first the job that is done by the Remove Tool or Generative Fill is not perfect, simply brush over the imperfect area again to clean things up. Both tools will do a good job of reconstructing lines or edges that may be missed on the first attempt.
Our tools keep on improving.
This article was first published in the September 2023 issue of Artists Down Under magazine.