The Nik Collection of Lightroom and Photoshop filters originally created by Nik Software, were acquired by Google in September 2012, and more recently by DxO in October 2017. The screen shots in this article are based on the latest free version that was supplied by Google as I have issues running the later DxO versions, but the information contained in the article is still relevant to all later versions.
All of the Nik filters are very powerful tools, providing you in most cases with presets, and then allowing you to make global adjustments using various sliders. The real power of the tools though comes with the use of control points which allow very accurate selective local adjustments, based both on the size of the control point and the luminosity and colour of the area directly under the centre of the control point.
Essentially when you place a control point on an image, it creates a complex mask that is based on the red, green, blue, hue, saturation, and brightness values of the area directly under the centre of the control point. These are very similar to luminosity masks, and range masks which I discussed in earlier articles. You can also restrict or expand the “circle of influence” or size of the control point by moving the slider that extends out from the centre of the control point.
Due to the fact that the purpose and operation of the various filters is different, the control points in each filter control different attributes, but in essence operation is very similar in each filter.
Let’s use Viveza as our first example, then look at the other filters in turn.
Viveza
Let’s take a look at the Viveza control panel (Figure 1) which is similar to most of the filters, I’ll highlight differences as we go through the other filters.
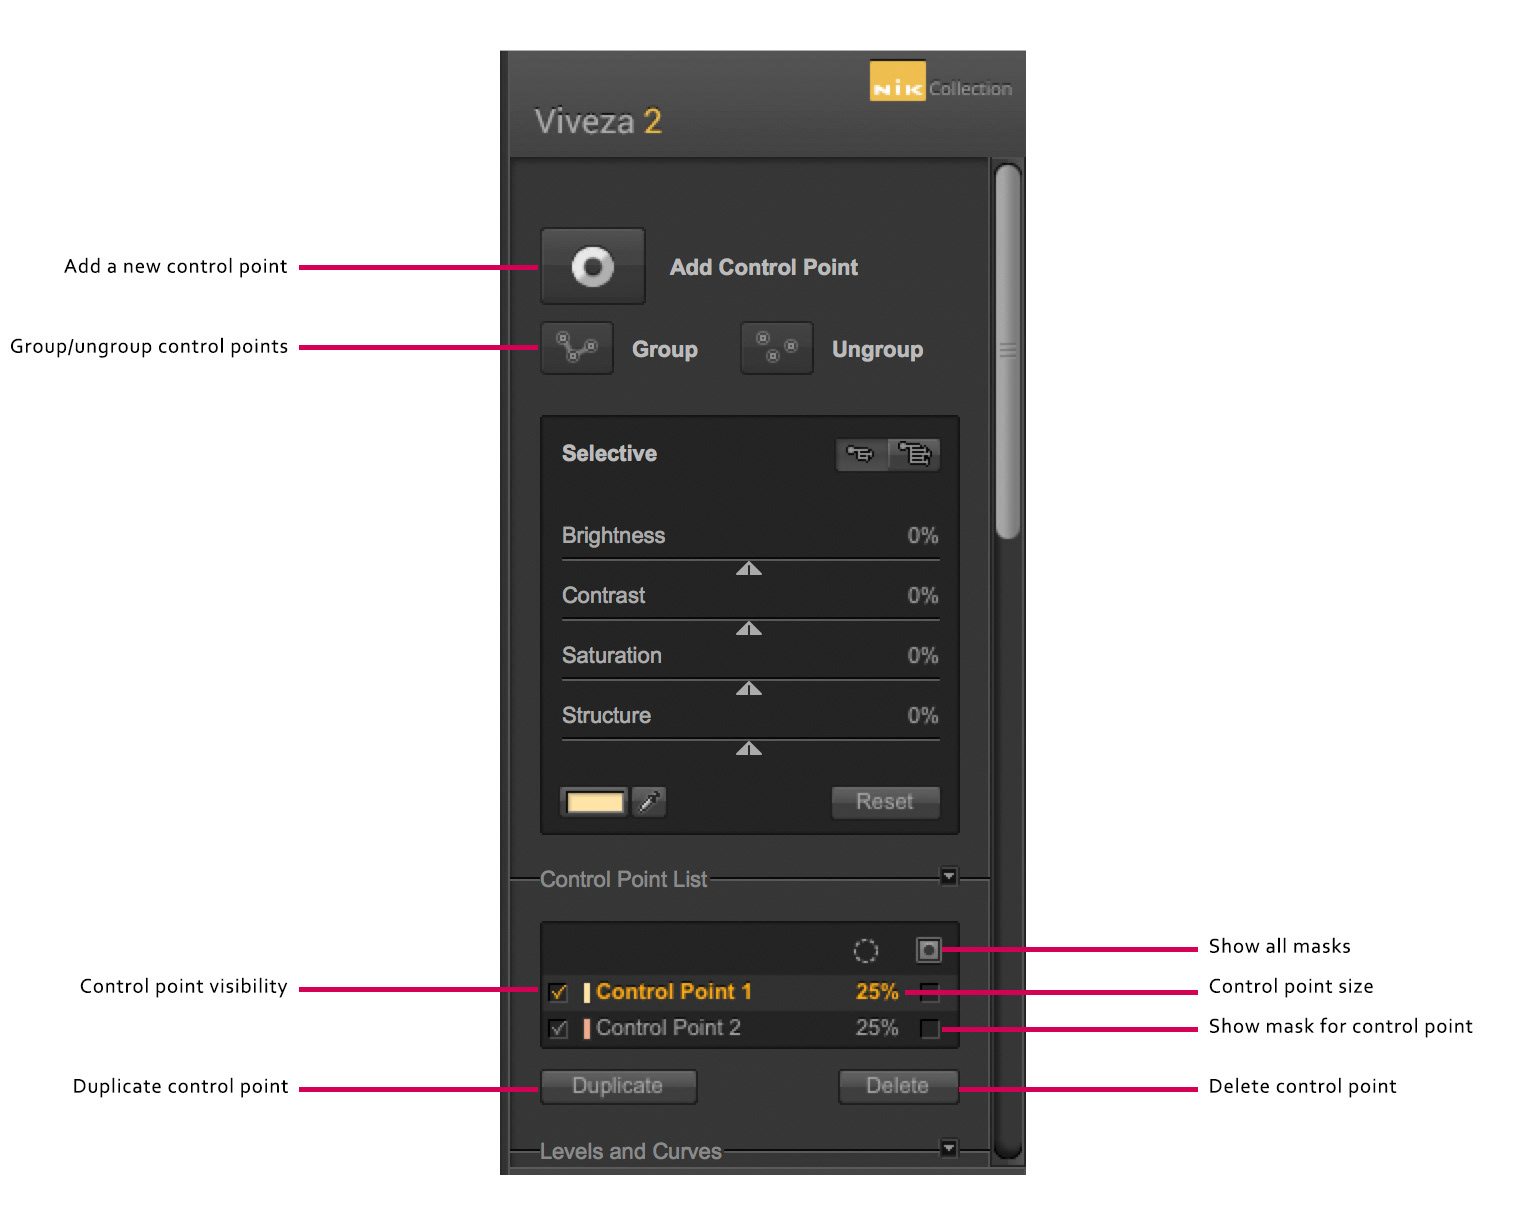
Fig 1 - Viveza Control Panel
You click the Add Control Point button, then go and click on the part of the image you want to selectively adjust. In most filters this button is similar, showing a light circle.
When you add a control point it will appear in the Control Point List (see Figure 1) – this is an expandable/collapsible section so you may have to click on the words “Control Point List”, or the small adjacent triangle, to see them.
The control point appears on the image as a small circle with a slider extending from it, and other sliders below. The number of sliders on a control point varies, filter by filter.
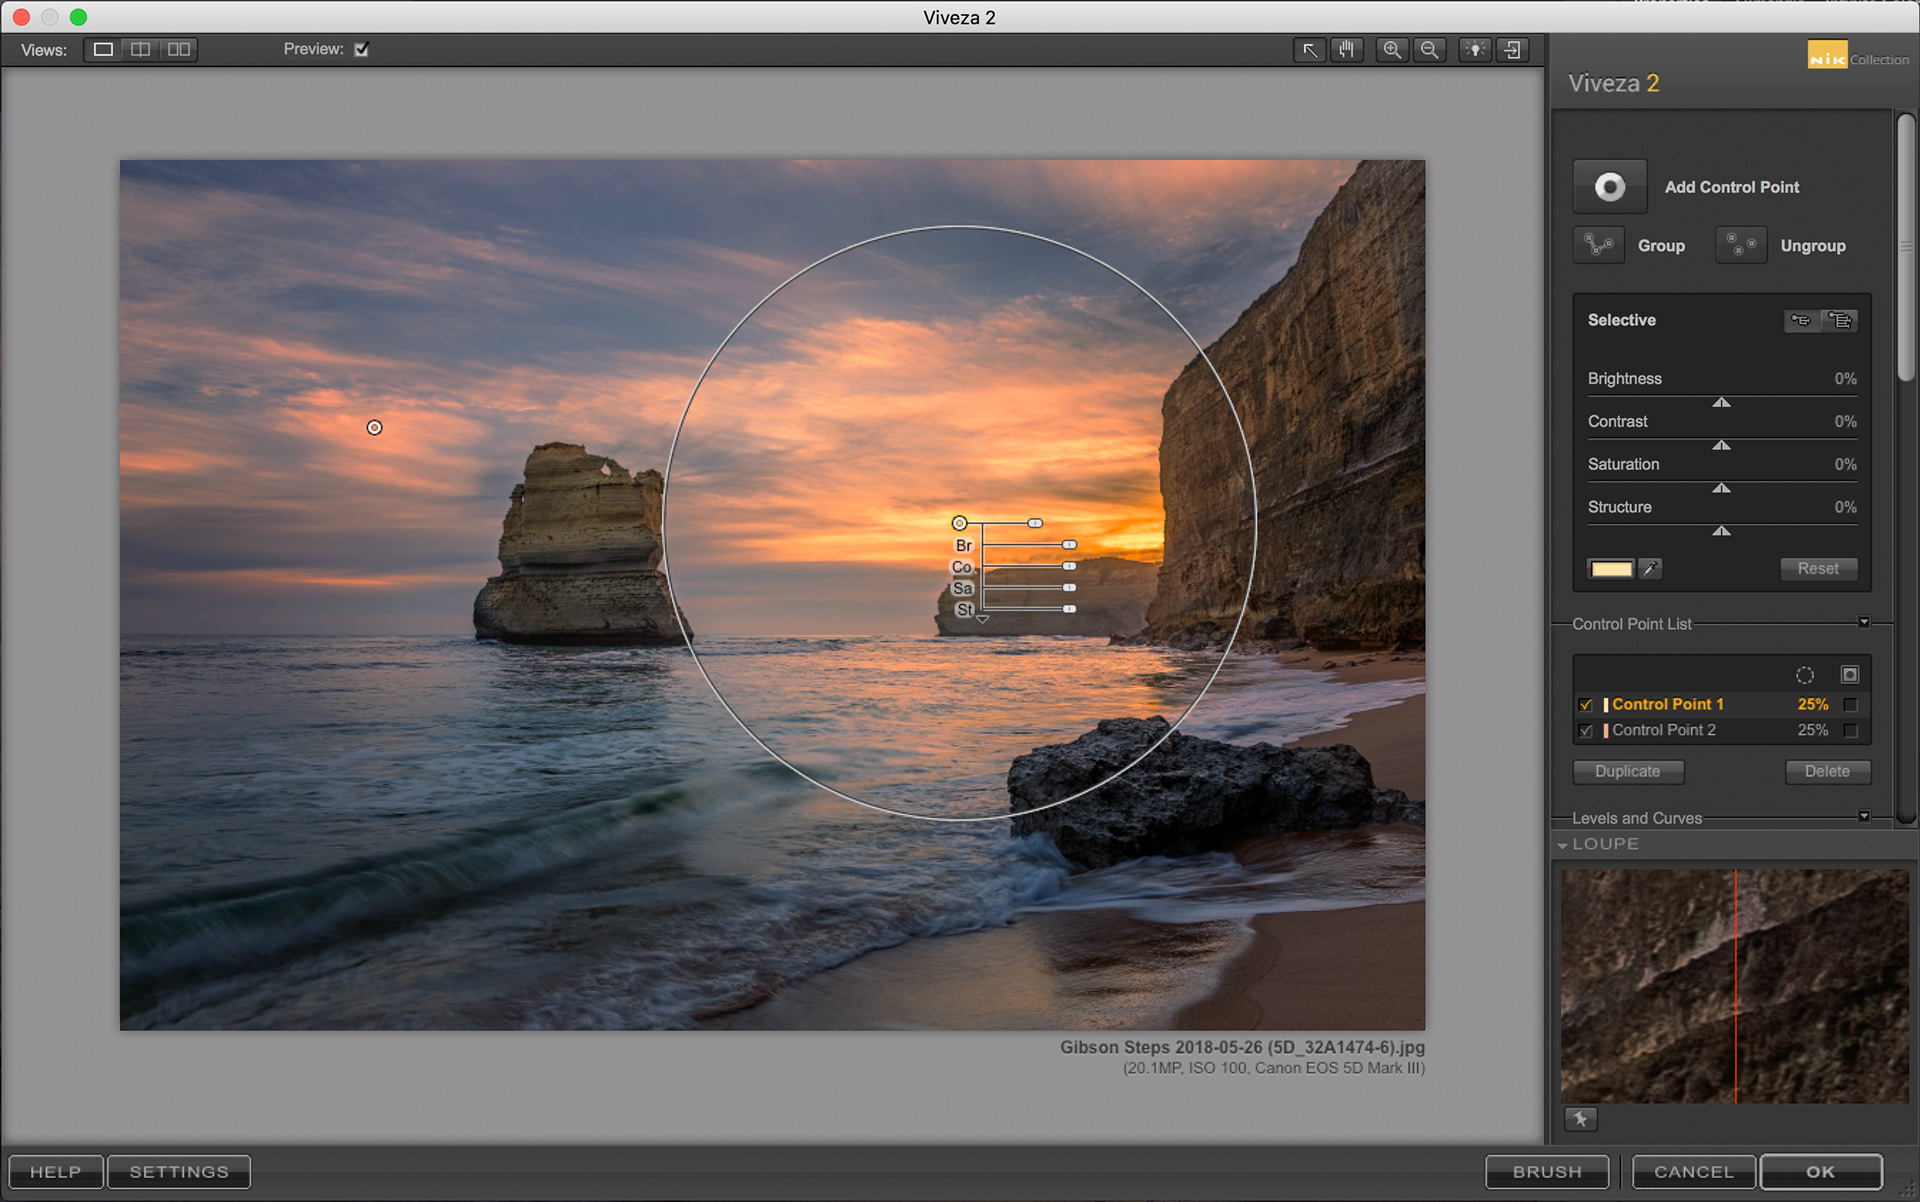
Fig 2 - Viveza Control Point
The size of the control point is shown by the outer circle, which is only visible as you drag the first slider to resize it.
You can click and drag the centre circle to move a Control Point around.
In figure 2, you’ll notice that there are sliders for Brightness, Contrast, Saturation and Structure, so as you drag these sliders these attributes are changed for the area of the image controlled by the control points mask. Note that at the bottom of the rows of sliders there is a small triangle. Click this to expand the list to show the expanded list of Vivexa’s attributes.
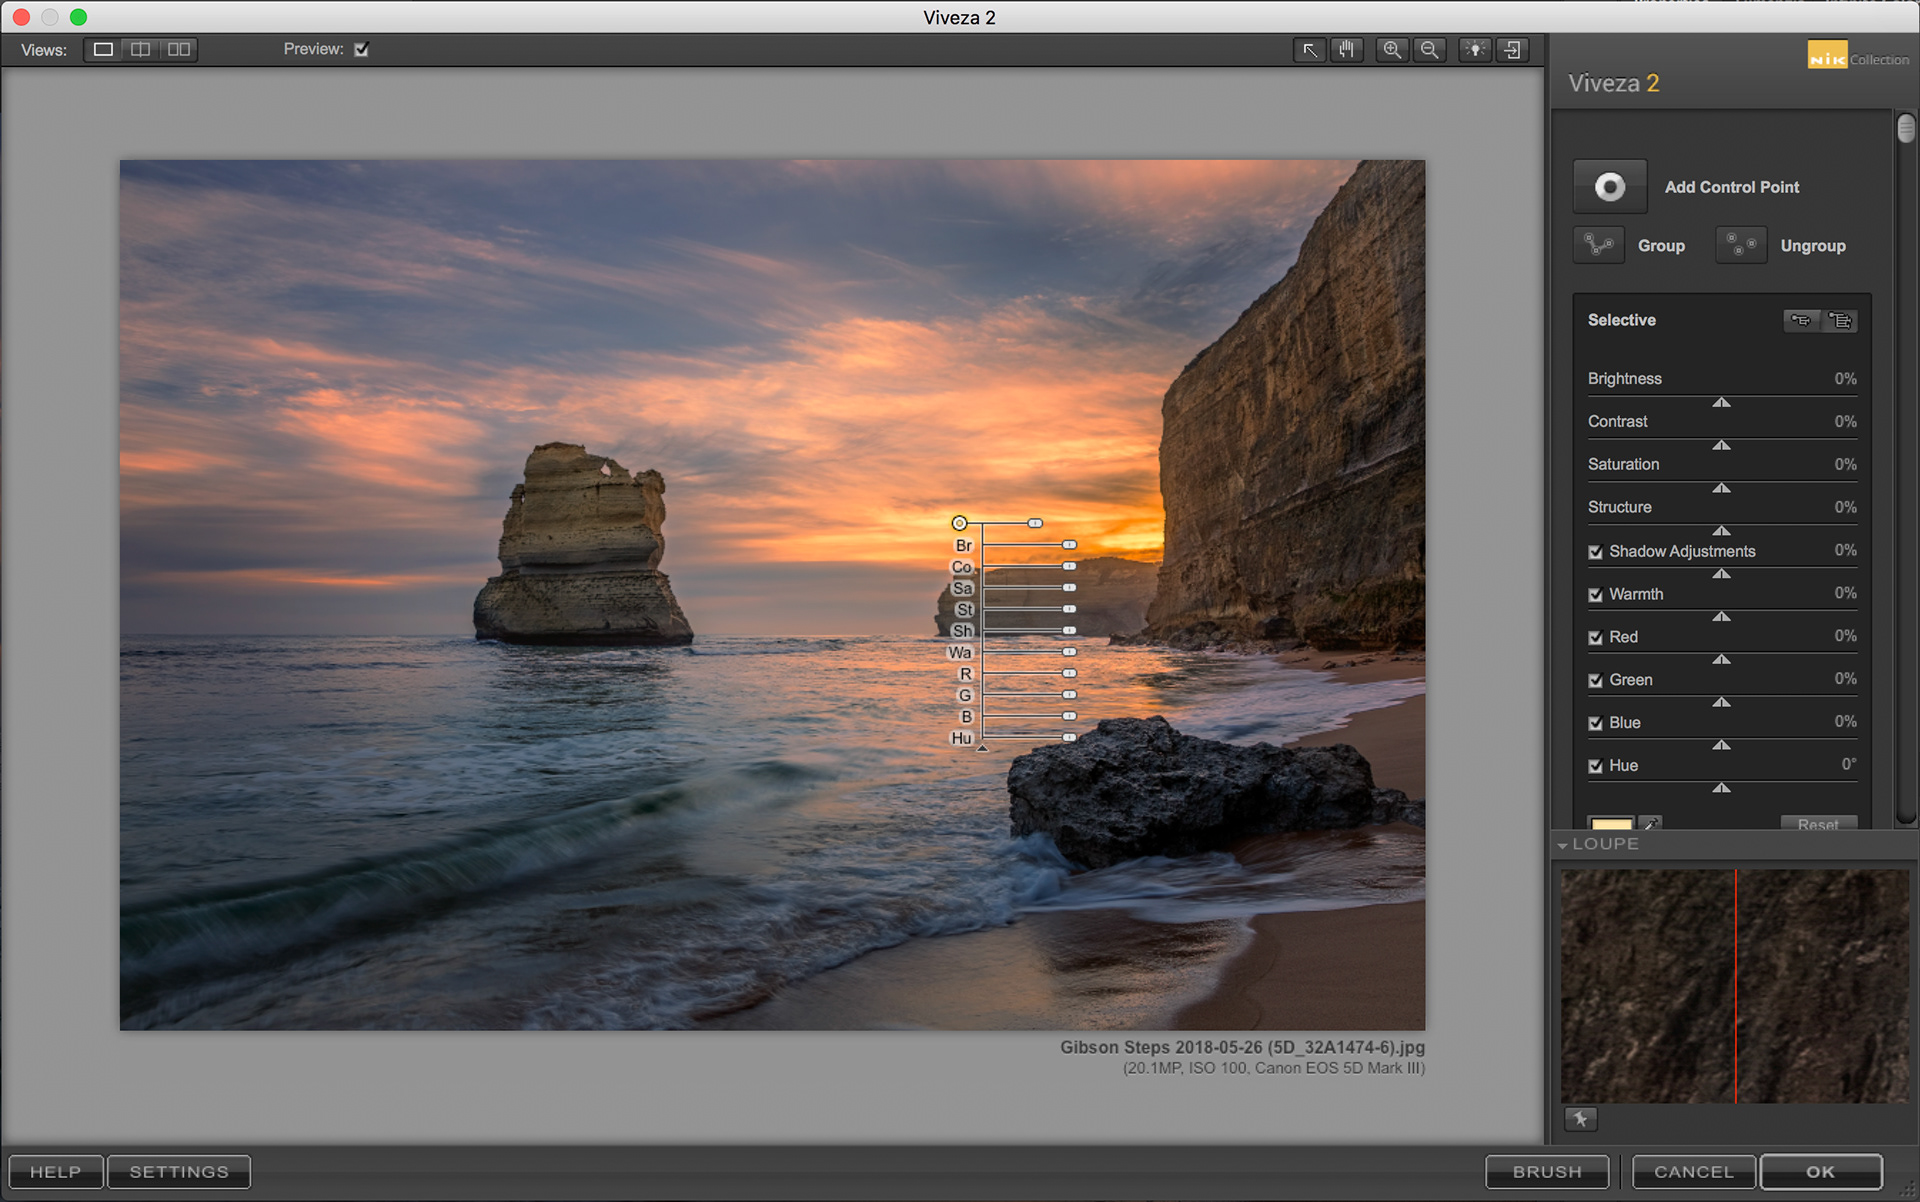
Fig 3 – Viveza Control Point with extended adjustment list
You’ll see we now have sliders where we can adjust Shadow Adjustments, Warmth, Red, Green, Blue and Hue.
You can add many control points to an image to make different adjustments to different areas.
If you want to see the effect a particular control is having remove the checkmark in the box on the left hand side of the line in the Control Point List (refer “Control point visibility” in Figure 1). This works in the same way as the “eye” visibility indicator on a layer in the Photoshop layer panel.
If you wish to get a better idea of the area that is being affected by the control point you can turn on the mask view for the control point. Do this by clicking on the box on the right hand side of the line in the Control Point List (refer “Show mask for control point” in Figure 1).
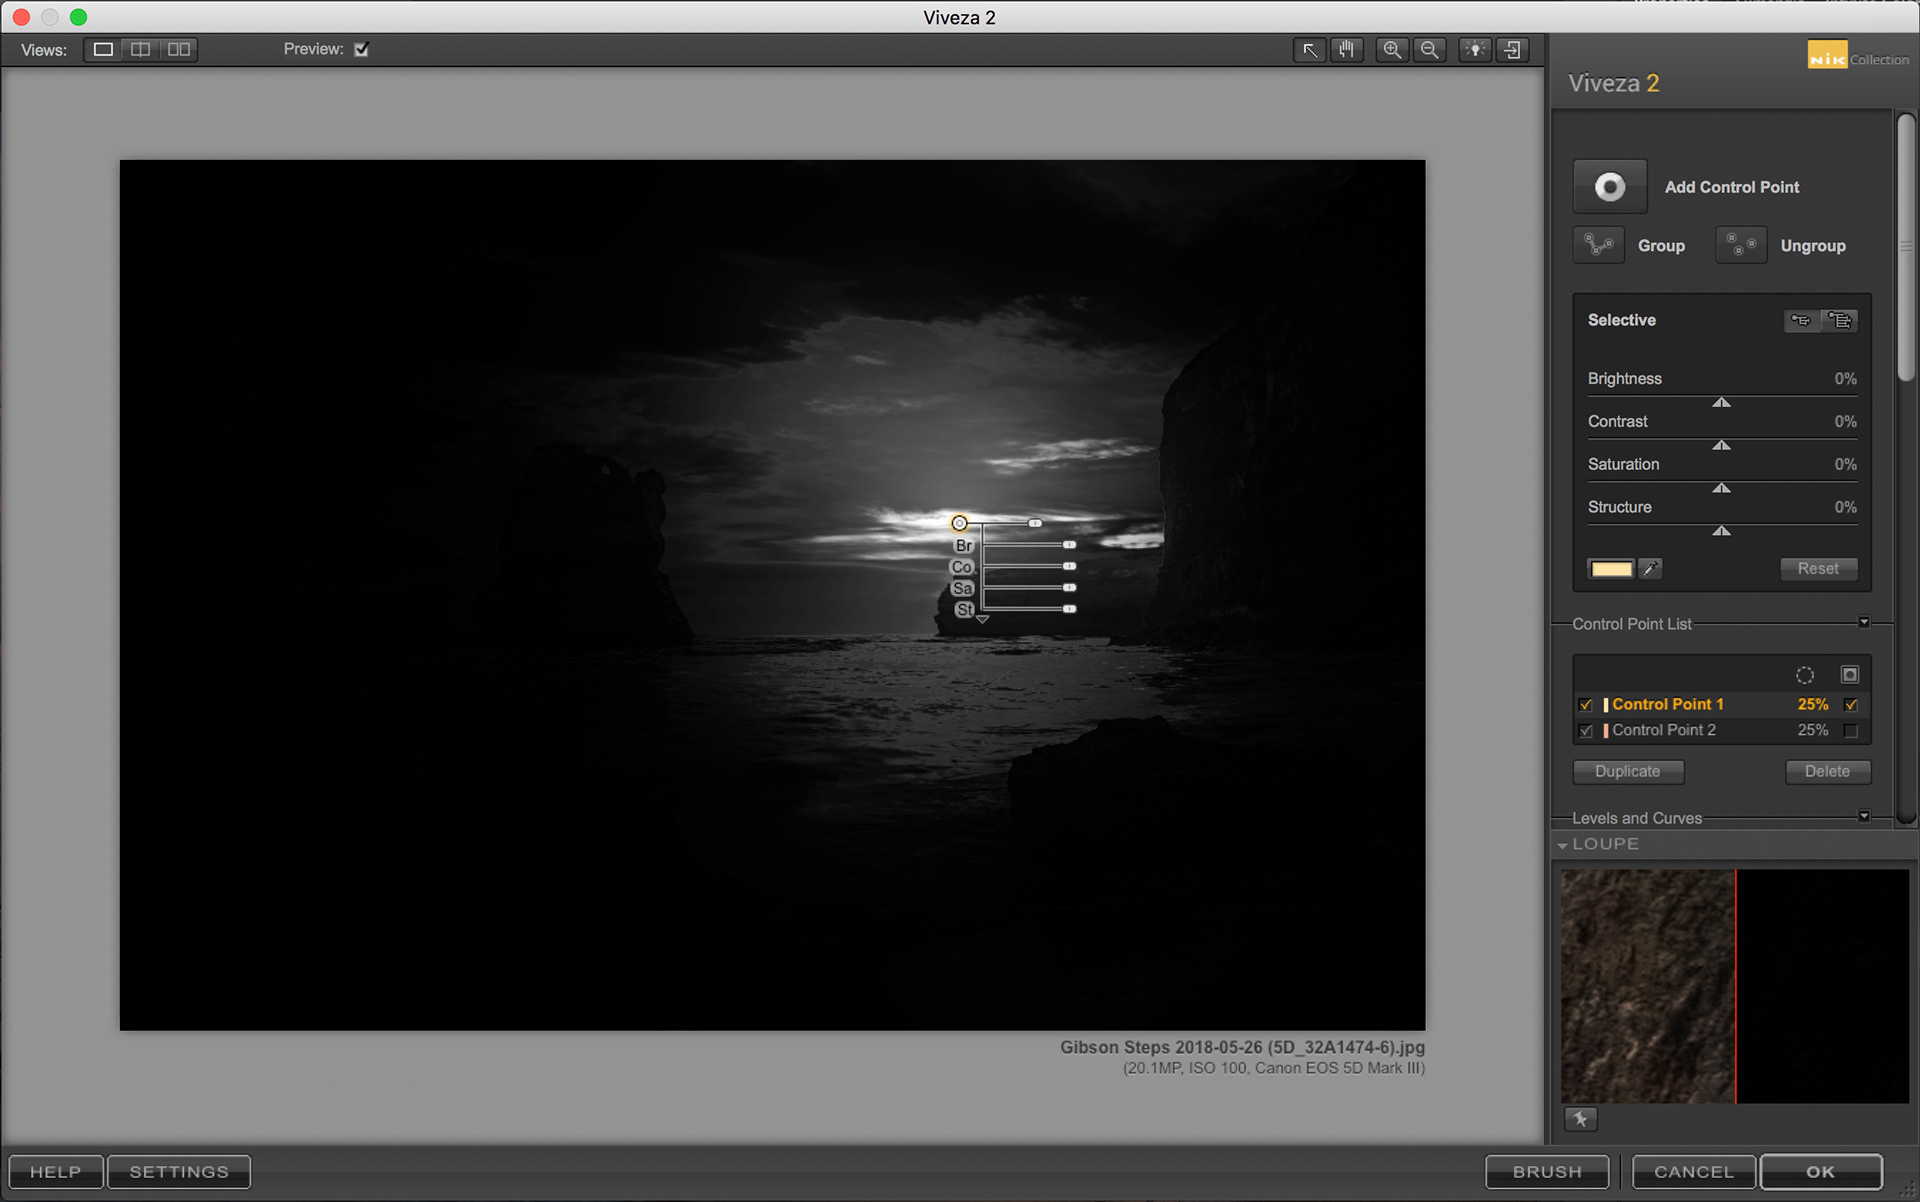
Fig 4 – Viveza Control Point showing mask view
When in mask view, the mask changes dynamically as you move the control point. Resizing the control point while in mask mode is useful too to see the areas of the image that will be affected.
You can delete the active control point using the Delete button in the control panel (for some filters it is a trashcan), or by pressing the Delete key on the keyboard.
You can duplicate a control point using the Duplicate button in the control panel, or by holding down the Option(Alt) key and dragging the control point.
You can use the Group and Ungroup buttons to group and ungroup control points. To group control points first select the control points you want to group by clicking on the first, then Command(Ctrl)+clicking on the others. You click on the control points themselves (use the centre circle) or on their names in the Control Point List. Once you have them selected press the Group button. All of the control points in the group except one will lose their adjustment sliders, and the entries in the Control Point List will replaced by one Group entry.
When grouped, you control the sliders of all of the control points from the sliders on one of them. So, this is a useful feature if you want to apply the same adjustment to lots of smaller areas in the image. Each individual control point in the group can still be moved around separately and retain their individual size sliders.
Analog Efex Pro
Analog Efex Pro has two different sort of control points. Each of the preset types allow you to create a control point to selectively adjust the basic adjustments of Detail Extraction, Brightness, Contrast and Saturation.
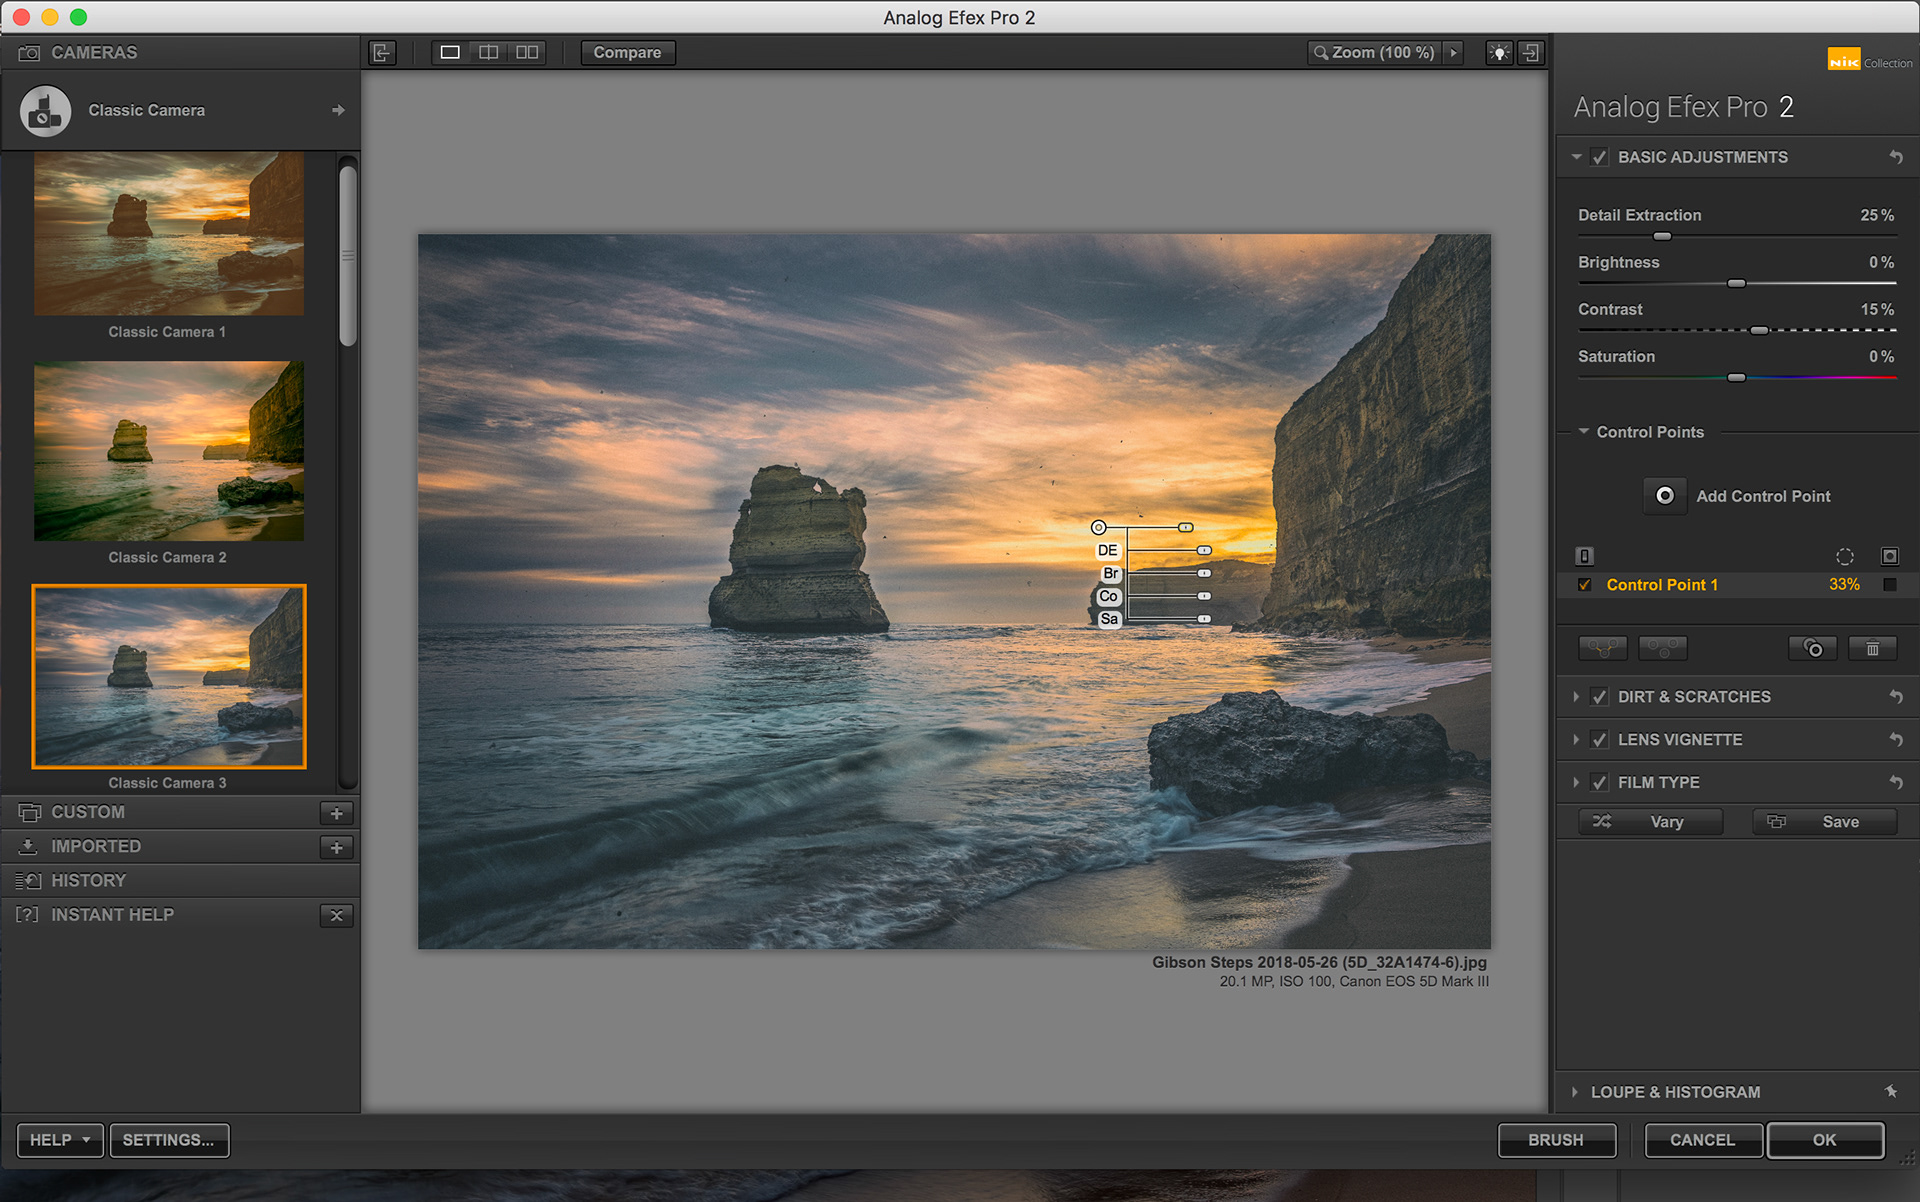
Fig 5 – Analog Efex Pro Control Point
In addition any of the preset types that have a Dirt & Scratches, Light Leaks or Photo Plate adjustment will give you control points to control the opacity (or Texture strength as its referred to) of that particular effect.
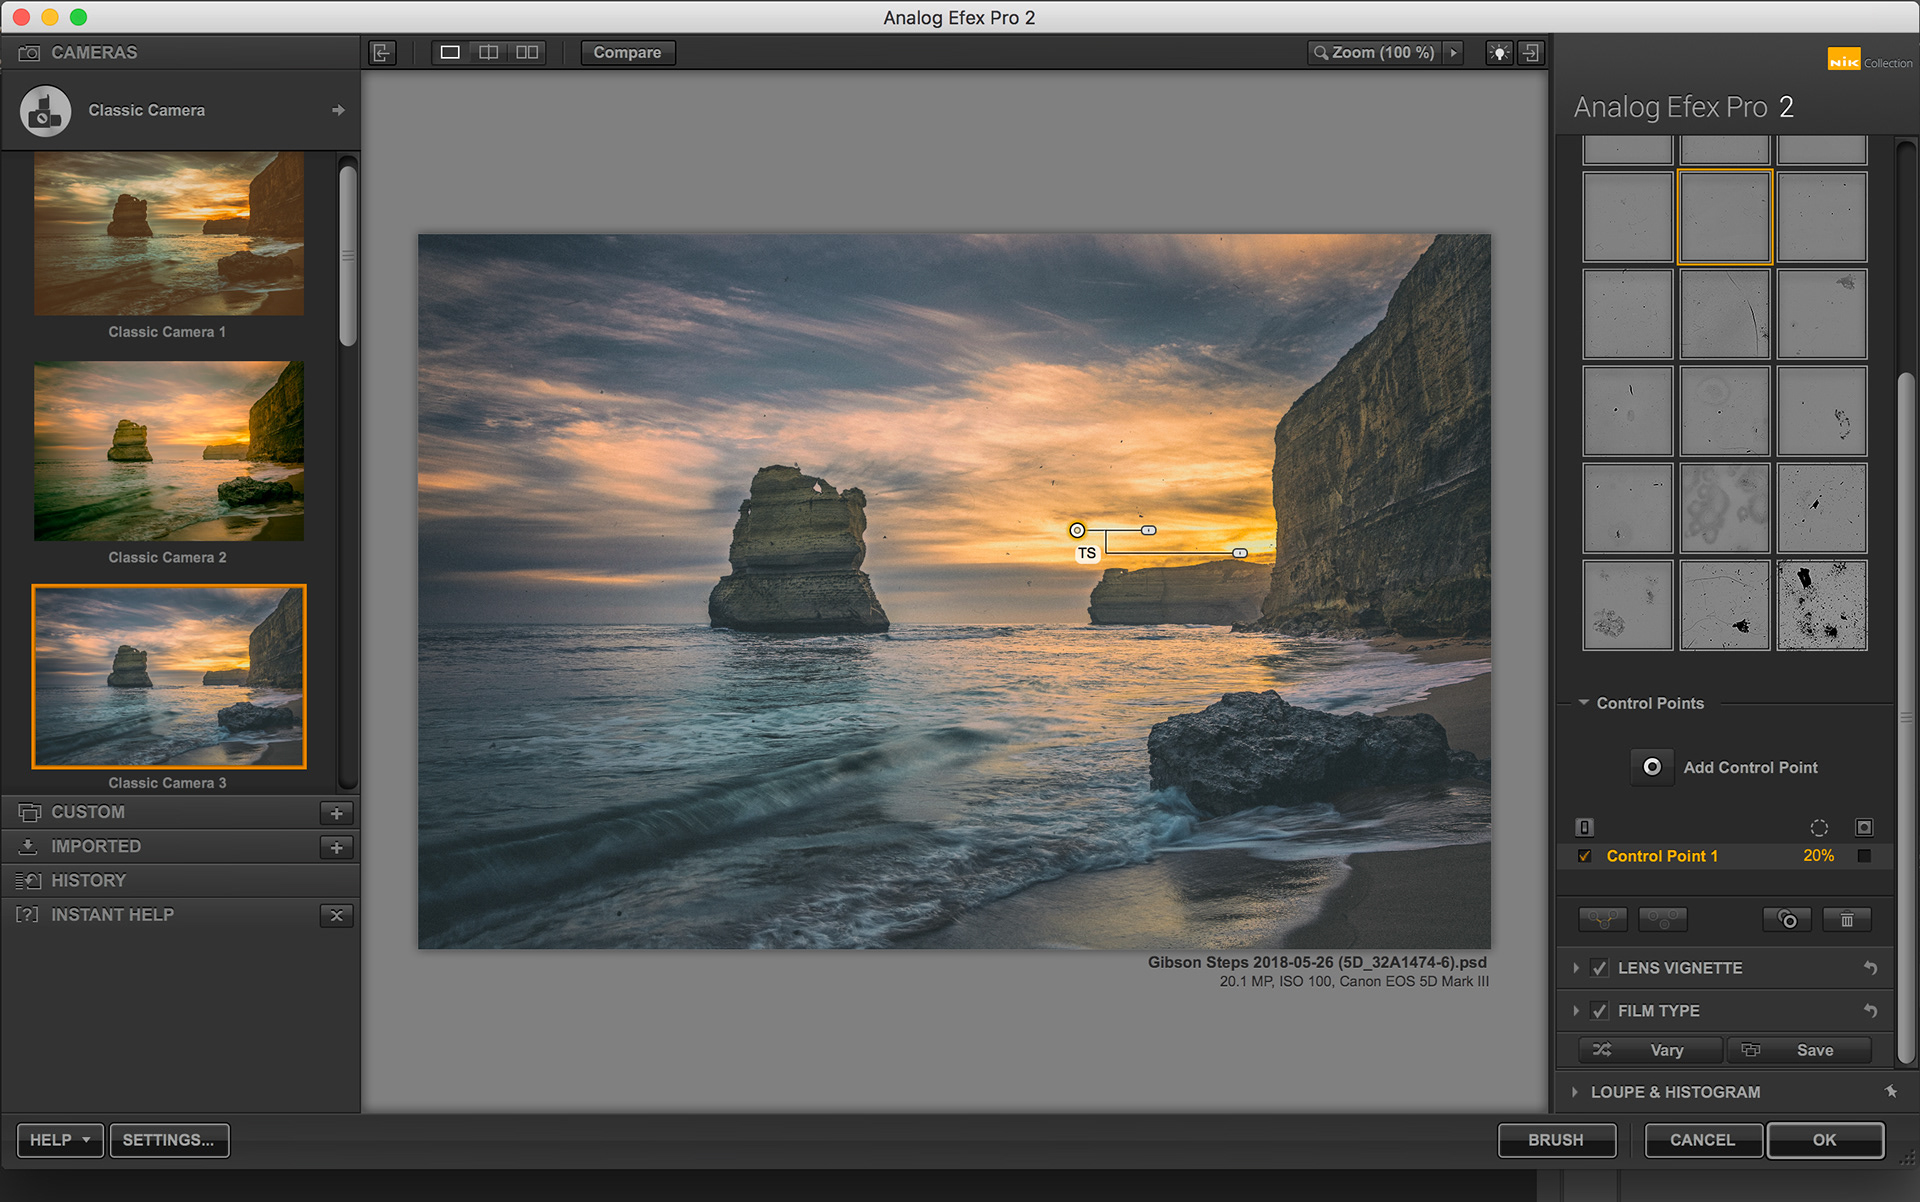
Fig 6 - Analog Efex Pro Dirt and Scratches Control Point
Color Efex Pro
Color Efex Pro works slightly differently to the previous filters. I think it has been set up this way due to the large number of different presets you have at your disposal, that have so many different adjustment variables.
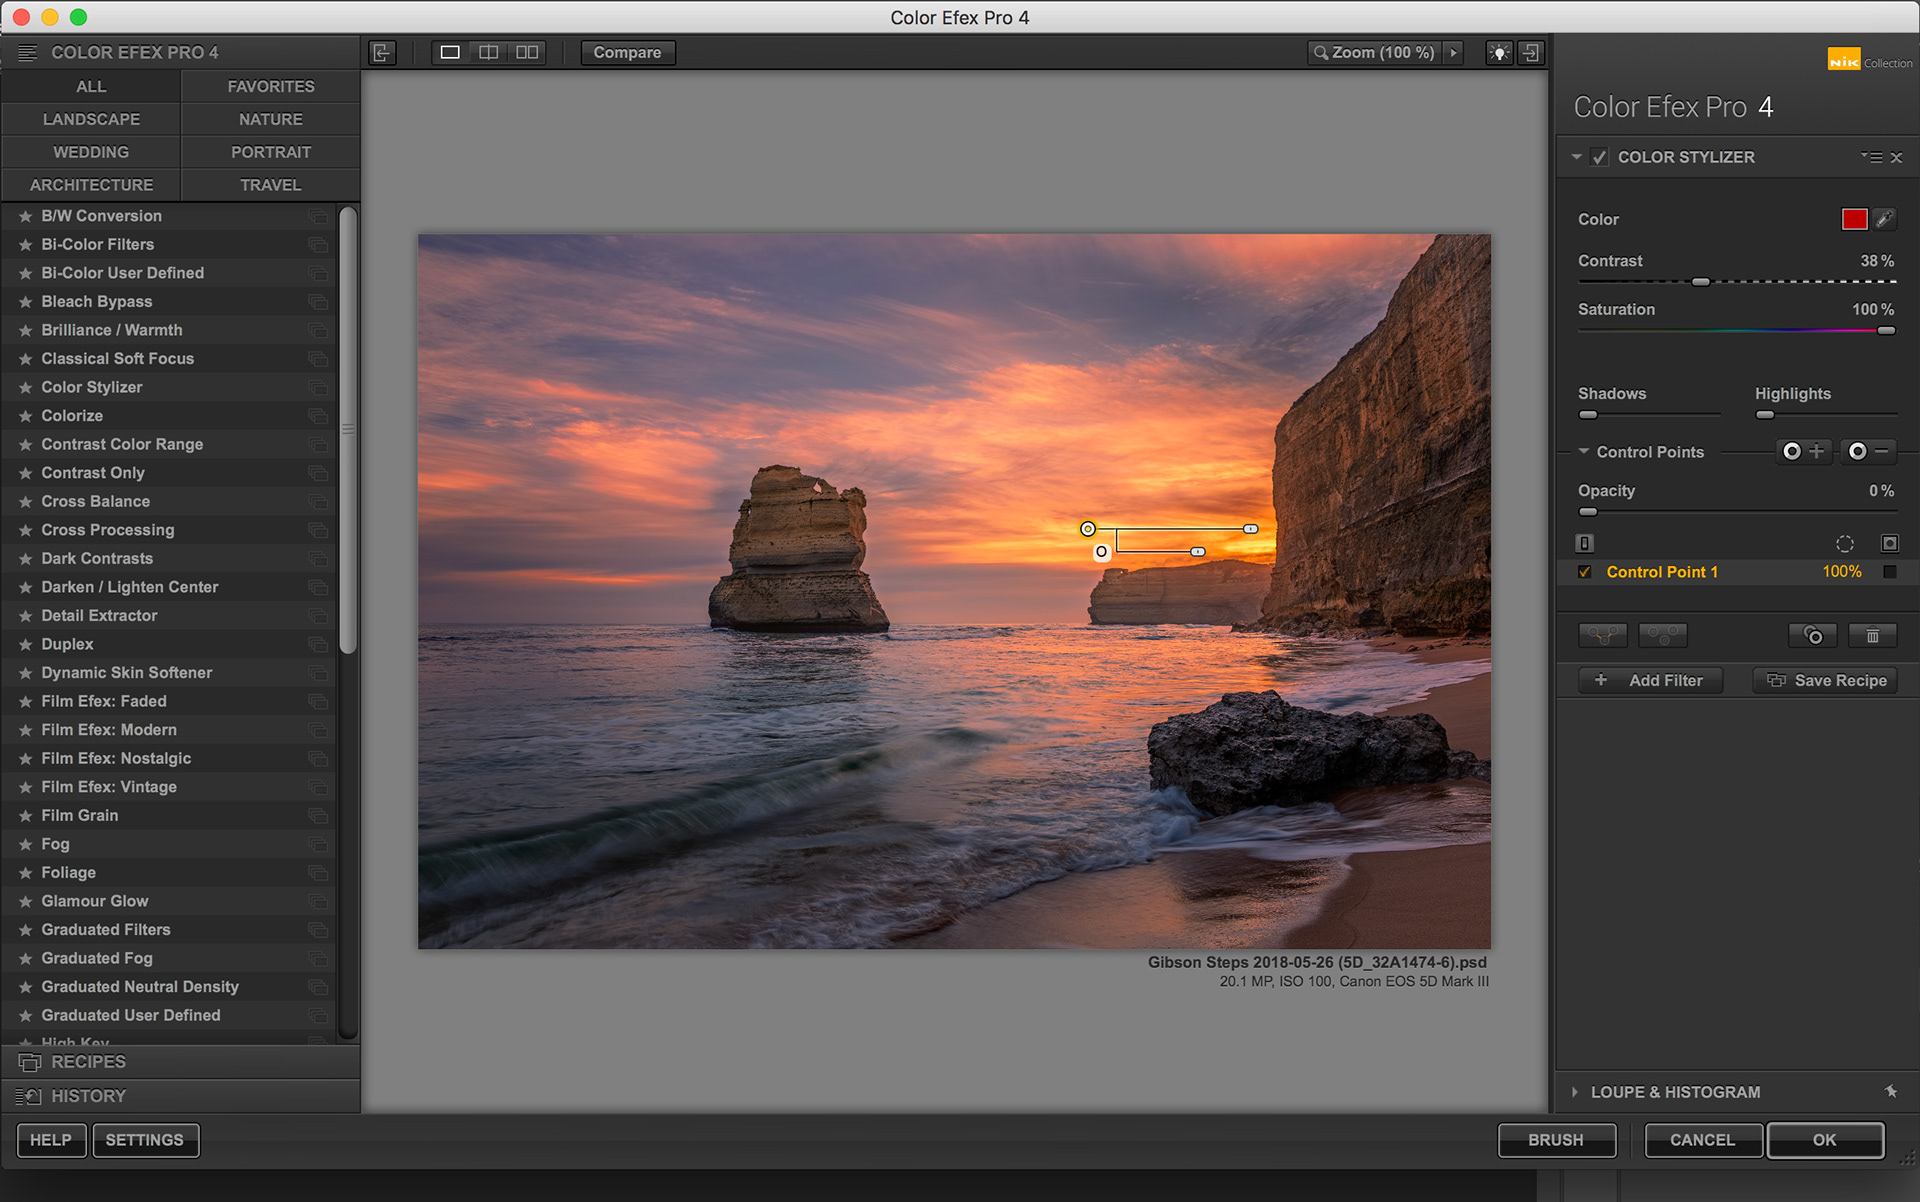
Fig 7 - Color Efex Pro Control Point
For each of the different presets you have the opportunity to apply multiple control points that allow you to vary the opacity of the effect. You will see there is an Add Control Point button with a plus sign next to it, and another with a minus sign next to it. The plus button adds a control point with an opacity set initially to 100%, so use this to add the effect. The minus button adds a control point with an opacity set initially to 0%, so use this to remove the effect.
The controls points added by both buttons are essentially the same, it’s just that the opacity slider is initially set to the opposite end of the scale, and in both cases you can adjust up or down as desired.
Please note that if you have created control points, and then you click away onto another preset, you will lose the control points you have created.
You can however save control points using the Copy Control Points feature in the drop-down menu at the top right of the control panel, and then paste them back or into another filter using the Paste Control Points feature found in the same menu.
If you choose to stack filters using the Add Filter button, then obviously any control points you created are saved, and you can use control points in all of the stacked filters.
DFine
To access the control points in Dfine you must be on the Reduce tab in the Control Panel and have Control Points selected in the Method drop-down menu.
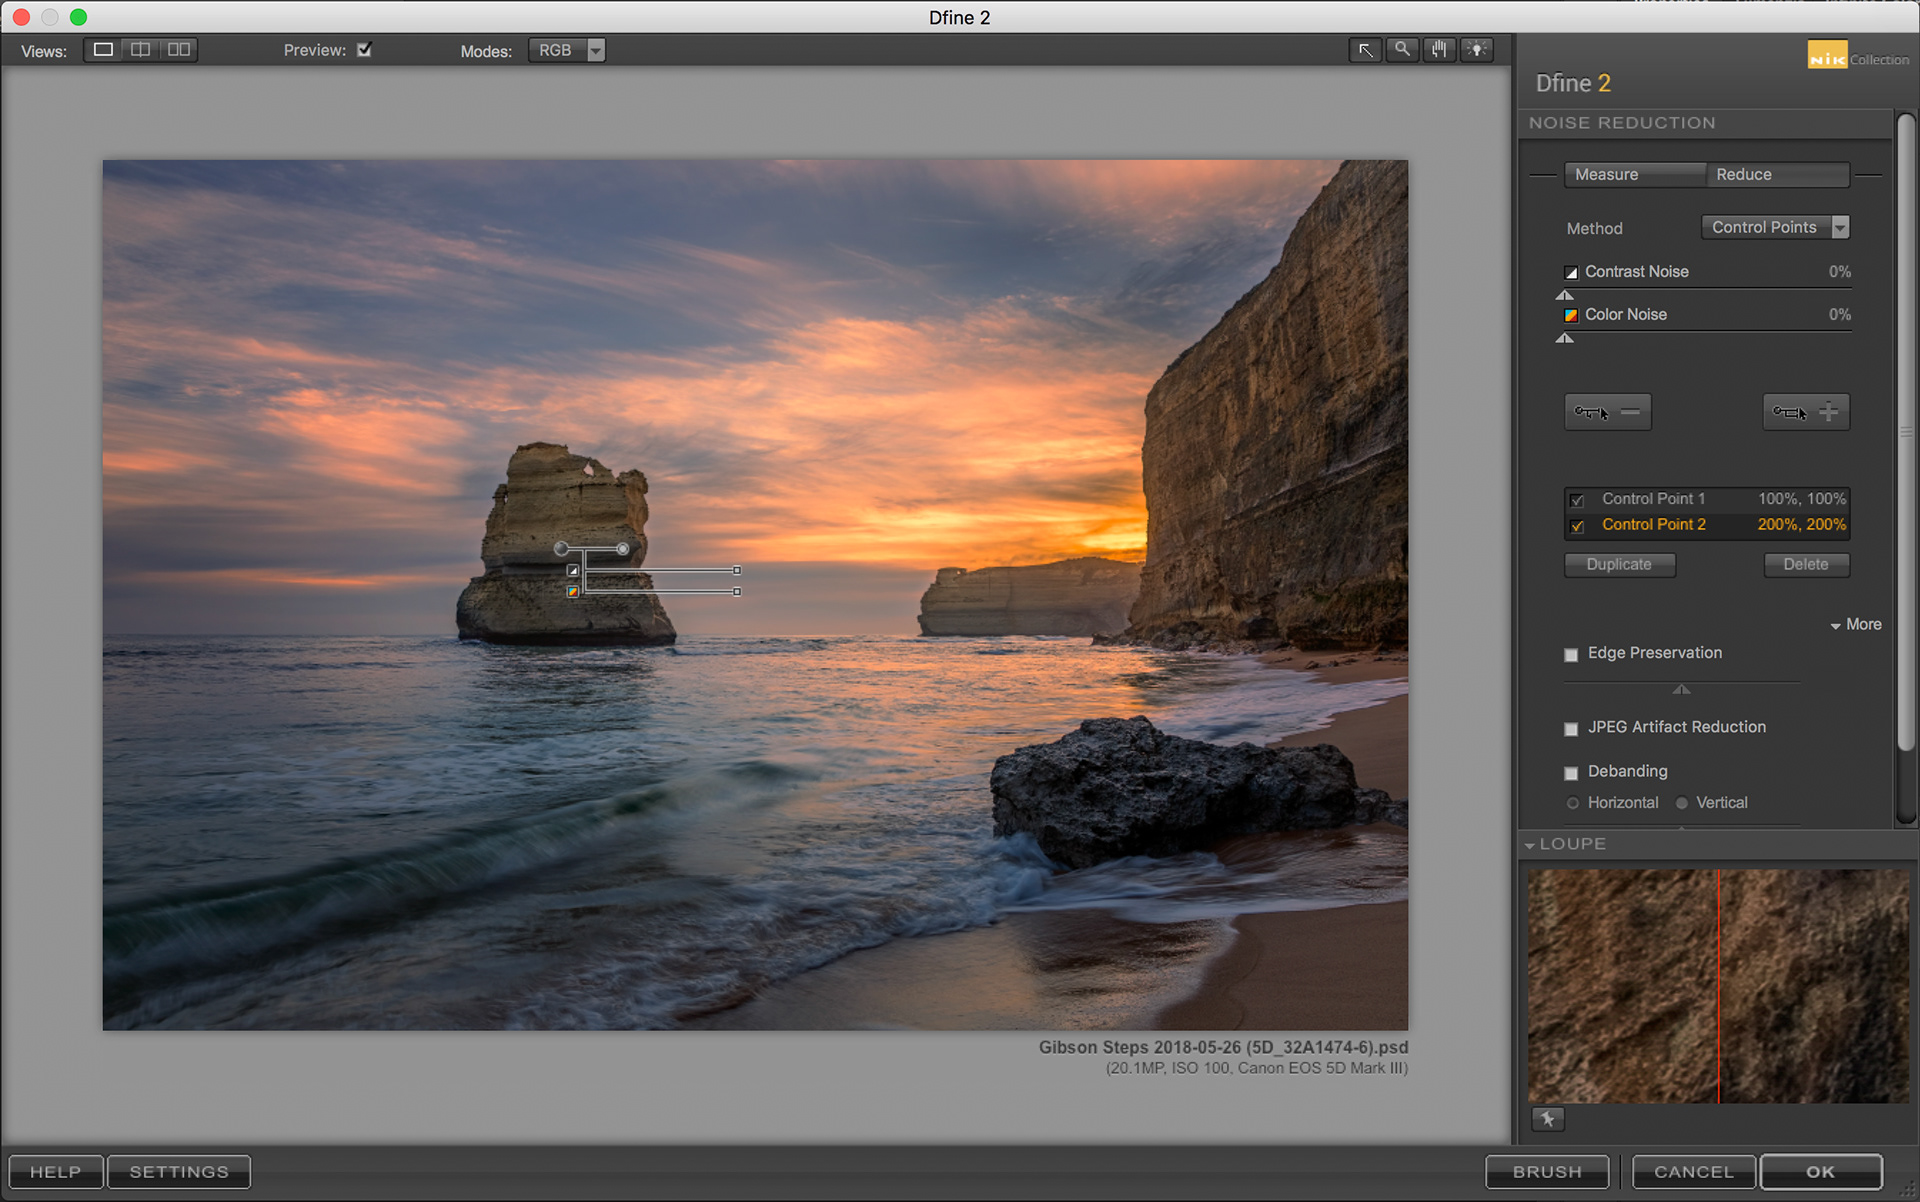
Fig 8 – Dfine Control Point
The first thing you will notice is that the control point buttons do not have the usual circle icon on them, and that like Color Efex Pro there is a plus and a minus button. The Plus sets both sliders at 100%, the Minus at 0% (note that these sliders allow values from 0% to 200%).
The control points in DFine have two sliders (in addition to the standard size slider), one each for the Contrast Noise and Color Noise sliders.
HDR Efex Pro
The control points in HDR Efex Pro can be found in the Selective Adjustments section of the Control Panel.
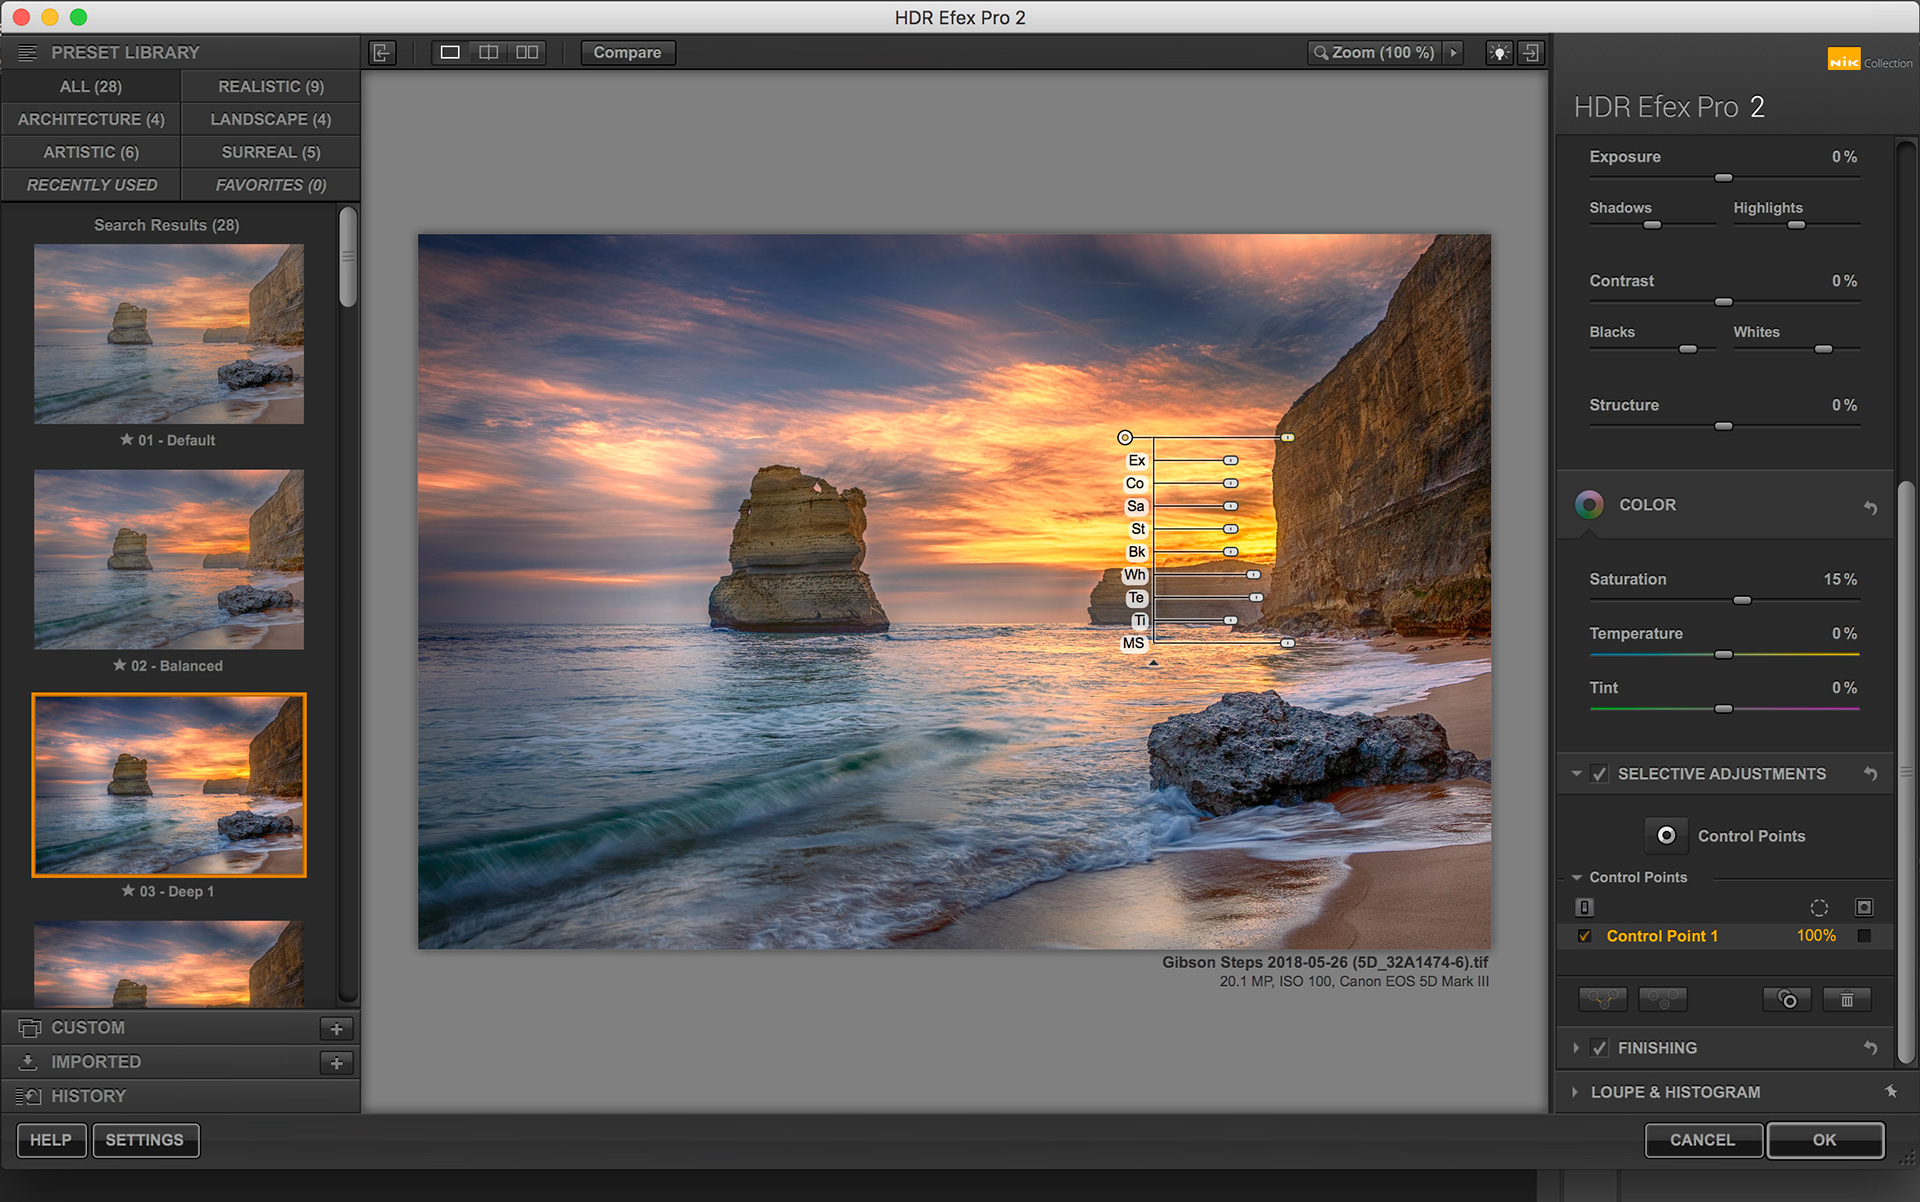
Fig 9 – HDR Efex Pro Control Point
Like the Viveza control points, in HDR Efex Pro, a control point can be expanded / contracted using the little triangle at the bottom of the sliders. The expanded slider list contains sliders for Exposure, Contrast, Saturation, Structure, Blacks, Whites, Temperature, Tint and Method Strength.
Silver Efex Pro
Again, like Viveza and HDR Efex Pro, the control points in Silver Efex Pro are expandable, when fully expanded they contain sliders for Brightness, Contrast, Structure, Amplify Whites, Amplify Blacks, Fine Structure and Selective Colorization.
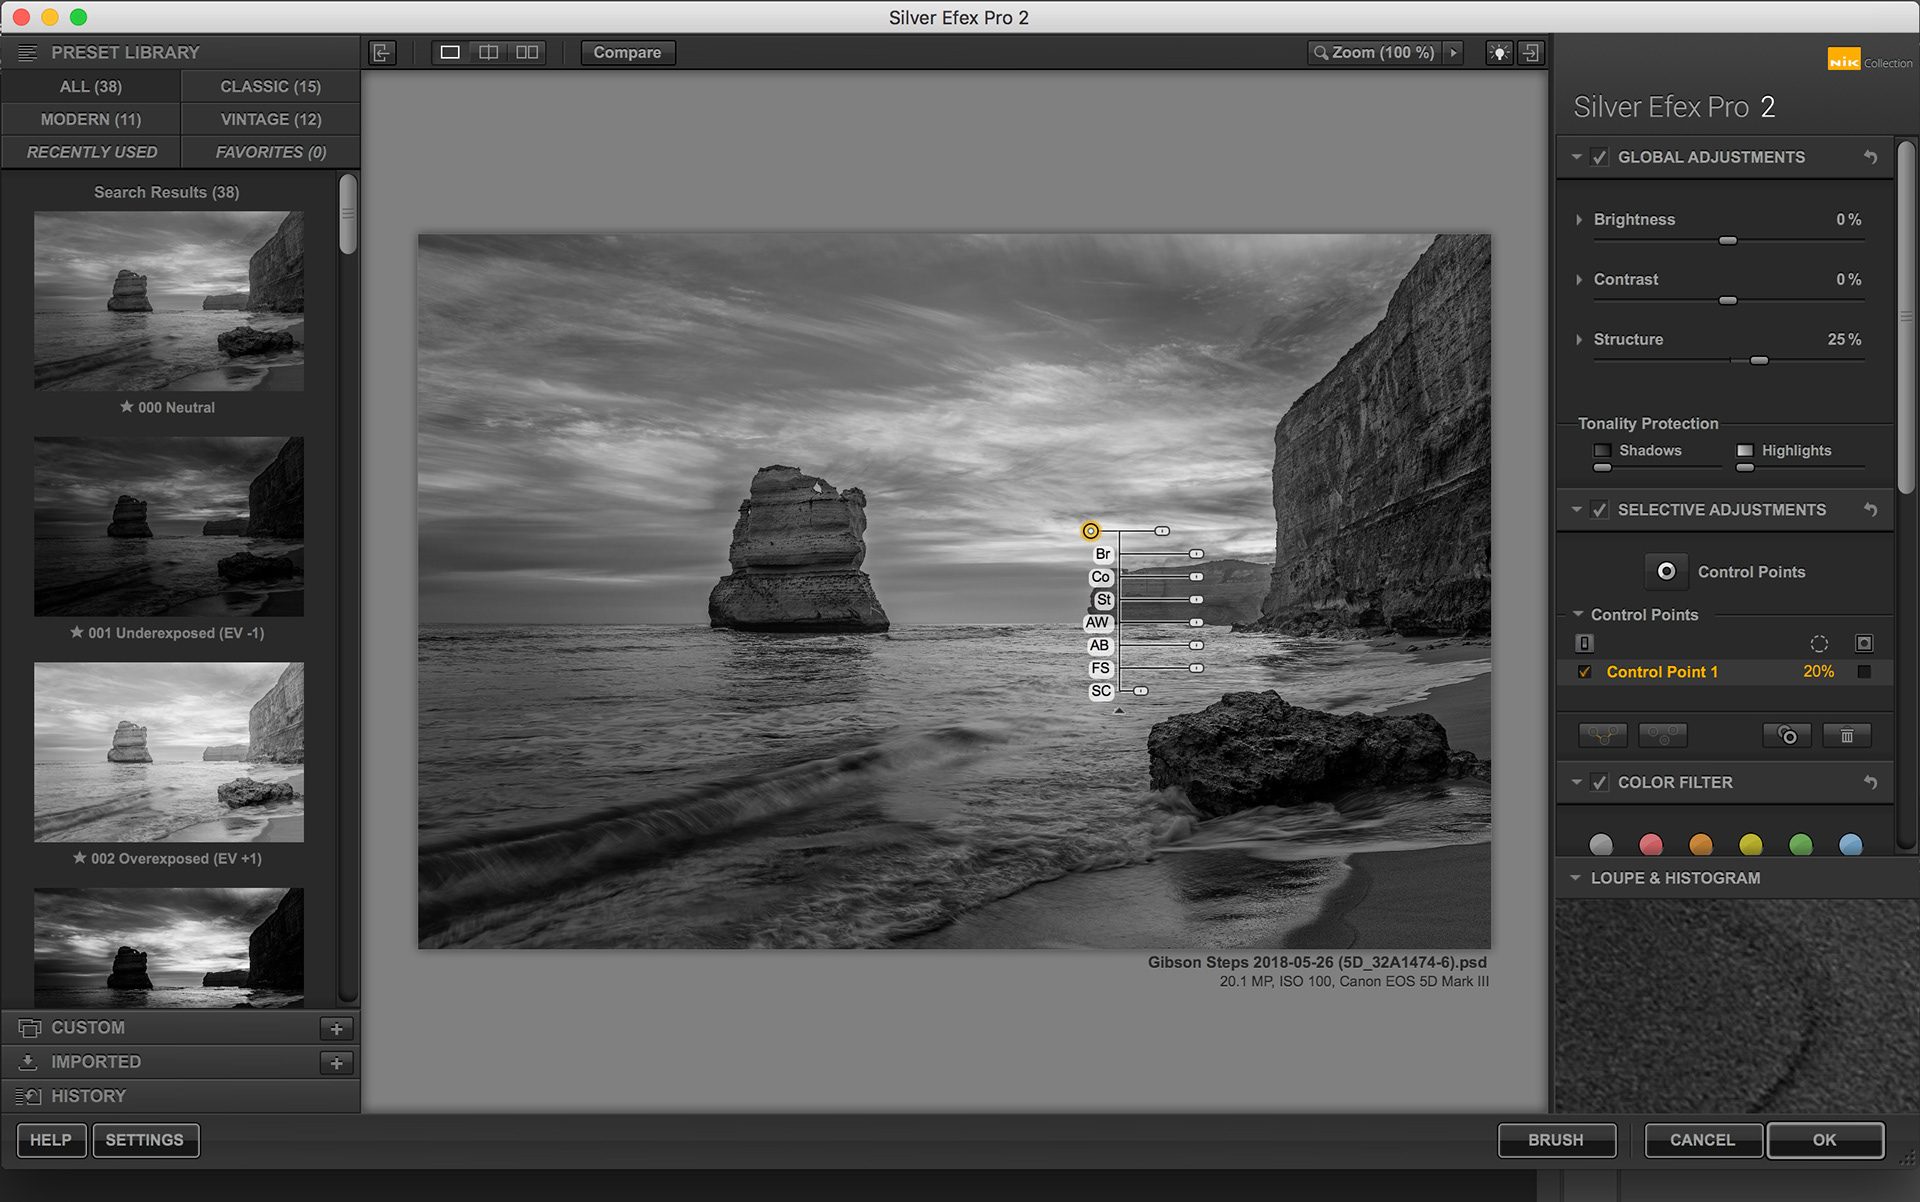
Fig 10 – Silver Efex Pro Control Point
Use Smart Objects for Non-Destructive Editing and Flexibility
If you convert your image layer to a Smart Object before using the Nik Filters, they will become Smart Filters. Then when you apply the filter, they will show up in the layer panel underneath the layer (see Figure 11).
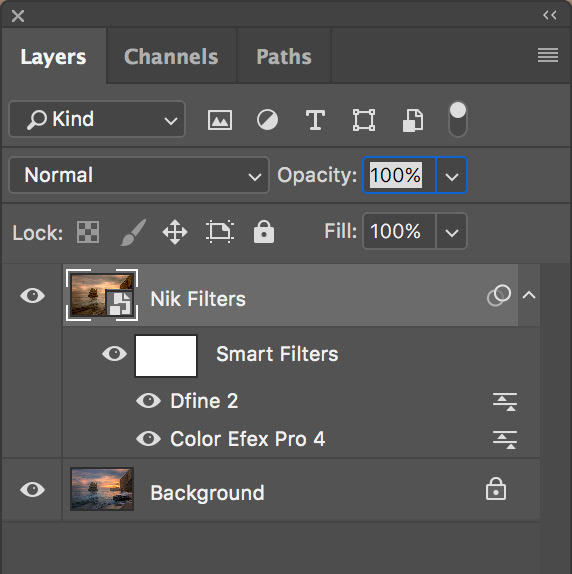
Fig 11 – Smart Filters
To modify the adjustments you made in the filter simply double-click it’s name. All the settings you chose, including the control points, are retained and can be easily adjusted.
Summary
The control point feature in the Nik Filters is incredibly powerful, giving you great control over the adjustments you make to your images.
I encourage you to have a play with them if you have not already.
This article was first published in the September 2018 issue of Artists Down Under magazine.