Using guides on your Photoshop page can making placing objects and lining up elements in your artwork, or just organising the structure of your artwork, much easier.
In order to use guides, we will normally want to have the rulers displayed along the vertical and horizontal edges of our document.
To view and hide the rulers, press (Ctrl/Cmd)+R, or use the View / Rulers menu command.
To change the unit of measure for the rulers, right-click anywhere on one of the rulers and then choose the unit of measure from the displayed drop-down list.
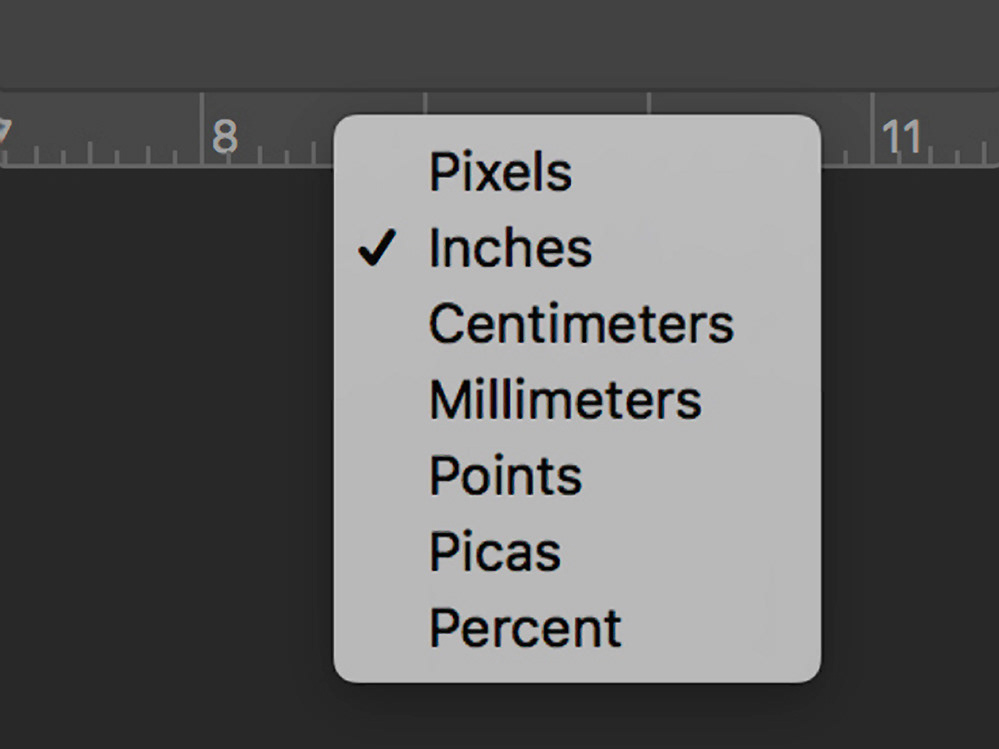
Fig 1 - Ruler unit of measure drop-down
To add a guide to your document click on one of the rulers and drag the mouse down into the document and drag the guide to the required position. Use the horizontal ruler for a horizontal guide and the vertical ruler for a vertical guide.
To move a guide, activate the Move tool (V), then move the mouse pointer near the guide. When the mouse cursor changes to two lines with arrows pointing up and down (for a horizontal guide), or left and right (for a vertical guide), click and drag the guide to the required position.
When initially creating, or moving a guide, if you hold down the [Shift] key, the guide will snap to the tick marks on the ruler, making it easier to precisely position the guide.
To change the orientation of a guide (ie turn a horizontal guide into a vertical one – or vice versa), activate the Move tool (V) and position the cursor as above as if you were going to move the guide, then hold down the [Opt/Alt] key and drag the guide.
To precisely create a single guide, use the View / New Guide menu command. The dialog box shown in Figure 2 is displayed, choose Horizontal or Vertical and type the required position in the Position field, followed by the required unit of measure.
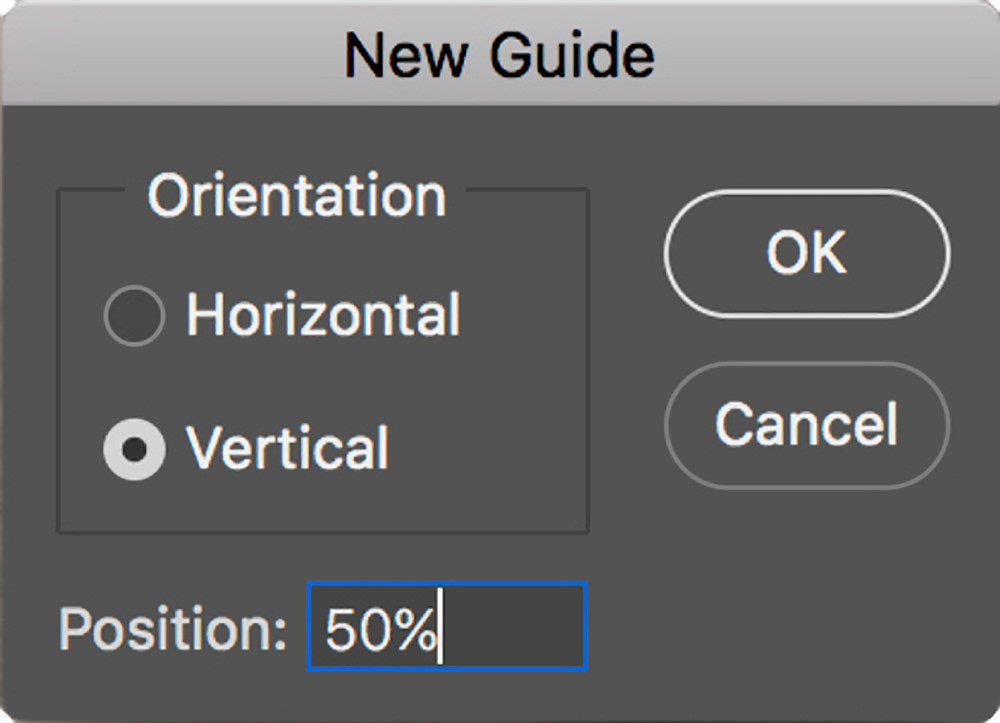
Fig 2 - New Guide dialog
To create a grid of guides in one command you can use the View / New Guide Layout menu command (see Figure 3). You can specify the number of rows and columns you want, the size of the columns (they will be equally distributed if no size is specified), and optionally gutters and margins. You can also specify if you want any existing guides removed or not.
You can also save custom presets if you create a guide layout that you think you might want to re-use in the future.
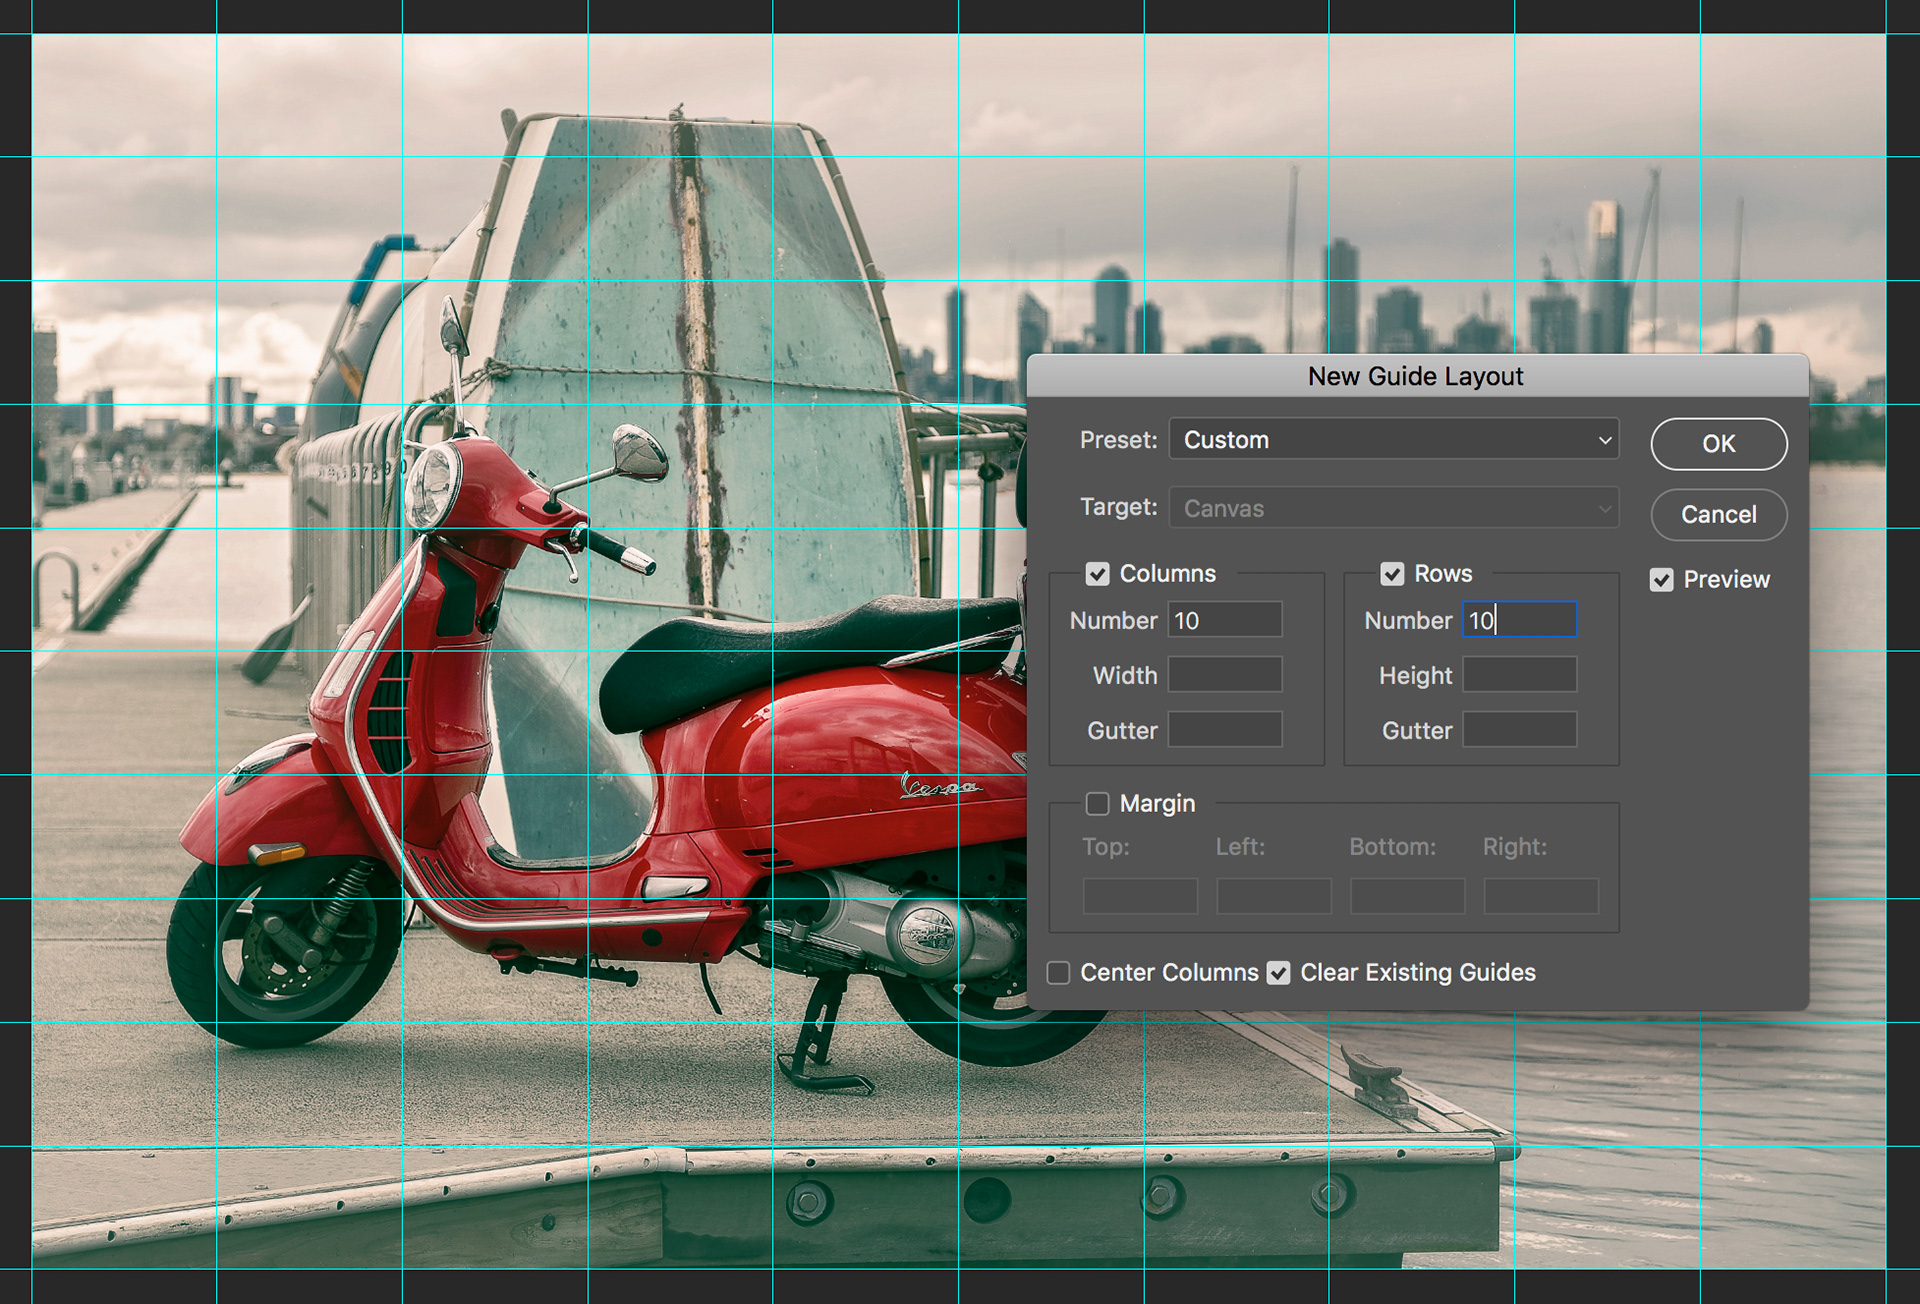
Fig 3 – New Guide Layout dialog
To temporarily hide the guides (as opposed to removing them), press [Cmd/Ctrl]+; (that is hold down the Cmd or Ctrl key and tap the semi-colon). Repeat the same keystroke to display the guides again.
To remove a single guide activate the Move tool (V) and position the cursor as above as if you were going to move the guide, then drag the guide back onto the ruler.
To remove all guides, use the View / Clear Guides menu command.
The View / New Guide From Shape menu command allows you to create guides based on an existing object (eg Shape, Text or other layer-based element) in your image. First select the layer containing the object, then use the New Guide From Shape menu command. In the example shown in Figure 4 I have created guides based on a text layer. This command will always add to existing guides rather than replace them.
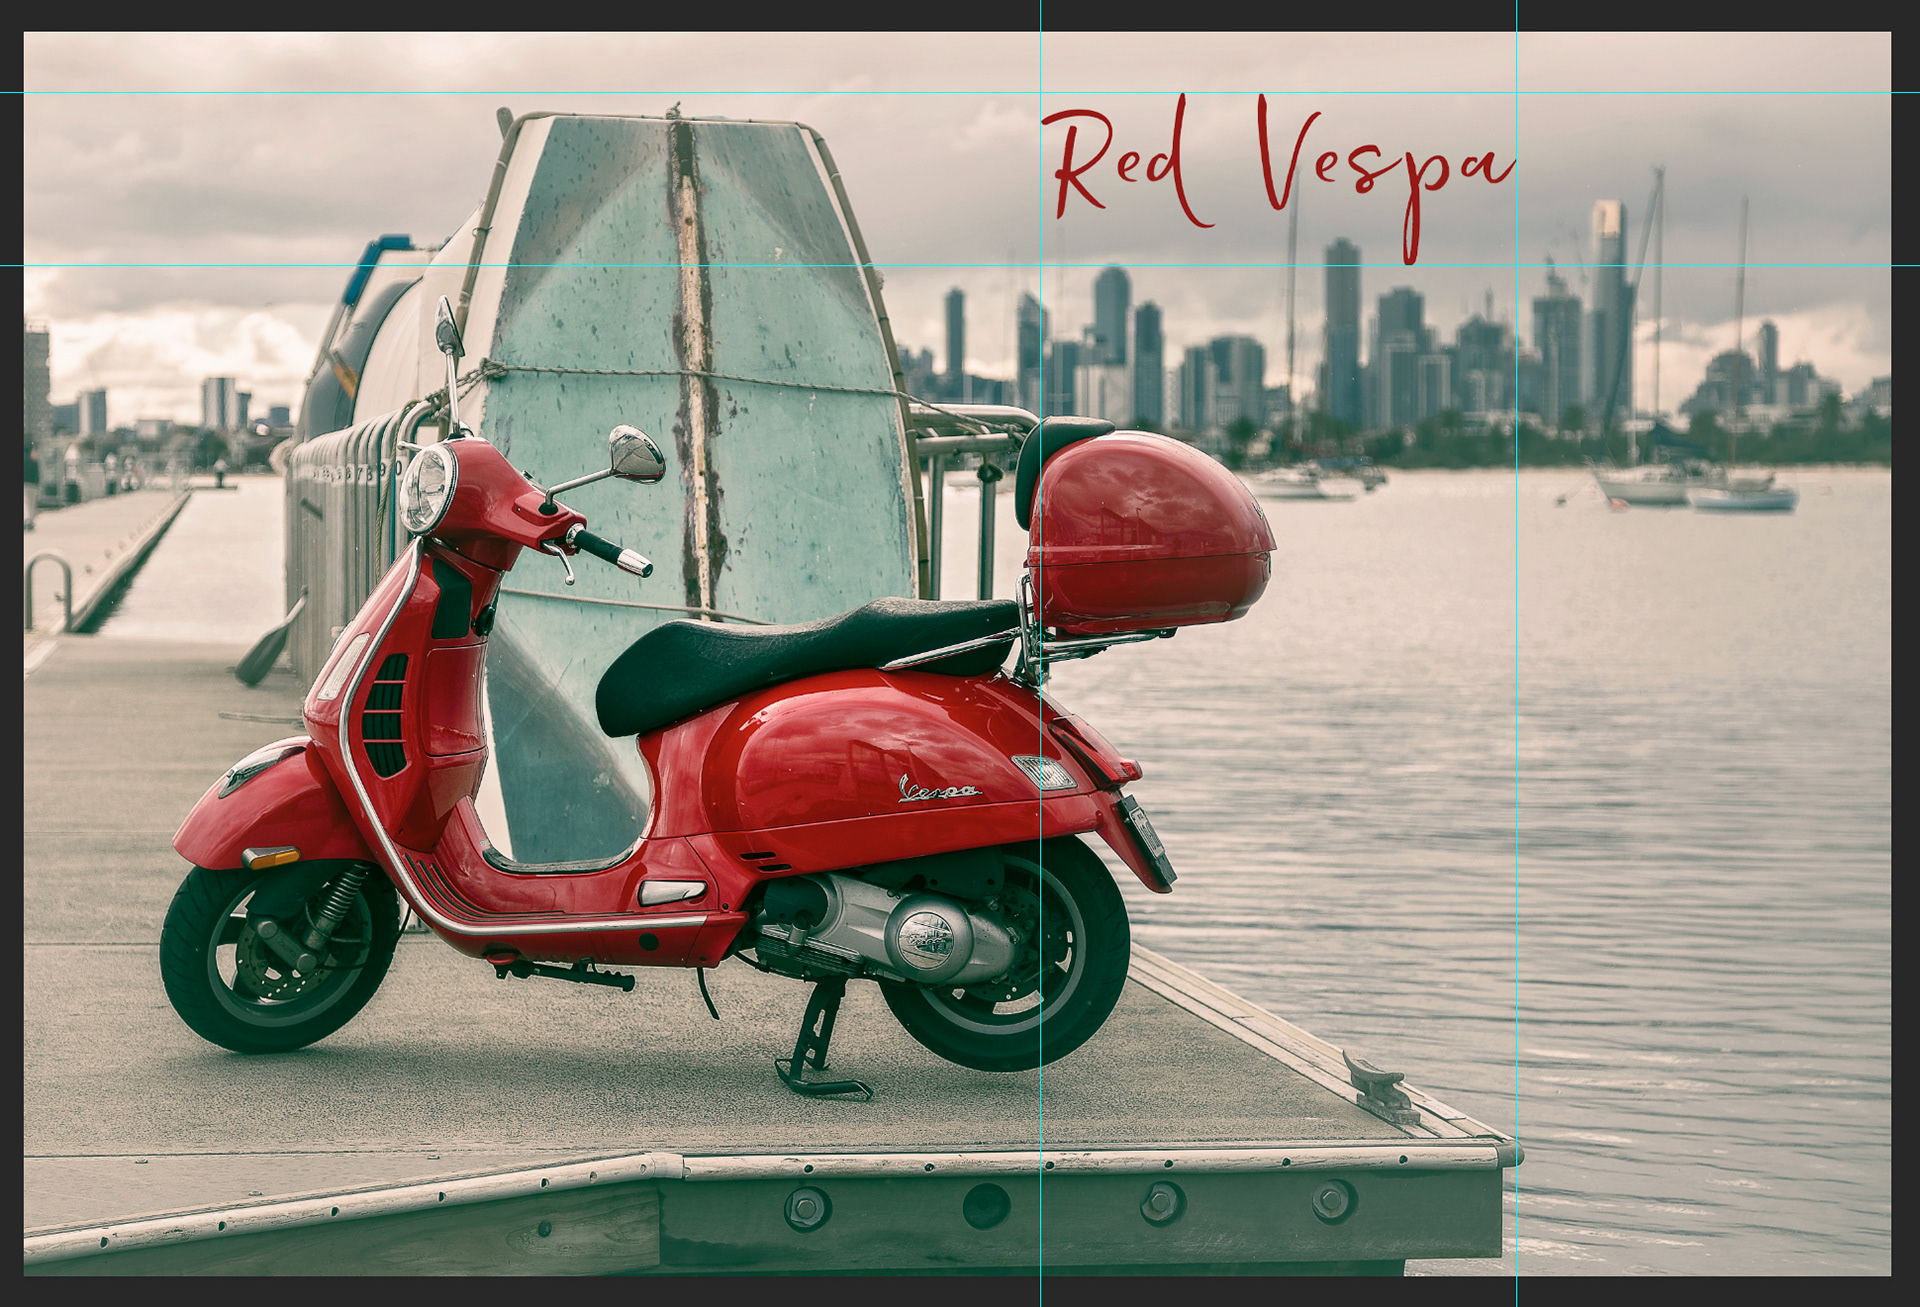
Fig 4 – New Guide From Shape
If you wish to more easily have things align to your guides, make sure that snapping is enabled with the View / Snap menu command, and make sure that Snap to Guides is enabled using the View / Snap to / Guides menu command.
The behaviour of guides when you resize an image is determined by the View / Lock Guides menu command. By default the guides are unlocked, so that when you change the size of an image, the guides are moved/resized proportionally to the change in image size. If you wish the guides to remain with their current size and position lock them using the View / Lock Guides menu command prior to resizing the image.
You can also change the colour of your guides from the default cyan colour in the Guides, Grids & Slices section of the Photoshop preferences.
This article was first published in the October 2018 issue of Artists Down Under magazine.