Significant changes made in the November 2019 Photoshop CC release, and further changes made in the latest September 2021 release make the Warp tool much easier to use to get the result you want.
To invoke the Warp tool you can;
- Choose Edit / Transform / Warp from the menu, or
- With the Move tool active press Cmd (Mac) / Ctrl (Windows)+T to enter Free Transform, then right-click and choose Warp from the context menu, or
- With the Move tool active press Cmd (Mac) / Ctrl (Windows)+T to enter Free Transform, then click the Switch Between Free Transform and Warp icon in the Options bar (see Figure 1).

Fig 1 - Warp Options Bar with Settings drop-down
In warp mode you can simply click and drag the image, or the anchor points or grid line segments shown, around to change its’ shape.
You can choose different sized grids from the Grid drop-down in the Options bar (see Figure 1).
You can choose when to see additional guides, inside the major grid lines, by clicking the Gear (Settings) icon in the Options bar. This will display the Guide Options menu (see Figure 1). Here you can choose when to see the guides and their colour, opacity and density. The density refers to how many guides will be seen within each grid square.
You can also customise the Warp grid by adding and removing grid lines. To add grid lines (referred to as “splitting the grid”) click one of the Split icons in the Options bar (Crosswise, Vertical or Horizontal) and then click on the image where you want to “split the grid”. The Crosswise option will add both a horizontal and vertical grid line (see Figure 2)
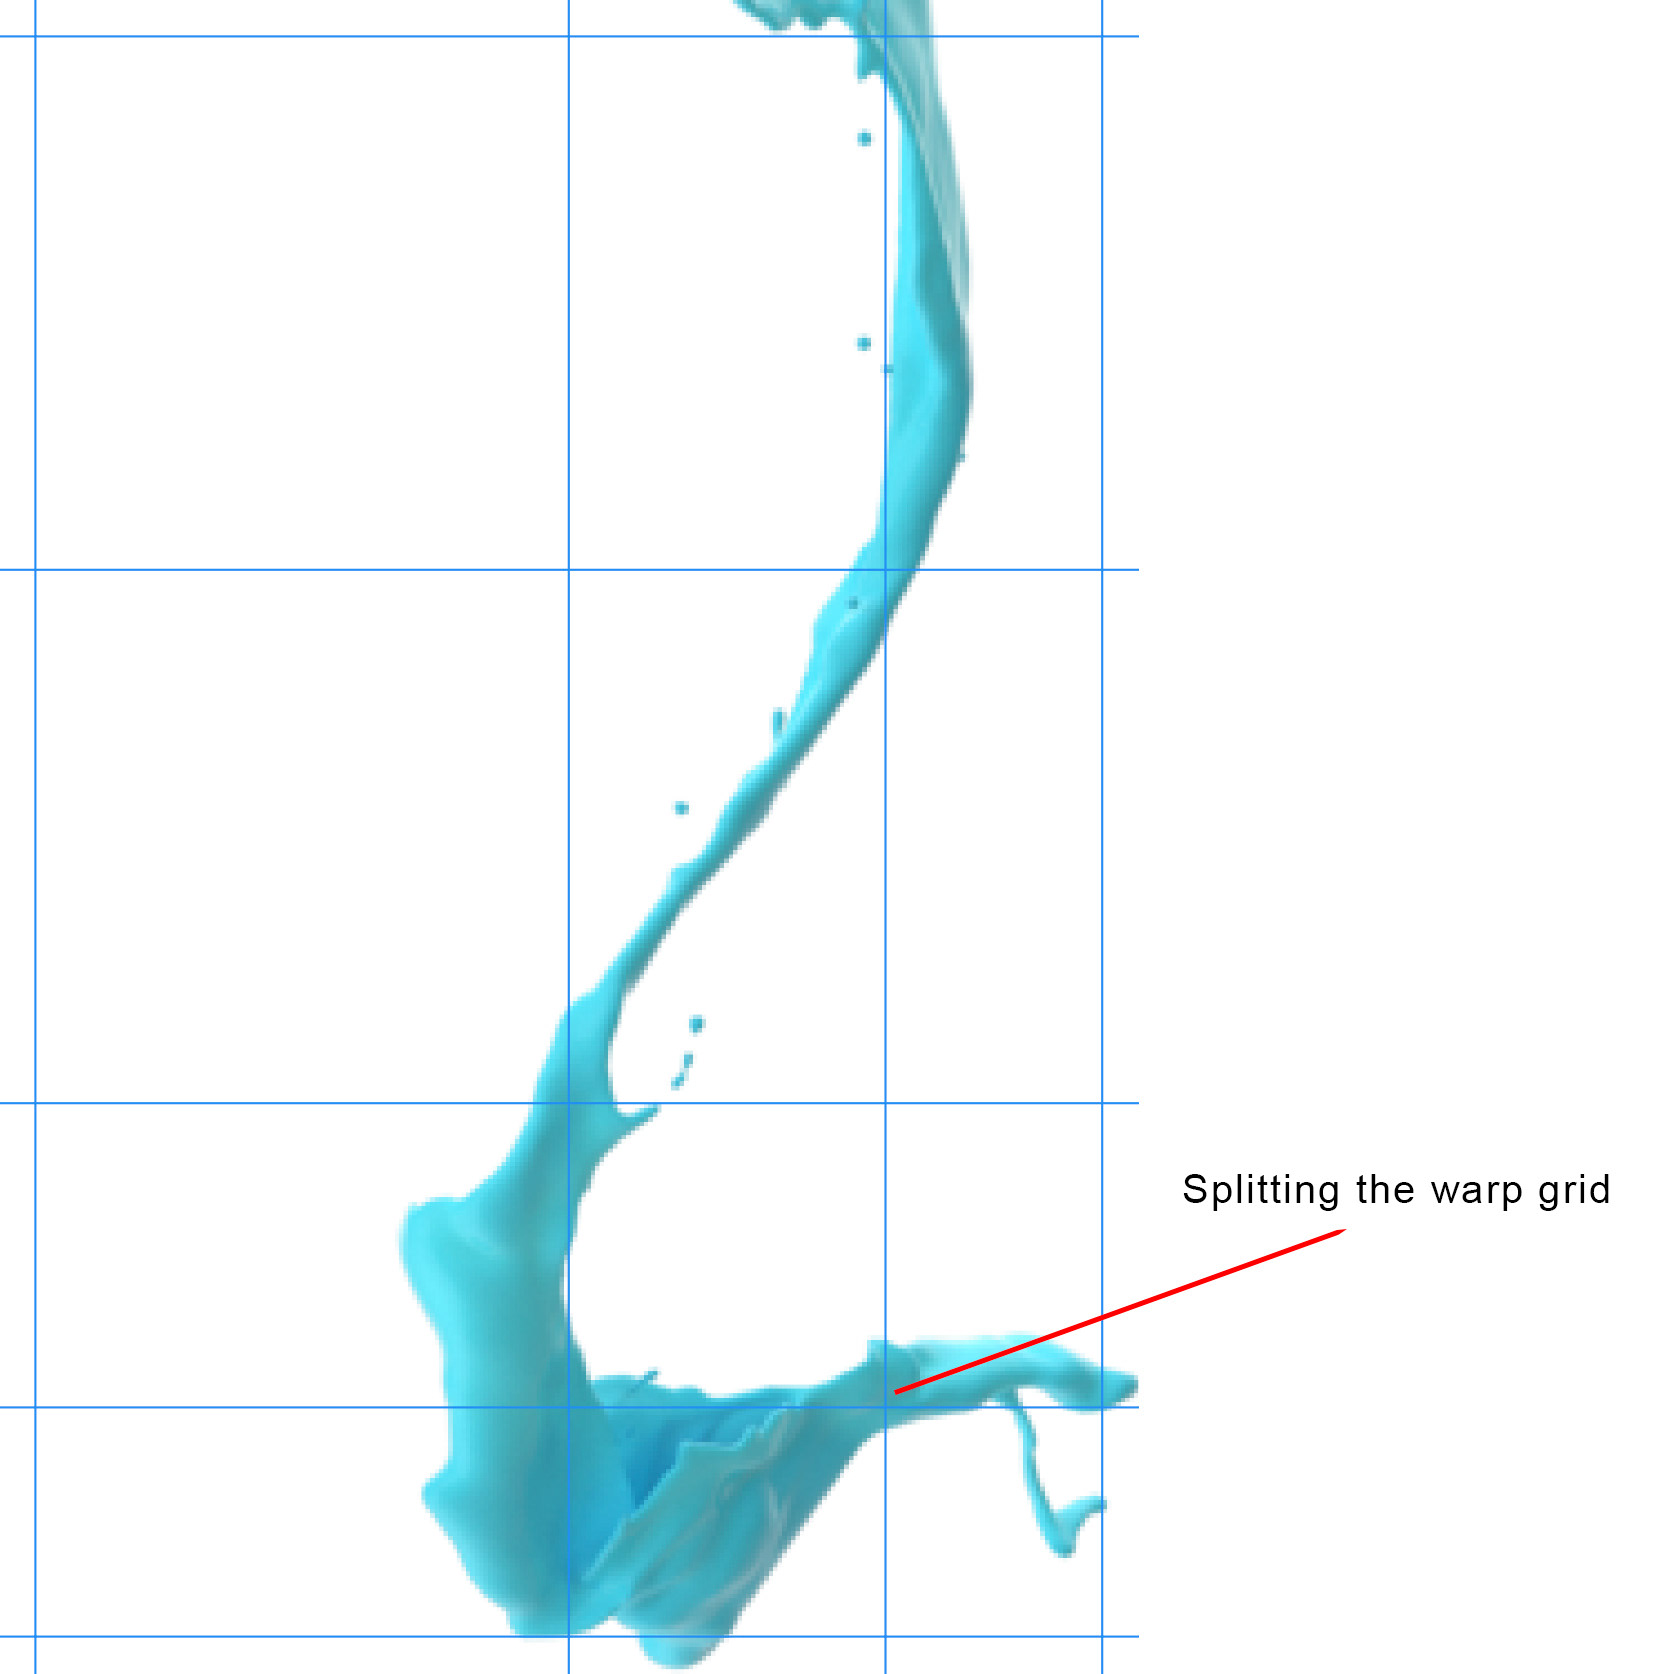
Fig 2 - Splitting the Warp grid
With the September 2021 release you now also have another option of splitting the grid without having to keep returning to the Options bar. Simply hold down the Cmd (Mac) or Ctrl (Windows) key, then click in the grid somewhere to split it. If you have the mouse pointer near an existing horizontal grid line you will split vertically, if near an existing vertical grid line you will split horizontally, if not near an existing grid line you will split crosswise. Photoshop will visually show you the lines as you hold down the Cmd/Ctrl key and move the mouse pointer around, clicking will add the additional grid line(s).
To delete grid lines you’ve added, right-click them and choose Remove Warp Split from the context menu.
The points at the intersection of the grid lines are called anchor points and you can use these in different ways to better control the warping.
You can select multiple anchor points by Shift-clicking them, or by holding down the Shift key and click-dragging a rectangle around them. Then as you warp your object only the areas controlled by the selected anchor points will be moved/warped, those areas where the anchor points are not selected will not move/warp.
De-select selected anchor points using the same Shift-click method.
You also have the ability to control the “curve” of the warp using the control (or Bezier) handles that are associated with each anchor point. These operate very similarly to the same control handles you use when drawing with the Pen tool.
When you select an anchor point you will see the four control handles emanating from it, as well as a single control handle for each adjacent anchor point (on the side of the selected anchor point). You can drag these control handles to alter the shape of the curve of the warp mesh.
These control handles operate in one of two modes (see Figure 3), and which mode is current for a given anchor point is shown by the anchor point shape. If the anchor point is shown as a circle, it’s control handles will work in “Unison” – that is, when you move one, they will all move. If the anchor point is shown as a square, it’s control handles are “Independent” – that is, moving one will have no effect on the other three sides.
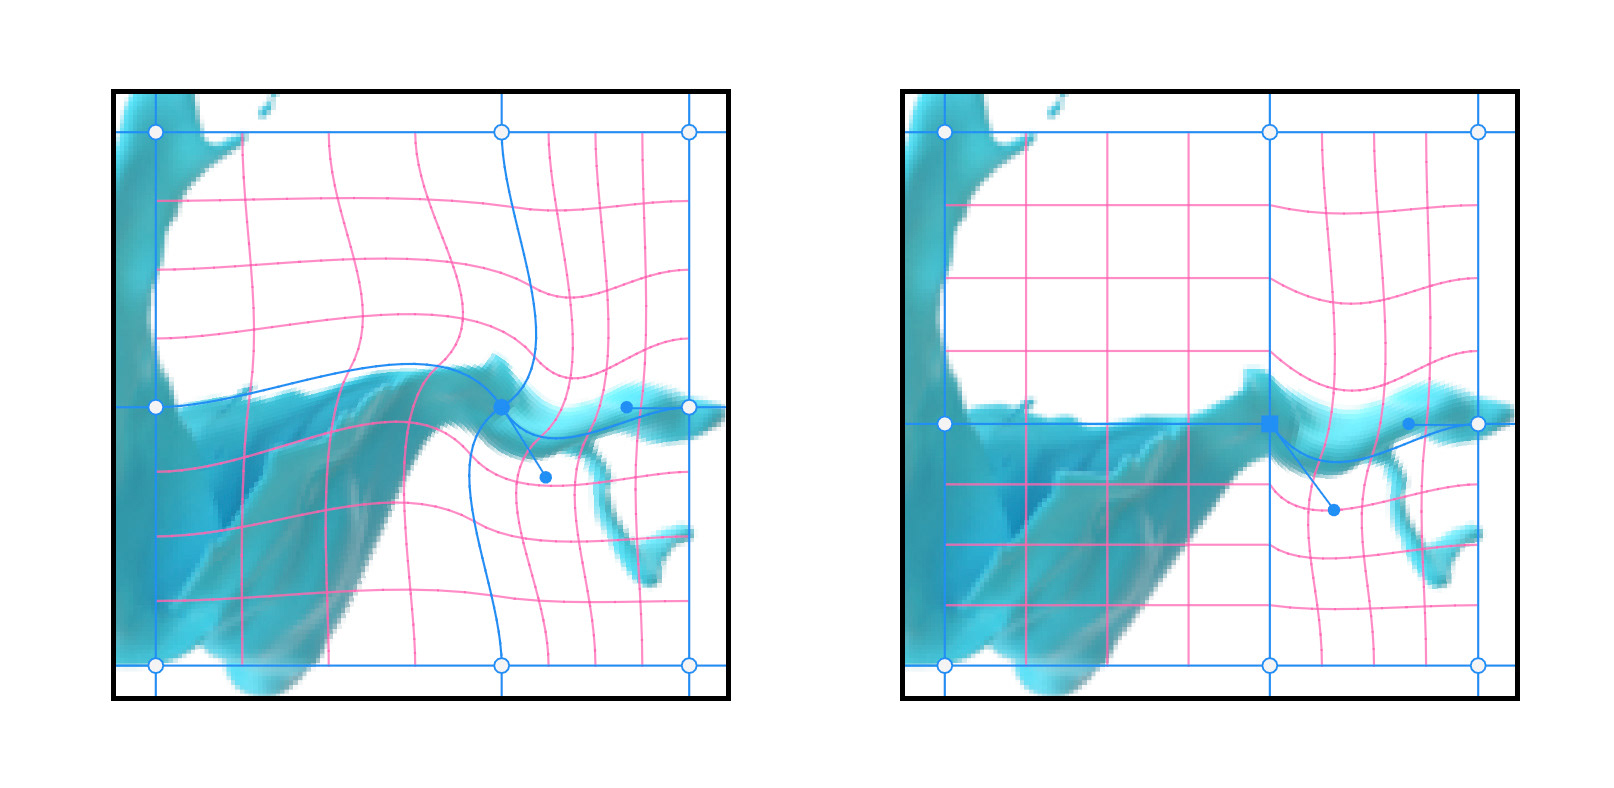
Fig 3a & 3b - Unison and Independent options for Control "Bezier" Handle Movement
By default the anchor points around the edge of your layer/object will be squares (Independent), while interior anchor points will be circles (Unison). You can change the mode for an anchor point by holding down the Option (Mac) or Alt (Windows) key and clicking on the anchor point.
The Warp tool is a powerful way to change the shape of objects. Have a play with it.
This article was first published in the October 2021 issue of Artists Down Under magazine.