A Luminosity Mask or Luminosity Selection is a mask or selection based on the brightness of the pixels in the image. A Luminosity Mask often looks like a black and white version of the image.
If you don’t have a Luminosity Masking add-in or action set, the easiest place to manually generate these from is the Channels panel which shows black and white images that represent the luminosity of the entire image (RGB) as well as of the individual Red, Green and Blue channels of the image.
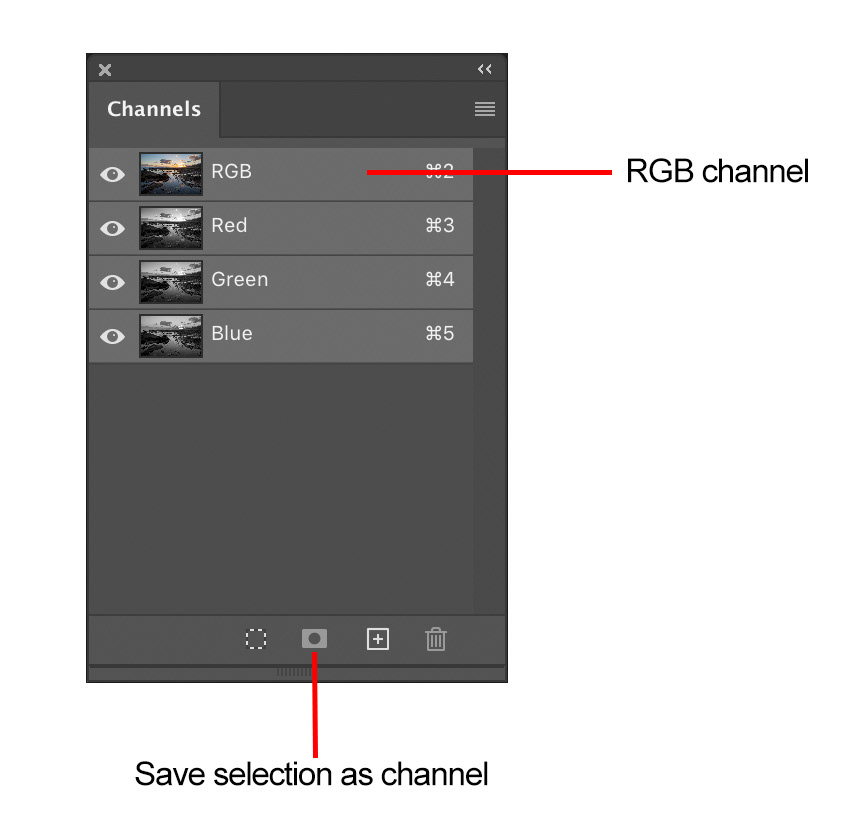
Fig 1 - Channels panel
Here are some useful keystrokes that will be used in the creation of the Luminosity Selections/Masks, and that are useful when working with them.
Action Keystroke (Mac) Keystroke (Win)
Create selection Cmd+click Ctrl+click
Add to selection Shift+Cmd+click Shift+Ctrl+click
Subtract from selection Opt+Cmd+click Alt+Ctrl+click
Intersect selection Opt+Shift+Cmd+click Alt+Shift+Ctrl+click
Select all Cmd+A Ctrl+A
Deselect Cmd+D Ctrl+D
Invert selection Shift+Cmd+I Shift+Ctrl+I
Hide/unhide selection Cmd+H Ctrl+H
Enable/disable mask Shift+click Shift+click
View layer mask Opt+click Alt+click
Set default colours (B&W) D D
Switch fore/background X X
Fill with foreground colour Cmd+Backspace (delete) Ctrl+Backspace
Fill with background colour Opt+Backspace (delete) Alt+Backspace
Creating Luminosity Masks
In the Channels panel, create a selection based on the RGB channel. Save this selection as a channel and rename it “Lights1”.
Invert the selection, save this selection as a channel and rename it “Darks1”.
Create a selection based on the Lights1 channel, then intersect it with itself. Save this selection as a channel and rename it “Lights2”.
Intersect this Lights2 selection with itself, save this selection as a channel and rename it “Lights3”.
Create a selection based on the Darks1 channel, then intersect it with itself. Save this selection as a channel and rename it “Darks2”.
Intersect this Darks2 selection with itself, save this selection as a channel and rename it “Darks3”.
To create midtone masks we first select the entire image (select all), and then subtract the Lights and Darks masks. So a “Midtones1” mask would be created by subtracting the Lights1 and Darks1 selections from the entire selection. The “Midtones2” mask would be created by subtracting the Lights2 and Darks2 selections from the entire selection.
Obviously, you can extend the number of Lights, Darks and Midtones masks to as many levels as you require.
Usually you will not want to create all the masks above and leave them in your file as they occupy a lot of space, but if you don’t have a Luminosity Masking tool then knowing how to create them manually is very useful.
Luminosity masks are invaluable for applying adjustments to only certain parts of your image.
Luminosity selections are invaluable for exposure blending and selective dodging and burning.
If you intend to use them though, I highly recommend purchasing a Luminosity Masking add-in, and my favourite is Lumenzia.
You can read a summary and review of Lumenzia in a previous article here, it contains links to the Lumenzia website.
This article was first published in the July 2020 issue of Artists Down Under magazine.